


文章目录
前言
本文依托于Tomcal,使用Servlet连接到mysql。实现将数据库中的内容打印在页面上。
1.安装Tomcal
前往官网下载http://tomcat.apache.org/
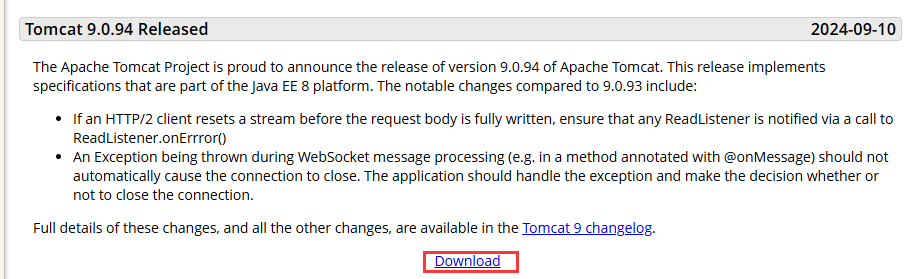
注意要下载
Tomcat9,不要下载10,不然后续导入包的时候会出问题。
下载完成后对压缩包进行解压。
2.创建idea项目
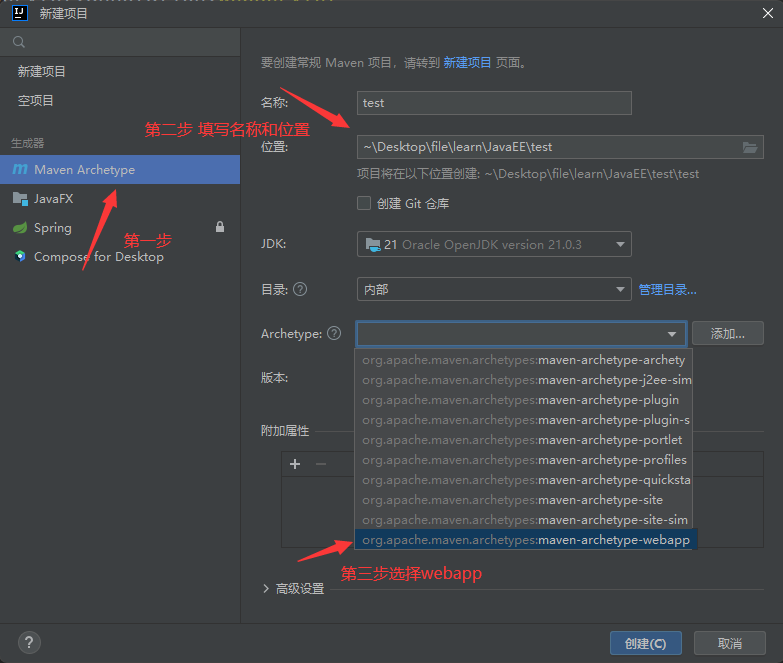
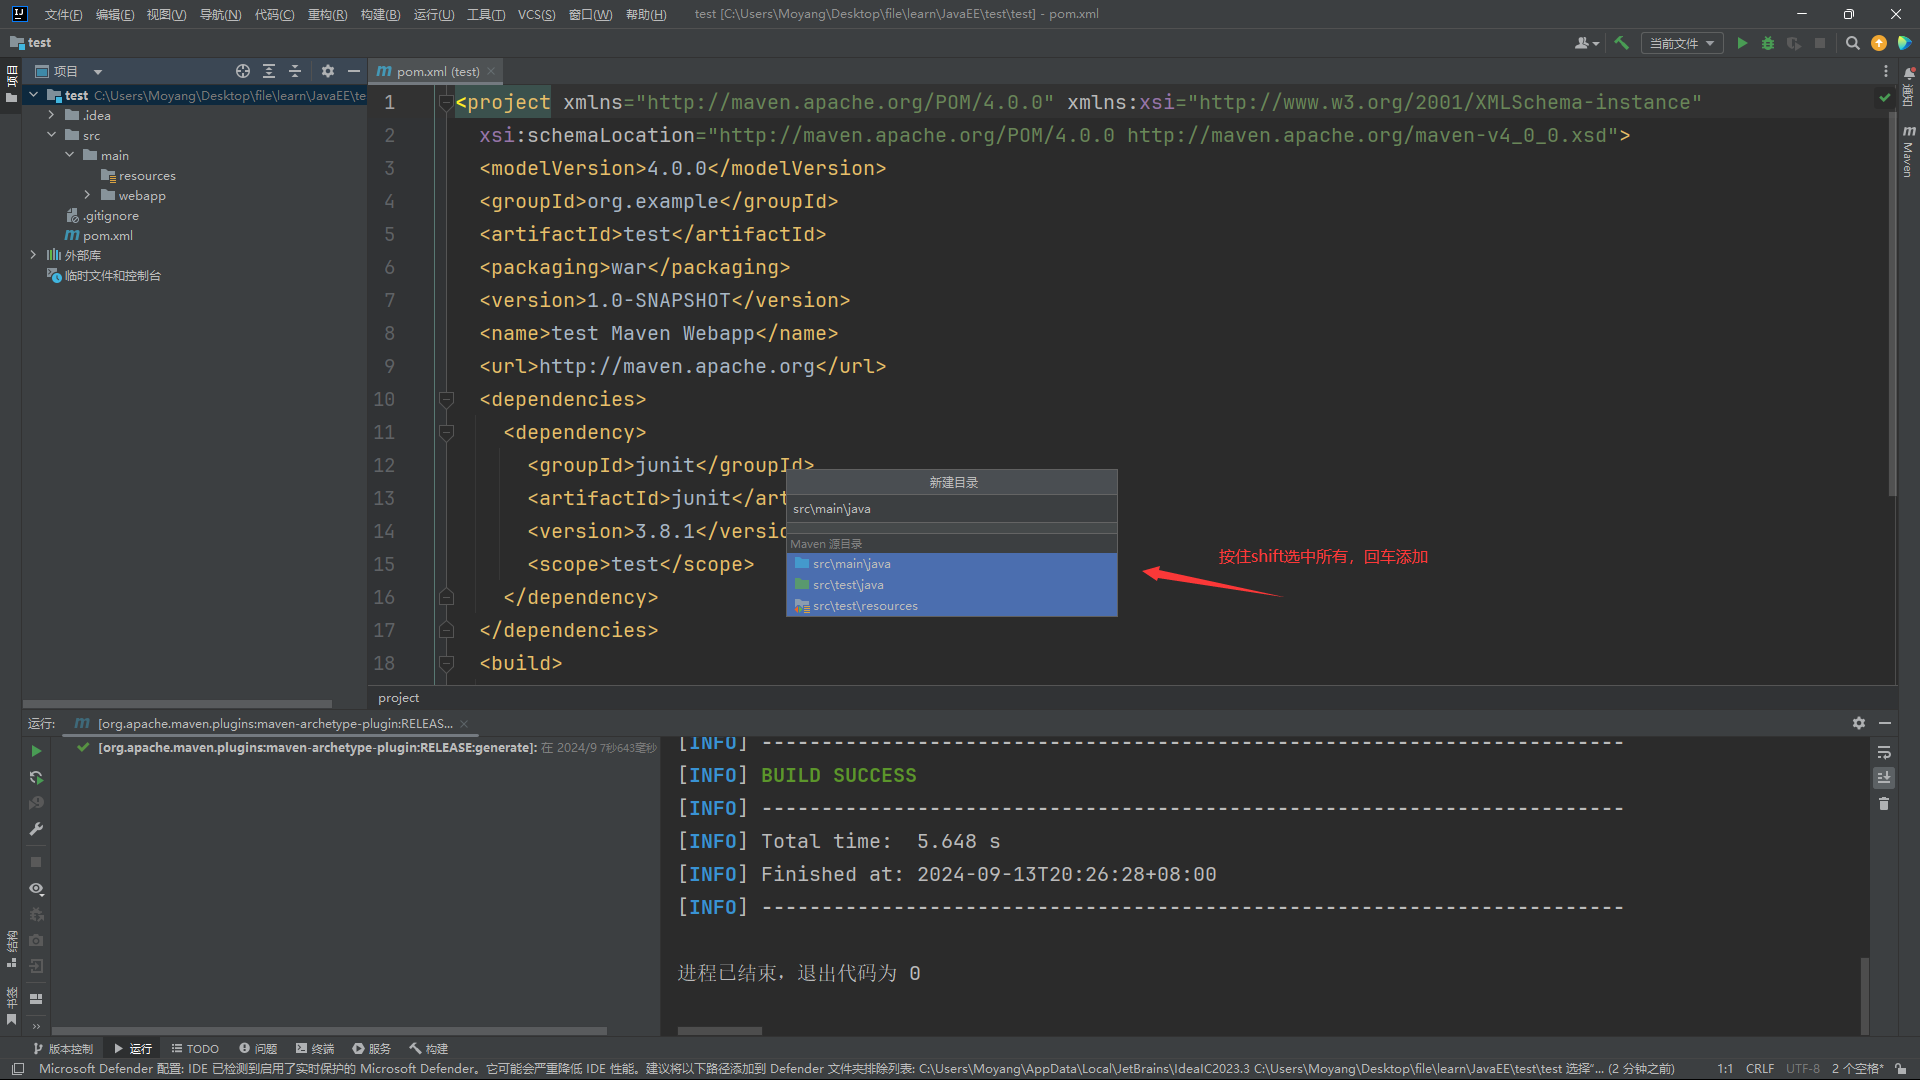
创建项目后构建需要一段时间,此时不要进行操作,等待即可直到文件结构到下图
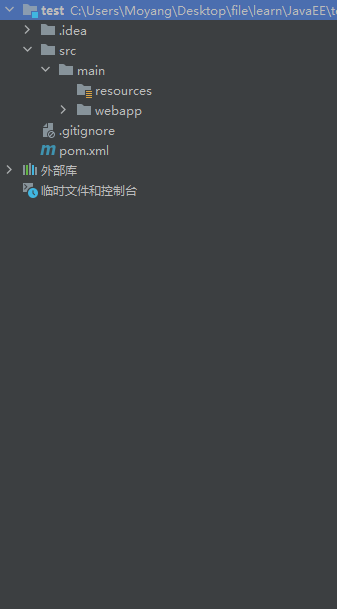
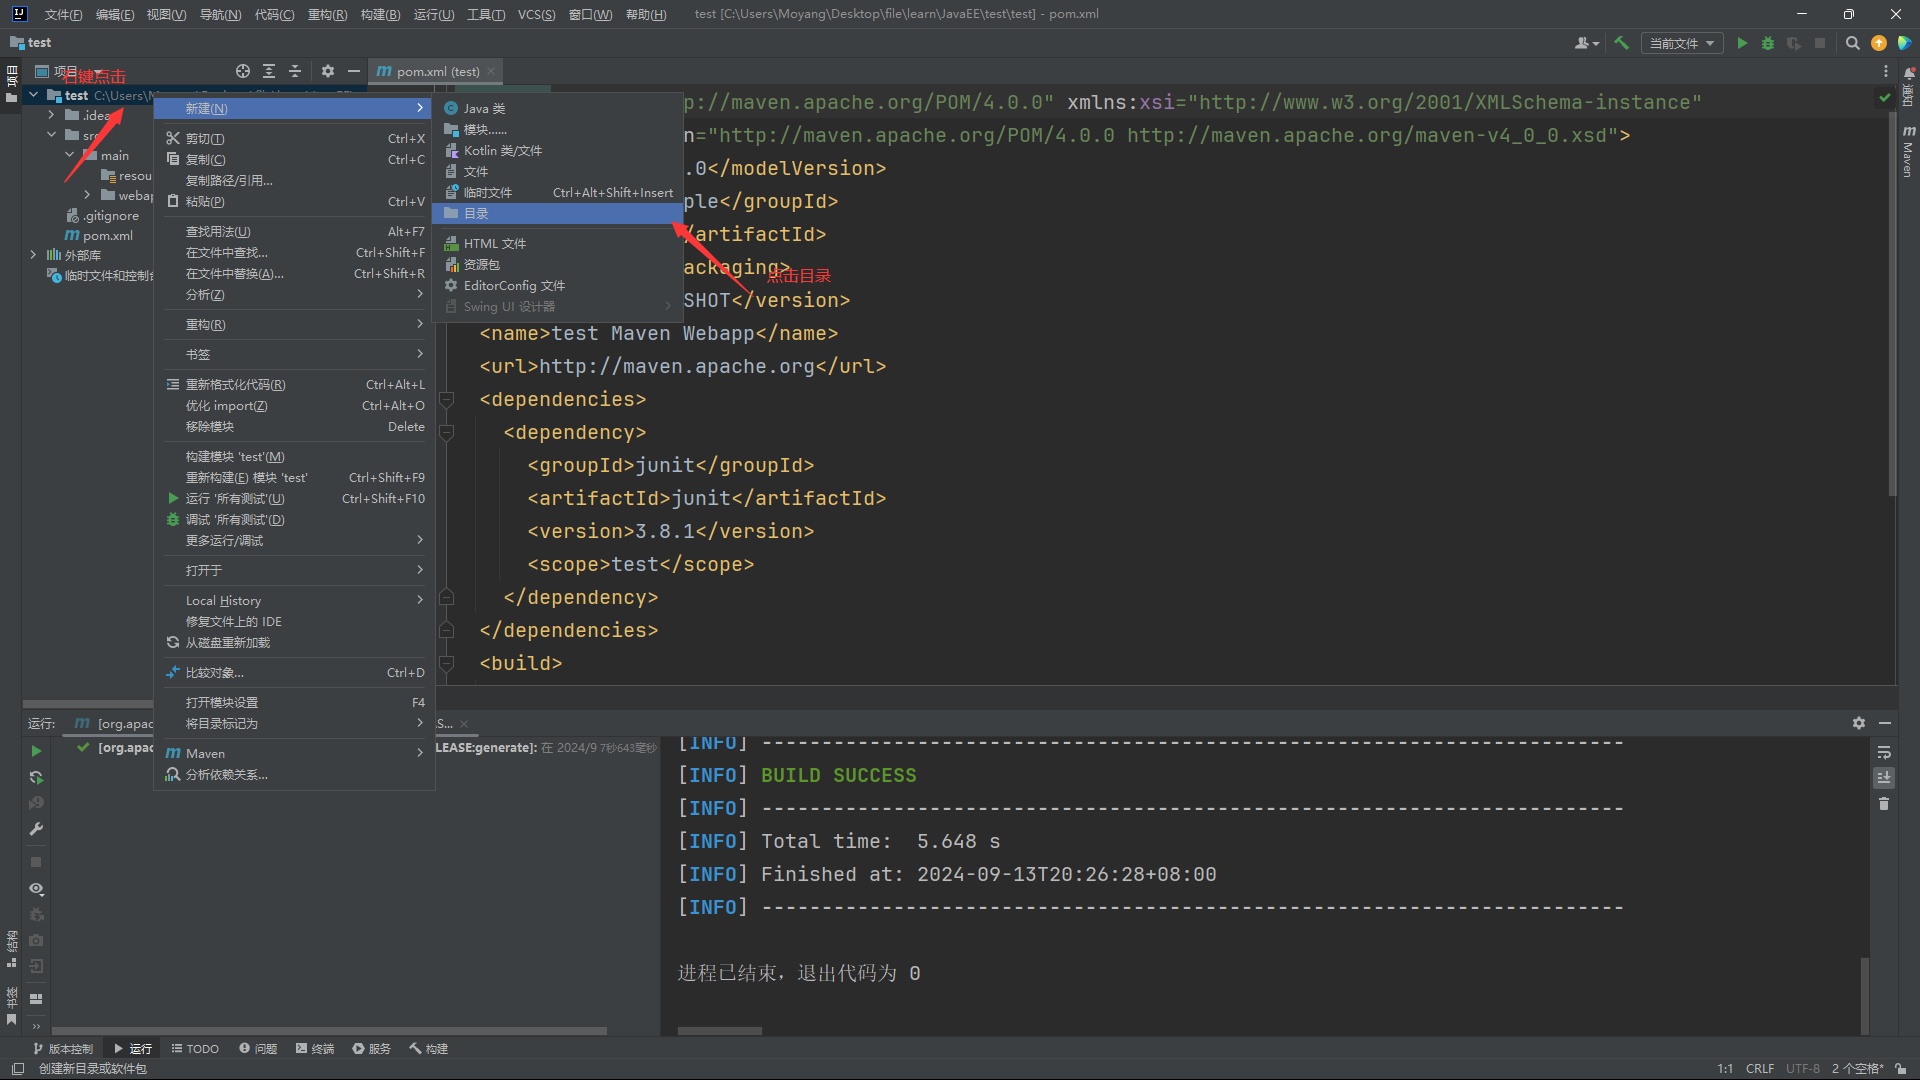
接下来要补充完整文件结构
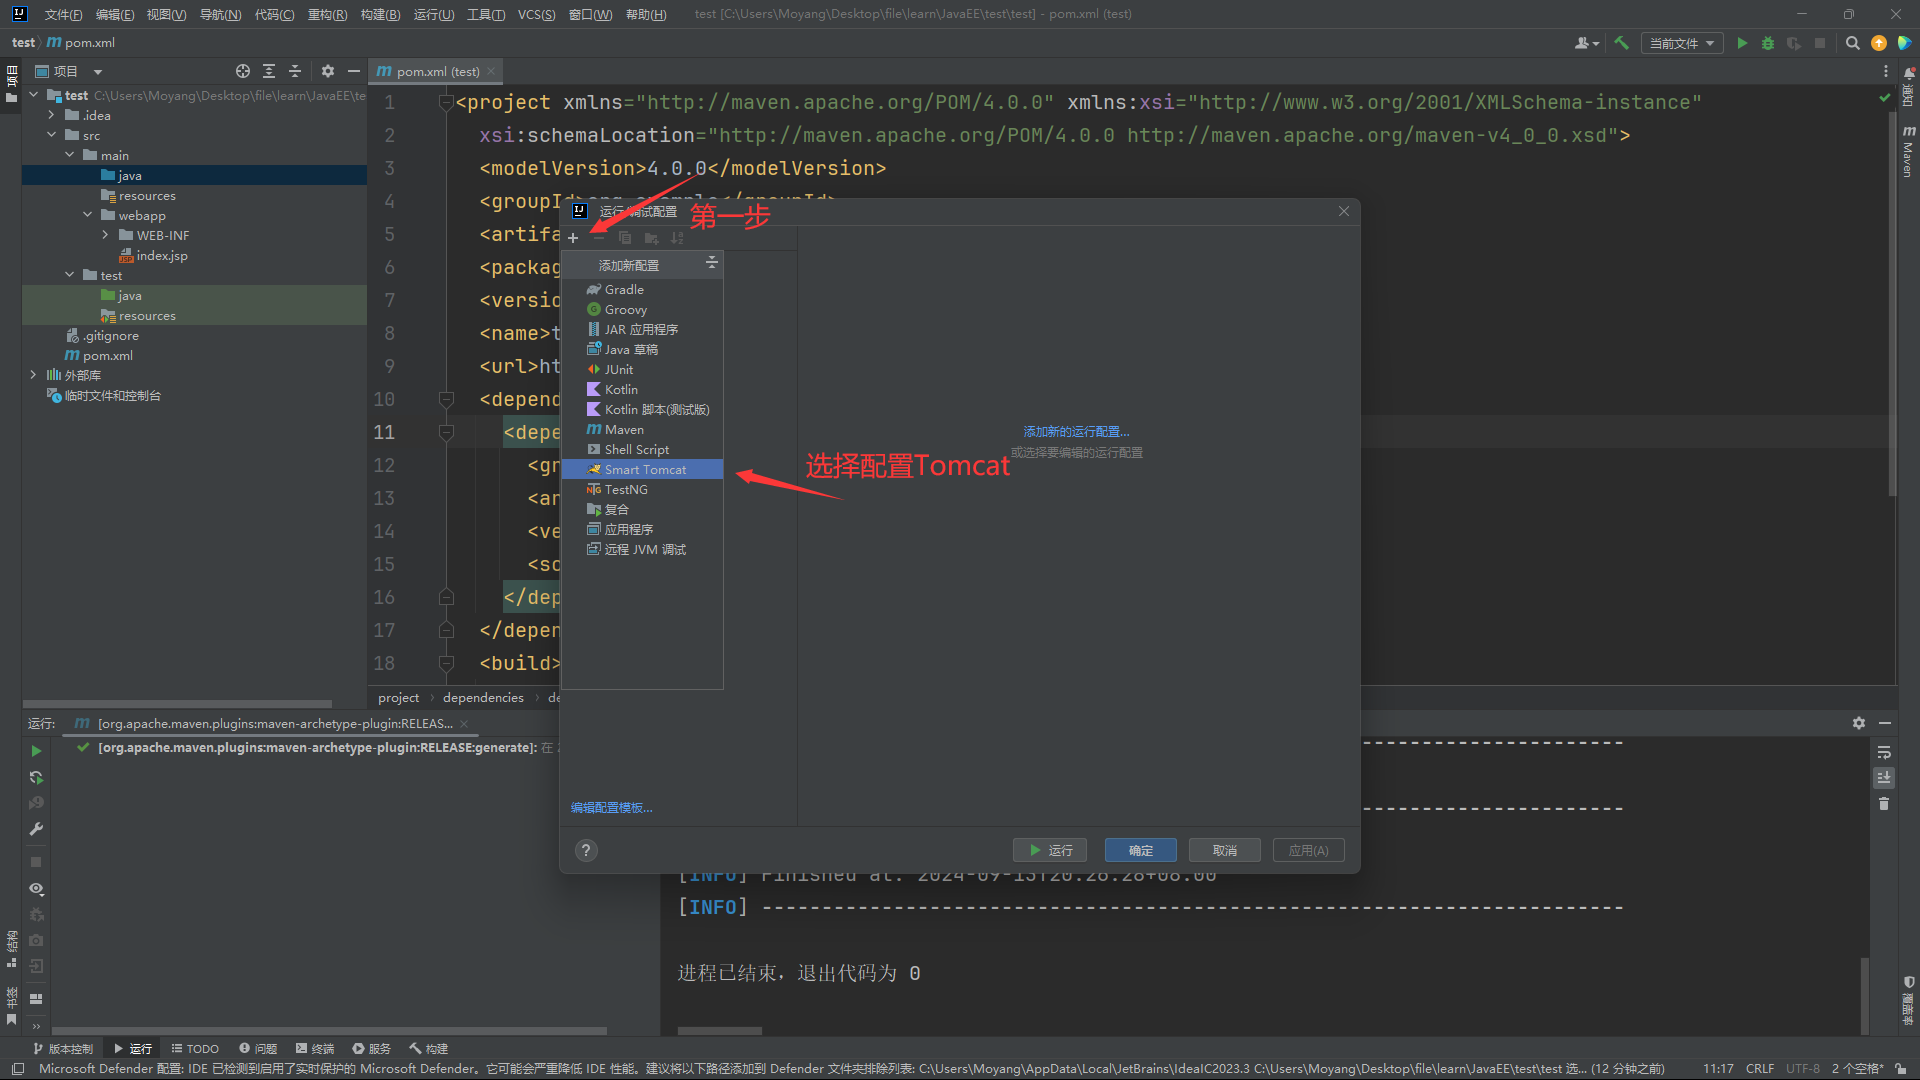
3.配置 Tomcat
3.1 安装Smart Tomcat 插件
点击文件->设置->插件->搜索smart Tomcat下载

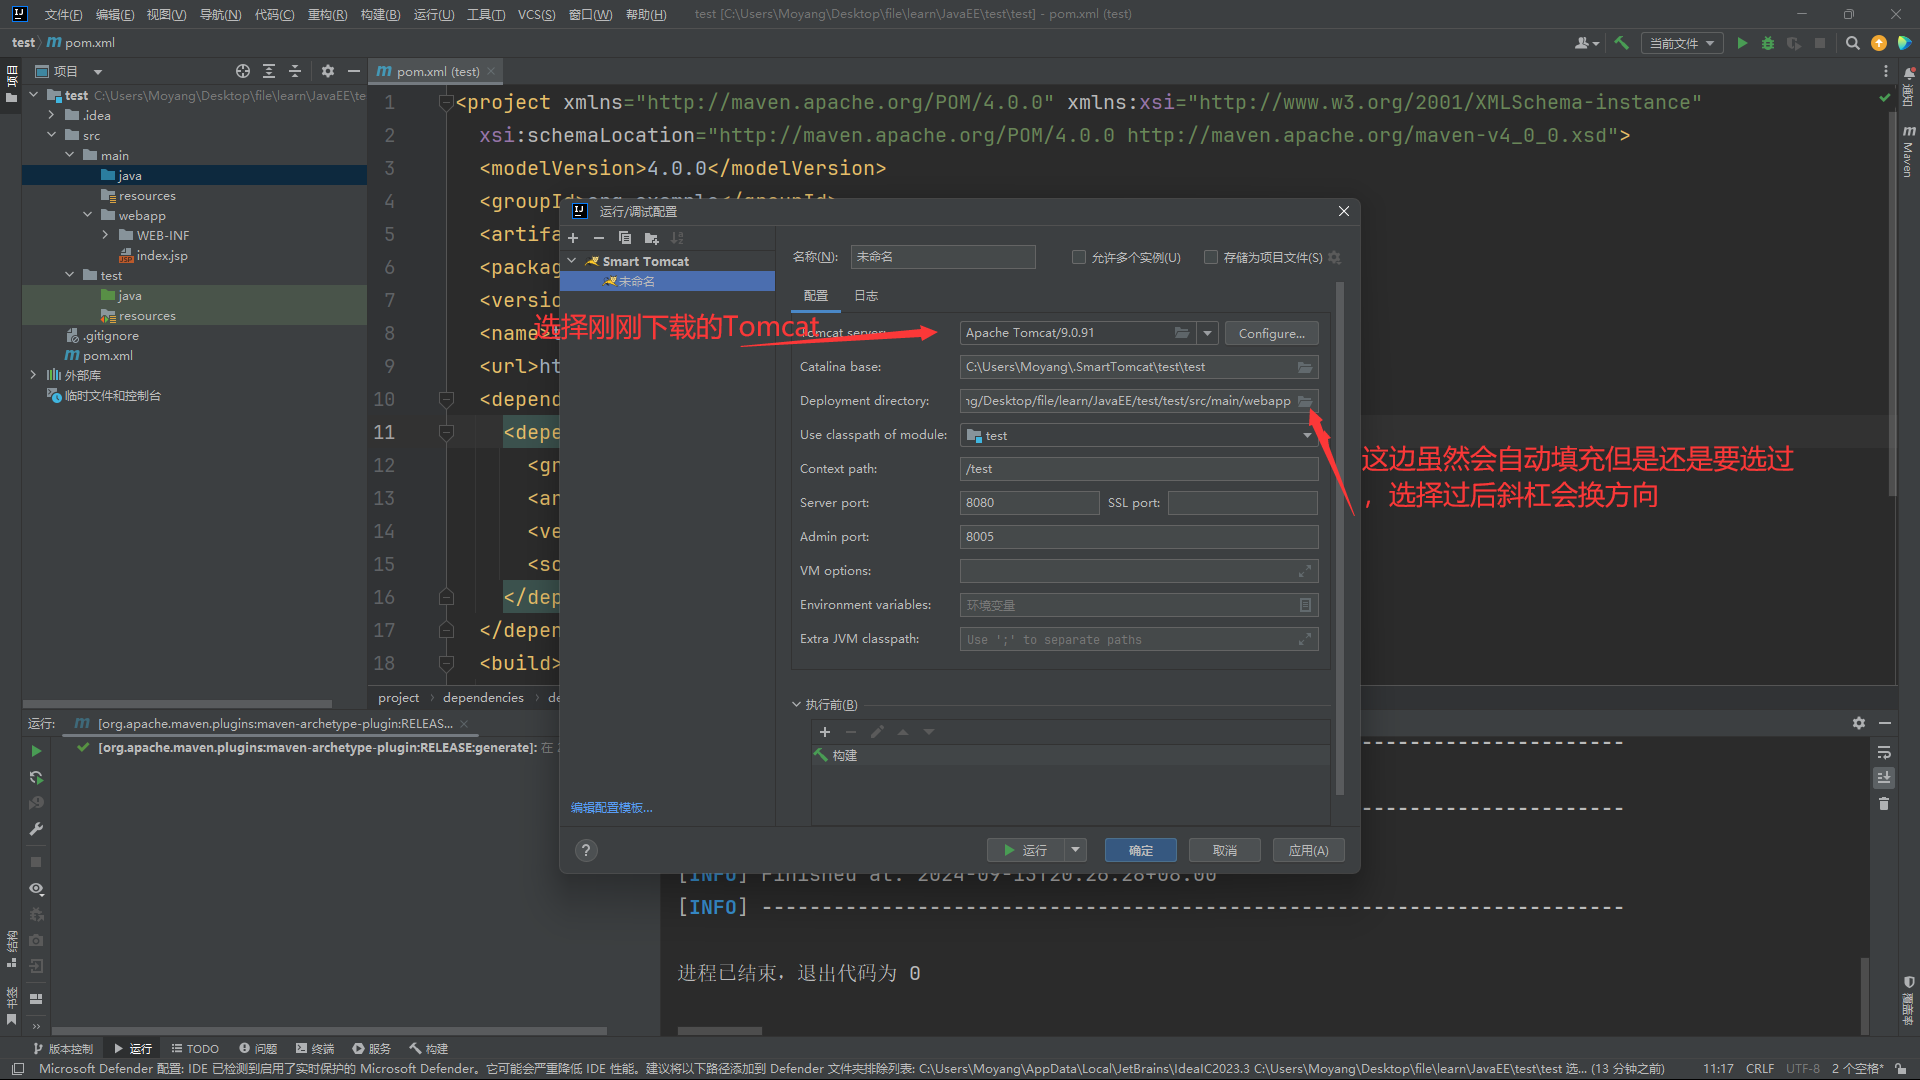
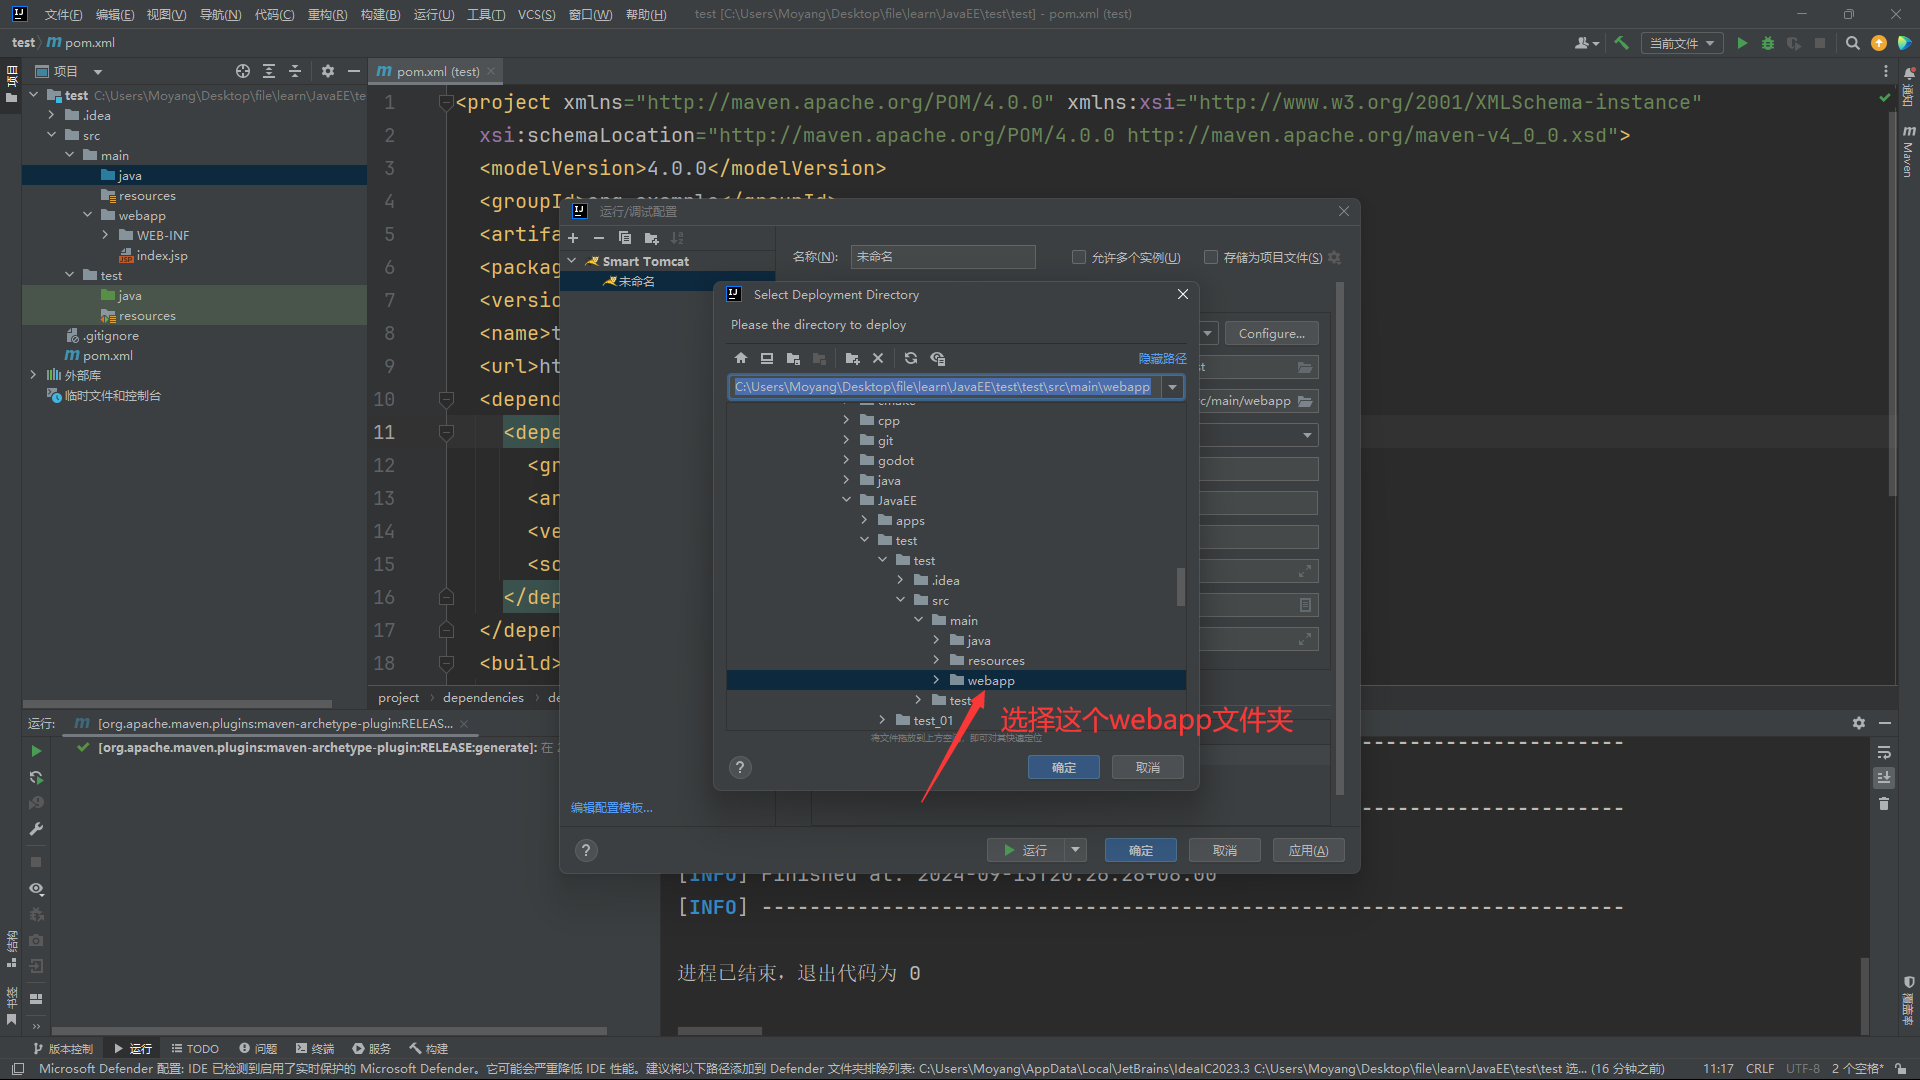
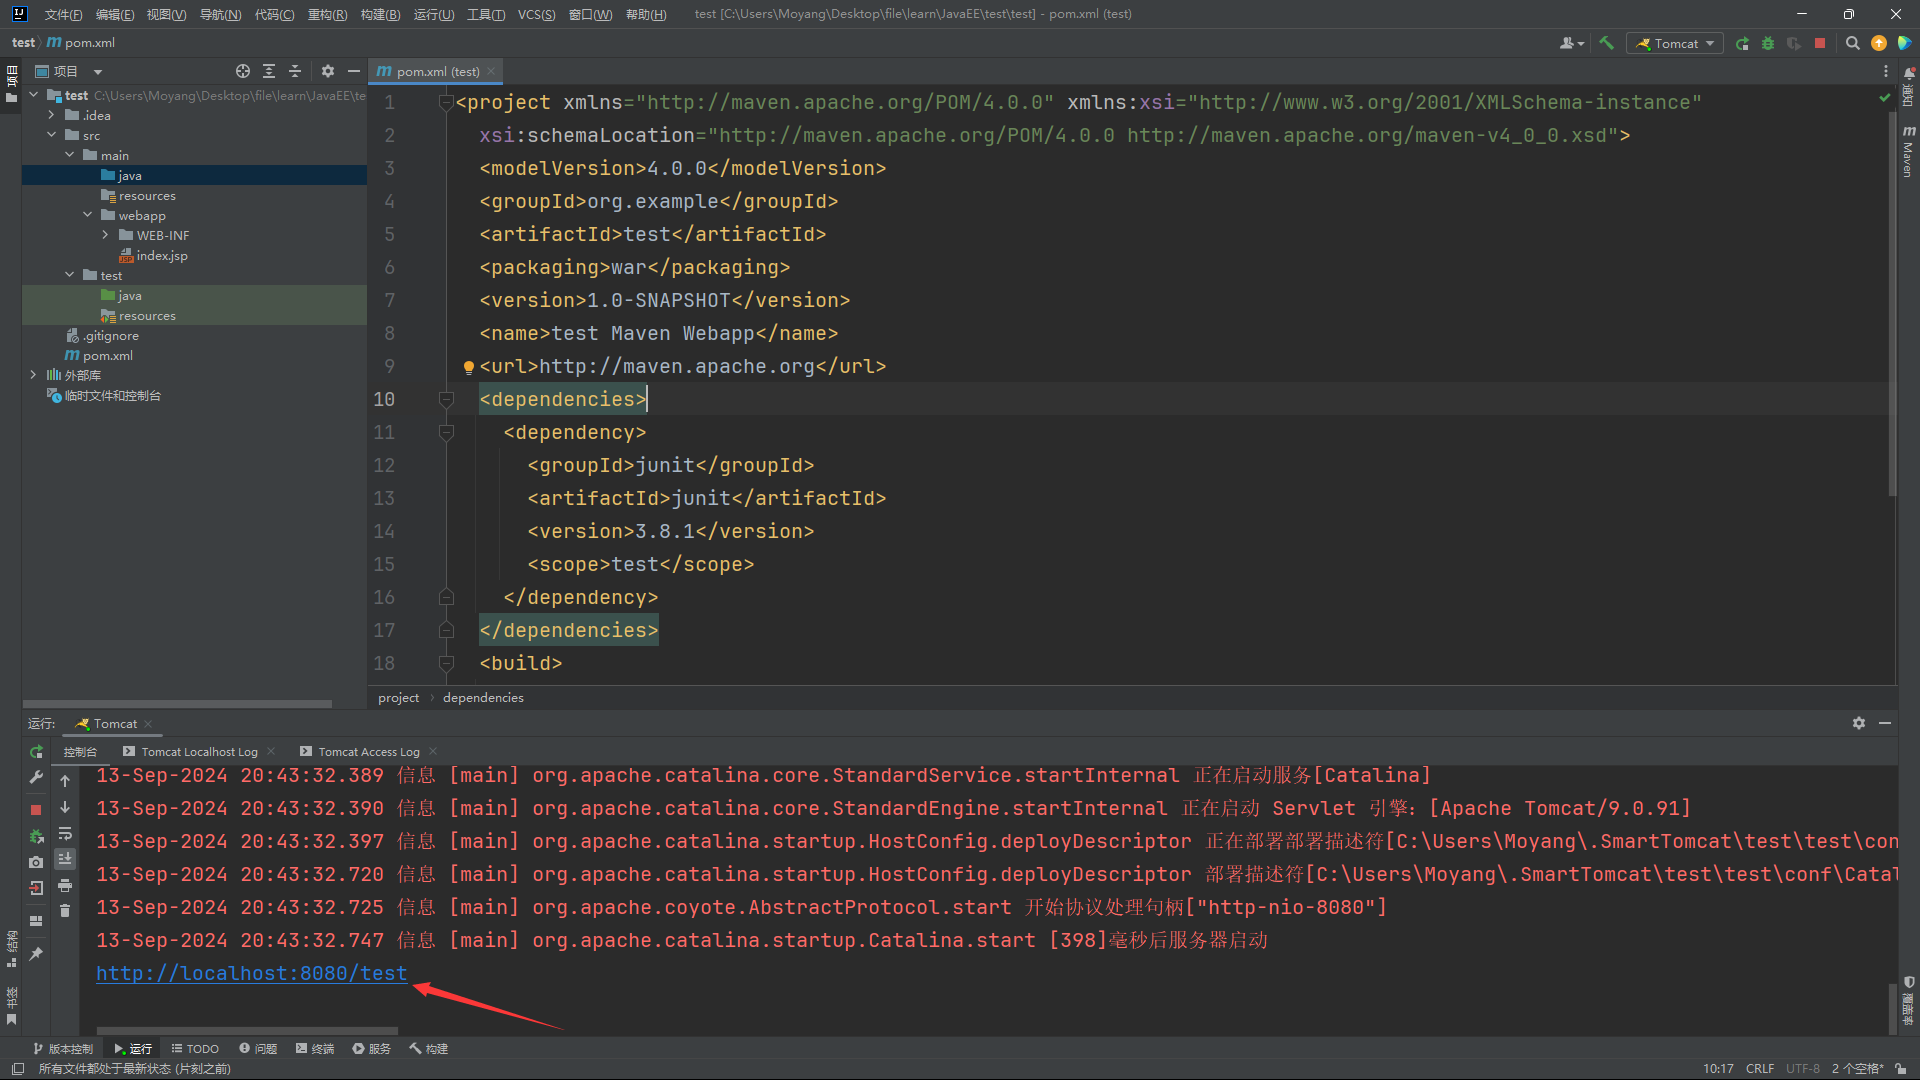
3.2 配置 Tomcat

点击运行后出现下图效果,说明成功了,点击就可以看到Hello World了,这个是在index.jsp下的内容,可以对在其中对于内容进行更改。
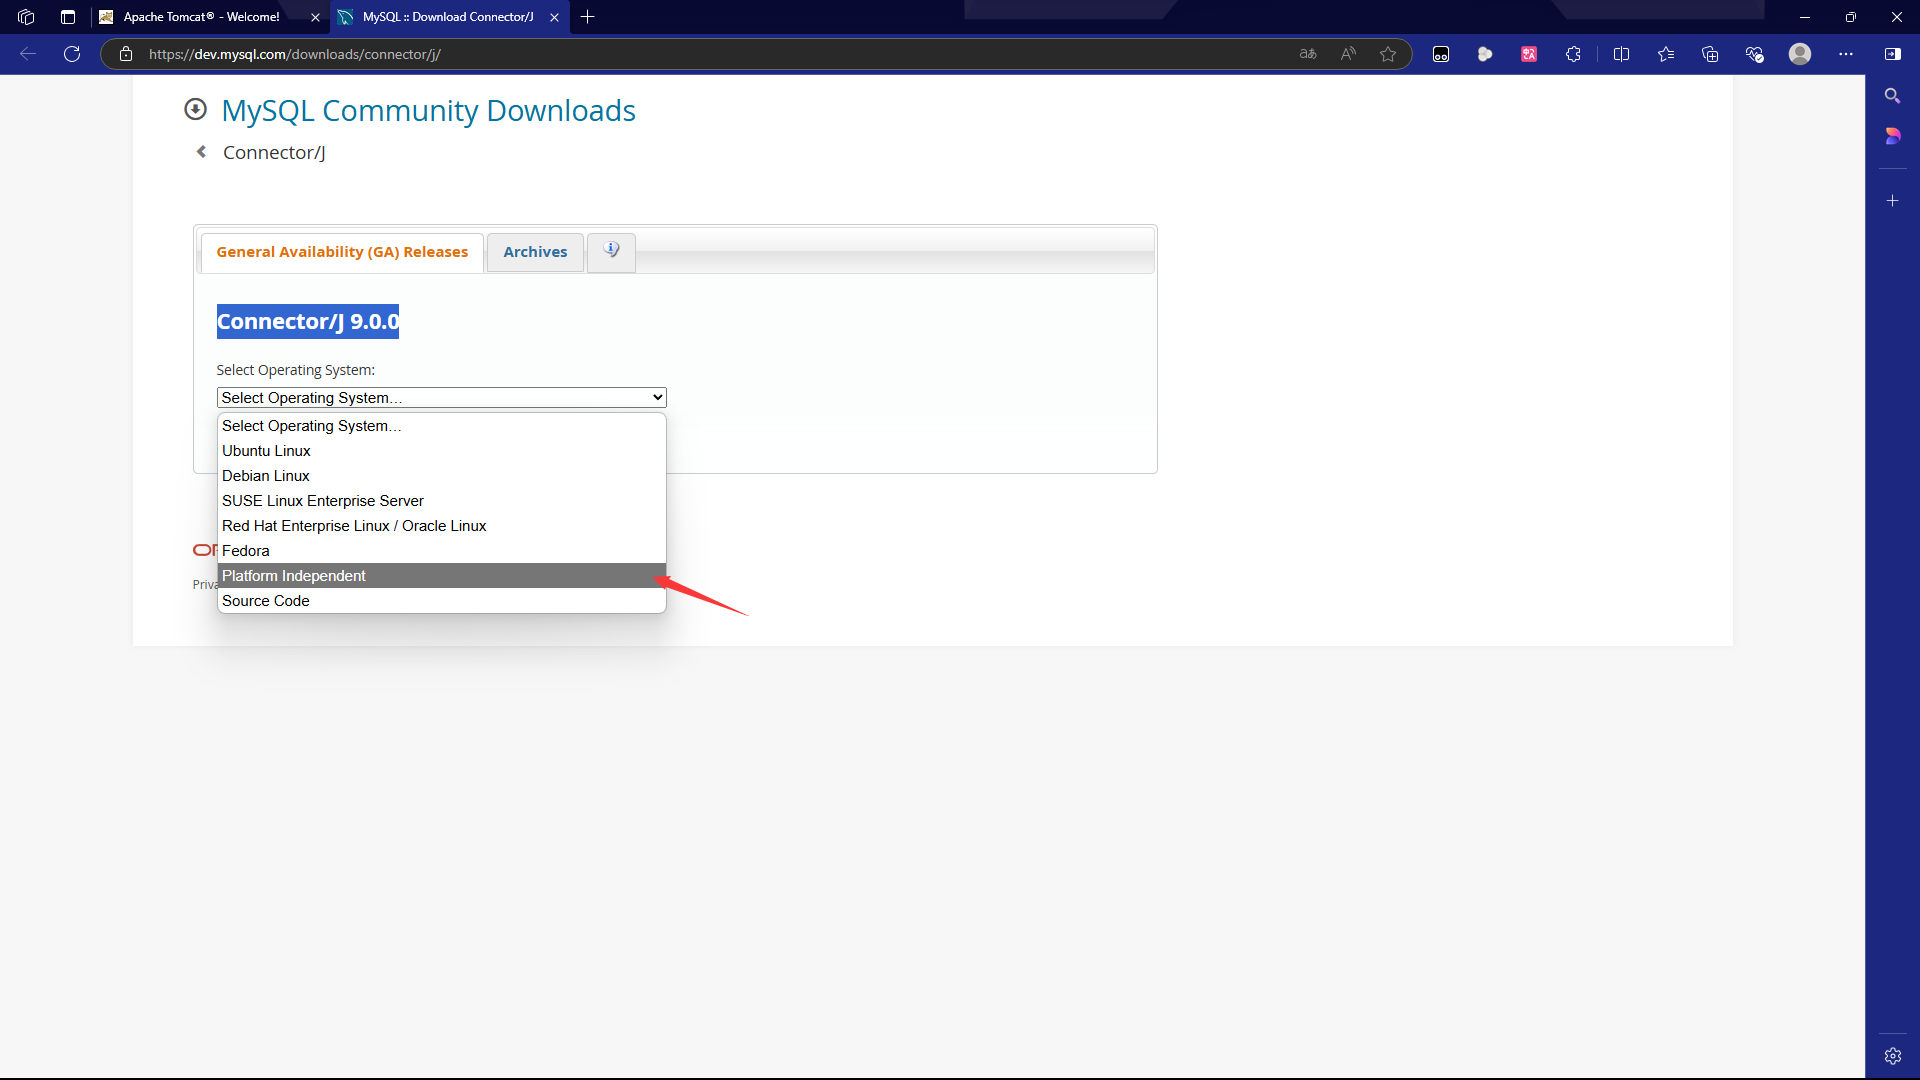
4.添加MySQL依赖
MySQL请自行下载,除此之外还要下载mysql.Connector/J 9.0.0。下载独立版本。并且解压。(配置在自己电脑的MySQL就不要设置过于复杂的密码了,这边建议root)。

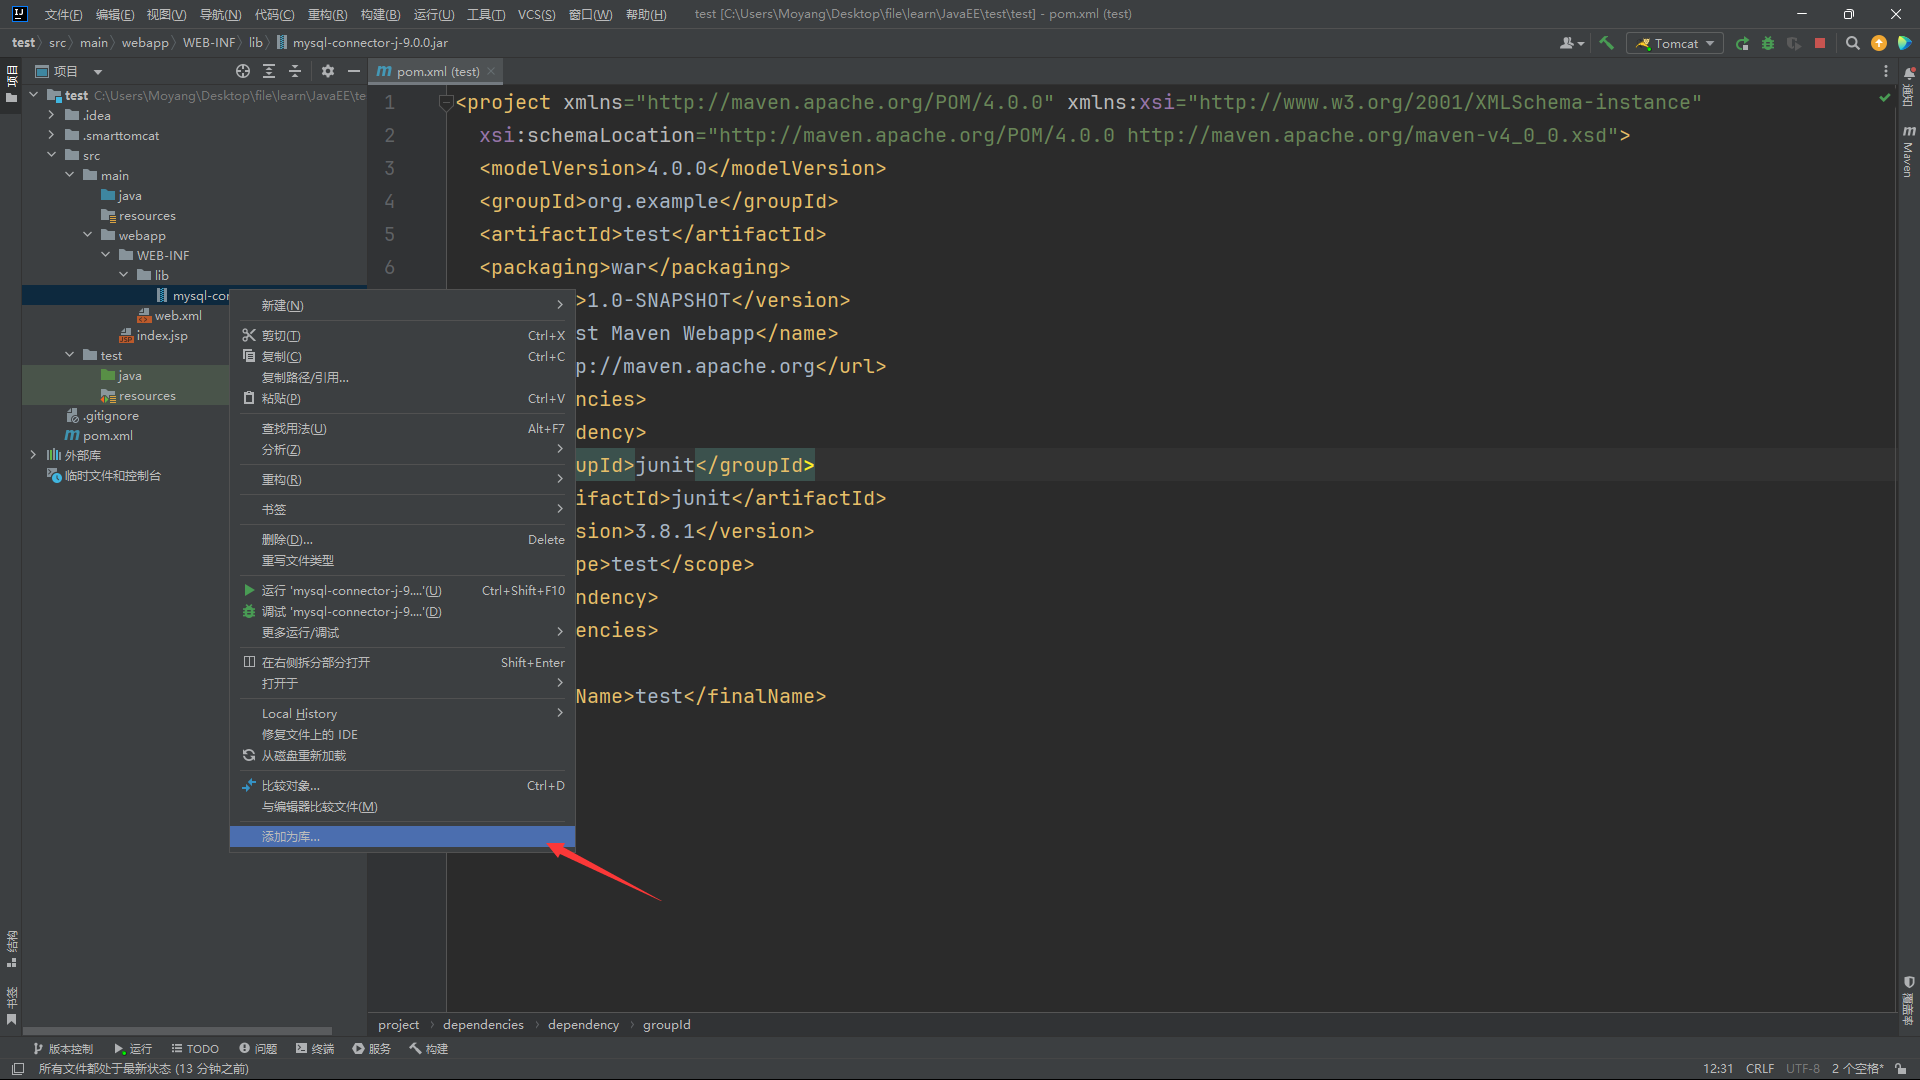
将这个依赖添加入库
5.Servlet的配置
5.1 导入 Servlet 依赖的包
!!!特别提醒,如果发生报红,请使用
idea的自动补全,idea伟大无需多言。
在 pom.xml 中的 dependencies 元素中添加如下 dependency 元素,maven 会自动导入包。
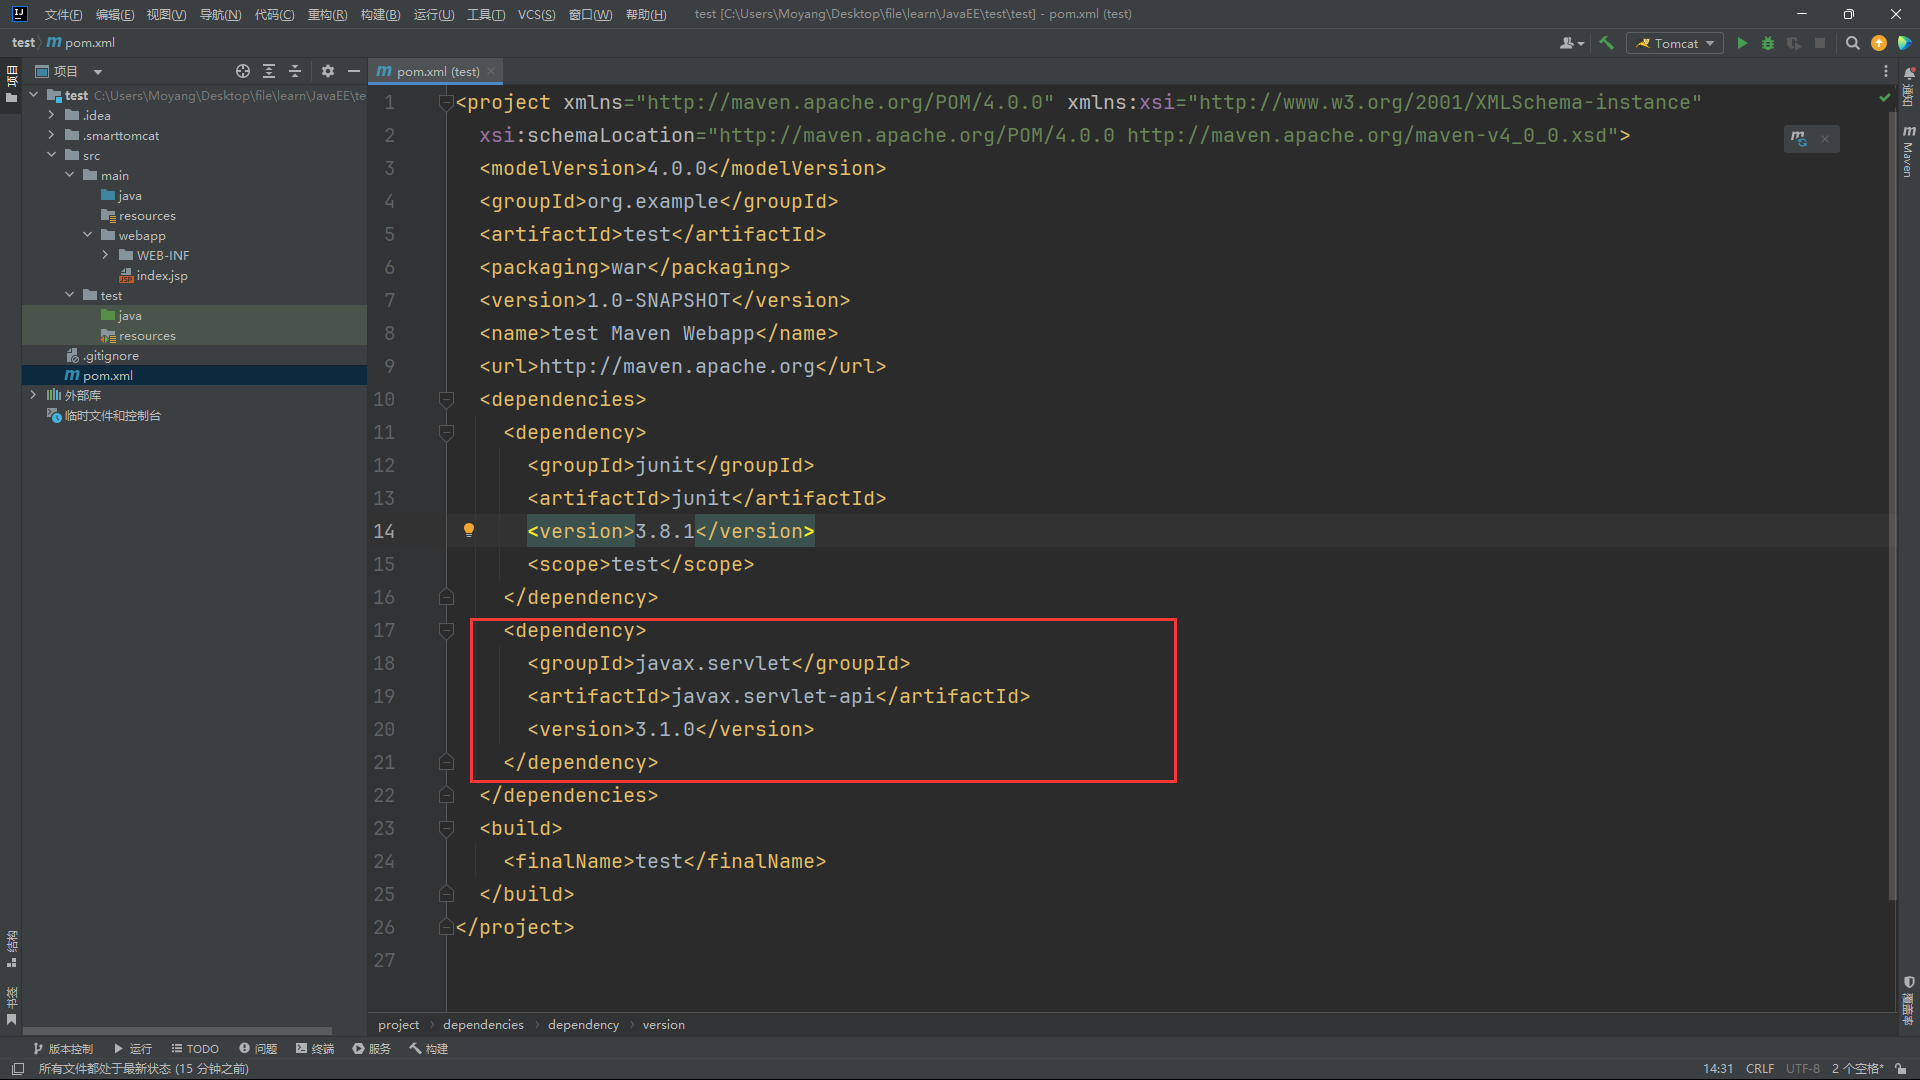
    <dependency>
      <groupId>javax.servlet</groupId>
      <artifactId>javax.servlet-api</artifactId>
      <version>3.1.0</version>
    </dependency>
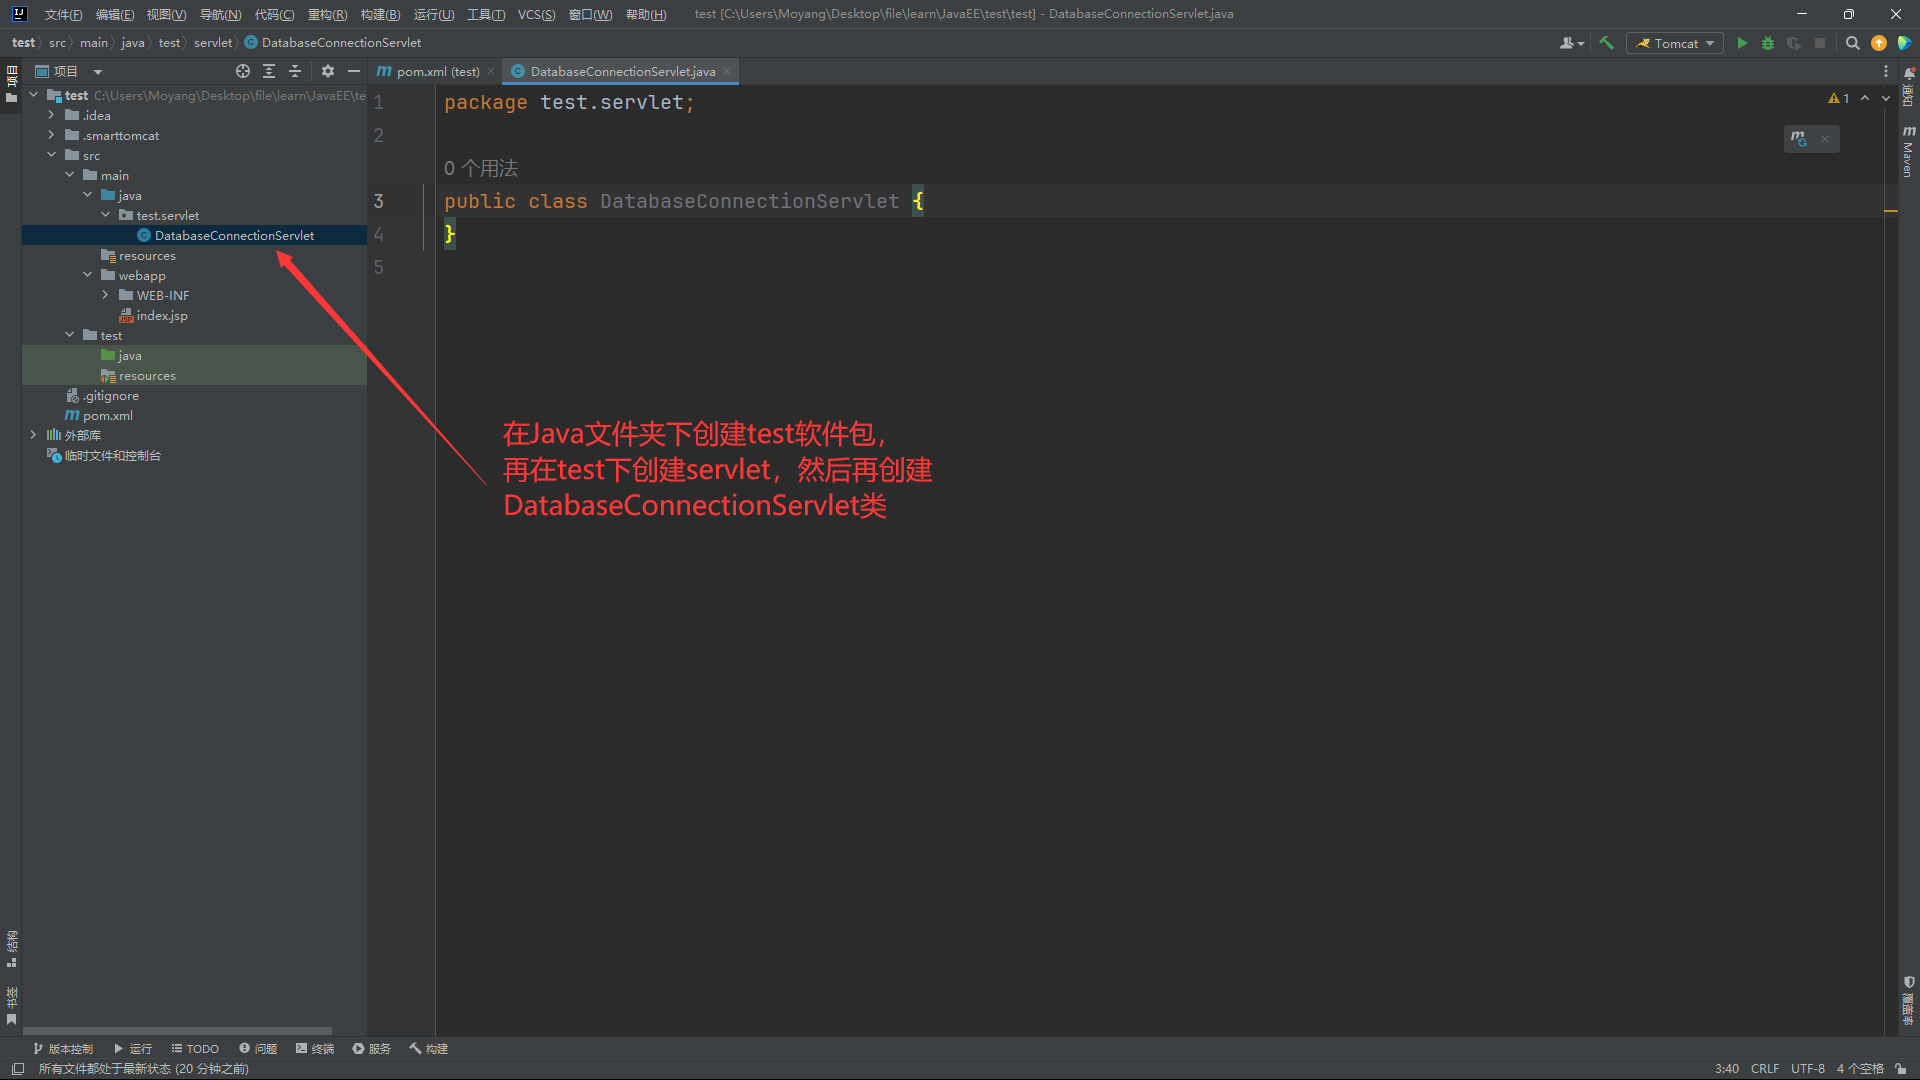
在Java文件夹下创建test软件包再在test下创建servlet,然后再创建DatabaseConnectionServlet类,当然除了servlet其他的名字可以自己选择。(servlet其实也可以改,但是为了规范还是不改为好)。在这个类继承自 HttpServlet 类,重写 doGet 和 doPost 方法以处理 HTTP 请求
5.2 书写Servlet 类
写成下列结构
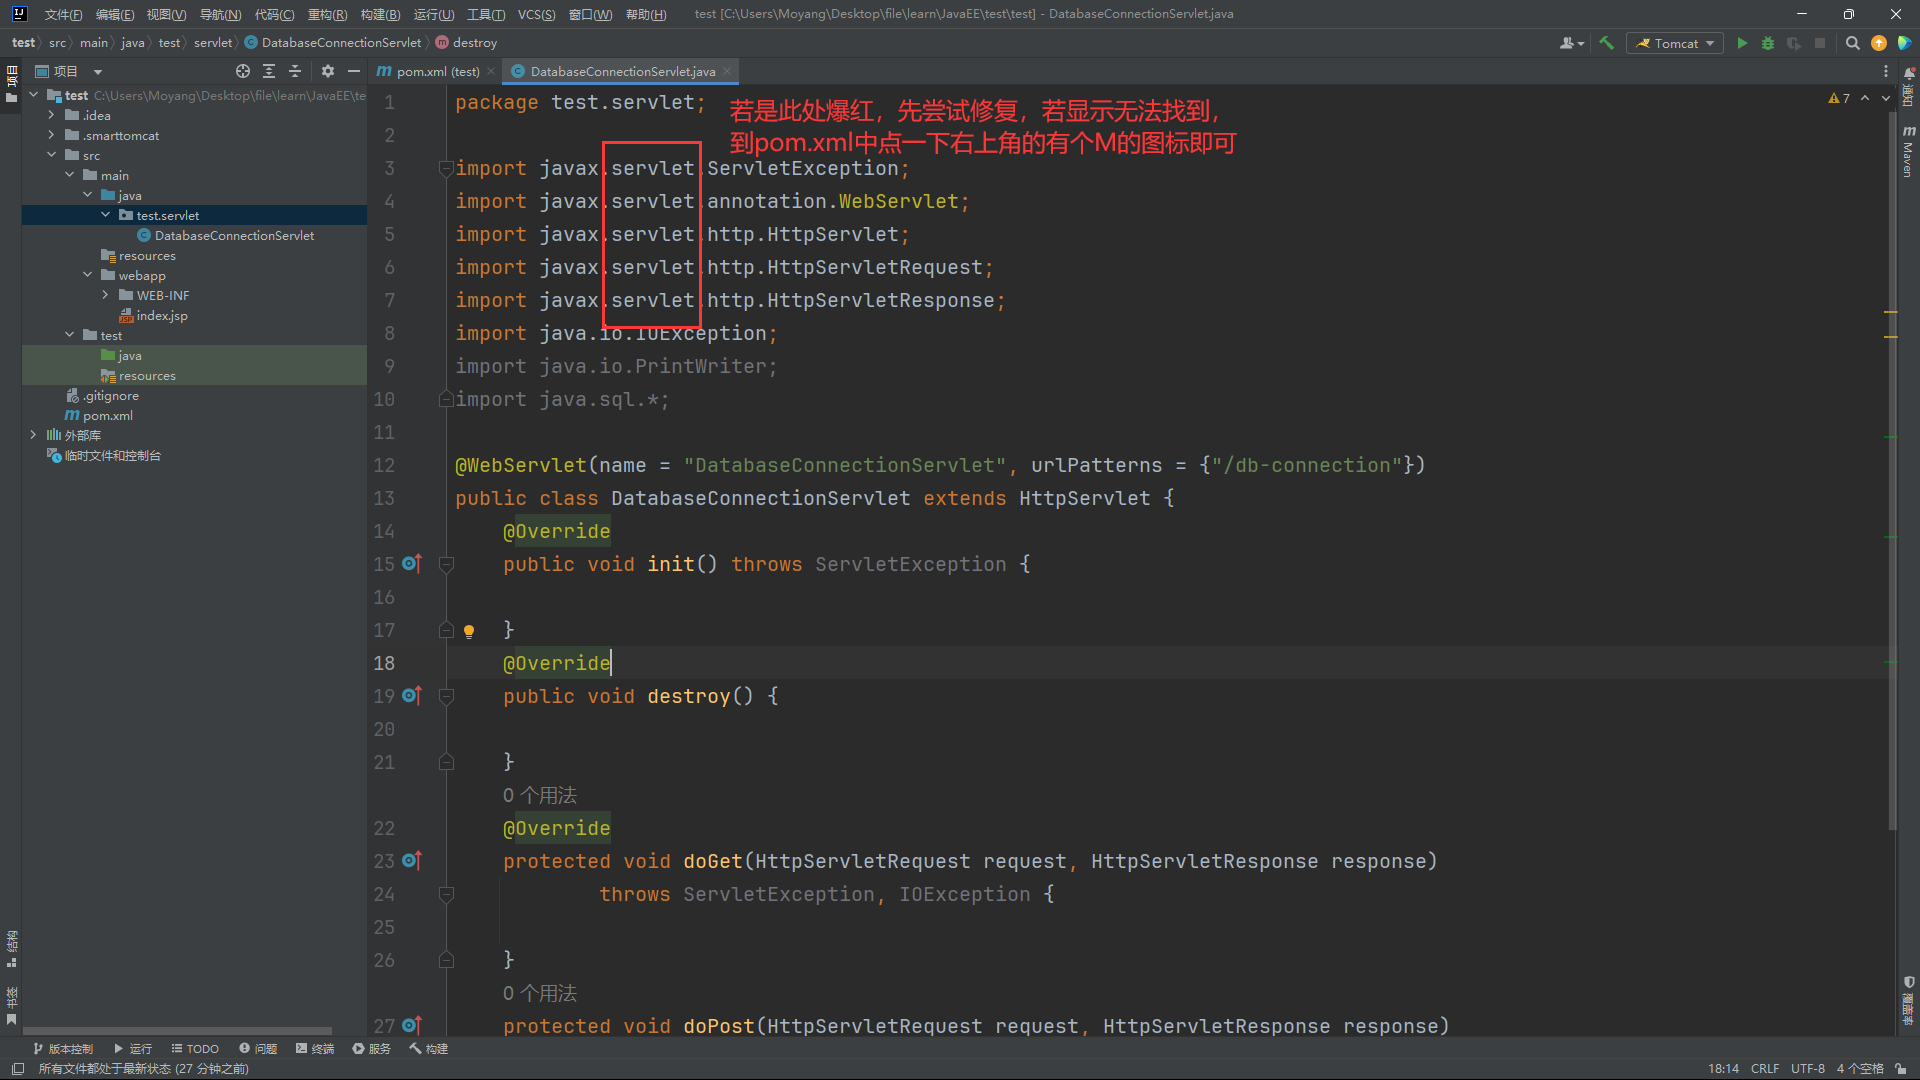
package test.servlet;

import javax.servlet.ServletException;
import javax.servlet.annotation.WebServlet;
import javax.servlet.http.HttpServlet;
import javax.servlet.http.HttpServletRequest;
import javax.servlet.http.HttpServletResponse;
import java.io.IOException;
import java.io.PrintWriter;
import java.sql.*;

@WebServlet(name = "DatabaseConnectionServlet", urlPatterns = {"/db-connection"})
public class DatabaseConnectionServlet extends HttpServlet {
    private Connection dbconn;// 这个变量用于存放数据库连接的数据
    @Override
    public void init() throws ServletException {

    }
    @Override
    public void destroy() {

    }
    @Override
    protected void doGet(HttpServletRequest request, HttpServletResponse response)
            throws ServletException, IOException {

    }
    protected void doPost(HttpServletRequest request, HttpServletResponse response)
            throws ServletException, IOException {
    }
}
5.2.1 完成init()
public void init() throws ServletException {
    // 下面这句话中的book要改成你的数据库的名称
    String dbUrl = "jdbc:mysql://127.0.0.1:3306/book?useSSL=false&serverTimezone=UTC";
    String username = "root";  // 你的Mysql的用户名
    String password = "root";  // 你的Mysql的密码

    try {
        // 加载MySQL的JDBC驱动
        Class.forName("com.mysql.cj.jdbc.Driver");

        // 建立数据库连接
        dbconn = DriverManager.getConnection(dbUrl, username, password);
        System.out.println("Database connected successfully!");

    } catch (ClassNotFoundException e) {
        // 如果加载JDBC驱动时发生错误,抛出 ClassNotFoundException,表示找不到JDBC驱动类。
        throw new ServletException("JDBC Driver not found", e);
    } catch (SQLException e) {
        // 如果连接数据库时发生错误(如用户名或密码错误,数据库不可用等),抛出 SQLException
        throw new ServletException("Error connecting to the database", e);
    }
}
5.2.2 完成destory()
public void destroy() {
    // Servlet被销毁时关闭与数据库的连接
    try {
        if (dbconn != null && !dbconn.isClosed()) {
            dbconn.close();
            System.out.println("Database connection closed.");
        }
    } catch (SQLException e) {
        e.printStackTrace();
    }
}
5.2.3 完成doGet()
protected void doGet(HttpServletRequest request, HttpServletResponse response)
    	throws ServletException, IOException {
    response.setContentType("text/html");// 告诉浏览器服务器将返回HTML格式的数据
    response.setCharacterEncoding("UTF-8");// 设置字符编码为UTF-8
    PrintWriter out = response.getWriter();// 获取响应对象的 PrintWriter,用于向客户端输出数据
    // 制作表头
    out.println("<h1>用户表<h1>");
    out.println("<table width = '100% ' border = '1'>");
    out.println("<tr>");
    out.println("<th>编号</th><th>姓名</th><th>密码</th>");
    out.println("<tr>");

    try{
        String sql = "select * from user";// sql语句,这里要将user改成自己的表
        PreparedStatement ps = dbconn.prepareStatement(sql);
        ResultSet rs = ps.executeQuery();
        while(rs.next()){// 循环读取数据库中的内容
            out.println("<tr>");
            out.println("<td>" + rs.getInt("id") + "</td>");// 这其中的内容都要进行更改
            out.println("<td>" + rs.getString("name") + "</td>");
            out.println("<td>" + rs.getString("password") + "</td>");
        }

    } catch (SQLException e) {
        throw new RuntimeException(e);
    }
    out.println("</table>");
    out.flush();
    out.close();
}
5.2.4 完成doPost()
protected void doPost(HttpServletRequest request, HttpServletResponse response)
    	throws ServletException, IOException {
    doGet(request,response);// 直接调doGet即可
}
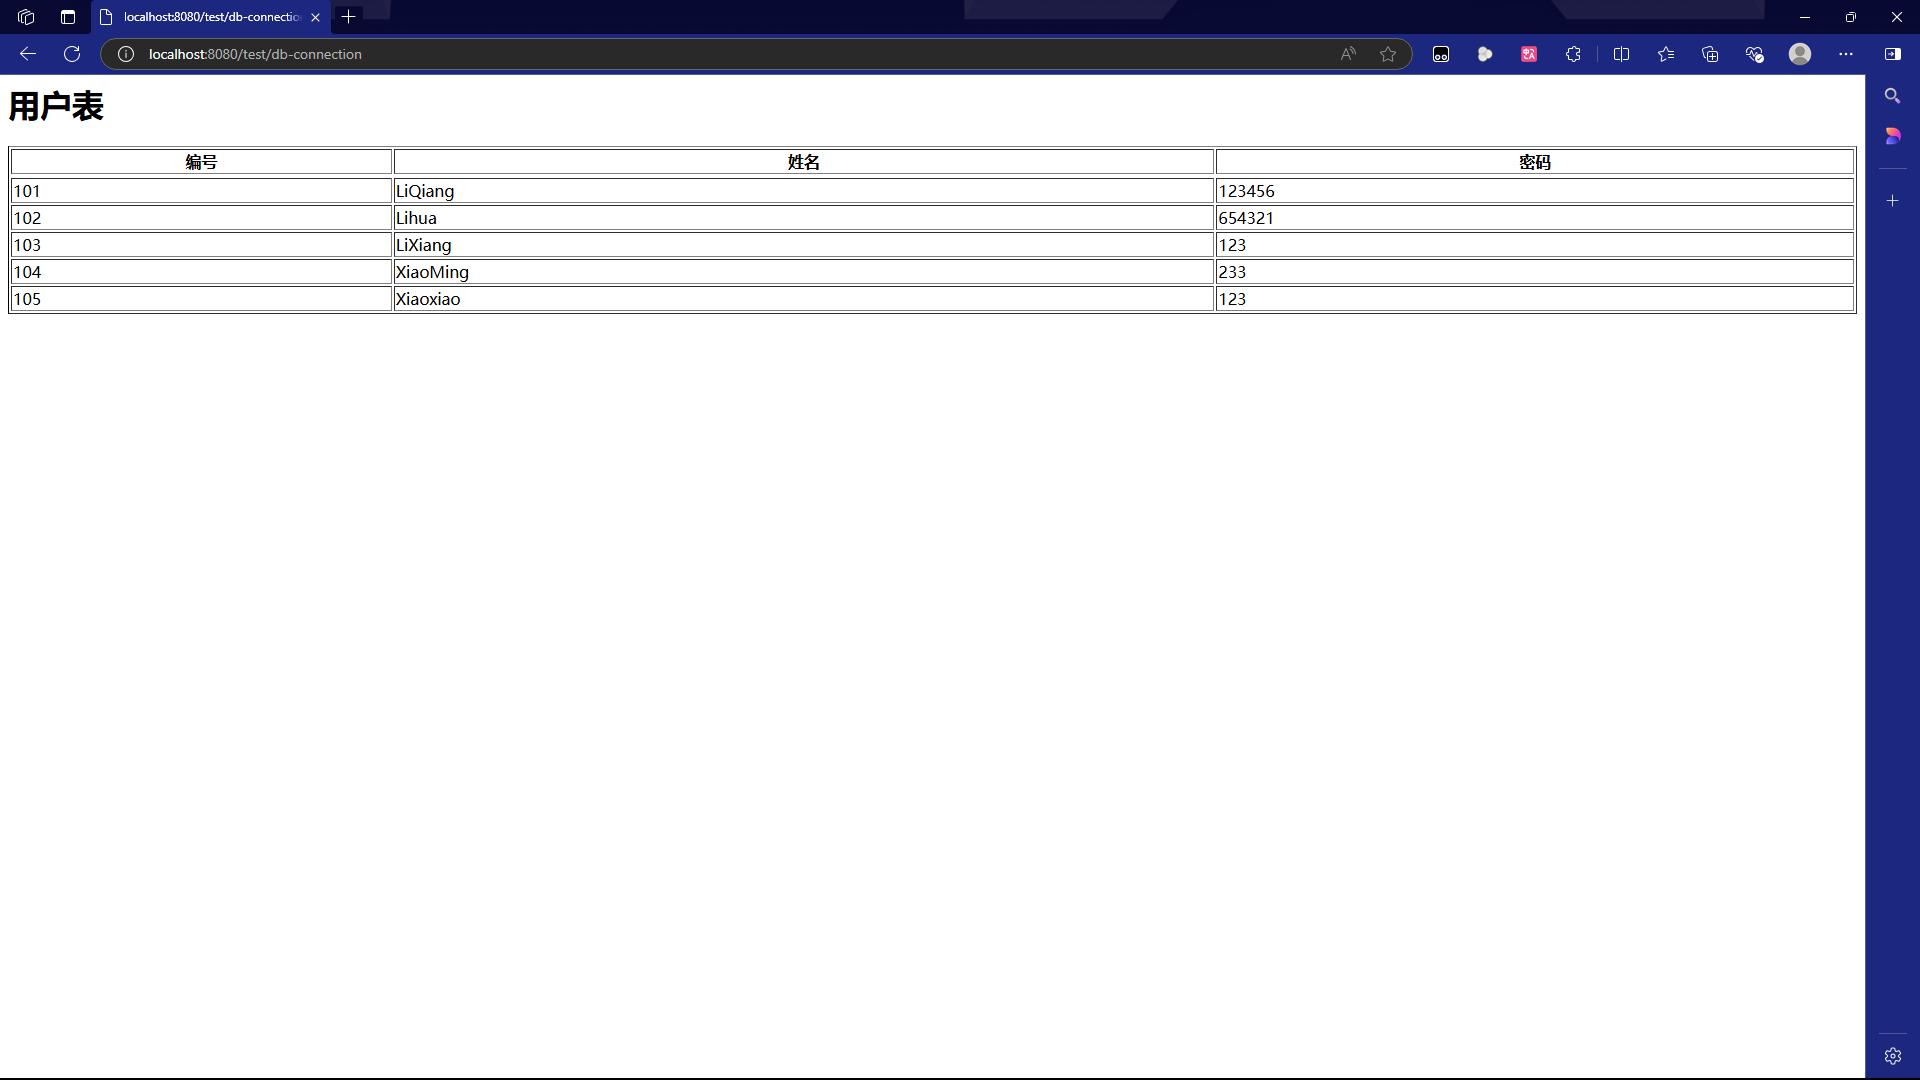
5.2.5 访问网页
首先要将Tomcat跑起来,也就是我们第3步中做的内容。接着访问localhost:8080/test/db-connection这里的/db-connection是你自个前面设置过的@WebServlet(name = "DatabaseConnectionServlet", urlPatterns = {"/db-connection"})中的后面的urlPatterns中的内容。
网页呈现出下列效果


 1万+
1万+

 被折叠的 条评论
为什么被折叠?
被折叠的 条评论
为什么被折叠?
 到【灌水乐园】发言


