


由于想做下小程序接口且因为小程序发起请求的API只能是Https形式的域名,所以为了能执行预开发的工作,逐步逐步的去注册购买以及配置。
从域名注册 – 实名认证 – 域名解析(DNS解析DNSPod,解析后的可以通过 http://***.com访问)
以下是域名解析配置

nginx
下载后解压
注:不能解压到含中文的目录下

配置 nginx.conf
    server {
        listen       80;
        server_name  www.****.com;

        #charset koi8-r;

        #access_log  logs/host.access.log  main;

        location / {

            proxy_set_header X-Real-IP $remote_addr;

            proxy_set_header X-Forwarded-For $proxy_add_x_forwarded_for;

            proxy_set_header Host  $http_host;

            proxy_set_header X-Nginx-Proxy true;

            proxy_set_header Connection "";

            proxy_pass http://127.0.0.1:3000;    // 对应 node

            proxy_redirect default;

            #root   html;
            #index  index.html index.htm;
        }

        #error_page  404              /404.html;

        # redirect server error pages to the static page /50x.html
        #
        error_page   500 502 503 504  /50x.html;
        location = /50x.html {
            root   html;
        }

        # proxy the PHP scripts to Apache listening on 127.0.0.1:80
        #
        #location ~ \.php$ {
        #    proxy_pass   http://127.0.0.1;
        #}

        # pass the PHP scripts to FastCGI server listening on 127.0.0.1:9000
        #
        #location ~ \.php$ {
        #    root           html;
        #    fastcgi_pass   127.0.0.1:9000;
        #    fastcgi_index  index.php;
        #    fastcgi_param  SCRIPT_FILENAME  /scripts$fastcgi_script_name;
        #    include        fastcgi_params;
        #}

        # deny access to .htaccess files, if Apache's document root
        # concurs with nginx's one
        #
        #location ~ /\.ht {
        #    deny  all;
        #}
    }
从腾讯云中搜索 SSL证书 ,然后点击 申请免费证书

按 确定 等待处理

等到处理完成时,即可 下载证书
nginx 证书安装
从腾讯下载的证书文件夹中找到 Nginx 文件夹,然后拷贝以下文件:
1_www.****.com_bundle.crt 证书文件和 2_www.****.com.key 私钥文件
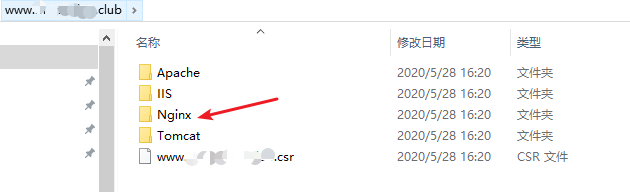
将拷贝的文件复制到nginx文件夹中 - conf 文件夹中
conf 文件夹中 - 打开 nginx.conf 然后用以下代码为例进行配置:
server {
     #SSL 访问端口号为 443
     listen 443 ssl;
     #填写绑定证书的域名
     server_name www.****.com;
     #证书文件名称
     ssl_certificate 1_www.****.com_bundle.crt;
     #私钥文件名称
     ssl_certificate_key 2_www.****.com.key;
     ssl_session_timeout 5m;
     #请按照以下协议配置
     ssl_protocols TLSv1 TLSv1.1 TLSv1.2;
     #请按照以下套件配置,配置加密套件,写法遵循 openssl 标准。
     ssl_ciphers ECDHE-RSA-AES128-GCM-SHA256:HIGH:!aNULL:!MD5:!RC4:!DHE;
     ssl_prefer_server_ciphers on;
     location / {
        #网站主页路径。此路径仅供参考,具体请您按照实际目录操作。
         root /var/www/www.****.com;
         index  index.html index.htm;
     }
 }

server {
listen 80;
#填写绑定证书的域名
server_name www.****.com;
#把http的域名请求转成https
return 301 https://$host$request_uri;
}
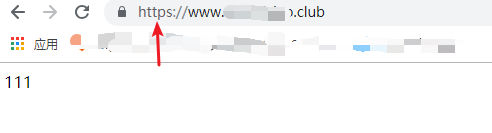
重启 nginx.exe 即可
最后可以看到成功示例:


 329
329


 被折叠的 条评论
为什么被折叠?
被折叠的 条评论
为什么被折叠?
 到【灌水乐园】发言


