


前一段时间,自己看了一下开眼效果,觉得这个还是非常有意思啊。那么,今天就来看看这个效果是如何实现的。
首先我们依然是先创建一个新的工程……
在ViewController.m中,添加一个私有属性,并将其添加到self.view上:
@interface ViewController ()<UITableViewDelegate, UITableViewDataSource>

@property (nonatomic, strong)UITableView *tableView;

@end

@implementation ViewController

- (void)viewDidLoad {
    [super viewDidLoad];
    [self.view addSubview:self.tableView];
}

#pragma mark - UITableViewDataSource
- (NSInteger)tableView:(UITableView *)tableView numberOfRowsInSection:(NSInteger)section {
    return 10;
}

- (NSInteger)numberOfSectionsInTableView:(UITableView *)tableView {
    return 1;
}

- (UITableViewCell *)tableView:(UITableView *)tableView cellForRowAtIndexPath:(NSIndexPath *)indexPath {
    UITableViewCell *cell = [tableView dequeueReusableCellWithIdentifier:@"cell"];
    if (indexPath.row % 2 == 1) {
        cell.backgroundColor = [UIColor blueColor];
    }else {
        cell.backgroundColor = [UIColor redColor];
    }
    return cell;
}

#pragma mark - UITableViewDelegate

#pragma mark - 懒加载
- (UITableView *)tableView {
    if (!_tableView) {
        _tableView = [[UITableView alloc] initWithFrame:CGRectMake(0, 20, self.view.bounds.size.width, self.view.bounds.size.height - 20) style:UITableViewStylePlain];
        // 将tableview的数据源和代理设置为当前控制器
        _tableView.dataSource = self;
        _tableView.delegate = self;
        // 设置cell的高度
        _tableView.rowHeight = 200;
        _tableView.backgroundColor = [UIColor orangeColor];


        // 设置tableview的原型cell
        [_tableView registerClass:[UITableViewCell class] forCellReuseIdentifier:@"cell"];
    }
    return _tableView;
}

@end
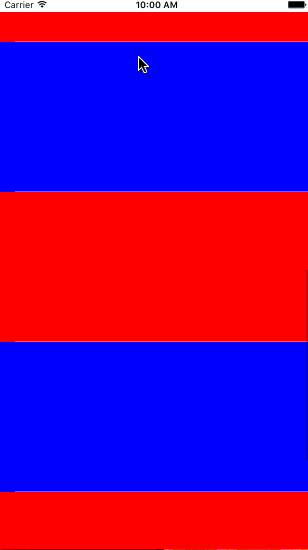
那么,现在运行出来的效果是这样的:
那么,这个时候,我们需要自己创建一个新的类型,继承于UITableViewCell,名字取为ShowTableViewCell,创建好后,将新的类导入ViewController.m中。
现在,我们想在ShowTableViewCell.h中,增加一个属性和两个可以调用的方法。
@interface ShowTableViewCell : UITableViewCell

@property (nonatomic, strong)NSString *imageName;

- (void)cellOffSet; /**< 偏移单元格 */
- (void)cancelAnimation; /**< 取消动画 */

@end
那么,在ShowTableViewCell.m中,将图片的位置进行懒加载,并且重写imageName的set方法。
#import "ShowTableViewCell.h"

#define SCREEN_SIZE [UIScreen mainScreen].bounds.size

@interface ShowTableViewCell ()

@property (nonatomic, strong)UIImageView *backgroundImageView;

@end

@implementation ShowTableViewCell

- (instancetype)initWithStyle:(UITableViewCellStyle)style reuseIdentifier:(NSString *)reuseIdentifier {
    self = [super initWithStyle:style reuseIdentifier:reuseIdentifier];
    // 添加子视图
    // 1.配置cell的属性
    self.selectionStyle = UITableViewCellSelectionStyleNone;
    self.clipsToBounds = YES;

    // 2.试图加载
    [self.contentView addSubview:self.backgroundImageView];

    // 3.自定义分割线
    UIView *line = [[UIView alloc] initWithFrame:CGRectMake(0, 200 - 1, SCREEN_SIZE.width, 1)];
    line.backgroundColor = [UIColor lightGrayColor];
    [self.contentView addSubview:line];

    return self;
}

#pragma mark - Handle offset
- (void)cancelAnimation {
    [self.backgroundImageView.layer removeAllAnimations];
}

- (void)cellOffSet {
    // 1、获取cell在屏幕中的rect
    CGRect  centerToWindow = [self convertRect:self.bounds toView:self.window];
    // 2、获取cell中心点y轴坐标
    CGFloat centerY        = CGRectGetMidY(centerToWindow);
    // 3、获取cell父视图的中心点
    CGPoint windowCenter   = self.superview.center;
    // 4、获取距离差
    CGFloat cellOffsetY = centerY - windowCenter.y;
    // 5、距离差 / 2倍父视图高度
    CGFloat offsetDig =  cellOffsetY / self.superview.frame.size.height * 2;
    // 6、计算偏移 kScreenHeight * 0.5 为图片视图的高度
    CGFloat offset    =  -offsetDig * (SCREEN_SIZE.height * 0.5 - 200) / 2;

    CGAffineTransform transY   = CGAffineTransformMakeTranslation(0, offset);
    self.backgroundImageView.transform = transY;
}

#pragma mark - 重写Set方法
- (void)setImageName:(NSString *)imageName {
    if ([_imageName isEqualToString:imageName]) {
        return;
    }
    _imageName = imageName;
    self.backgroundImageView.image = [UIImage imageNamed:_imageName];
}

#pragma mark - 懒加载
- (UIImageView *)backgroundImageView {
    if (!_backgroundImageView) {
        _backgroundImageView = [[UIImageView alloc]initWithFrame:CGRectMake(0, - (SCREEN_SIZE.height * 0.5 - 200) / 2, SCREEN_SIZE.width, SCREEN_SIZE.height * 0.5)];
    }
    return _backgroundImageView;
}

@end
在ViewController.m中,将所有的UITableViewCell改为ShowTableViewCell,并且在整个demo中添加添加一张图片。

- (ShowTableViewCell *)tableView:(UITableView *)tableView cellForRowAtIndexPath:(NSIndexPath *)indexPath {
    ShowTableViewCell *cell = [tableView dequeueReusableCellWithIdentifier:@"cell"];
    cell.imageName = @"青春3.jpg";
    return cell;
}
上面的代码是从新将cell的属性从新定义。
那么,这个时候,我们只要将ShowTableViewCell的delegate从新书写就OK了。
#pragma mark - UITableViewDelegate
// 将要显示cell时调用
- (void)tableView:(UITableView *)tableView willDisplayCell:(ShowTableViewCell *)cell forRowAtIndexPath:(NSIndexPath *)indexPath {
    // 1、cell 出现时的效果
    // 防止加载时滑动卡顿
    CATransform3D rotation;//3D旋转

    rotation = CATransform3DMakeTranslation(0 ,50 ,20);
    // rotation = CATransform3DMakeRotation( M_PI_4 , 0.0, 0.7, 0.4);
    // 逆时针旋转

    rotation = CATransform3DScale(rotation, 0.9, .9, 1);

    rotation.m34 = 1.0/ -600;

    cell.layer.shadowColor = [[UIColor blackColor]CGColor];
    cell.layer.shadowOffset = CGSizeMake(10, 10);
    cell.alpha = 0;

    cell.layer.transform = rotation;

    [UIView beginAnimations:@"rotation" context:NULL];
    //旋转时间
    [UIView setAnimationDuration:0.6];
    cell.layer.transform = CATransform3DIdentity;
    cell.alpha = 1;
    cell.layer.shadowOffset = CGSizeMake(0, 0);
    [UIView commitAnimations];

    // 2、滚动视差效果实现
    [cell cellOffSet];
}

- (void)scrollViewDidScroll:(UIScrollView *)scrollView {
    // 获取可以见到的 cell,让图片在cell坐标改变的时候偏移
    NSArray<ShowTableViewCell *> *array = [self.tableView visibleCells];
    [array enumerateObjectsUsingBlock:^(ShowTableViewCell * _Nonnull obj, NSUInteger idx, BOOL * _Nonnull stop) {
        [obj cellOffSet];
    }];
}

// cell显示完时调用
- (void)tableView:(UITableView *)tableView didEndDisplayingCell:(ShowTableViewCell *)cell forRowAtIndexPath:(NSIndexPath *)indexPath {
    [cell cancelAnimation];
}
那么,全部就完成了,剩下的就command+r跑一下了。


 126
126

 被折叠的 条评论
为什么被折叠?
被折叠的 条评论
为什么被折叠?
 到【灌水乐园】发言


