


系统: centos7.6.1810
内核: 3.10.0-957.el7.x86_64
一、先下载相关的工具
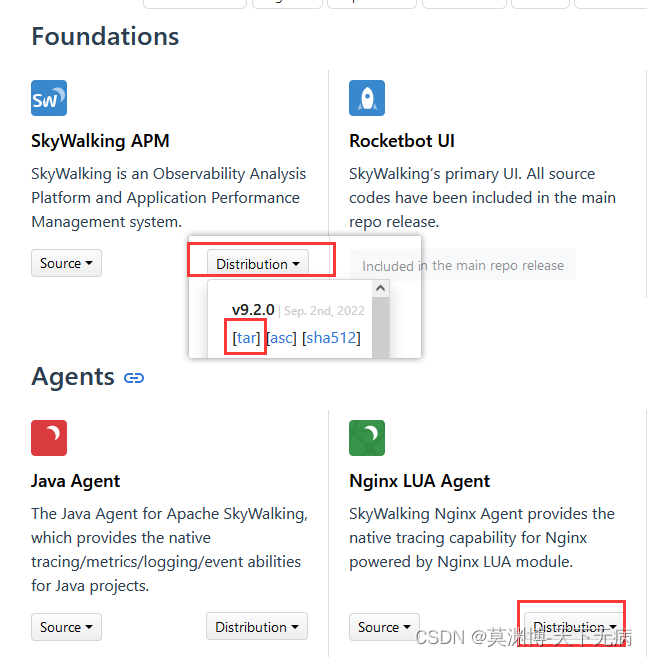
官网下载地址: https://skywalking.apache.org/downloads/

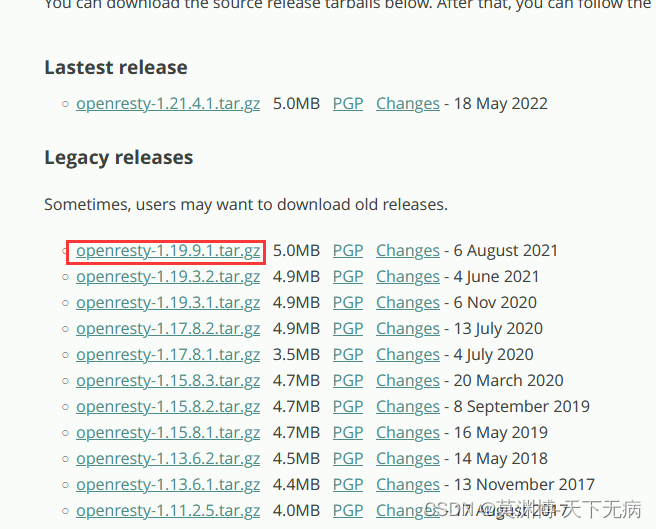
openresty官网下载地址: http://openresty.org/en/download.html
下载openresty工具,捆绑了lua模块,收集日志需要用到lua语言模块
拉到网页的半中间,不下载最新的,下载稳定版本
先下载工具:
yum -y install wget git然后下载响应的软件工具:
# 下载工具安装包:
wget https://dlcdn.apache.org/skywalking/9.2.0/apache-skywalking-apm-9.2.0.tar.gz --no-check-certificate
git clone https://ghproxy.com/https://github.com/apache/skywalking-nginx-lua.git
wget https://dlcdn.apache.org/tomcat/tomcat-9/v9.0.69/bin/apache-tomcat-9.0.69.tar.gz --no-check-certificate
wget https://artifacts.elastic.co/downloads/elasticsearch/elasticsearch-7.16.2-x86_64.rpm
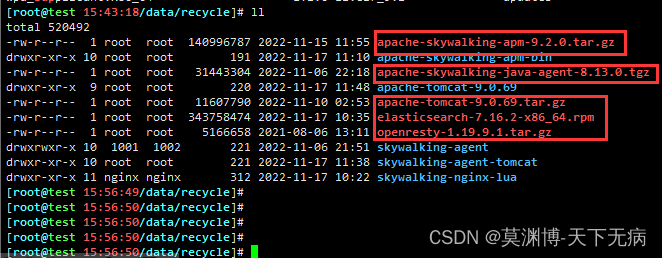
wget https://openresty.org/download/openresty-1.19.9.1.tar.gz检查总共5个文件
二、安装elasticsearch,elasticsearch用来存储skywalking的数据
yum -y install elasticsearch-7.16.2-x86_64.rpm三、配置java环境,skywalking工具需要用到java环境,而且要求在11版本以上
cat > /etc/profile.d/java_home.sh <<'EOF'
export JAVA_HOME=/usr/share/elasticsearch/jdk
export ES_JAVA_HOME=${JAVA_HOME}
export PATH=${PATH}:${JAVA_HOME}/bin
EOF
检查java环境
source /etc/profile
java -version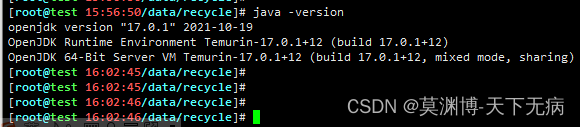
四、修改elasticsearch的配置
1、把/var/log/elasticsearch日志目录改为/data/software/elasticsearch/logs/目录下
cd /etc/elasticsearch/
sed -i 's#/var/log/elasticsearch#/data/software/elasticsearch/logs#g#' jvm.options
2、修改内存管理,大概在31行和32行左右;把星号去掉,根据情况改内存配置
vim jvm.options 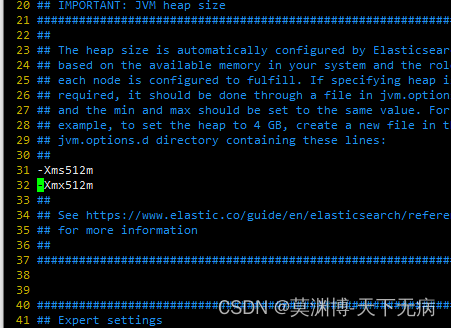
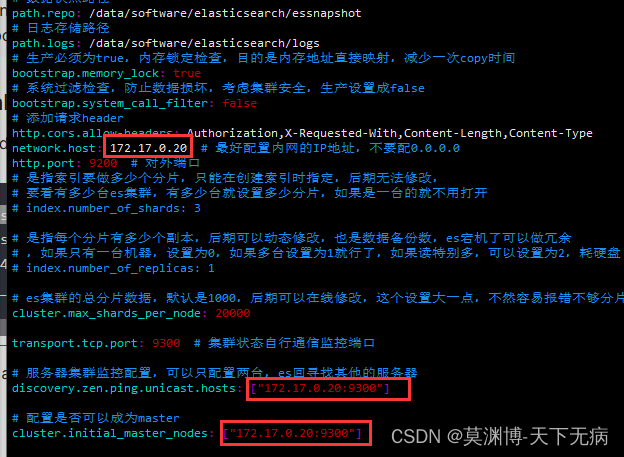
3、修改主配置文件
cat > elasticsearch.yml <<'EOF'
cluster.name: skywalking-cluster  # 集群名称
node.name: node1  # node名称,集群的每台服务器名称必须不一致
# 参与master竞争
node.master: true
node.data: true  # 改服务器是否可以存放数据
# 数据存储路径,可以分块,可以只配置一个data目录
path.data: /data/software/elasticsearch/data
# 数据快照路径
path.repo: /data/software/elasticsearch/essnapshot
# 日志存储路径
path.logs: /data/software/elasticsearch/logs
# 生产必须为true,内存锁定检查,目的是内存地址直接映射,减少一次copy时间
bootstrap.memory_lock: true
# 系统过滤检查,防止数据损坏,考虑集群安全,生产设置成false
bootstrap.system_call_filter: false
# 添加请求header
http.cors.allow-headers: Authorization,X-Requested-With,Content-Length,Content-Type
network.host: 172.17.0.20  # 最好配置内网的IP地址,不要配0.0.0.0
http.port: 9200  # 对外端口
# 是指索引要做多少个分片,只能在创建索引时指定,后期无法修改,
# 要看有多少台es集群,有多少台就设置多少分片,如果是一台的就不用打开
# index.number_of_shards: 3

# 是指每个分片有多少个副本,后期可以动态修改,也是数据备份数,es宕机了可以做冗余
# ,如果只有一台机器,设置为0,如果多台设置为1就行了,如果读特别多,可以设置为2,耗硬盘
# index.number_of_replicas: 1

# es集群的总分片数据,默认是1000,后期可以在线修改,这个设置大一点,不然容易报错不够分片
cluster.max_shards_per_node: 20000

transport.tcp.port: 9300  # 集群状态自行通信监控端口

# 服务器集群监控配置,可以只配置两台,es回寻找其他的服务器
discovery.zen.ping.unicast.hosts: ["172.17.0.20:9300"]

# 配置是否可以成为master
cluster.initial_master_nodes: ["172.17.0.20:9300"]

# 这个配置限制了单节点上可以开启的ES存储实例的个数,我们需要开多个实例,因此需要把这个配置写到配置文件中,并为这个配置赋值为2或者更高。
node.max_local_storage_nodes: 256

# 用来控制缓存的大小,支持两种格式,一种是百分数,代表占节点heap的百分比,另一种是精确值,如10gb,默认是无限
indices.fielddata.cache.size: 50%
# 允许跨域请求
http.cors.enabled: true
# *表示支持所有域名
http.cors.allow-origin: "*"
EOF
4、根据自己的情况修改
五、创建相关目录
mkdir -p /data/software/elasticsearch/{data,essnapshot,logs}六、修改文件属性
chown elasticsearch:elasticsearch /data/software/elasticsearch/ -R七、去掉内核对elasticsearch的内存限制
vim /usr/lib/systemd/system/elasticsearch.service
LimitMEMLOCK=infinity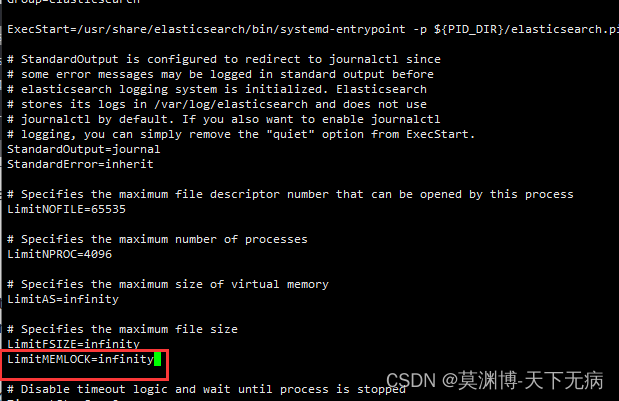
八、重新加载配置,启动elasticsearch并设置开机自启
systemctl daemon-reload
systemctl enable --now elasticsearch.service
九、检查elasticsearch启动情况
curl 172.17.0.20:9200 
十、解压apache-skywalking-apm-9.2.0.tar.gz
tar zxf apache-skywalking-apm-9.2.0.tar.gz十一、配置skywalking的配置文件
:set nu # 开启行数显示
cd apache-skywalking-apm-bin/
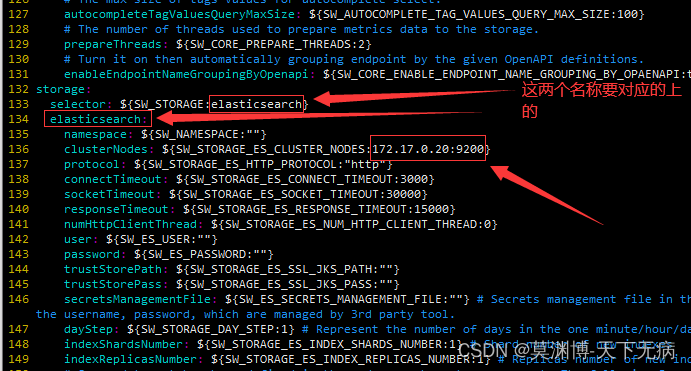
vim config/application.yml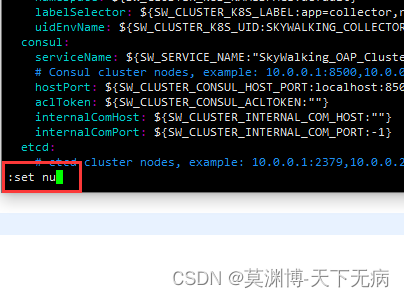
修改存储方式为elasticsearch
十二、启动skywalking
./bin/startup.sh
十三、检查skywalking启动情况,总共两个服务,三个端口
jps
netstat -untpl | grep java 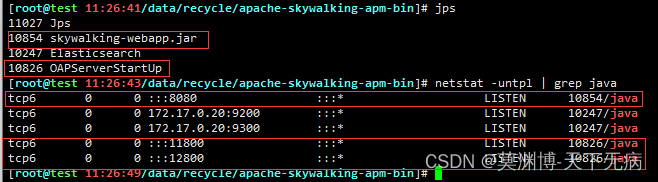
十四、配置skywalking客服端收集tomcat收集日志
1、解压:
tar zxf apache-skywalking-java-agent-8.13.0.tgz2、复制一份出来,作为tomcat的配置:
cp -r skywalking-agent skywalking-agent-tomcat3、修改配置文件
cd skywalking-agent-tomcat
vim config/agent.config 
修改skywalking服务端的地址,11800是收集数据的端口

十五、开始安装tomcat
1、解压tomcat:
cd /data/recycle/
tar zxf apache-tomcat-9.0.69.tar.gz
2、配置启动脚本:
cd apache-tomcat-9.0.69
vim bin/catalina.sh
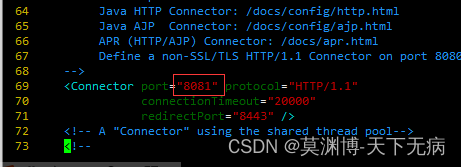
3、修改8080端口为8081,因为8080的端口已经被skywalking服务占用了
4、启动tomcat服务
./bin/startup.sh5、检查tomcat服务
jps
netstat -untpl | grep 8081 
十六、访问tomcat获取数据: http://172.17.0.20:8081 
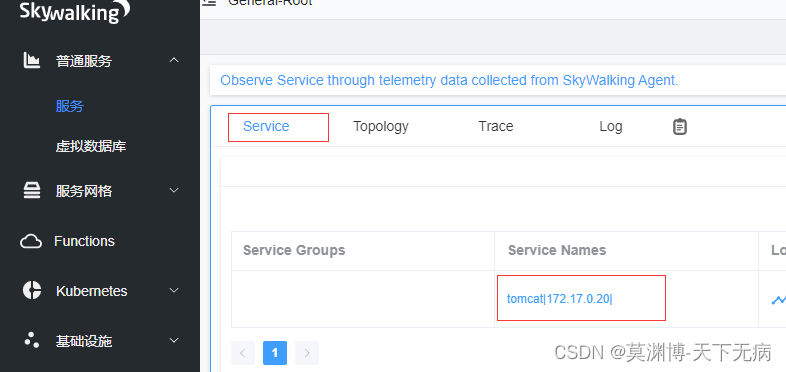
十七、访问skywalking查看数据:
http://172.17.0.20:8080
十八、配置nginx日志收集
1、安装依赖环境:
yum -y install pcre-devel openssl-devel gcc curl gcc-c++2、解压:
tar zxf openresty-1.19.9.1.tar.gz3、创建nginx用户
groupadd nginx
useradd -r -s /sbin/nologin -g nginx nginx
4、编译安装:
cd openresty-1.19.9.1
./configure --prefix=/data/software/openresty/nginx \
--sbin-path=/data/software/openresty/nginx/sbin/nginx \
--conf-path=/data/software/openresty/nginx/etc/nginx.conf \
--error-log-path=/data/software/openresty/nginx/logs/error.log \
--http-log-path=/data/software/openresty/nginx/logs/access.log \
--pid-path=/data/software/openresty/nginx/run/nginx.pid \
--lock-path=/data/software/openresty/nginx/run/nginx.lock \
--http-client-body-temp-path=/data/software/openresty/nginx/tmp/client \
--http-proxy-temp-path=/data/software/openresty/nginx/tmp/proxy \
--http-fastcgi-temp-path=/data/software/openresty/nginx/tmp/fcgi \
--http-uwsgi-temp-path=/data/software/openresty/nginx/tmp/uwsgi \
--http-scgi-temp-path=/data/software/openresty/nginx/tmp/scgi \
--user=nginx \
--group=nginx \
--with-http_v2_module \
--with-http_ssl_module \
--with-http_addition_module \
--with-http_dav_module \
--with-http_flv_module \
--with-http_mp4_module \
--with-http_gunzip_module \
--with-http_gzip_static_module \
--with-http_random_index_module \
--with-http_secure_link_module \
--with-http_auth_request_module \
--with-mail \
--with-mail_ssl_module \
--with-file-aio \
--with-http_v2_module \
--with-threads \
--with-luajit \
--with-pcre \
--with-http_iconv_module \
--with-http_realip_module \
--with-http_sub_module \
--with-http_stub_status_module \
--with-stream \
--with-stream_ssl_module

gmake
gmake install
5、创建目录
mkdir /data/software/openresty/nginx/etc/vhost /data/software/openresty/nginx/tmp6、修改权限
chown nginx:nginx /data/recycle/skywalking-nginx-lua -R7、配置主配置文件
cat > /data/software/openresty/nginx]# cat > etc/nginx.conf <<'EOF'
user nginx nginx;
pid /data/software/openresty/nginx/run/nginx.pid;
error_log /data/software/openresty/nginx/logs/error.log crit;
worker_processes auto;
worker_rlimit_nofile 65535;
events {
use epoll;
worker_connections 65535;
}
http {
include mime.types;
default_type application/octet-stream;
server_names_hash_bucket_size 128;
client_header_buffer_size 32k;
large_client_header_buffers 4 32k;
client_max_body_size 8m;
sendfile on;
tcp_nopush on;
tcp_nodelay on;
max_ranges 1;
keepalive_timeout 60;
server_tokens off;
fastcgi_connect_timeout 300;
fastcgi_send_timeout 300;
fastcgi_read_timeout 300;
fastcgi_buffer_size 64k;
fastcgi_buffers 4 64k;
fastcgi_busy_buffers_size 128k;
fastcgi_temp_file_write_size 128k;
gzip on;
gzip_min_length 1k;
gzip_buffers 4 16k;
gzip_http_version 1.0;
gzip_comp_level 2;
gzip_types text/plain application/x-javascript text/css application/xml;
gzip_vary on;
log_format json_log escape=json '{'
'"timestamp":"$time_local", '
'"remote_addr":"$remote_addr", '
'"request_method":"$request_method", '
'"request_uri": "$request_uri", '
'"server_protocol": "$server_protocol", '
'"request_length": $request_length, '
'"request_time": $request_time, '
'"status": $status, '
'"body_bytes_sent": $body_bytes_sent, '
'"bytes_sent": $bytes_sent, '
'"referer": "$http_referer", '
'"http_agent": "$http_user_agent", '
'"x_forwarded": "$http_x_forwarded_for", '
'"http_host": "$http_host", '
'"up_addr": "$upstream_addr", '
'"up_host": "$upstream_http_host", '
'"up_resp_time": "$upstream_response_time", '
'"http_x_cdn_provider": "$http_x_cdn_provider"'
'}';
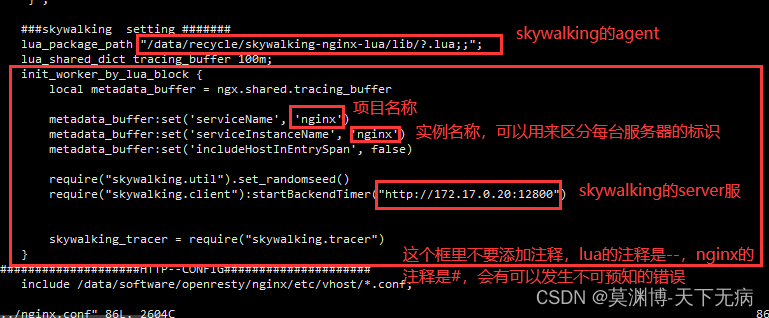
###skywalking setting #######
lua_package_path "/data/recycle/skywalking-nginx-lua/lib/?.lua;;";
lua_shared_dict tracing_buffer 100m;
init_worker_by_lua_block {
local metadata_buffer = ngx.shared.tracing_buffer
metadata_buffer:set('serviceName', 'nginx')
metadata_buffer:set('serviceInstanceName', 'nginx')
metadata_buffer:set('includeHostInEntrySpan', false)
require("skywalking.util").set_randomseed()
require("skywalking.client"):startBackendTimer("http://172.17.0.20:12800")
skywalking_tracer = require("skywalking.tracer")
}
#####################HTTP--CONFIG#####################
include /data/software/openresty/nginx/etc/vhost/*.conf;
}
EOF8、配置子配置文件
cat > etc/vhost/test_lua.conf <<'EOF'
# 静态文件示例,没有后端服务
server {
    listen       80;
    server_name  172.17.0.20;

    location / {
        default_type text/html;
        root   /data/software/openresty/nginx/html;
        index  index.html index.htm;

        rewrite_by_lua_block {
            skywalking_tracer:start("localhost_nginx")
        }

        body_filter_by_lua_block {
            if ngx.arg[2] then
                skywalking_tracer:finish()
            end
        }
        log_by_lua_block {
            skywalking_tracer:prepareForReport()
        }
    }
    access_log  /data/software/openresty/nginx/logs/access.log json_log;
    error_log /data/software/openresty/nginx/logs/error.log;
}
EOF

cat > etc/vhost/skywalking.conf <<'EOF'
# 有后端服务的示例
server {
    listen     18080;
    server_name  172.17.0.20;

    location / {
       rewrite_by_lua_block {
            skywalking_tracer:start("skywalking_server")
        }
       proxy_pass http://172.17.0.20:8080;

       body_filter_by_lua_block {
            if ngx.arg[2] then
                skywalking_tracer:finish()
            end
        }

        log_by_lua_block {
            skywalking_tracer:prepareForReport()
        }

    }
    access_log  /data/software/openresty/nginx/logs/access.log json_log;
    error_log /data/software/openresty/nginx/logs/error.log;
}
EOF
9、主配置文件修改和注意事项: nginx.conf
10、子配置文件修改和注意事项: test_lua.conf,skywalking.conf差不多一样

11、启动nginx:
/data/software/openresty/nginx/sbin/nginx12、测试访问,弄点假数据
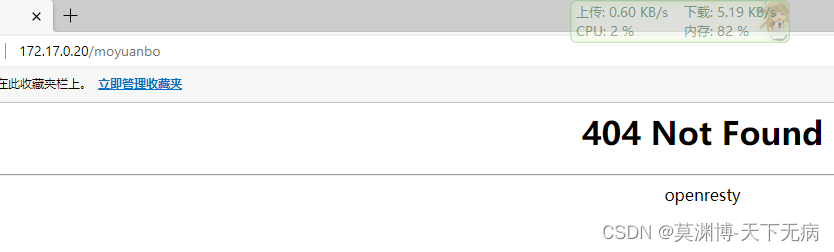
13、获取时间范围的数据
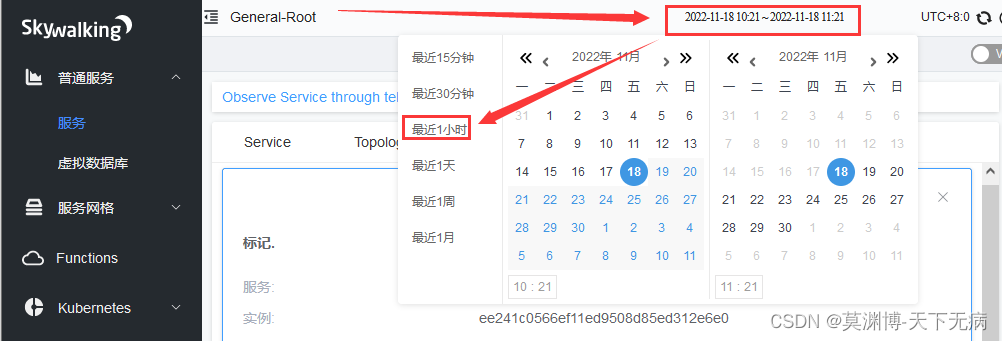
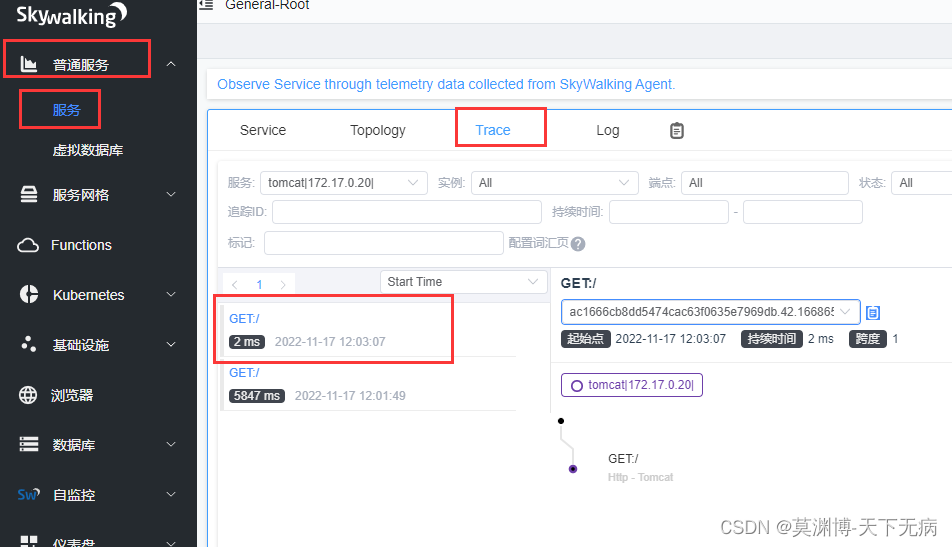
14、找访问路径的信息,不能直接搜索,只能找
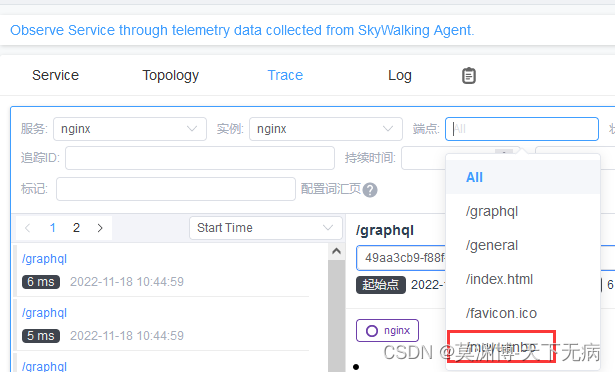
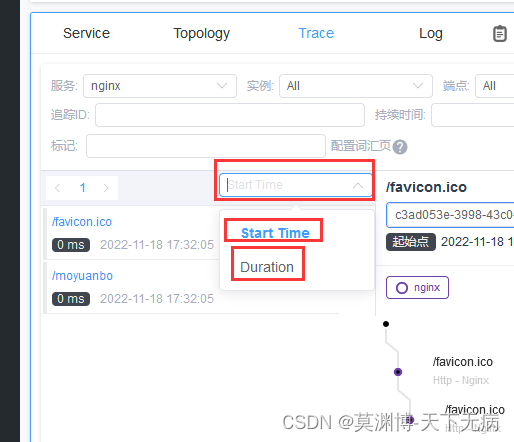
Start Time: 是访问开始时排序
Duration: 是耗时长的排序
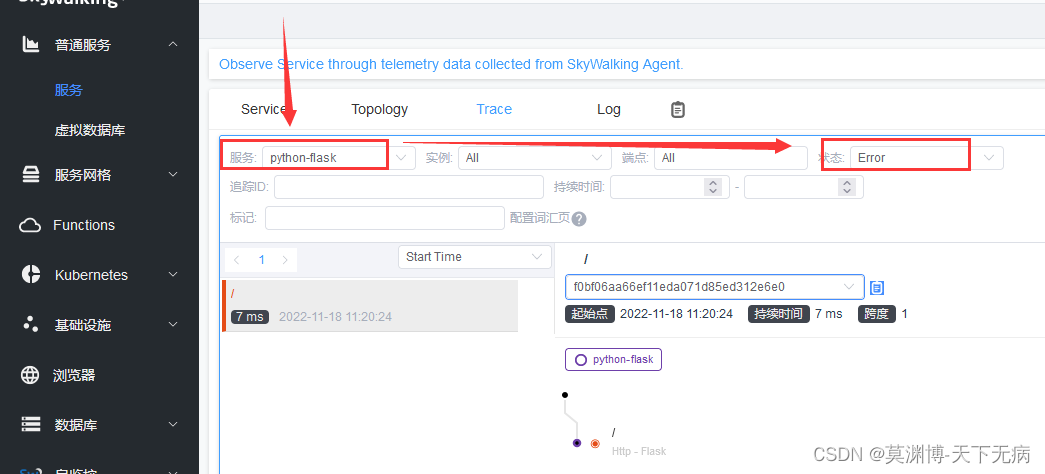
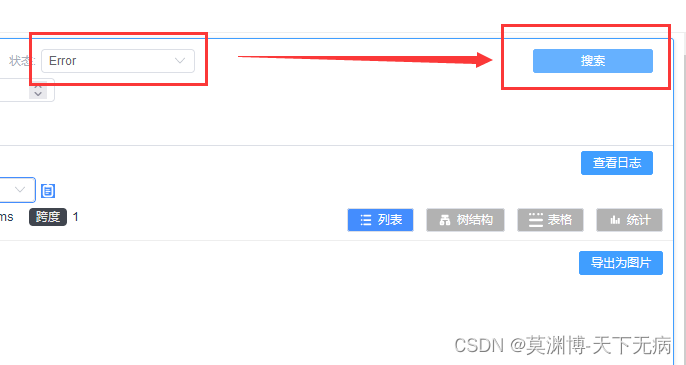
15、检索错误的访问,有个奇怪的地方,nginx的错误不识别的


 1677
1677


 被折叠的 条评论
为什么被折叠?
被折叠的 条评论
为什么被折叠?
 到【灌水乐园】发言


