


参考链接
openwrt wrt1900acs
openwrt mx4200
openwrt usb-drives-quickstart
openwrt Using storage devices
注意:MX4200标签没有注明V1还是V2,即默认是V1.
刷机
wrt1900acs原生固件刷openwrt-23.05.3-mvebu-cortexa9-linksys_wrt1900acs-squashfs-factory.img
wrt1900acs openwrt更新刷openwrt-23.05.3-mvebu-cortexa9-linksys_wrt1900acs-squashfs-sysupgrade.bin
通过WEB UI来刷,过程简单,不做叙述。
玩机
扩展overlay
- 安装驱动
opkg update
opkg install block-mount kmod-fs-ext4 e2fsprogs kmod-usb-storage-uas parted kmod-usb-storage kmod-usb3
- 挂载exfat
笔者有个金士顿U盘,只有exfat格式能最好兼容。于是学习了一下挂载exfat。参考博客OpenWrt 挂载FAT32 / exFat 硬盘
opkg install kmod-usb-storage block-mount kmod-fs-vfat kmod-nls-cp437 kmod-nls-iso8859-1 kmod-fs-exfat usbutils
- 识别U盘
将U盘格式化成ext4,插入之后,执行block info
/dev/ubiblock0_0: UUID="717bd2c9-ad69faf3-6b367d9c-27ac56f7" VERSION="4.0" MOUNT="/rom" TYPE="squashfs"
/dev/ubi0_1: UUID="1b356301-ad42-41d3-a448-20b80a6fd110" VERSION="w5r0" TYPE="ubifs"
/dev/ubi1_0: UUID="493531ba-86cd-421e-aa0b-39fc2950eb38" VERSION="w4r0" TYPE="ubifs"
/dev/sda4: UUID="c6115da9-3e8f-4f93-9937-0e1e04531676" VERSION="1.0" MOUNT="/overlay" TYPE="ext4"
- 备份overlay
mkdir /mnt/sda1
mount /dev/sda1 /mnt/sda1
tar -C /overlay -cvf - . | tar -C /mnt/sda1 -xf -
sync
- 修改fstab
可以通过命令block detect来生成模板。
root@WRT1900ACS:~# cat /etc/config/fstab
config 'global'
        option  anon_swap       '0'
        option  anon_mount      '0'
        option  auto_swap       '1'
        option  auto_mount      '1'
        option  delay_root      '5'
        option  check_fs        '0'

config 'mount'
        option  target  '/overlay'
        option  uuid    'c6115da9-3e8f-4f93-9937-0e1e04531676'
        option  enabled '1'
重启确认
root@WRT1900ACS:~# df -h
Filesystem                Size      Used Available Use% Mounted on
/dev/root                 3.3M      3.3M         0 100% /rom
tmpfs                   248.0M      4.6M    243.4M   2% /tmp
/dev/sda4               113.3G     41.8G     65.6G  39% /overlay
overlayfs:/overlay      113.3G     41.8G     65.6G  39% /
tmpfs                   512.0K         0    512.0K   0% /dev
可见,overlay已经扩展。128G的U盘目前足够使用一段时间。
samba
- 安装
opkg update
opkg install luci-app-samba4
- 配置
通过openwrt UI配置即可。两种方式,二选其一。
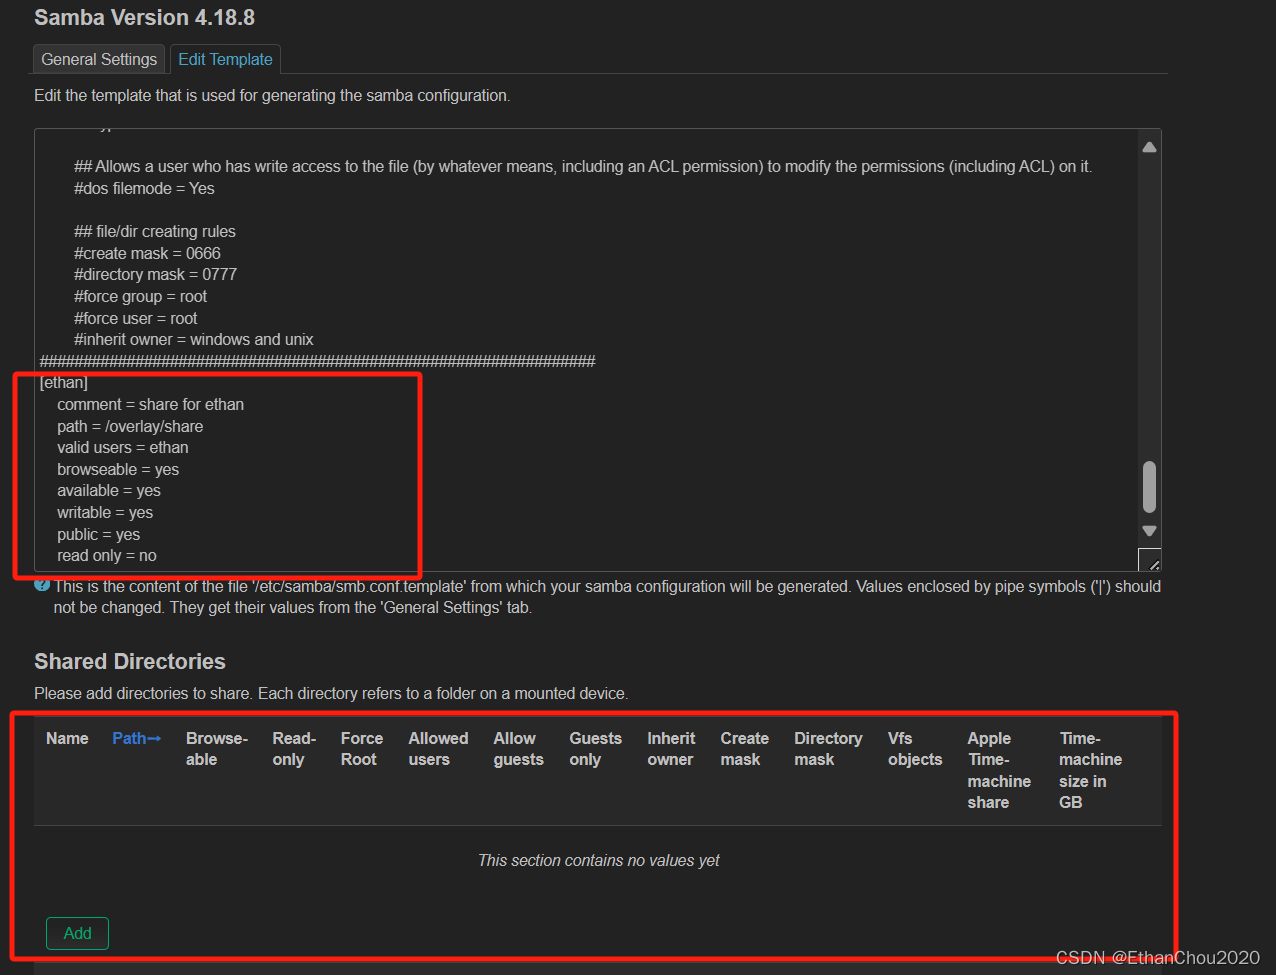
重点是共享目录配置足够权限
drwxrwxrwx 6 root root 4.0K May 7 14:58 share
考虑到安全,修改/etc/passwd
root@WRT1900ACS:/etc# cat passwd | grep ethan
ethan:*:1000:65534:ethan:/var:/bin/false
设置密码
smbpasswd -a ethan
aria2
- 安装
opkg update
opkg install luci-app-aria2
配置MX4200 V1时,发现aria2启动不成功,提示。
Exception caught
Exception: [Platform.cc:125] errorCode=1 OSSL_PROVIDER_load 'legacy' failed.
解决方法
- 安装依赖
opkg update
opkg install openssl-util libopenssl libopenssl-legacy
- 修改
/etc/init.d/aria2
        procd_add_jail "$NAME.$section" log
        procd_add_jail_mount "/usr/lib"
        procd_add_jail_mount "$ca_certificate" "$certificate" "$rpc_certificate" "$rpc_private_key"
        procd_add_jail_mount_rw "$dir" "$config_dir" "$log"
        procd_close_instance
- 配置
openwrt aria2的配置方式跟linux版本有点差异,举例一下。
# You can use most aria2 command-line options, replace '-' with '_'.
# eg. 'rpc-secret' ==> 'rpc_secret'
#
# We do not support all options at this time. But you can add any option
# with 'list extra_settings'.
#
# You can also add new config sections to define multi instance.
#
config aria2 'main'
        option enabled '1'
        option user 'aria2'
        option save_session '/overlay/share/Downloads'
        option dir '/overlay/share/Downloads'
        option config_dir '/var/etc/aria2'
        option bt_enable_lpd 'true'
        option enable_dht 'true'
        option enable_rpc 'true'
        option follow_torrent 'true'
        option bt_save_metadata 'true'
        option rpc_listen_all 'true'
        option rpc_secret 'JustDoIt'
        option file_allocation 'none'
        option save_session_interval '30'
        option seed_time '0'
        option max_concurrent_downloads '256'
        option max_connection_per_server '16'
        option max_overall_upload_limit '102400'
        option max_upload_limit '102400'
        option max_concurrent_downloads '256'

        # Add addition Headers here.
        # eg. list header 'Content-Encoding: gzip'
        list header ''

        # Add BT trackers here.
        # eg. list bt_tracker 'http://tracker.example.com/announce'
        list bt_tracker 'http://1337.abcvg.info:80/announce'
        list bt_tracker 'http://bt.okmp3.ru:2710/announce'

        # Add extra settings here.
        # eg. list extra_settings 'option=value'
        list extra_settings ''
更多设置,请参考笔者其他文章。
其他
还可以安装一些不足为外人道的小软件。例如nodejs,通过opkg install node安装。


 2万+
2万+


 被折叠的 条评论
为什么被折叠?
被折叠的 条评论
为什么被折叠?
 到【灌水乐园】发言


