


有段时间没写vue了,有点生疏了......
1、代码有注释,完整代码如下
<template>
	<view class="page">
		<canvas class="canvas" v-if="isShow" :style="{width:`${canvasWidth}px`,height:`${canvasHeight}px`}"
			:canvas-id="canvasId"></canvas>
		<view class="tool">
			<u-button @click="nextImg" :custom-style="buttonCustomStyle" text="下一张"
				color="linear-gradient(to right, #232526, #414345)"></u-button>
			<u-button @click="save" :custom-style="buttonCustomStyle" text="保存图片"
				color="linear-gradient(to right, rgb(66, 83, 216), rgb(213, 51, 186))"></u-button>

		</view>
	</view>
</template>

<script setup lang="ts">
	import { onMounted, reactive, ref, watch } from "vue";
	import { getImgBase64, drawRoundedRect, drawText, getSystemInfo } from "@/utils/canvas";
	import { imageList } from './utils'
	import type { ImageListType } from './utils'
	import { getAuthorize } from "@/utils";
	// 按钮样式
	const buttonCustomStyle = reactive({
		width: '49%',
	});
	// const color = '#f7f6ff'
	const offsetNumber : number = 20;
	const listHeight : number = 66;
	const context = ref(null)
	const pageColor = ref(imageList[0].pageColor)
	const canvasId = ref<string>(String(`canvasId${new Date().getTime()}`))
	const isShow = ref<boolean>(false)
	const imageObj = ref<ImageListType>(imageList[0])
	const imgTemp = ref<string>(wx.env.USER_DATA_PATH + `/${new Date().getTime()}-temp.png`) //图片存储的临时路径
	const canvasWidth = ref<number>(0)// canvas宽度
	const canvasHeight = ref<number>(0)// canvas宽度
	const canvasWidthRate = ref<number>(0.8)//canvas基于屏幕宽度占比,随便设置,我这里设置占屏幕宽度的百分之八十
	// 绘制图片,并转成base64
	const drawBgImg = async () => {
		// 图片临时地址重新赋值,避免图片加载路径都是一样的
		imgTemp.value = wx.env.USER_DATA_PATH + `/${new Date().getTime()}-temp.png`
		const ctx = context.value
		const { imgUrl, imageWidth, imageHeight } = await getImgBase64({
			src: imageObj.value.imageSrc,
			canvasWidth: canvasWidth.value,
			filePath: imgTemp.value
		})
		canvasHeight.value = canvasHeight.value + imageHeight //重新计算画布总高度
		// 填充背景矩阵
		drawRoundedRect(ctx, 0, 0, canvasWidth.value, canvasHeight.value, {
			fillColor: imageObj.value.bgColor,
			leftBottom: true,
			leftTop: true,
			rightBottom: true,
			rightTop: true,
			r: 5
		})
		// 图片如何居中呢?
		// 当前画布宽度 - 图片宽度 = 空出来的间隙
		// 图片居中 = 空出来的间隙 / 2 = x 轴起点 x = canvasWidth.value - imageWidth) / 2
		ctx.drawImage(imgUrl, (canvasWidth.value - imageWidth) / 2, offsetNumber, imageWidth, imageHeight);
	}
	// 绘制文字
	const drawTxt = async () => {
		const ctx = context.value
		const offsetY = canvasHeight.value
		// 填充矩形背景
		drawRoundedRect(ctx, 0, canvasHeight.value, canvasWidth.value, listHeight, {
			fillColor: imageObj.value.bgColor,
		});
		// 绘制文字
		drawText({
			ctx,
			text: imageObj.value.name,
			fillStyle: '#000000',
			fontSize: 22,
			x: (canvasWidth.value / 2),
			y: offsetY + 25,
			center: true
		})
		// 绘制文字
		drawText({
			ctx,
			text: imageObj.value.desc,
			fillStyle: '#000000',
			fontSize: 16,
			x: (canvasWidth.value / 2),
			y: offsetY + 25 + 25,
			center: true
		})
		//画布高度重新计算
		canvasHeight.value = canvasHeight.value + listHeight
	}
	// 初始化canvas
	const initCanvas = async () => {
		try {
			uni.showLoading()
			const { windowWidth } : any = await getSystemInfo()
			const ctx = context.value
			canvasHeight.value = offsetNumber;//初始化高度
			canvasWidth.value = windowWidth * canvasWidthRate.value//初始化宽度
			await drawBgImg()
			await drawTxt()
			ctx.draw()
		} finally {
			uni.hideLoading()
		}

	}
	onMounted(() => {
		isShow.value = true
	})
	watch(isShow, () => {
		if (isShow.value) {
			canvasId.value = String(`canvasId${new Date().getTime()}`)//由于存在多次绘制,避免ID重复,需要重新赋值
			context.value = uni.createCanvasContext(canvasId.value)//由于存在多次绘制,所以每次都重新创建新的画布实例
			initCanvas()

		}

	})
	// 下一张图
	const nextImg = () => {
		isShow.value = false
		imageObj.value = imageList[imageObj.value.id + 1] ?? imageList[0]
		pageColor.value = imageObj.value.pageColor
		setTimeout(() => {
			isShow.value = true
		}, 100)
	}
	// 图片添加到相册
	const addIamgeToAlbum = async () => {
		try {
			const { tempFilePath } = await uni.canvasToTempFilePath({
				canvasId: canvasId.value,
			});
			console.log('tempFilePath', tempFilePath);
			await uni.saveImageToPhotosAlbum({
				filePath: tempFilePath
			})
			uni.showToast({
				title: '保存成功!'
			})
		} catch {

		}

	}
	// 保存
	const save = async () => {
		try {
			uni.showLoading()
			// 获取用户设置
			const { authSetting } = await uni.getSetting()
			// 没有权限的时候
			if (!authSetting['scope.writePhotosAlbum']) {
				await getAuthorize('scope.writePhotosAlbum', {
					title: '请授权保存到相册',
					callback: addIamgeToAlbum
				})
				return
			}
			addIamgeToAlbum()
		} catch (err) {
		} finally {
			uni.hideLoading()
		}

	}
</script>

<style lang="scss" scoped>
	.page {
		background-color: v-bind(pageColor);
		height: 100vh;
		overflow: hidden;

		.canvas {
			margin: 20px auto 0;
		}

		.tool {
			width: 100%;
			display: flex;
			align-items: center;
			justify-content: center;
			position: fixed;
			bottom: 0;
			left: 0;
			right: 0;
		}
	}
</style>
1.1、工具函数 - canvas.ts
//utils/canvas.ts
const fs = uni.getFileSystemManager()

// 将Base64写入本地文件
const base64WriteFile = (filePath : string, data : string) => {
	return new Promise((resolve, reject) => {
		fs.writeFile({
			filePath,
			data,
			encoding: 'base64',
			success: (res) => {
				resolve(res);
			},
			fail: (err) => {
				reject(err);
			},
		});
	});
};
// 参数的类型校验
type GetImgBase64Type = {
	src : string;//图片地址(本地/在线地址)
	canvasWidth : number;//画布宽度
	filePath : string//临时路径
}
// 加载图片地址,生成base64并写入临时路径中
export const getImgBase64 = async (params : GetImgBase64Type) => {
	const { src, canvasWidth, filePath } = params
	try {
		// 获取图片信息:地址、宽高
		const imgInfo = await uni.getImageInfo({
			src,
		});
		// 计算图片在画布中的宽度
		const imageWidth = canvasWidth * 0.8;//随便定的,多少px都行
		// // 根据比例计算图片在画布中的高度
		const scaleFactor = Number((imageWidth / imgInfo.width).toFixed(2));
		// 根据比例计算图片高度
		const imageHeight = imgInfo.height * scaleFactor;
		// 生成base64
		const base64 : any = fs.readFileSync(imgInfo.path, 'base64')
		// 写入本地
		await base64WriteFile(filePath, base64)
		const currentImgInfo = await uni.getImageInfo({
			src: filePath,
		});
		return {
			imageWidth,
			imageHeight,
			imgUrl: currentImgInfo.path
		}
	} catch (err) {
		console.log('err', err);
	}

};

type DrawRoundedRectParamsType = {
	leftTop ?: boolean;
	leftBottom ?: boolean;
	rightTop ?: boolean;
	rightBottom ?: boolean;
	fillColor ?: string;
	r ?: number;
};
// canvas 绘制自定义圆角矩形
export const drawRoundedRect = (
	ctx : any,
	x : number,
	y : number,
	w : number,
	h : number,
	params ?: DrawRoundedRectParamsType,
) => {
	const {
		leftTop = false,
		leftBottom = false,
		rightTop = false,
		rightBottom = false,
		fillColor = 'transparent',
		r = 0,
	} = params || {};
	ctx.save(); // 保存当前绘图状态 防止虚线影响其他图形
	ctx.beginPath();
	ctx.setFillStyle(fillColor);
	ctx.setStrokeStyle('transparent');
	ctx.moveTo(x + r, y);
	// 绘制上边线和左上角圆弧
	if (leftTop) {
		ctx.arc(x + r, y + r, r, Math.PI, Math.PI * 1.5);
		ctx.lineTo(x, y);
	} else {
		ctx.moveTo(x, y + r);
		ctx.lineTo(x, y);
		ctx.lineTo(x + r, y);
	}
	ctx.lineTo(x + w - r, y);
	// 绘制上边线和右上角圆弧
	if (rightTop) {
		ctx.arc(x + w - r, y + r, r, Math.PI * 1.5, Math.PI * 2);
	} else {
		ctx.lineTo(x + w - r, y);
		ctx.lineTo(x + w, y);
		ctx.lineTo(x + w, y + r);
	}

	ctx.lineTo(x + w, y + h - r);

	// 绘制下边线和右下角圆弧
	if (rightBottom) {
		ctx.arc(x + w - r, y + h - r, r, 0, Math.PI * 0.5);
	} else {
		ctx.lineTo(x + w, y + h - r);
		ctx.lineTo(x + w, y + h);
		ctx.lineTo(x + w - r, y + h);
	}

	ctx.lineTo(x + r, y + h);

	// 绘制下边线和左下角圆弧
	if (leftBottom) {
		ctx.arc(x + r, y + h - r, r, Math.PI * 0.5, Math.PI);
	} else {
		ctx.lineTo(x + r, y + h);
		ctx.lineTo(x, y + h);
		ctx.lineTo(x, y + h - r);
	}

	ctx.lineTo(x, y + r);

	// 绘制左边线和左上角圆弧
	if (leftTop) {
		ctx.arc(x + r, y + r, r, Math.PI, Math.PI * 1.5);
		ctx.moveTo(x + r, y);
	} else {
		ctx.moveTo(x, y + r);
		ctx.lineTo(x, y);
		ctx.lineTo(x + r, y);
	}
	ctx.fill();
	ctx.closePath();
	ctx.stroke();
	ctx.restore(); // 恢复之前的绘图状态
};
type DrawTextConfigType = {
	ctx : any;
	fillStyle : string;//填充颜色
	fontSize : number//文字大小
	text : string;//在画布上输出的文本
	x : number;//绘制文本的左上角x坐标位置
	y : number//绘制文本的左上角y坐标位置
	center ?: boolean
}
// 绘制文本
export const drawText = (config : DrawTextConfigType) => {
	const { fillStyle, fontSize, x, y, text, ctx, center = false } = config
	ctx.setFillStyle(fillStyle);
	ctx.setFontSize(fontSize);
	if (center) {
		ctx.textAlign = 'center';//文字水平居中
	}
	ctx.fillText(text, x, y);
}
// 获取当前设备信息
export const getSystemInfo = () => {
	return new Promise((resolve) => {
		uni.getSystemInfo({
			success(res) {
				resolve(res)
			},
		})
	})
}
1.2、工具函数 - index.ts
//utils/index.ts
// 获取用户授权
type GetAuthorizeType = {
	title ?: string;//授权弹框描述
	callback ?: () => void//成功的回调
}
export const getAuthorize = (scope : string, params : GetAuthorizeType) => {
	const { title = '请开启授权', callback } = params
	return new Promise(() => {
		uni.authorize({
			scope,
			success: () => {
				callback?.()
			},
			fail: () => {
				// 如果用户点了拒绝,需要弹框提示再次授权
				uni.showModal({
					title,
					success() {
						uni.openSetting();
					},
				});
			}
		})
	})
}
1.3、图片列表函数
// ./utils/index.ts
export type ImageListType = {
id : number;
name : string
desc : string
imageSrc : string
bgColor : string
pageColor : string
}
export const imageList : ImageListType[] = [
{
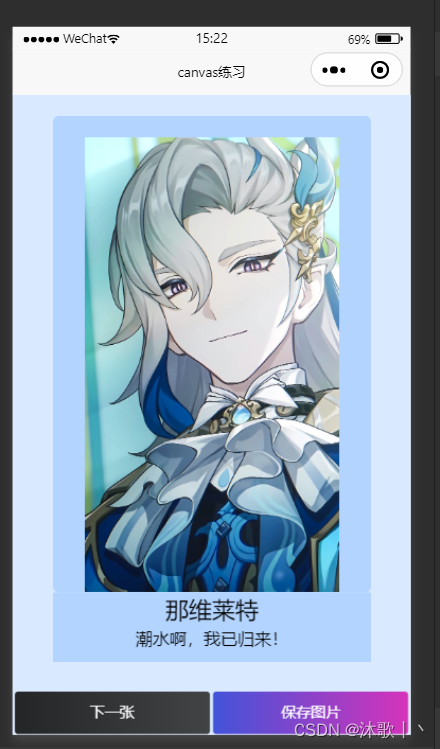
id: 0,
name: '那维莱特',
desc: '潮水啊,我已归来!',
imageSrc: '../../static/那维莱特.jpg',
bgColor: '#b2d4ff',
pageColor: '#d9e9ff',
},
{
id: 1,
name: '东方镜',
desc: '太阳之下,诸世皆影!',
imageSrc: '../../static/镜.jpg',
bgColor: '#ffdecd',
pageColor: '#fff3ed',
},
{
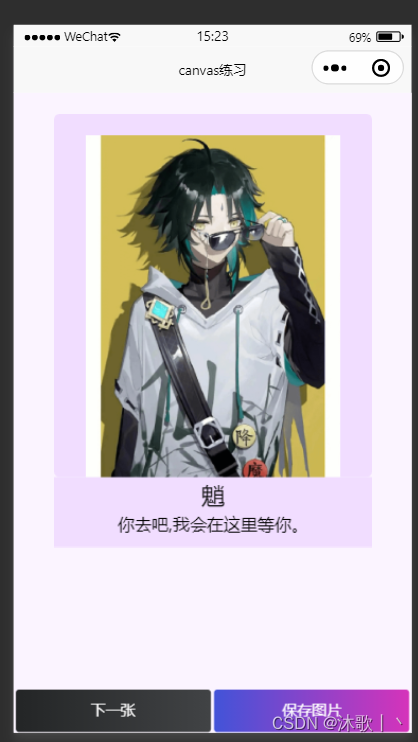
id: 2,
name: '魈',
desc: '你去吧,我会在这里等你。',
imageSrc: '../../static/魈.png',
bgColor: '#f1ddff',
pageColor: '#fbf4ff',
},
{
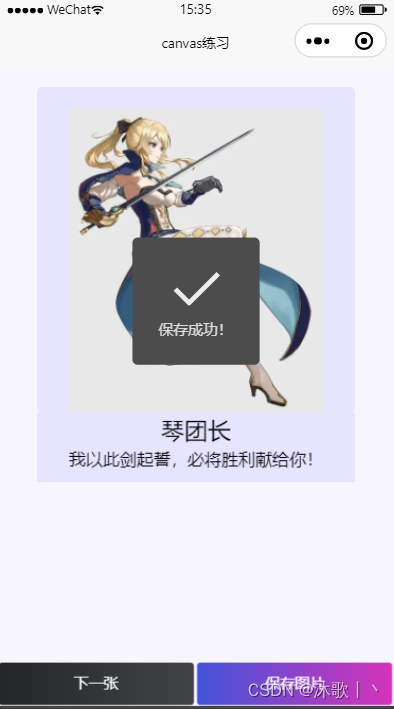
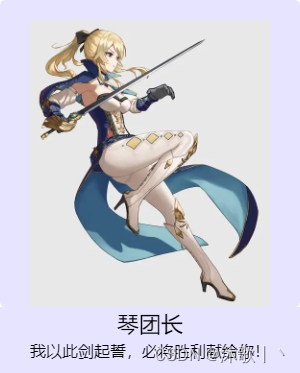
id: 3,
name: '琴团长',
desc: '我以此剑起誓,必将胜利献给你!',
imageSrc: '../../static/琴.jpg',
bgColor: '#e6e4ff',
pageColor: '#f7f6ff',
},
]2、效果如下


3、添加相册授权
根据各自框架添加授权即可,比如uniapp在manifest.json下
    "mp-weixin" : {
        "appid" : "你的微信appid",
        "setting" : {
            "urlCheck" : false
        },
        "usingComponents" : true,
         /* 授权 */
		"permission": {
			"scope.writePhotosAlbum": {
				"desc": "请授权保存到相册"
			}
		}
    },
4、项目地址
5、问题总汇
5.1、为什么本地图片/在线图片真机不显示等?
将所有用到的图片转 base64 展示,参考上面工具函数中的 getImgBase64()
5.2、多文本如何换行?
参考下面地址 使用canvas画布时多行文本应该怎么换行? | 微信开放社区
5.3、多次绘制出现白屏等?
比如以弹框的形式多次点击生成等情况,首先要确保每个canvas-idID的实例不能重复。可以参考我上面标题1中的代码。
5.4、当ctx.draw()后需要立马回去临时路径做 image预览时,画布生成的内容不全?
5.4.1、前提情景
由于 canvas 的层级比较高,做预览的时候会遮住其他的view等标签。而且样式或拖拽等也不好处理,花费时间肯定更多一点,这个时候需要用 <image src="图片的临时路径" mode=""></image> 代替 canvas 做展示。
5.4.2、解决
改写ctx.draw()为如下:
		ctx.draw(
				false,
				setTimeout(async () => {
					//在这里生成临时路径
					const { tempFilePath } = await uni.canvasToTempFilePath({
						canvasId: canvasId.value,
					});
					console.log('tempFilePath', tempFilePath);
					await uni.saveImageToPhotosAlbum({
						filePath: tempFilePath
					})
				}, 100),
			);
由于绘制可能需要更长的时间,通过延时器即可解决。


 517
517


 被折叠的 条评论
为什么被折叠?
被折叠的 条评论
为什么被折叠?
 到【灌水乐园】发言


