


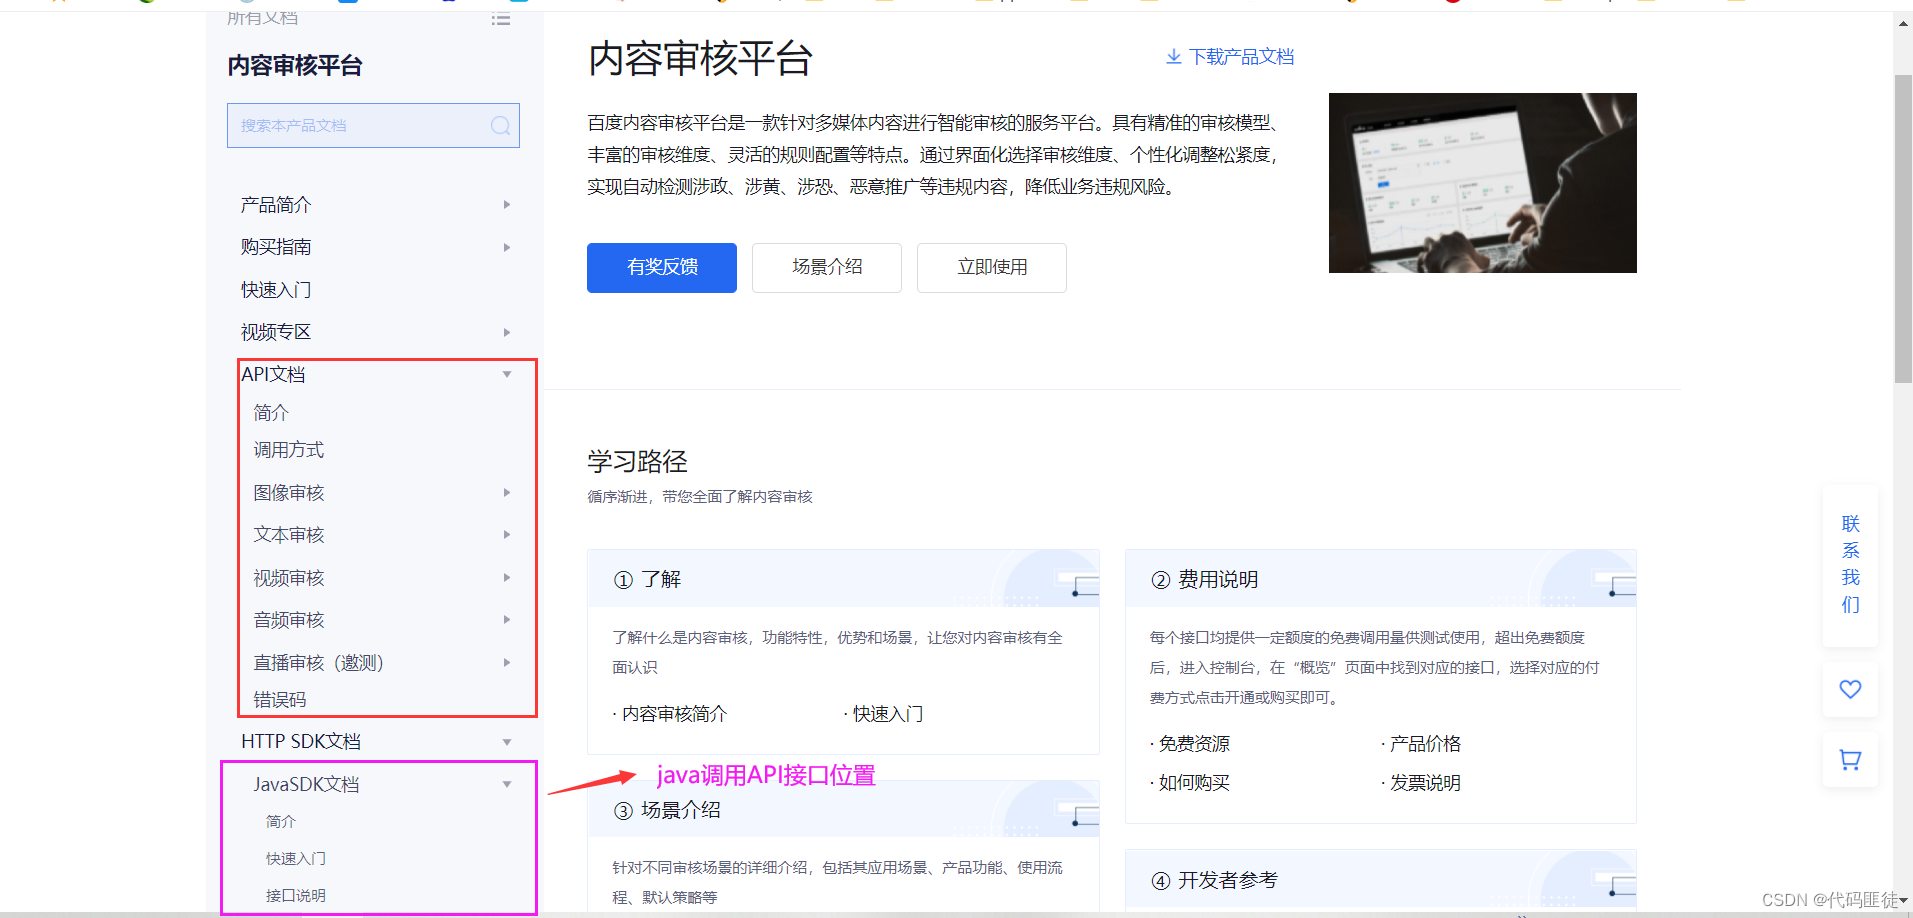
百度内容审核平台
Baidu-AIP的java-sdk的guithub
流程
打开百度内容审核平台
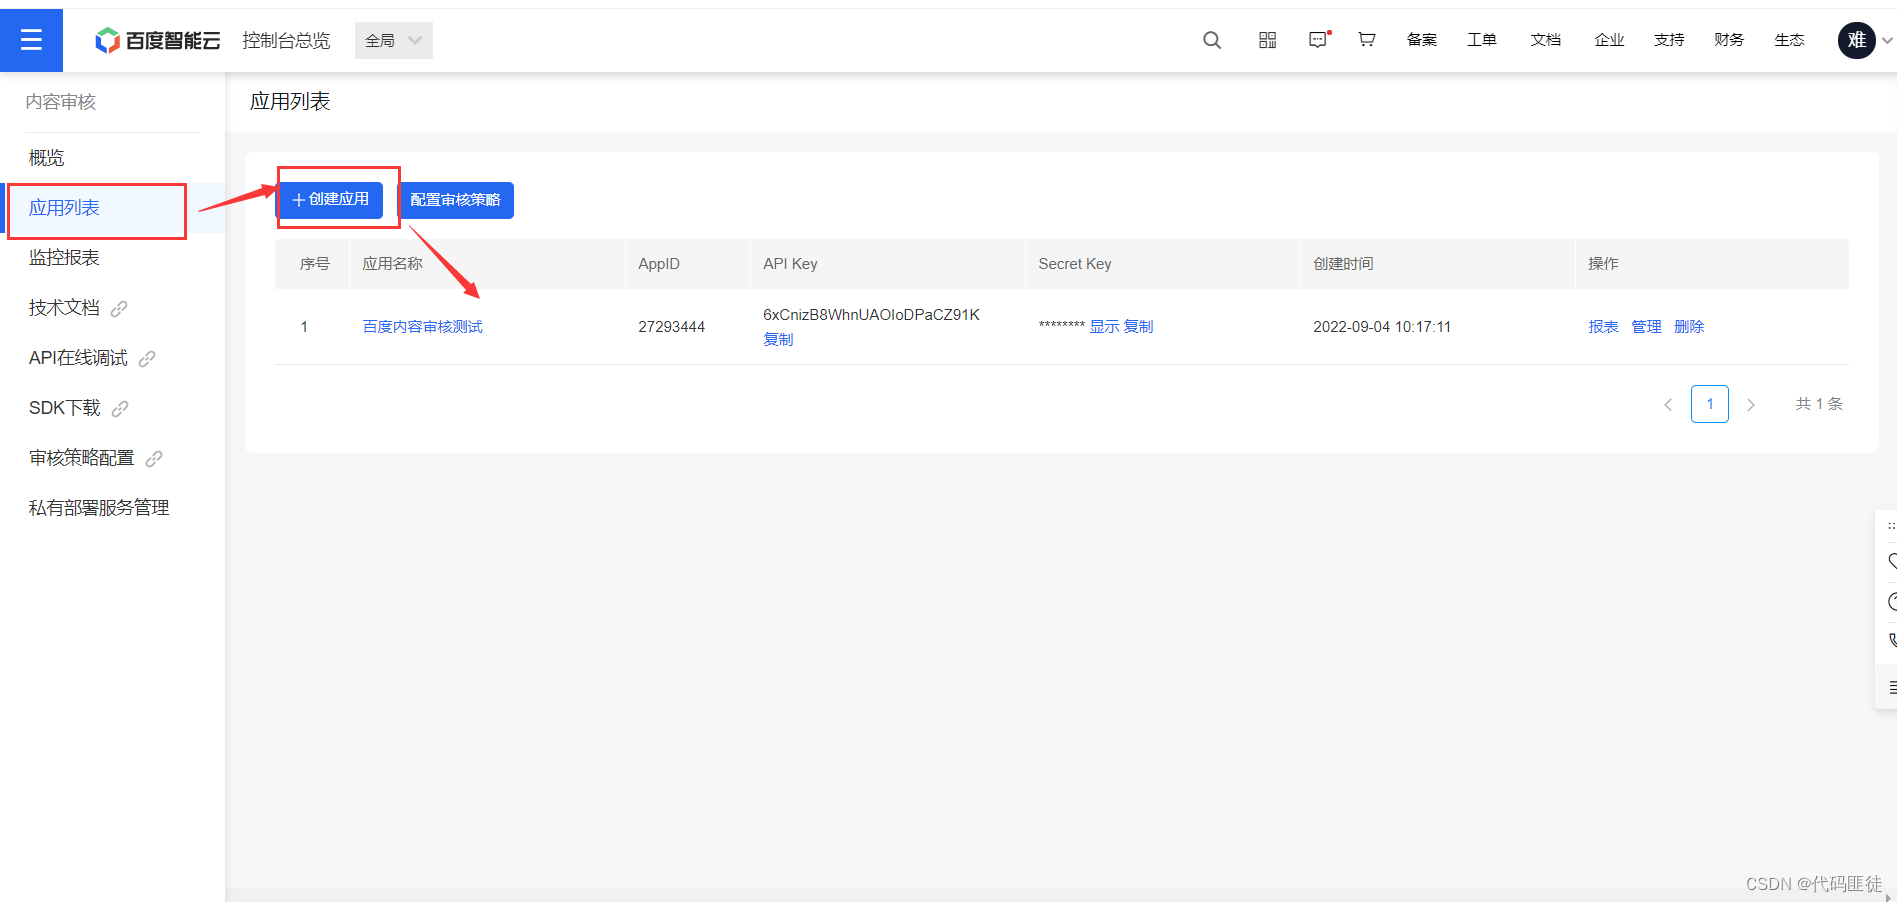
一、创建AppID、API Key及Secret Key
接入指南(获取百度内容审核需要用到的AppID、API Key及Secret Key)

创建后就可以得到AppID、API Key及Secret Key
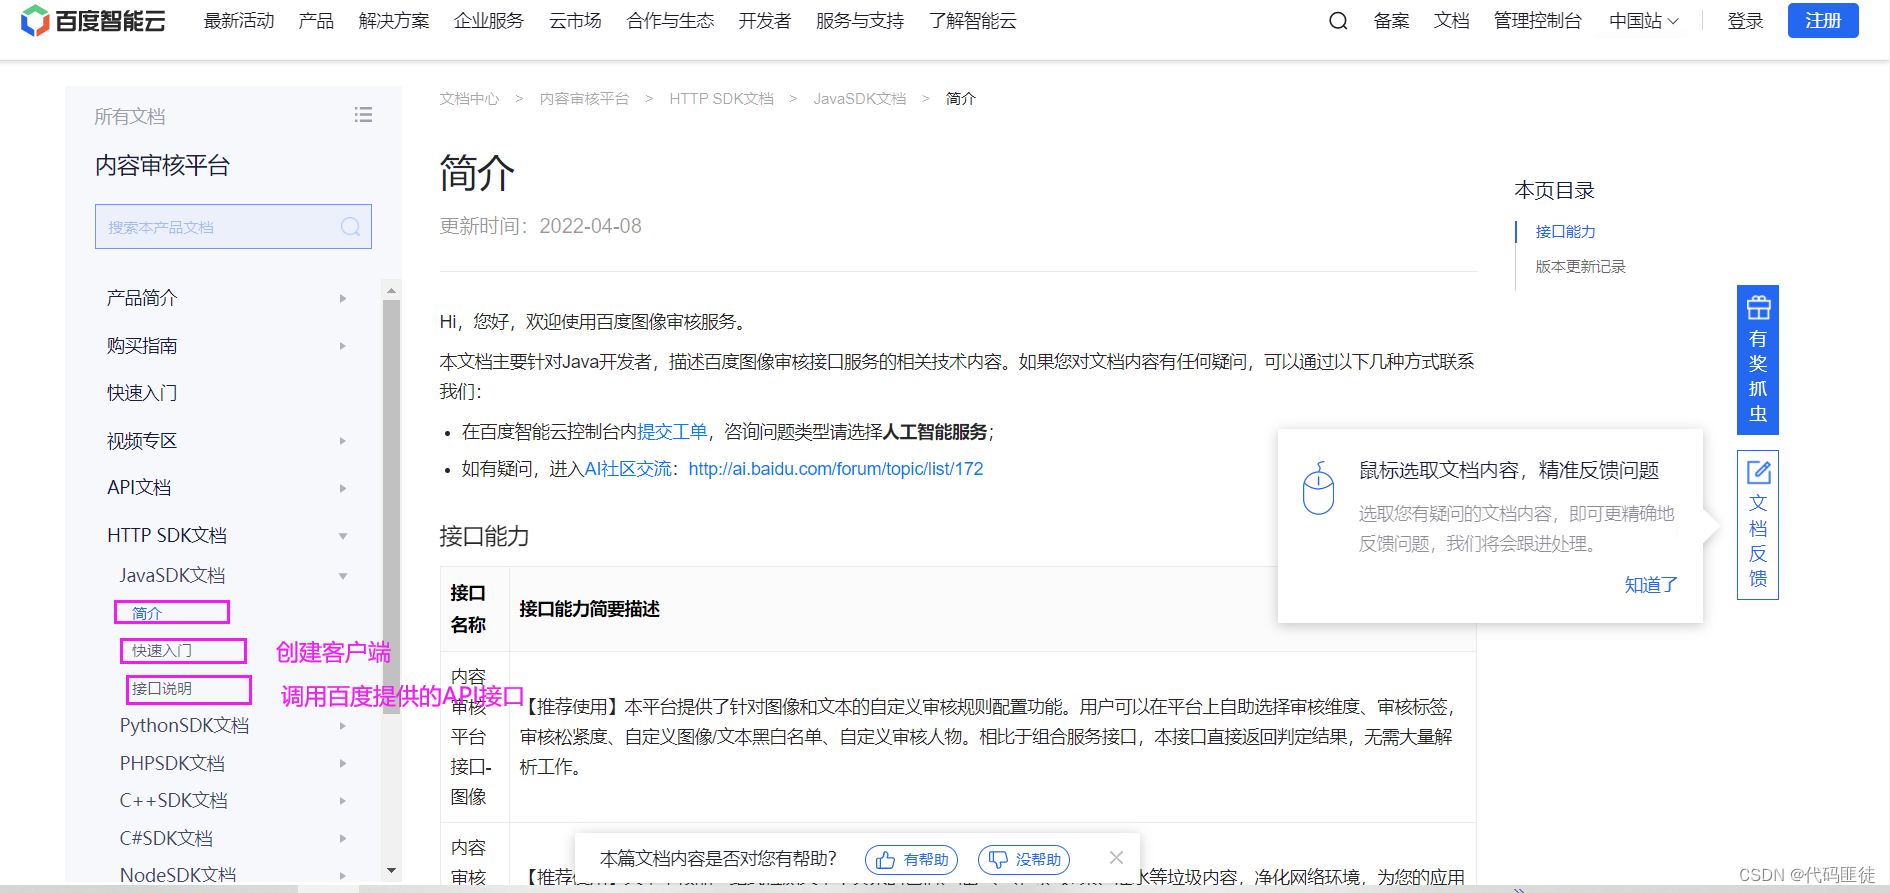
二、构建百度内容审核客户端
1.pom中添加依赖
		<!--百度内容审核SDK-->
        <dependency>
            <groupId>com.baidu.aip</groupId>
            <artifactId>java-sdk</artifactId>
            <version>4.15.7</version>
        </dependency>
2.在yaml文件中配置你的AppID、API Key及Secret Key
#百度内容审核
baidu:
  examine:
    #你的 App ID
    AppID: xxx
    #你的 Api Key
    API_Key: xxx
    #你的 Secret Key
    Secret_Key: xxx
3.构建百度内容审核客户端
import com.baidu.aip.contentcensor.AipContentCensor;
import org.springframework.beans.factory.annotation.Value;
import org.springframework.context.annotation.Bean;
import org.springframework.context.annotation.Configuration;

@Configuration
public class AipContentCensorClientConfig {
    /**
     * 百度云审核的AppID
     */
    @Value("${baidu.examine.AppID}")
    String AppID;
    /**
     * 百度云审核的Api Key
     */
    @Value("${baidu.examine.API_Key}")
    String API_Key;
    /**
     * 百度云审核的Secret Key
     */
    @Value("${baidu.examine.Secret_Key}")
    String Secret_Key;

    @Bean(name = "commonTextCensorClient")
    AipContentCensor commonTextCensorClient() {
        /**
         * 可以选择在客户端中添加参数,参考 https://ai.baidu.com/ai-doc/ANTIPORN/ik3h6xdze
         * 如:
         *         // 可选:设置网络连接参数
         *         client.setConnectionTimeoutInMillis(2000);
         *         client.setSocketTimeoutInMillis(60000);
         *
         *         // 可选:设置代理服务器地址, http和socket二选一,或者均不设置
         *         client.setHttpProxy("proxy_host", proxy_port);  // 设置http代理
         *         client.setSocketProxy("proxy_host", proxy_port);  // 设置socket代理
         *
         *         // 可选:设置log4j日志输出格式,若不设置,则使用默认配置
         *         // 也可以直接通过jvm启动参数设置此环境变量
         *         System.setProperty("aip.log4j.conf", "path/to/your/log4j.properties");
         */
        return new AipContentCensor(AppID, API_Key, Secret_Key);
    }
}
三、使用百度云内容审核API
1.封装结果类
import lombok.AllArgsConstructor;
import lombok.Data;
import lombok.NoArgsConstructor;

@Data
@AllArgsConstructor
@NoArgsConstructor
public class CensorResult {

    /**
     * 内容是否审核通过
     */
    Boolean isPass;

    /**
     * 审核结果
     */
    ContentWithCensorStateEnum contentWithCensorStateEnum;

    /**
     * 文字审核结果的Json字符串
     */
    String textCensorJson;

    /**
     * 图片审核结果的Json字符串
     */
    String imageCensorJson;

}
/**
 * 内容审核状态
 */
public enum ContentWithCensorStateEnum {
    /**
     * 正常状态
     */
    ADD,

    /**
     * 删除状态
     */
    REMOVE,

    /**
     * Ai审核不通过
     */
    CENSOR_FAIL,

    /**
     * Ai审核疑似不通过
     */
    CENSOR_SUSPECT,

    /**
     * Ai审核错误
     */
    CENSOR_ERROR,

    /**
     * 人工审核不通过
     */
    BLOCK
}
3.service层,调用API
里面仅有两个demo功能,常规文本审核和图片审核,如需更多功能参见 接口说明
import com.baidu.aip.contentcensor.AipContentCensor;
import com.baidu.aip.contentcensor.EImgType;
import com.xunan.baidu.pojo.CensorResult;
import com.xunan.baidu.pojo.ContentWithCensorStateEnum;
import org.json.JSONObject;
import org.springframework.stereotype.Service;

import javax.annotation.Resource;

@Service
public class BaiduContentCensorService {

    /**
     * 百度文本审核,识别审核结果的JSON KEY
     */
    final public static String CENSOR_CONCLUSION_TYPE_KEY = "conclusionType";

    @Resource(name = "commonTextCensorClient")
    AipContentCensor commonTextCensorClient;

    /**
     * 获取常规文本审核结果
     *
     * @param content 内容
     * @return 百度内容审核JSON
     */
    public CensorResult getCommonTextCensorResult(String content) {

        //如果内容为空,则直接返回
        if (content == null || content.isEmpty()) {
            return getCensorResult(null);
        }

        try {
            JSONObject response = commonTextCensorClient.textCensorUserDefined(content);
            return getCensorResult(response);
        } catch (Exception exception) {
            System.out.println(exception);
            return getCensorResult(null);
        }
    }

    /**
     * 获取照片审核结果
     *
     * @param imageUrl 图片Url
     * @return 百度图片审核JSON
     */
    public CensorResult getImageCensorResult(String imageUrl) {

        //如果内容为空,则直接返回
        if (imageUrl == null || imageUrl.isEmpty()) {
            return getCensorResult(null);
        }

        try {
            JSONObject response = commonTextCensorClient.imageCensorUserDefined(imageUrl, EImgType.URL, null);
            return getCensorResult(response);
        } catch (Exception exception) {
            System.out.println(exception);
            return getCensorResult(null);
        }
    }

    /**
     * 获取审核结果
     *
     * @param clientJsonObject 百度审核的JSON字段
     * @return 审核结果
     */
    private CensorResult getCensorResult(JSONObject clientJsonObject) {

        //获取代表审核结果的字段
        //审核结果类型,可取值1.合规,2.不合规,3.疑似,4.审核失败
        int conclusionType;

        //如果是null就直接判定为失败
        if (clientJsonObject == null) {
            conclusionType = 4;
        } else {
            conclusionType = clientJsonObject.getInt(CENSOR_CONCLUSION_TYPE_KEY);
        }

        try {
            ContentWithCensorStateEnum result;

            switch (conclusionType) {
                case 1:
                    //合规情况
                    result = ContentWithCensorStateEnum.ADD;
                    break;
                case 2:
                    //不合规情况
                    result = ContentWithCensorStateEnum.CENSOR_FAIL;
                    break;
                case 3:
                    //疑似不合规
                    result = ContentWithCensorStateEnum.CENSOR_SUSPECT;
                    break;
                default:
                    //审核失败和其他情况,都归结到censor_error上去
                    result = ContentWithCensorStateEnum.CENSOR_ERROR;
                    break;
            }

            //过审要求:只能是合规情况
            //解释:因为百度云控制台是可以调节不合规和疑似不合规的参数值的,因此这里只写合规情况就可以了
            boolean isPass = result == ContentWithCensorStateEnum.ADD;

            return new CensorResult(isPass, result, clientJsonObject != null ? clientJsonObject.toString() : null, null);

        } catch (Exception exception) {
            System.out.println(exception);
            //如果出错,就直接返回true
            return new CensorResult(true, null, null, null);
        }

    }

}


 946
946

 被折叠的 条评论
为什么被折叠?
被折叠的 条评论
为什么被折叠?
 到【灌水乐园】发言


