


1、准备两台服务器,
A服务器:8.130.30.110
B服务器:8.130.30.171
默认两台服务器安全组、防火墙先关闭
默认两台服务器mysql均安装完毕,请如果没安装 请参考 服务器mysql安装指引
2、登录A服务器,配置 mysql配置文件,默认在 /etc/my.cnf
其中 server-id 要唯一,两个服务器不能重复。 replicate-do-db 表示要同步的数据库
vim /etc/my.cnf
# For advice on how to change settings please see
# http://dev.mysql.com/doc/refman/5.7/en/server-configuration-defaults.html

[mysqld]
#
# Remove leading # and set to the amount of RAM for the most important data
# cache in MySQL. Start at 70% of total RAM for dedicated server, else 10%.
# innodb_buffer_pool_size = 128M
#
# Remove leading # to turn on a very important data integrity option: logging
# changes to the binary log between backups.
# log_bin
#
# Remove leading # to set options mainly useful for reporting servers.
# The server defaults are faster for transactions and fast SELECTs.
# Adjust sizes as needed, experiment to find the optimal values.
# join_buffer_size = 128M
# sort_buffer_size = 2M
# read_rnd_buffer_size = 2M
datadir=/var/lib/mysql
socket=/var/lib/mysql/mysql.sock


log_bin = mysql-bin
server-id = 1
replicate-do-db = test1

# Disabling symbolic-links is recommended to prevent assorted security risks
symbolic-links=0

log-error=/var/log/mysqld.log
pid-file=/var/run/mysqld/mysqld.pid
3、修改完毕后,记得保存重启mysql
systemctl restart mysqld
4、连接B服务器 修改配置文件
vim /etc/my.cnf
# For advice on how to change settings please see
# http://dev.mysql.com/doc/refman/5.7/en/server-configuration-defaults.html

[mysqld]
#
# Remove leading # and set to the amount of RAM for the most important data
# cache in MySQL. Start at 70% of total RAM for dedicated server, else 10%.
# innodb_buffer_pool_size = 128M
#
# Remove leading # to turn on a very important data integrity option: logging
# changes to the binary log between backups.
# log_bin
#
# Remove leading # to set options mainly useful for reporting servers.
# The server defaults are faster for transactions and fast SELECTs.
# Adjust sizes as needed, experiment to find the optimal values.
# join_buffer_size = 128M
# sort_buffer_size = 2M
# read_rnd_buffer_size = 2M
datadir=/var/lib/mysql
socket=/var/lib/mysql/mysql.sock

# Disabling symbolic-links is recommended to prevent assorted security risks
symbolic-links=0


log_bin = mysql-bin
server-id = 2
replicate-do-db = test1


log-error=/var/log/mysqld.log
pid-file=/var/run/mysqld/mysqld.pid
~
5、修改完毕后,记得保存重启mysql
systemctl restart mysqld
6、登录A服务,并登录mysql
mysql> grant replication slave on *.* to 'slave'@'8.130.30.171' identified by 'slave!1234';
mysql> flush privileges;
7、此时A 在查看 binlog情况 。file和position记录一下
mysql> show master status;
+------------------+----------+--------------+------------------+-------------------+
| File             | Position | Binlog_Do_DB | Binlog_Ignore_DB | Executed_Gtid_Set |
+------------------+----------+--------------+------------------+-------------------+
| mysql-bin.000003 |      154 |              |                  |                   |
+------------------+----------+--------------+------------------+-------------------+
1 row in set (0.00 sec)
8、登录B服务器
mysql> grant replication slave on *.* to 'slave'@'8.130.30.110' identified by 'slave!1234';
mysql> flush privileges;
并查看 binlog情况 记录 file和posttion
mysql> show master status
+------------------+----------+--------------+------------------+-------------------+
| File             | Position | Binlog_Do_DB | Binlog_Ignore_DB | Executed_Gtid_Set |
+------------------+----------+--------------+------------------+-------------------+
| mysql-bin.000003 |      396 |              |                  |                   |
+------------------+----------+--------------+------------------+-------------------+
1 row in set (0.00 sec)
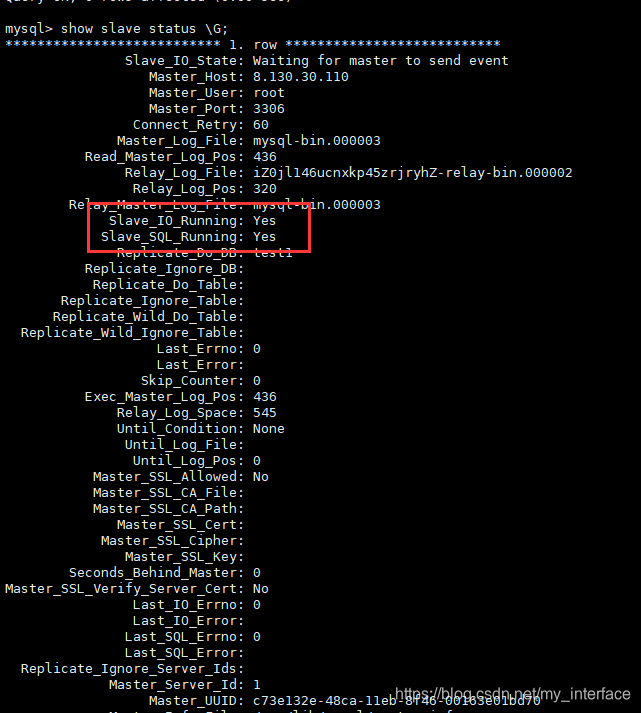
9、设置B服务器同步A的数据,A为主数据源,B为从。 注意此时还在B服务器操作
注意,如果slave启动的时候是不能修改master的,需要 stop slave 停止掉
mysql> change master to master_host='8.130.30.110',master_port=3306, master_user='slave',master_password='slave!1234',master_log_file='mysql-bin.000003',master_log_pos=154;

mysql> start slave;
mysql> show slave status\G;
如果两个都为yes,则正确
Slave_IO_Running: Yes
Slave_SQL_Running: Yes
此时可以从A数据库中 表里面 添加数据,会发先能够通B服务器中同步
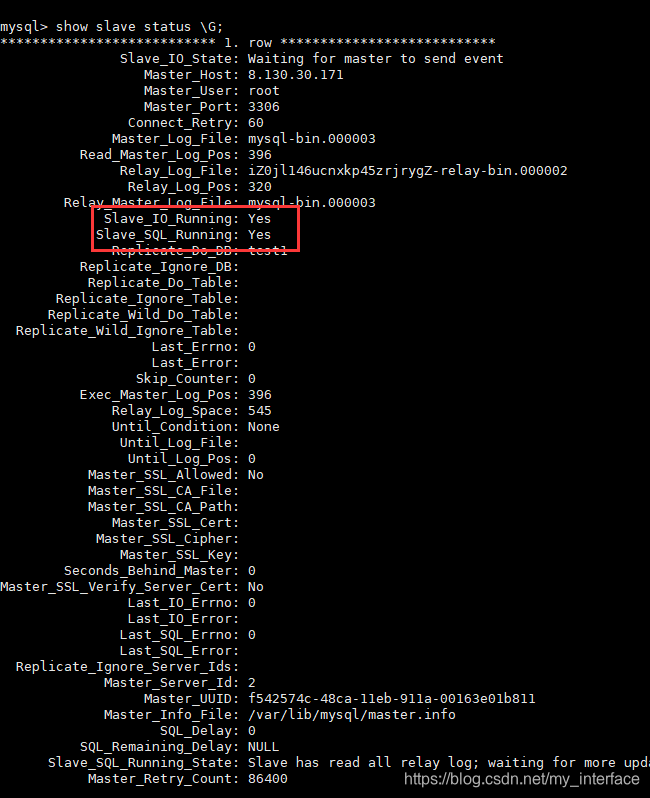
10、 此时连接A服务器,在A服务器中执行 , 设置A服务器同步B服务器的数据。
mysql> change master to master_host='8.130.30.171',master_port=3306, master_user='root',master_password='slave!1234',master_log_file='mysql-bin.000003',master_log_pos=396;

mysql> start slave;
mysql>show slave status \G;
如下图正常。 到此配置完毕
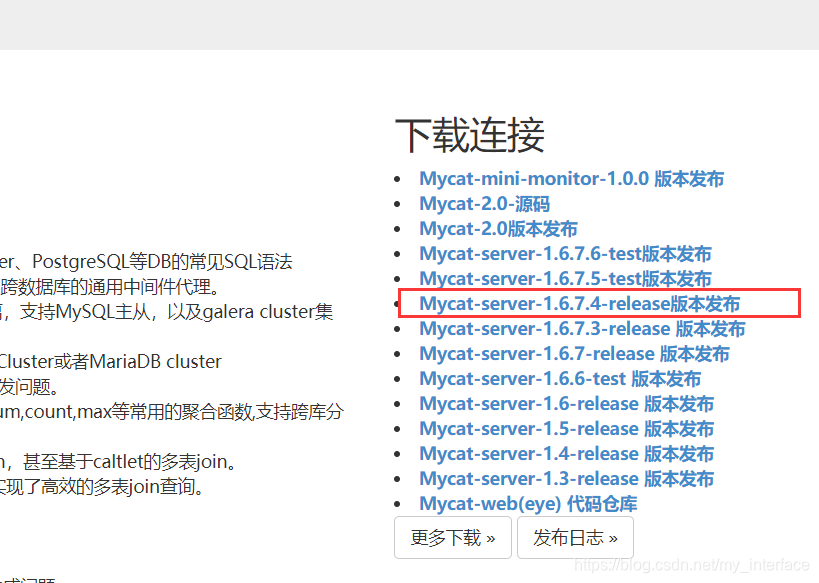
11、mycat开始安装
注意如果上面配置mysql的账号的时候注意权限,否则有可能mycat使用这个ip没有权限。
下载安装路径位置如下:http://www.mycat.org.cn/
然后修改conf/wrapper.conf 中的java路径,改为jdk中的java路径

修改conf /server.xml 配置
<?xml version="1.0" encoding="UTF-8"?>
<!-- - - Licensed under the Apache License, Version 2.0 (the "License");
	- you may not use this file except in compliance with the License. - You
	may obtain a copy of the License at - - http://www.apache.org/licenses/LICENSE-2.0
	- - Unless required by applicable law or agreed to in writing, software -
	distributed under the License is distributed on an "AS IS" BASIS, - WITHOUT
	WARRANTIES OR CONDITIONS OF ANY KIND, either express or implied. - See the
	License for the specific language governing permissions and - limitations
	under the License. -->
<!DOCTYPE mycat:server SYSTEM "server.dtd">
<mycat:server xmlns:mycat="http://io.mycat/">
	<system>
	<property name="nonePasswordLogin">0</property> <!-- 0为需要密码登陆、1为不需要密码登陆 ,默认为0,设置为1则需要指定默认账户-->
	<property name="ignoreUnknownCommand">0</property><!-- 0遇上没有实现的报文(Unknown command:),就会报错、1为忽略该报文,返回ok报文。
	在某些mysql客户端存在客户端已经登录的时候还会继续发送登录报文,mycat会报错,该设置可以绕过这个错误-->
	<property name="useHandshakeV10">1</property>
    <property name="removeGraveAccent">1</property>
	<property name="useSqlStat">0</property>  <!-- 1为开启实时统计、0为关闭 -->
	<property name="useGlobleTableCheck">0</property>  <!-- 1为开启全加班一致性检测、0为关闭 -->
		<property name="sqlExecuteTimeout">300</property>  <!-- SQL 执行超时 单位:秒-->
		<property name="sequnceHandlerType">1</property>
		<!--<property name="sequnceHandlerPattern">(?:(\s*next\s+value\s+for\s*MYCATSEQ_(\w+))(,|\)|\s)*)+</property>
		INSERT INTO `travelrecord` (`id`,user_id) VALUES ('next value for MYCATSEQ_GLOBAL',"xxx");
		-->
		<!--必须带有MYCATSEQ_或者 mycatseq_进入序列匹配流程 注意MYCATSEQ_有空格的情况-->
		<property name="sequnceHandlerPattern">(?:(\s*next\s+value\s+for\s*MYCATSEQ_(\w+))(,|\)|\s)*)+</property>
	<property name="subqueryRelationshipCheck">false</property> <!-- 子查询中存在关联查询的情况下,检查关联字段中是否有分片字段 .默认 false -->
	<property name="sequenceHanlderClass">io.mycat.route.sequence.handler.HttpIncrSequenceHandler</property>
      <!--  <property name="useCompression">1</property>--> <!--1为开启mysql压缩协议-->
        <!--  <property name="fakeMySQLVersion">5.6.20</property>--> <!--设置模拟的MySQL版本号-->
	<!-- <property name="processorBufferChunk">40960</property> -->
	<!--
	<property name="processors">1</property>
	<property name="processorExecutor">32</property>
	 -->
        <!--默认为type 0: DirectByteBufferPool | type 1 ByteBufferArena | type 2 NettyBufferPool -->
		<property name="processorBufferPoolType">0</property>
		<!--默认是65535 64K 用于sql解析时最大文本长度 -->
		<!--<property name="maxStringLiteralLength">65535</property>-->
		<!--<property name="sequnceHandlerType">0</property>-->
		<!--<property name="backSocketNoDelay">1</property>-->
		<!--<property name="frontSocketNoDelay">1</property>-->
		<!--<property name="processorExecutor">16</property>-->
		<property name="serverPort">3307</property>

		<!--
			<property name="serverPort">8066</property> <property name="managerPort">9066</property>
			<property name="idleTimeout">300000</property> <property name="bindIp">0.0.0.0</property>
			<property name="dataNodeIdleCheckPeriod">300000</property> 5 * 60 * 1000L; //连接空闲检查
			<property name="frontWriteQueueSize">4096</property> <property name="processors">32</property> -->
		<!--分布式事务开关,0为不过滤分布式事务,1为过滤分布式事务(如果分布式事务内只涉及全局表,则不过滤),2为不过滤分布式事务,但是记录分布式事务日志-->
		<property name="handleDistributedTransactions">0</property>

			<!--
			off heap for merge/order/group/limit      1开启   0关闭
		-->
		<property name="useOffHeapForMerge">0</property>

		<!--
			单位为m
		-->
        <property name="memoryPageSize">64k</property>

		<!--
			单位为k
		-->
		<property name="spillsFileBufferSize">1k</property>

		<property name="useStreamOutput">0</property>

		<!--
			单位为m
		-->
		<property name="systemReserveMemorySize">384m</property>


		<!--是否采用zookeeper协调切换  -->
		<property name="useZKSwitch">false</property>

		<!-- XA Recovery Log日志路径 -->
		<!--<property name="XARecoveryLogBaseDir">./</property>-->

		<!-- XA Recovery Log日志名称 -->
		<!--<property name="XARecoveryLogBaseName">tmlog</property>-->
		<!--如果为 true的话 严格遵守隔离级别,不会在仅仅只有select语句的时候在事务中切换连接-->
		<property name="strictTxIsolation">false</property>

		<property name="useZKSwitch">true</property>
		<!--如果为0的话,涉及多个DataNode的catlet任务不会跨线程执行-->
		<property name="parallExecute">0</property>
	</system>

	<!-- 全局SQL防火墙设置 -->
	<!--白名单可以使用通配符%或着*-->
	<!--例如<host host="127.0.0.*" user="root"/>-->
	<!--例如<host host="127.0.*" user="root"/>-->
	<!--例如<host host="127.*" user="root"/>-->
	<!--例如<host host="1*7.*" user="root"/>-->
	<!--这些配置情况下对于127.0.0.1都能以root账户登录-->
	<!--
	<firewall>
	   <whitehost>
	      <host host="1*7.0.0.*" user="root"/>
	   </whitehost>
       <blacklist check="false">
       </blacklist>
	</firewall>
	-->

	<user name="root" defaultAccount="true">
		<property name="password">root</property>
		<property name="schemas">test1</property>
		<property name="defaultSchema">test1</property>
		<!--No MyCAT Database selected 错误前会尝试使用该schema作为schema,不设置则为null,报错 -->

		<!-- 表级 DML 权限设置 -->
		<!--
		<privileges check="false">
			<schema name="TESTDB" dml="0110" >
				<table name="tb01" dml="0000"></table>
				<table name="tb02" dml="1111"></table>
			</schema>
		</privileges>
		 -->
	</user>


</mycat:server>
修改配置文件如下 schema.xml
<?xml version="1.0"?>
<!DOCTYPE mycat:schema SYSTEM "schema.dtd">
<mycat:schema xmlns:mycat="http://io.mycat/">

	<schema name="test1" checkSQLschema="false" sqlMaxLimit="100" dataNode="dn1"> </schema>

	<dataNode name="dn1" dataHost="localhost" database="test1" />


	<dataHost name="localhost" maxCon="1000" minCon="10" balance="0"
			  writeType="0" dbType="mysql" dbDriver="native" switchType="1"  slaveThreshold="100">
		<heartbeat>select user()</heartbeat>
		<!-- can have multi write hosts -->
		<writeHost host="hostM1" url="localhost:3306" user="root"  password="root"> </writeHost>

		 <writeHost host="hostM2" url="8.130.30.110:3306" user="root"  password="root"> </writeHost>
	</dataHost>

</mycat:schema>
启动即可。
linux:
./mycat start 启动
./mycat stop 停止
./mycat console 前台运行
./mycat restart 重启服务
./mycat pause 暂停
./mycat status 查看启动状态


 1293
1293

 被折叠的 条评论
为什么被折叠?
被折叠的 条评论
为什么被折叠?
 到【灌水乐园】发言


