


需求
- UITableView实现显示单组数据。
- 尝试设置不同行高度不同。
效果:
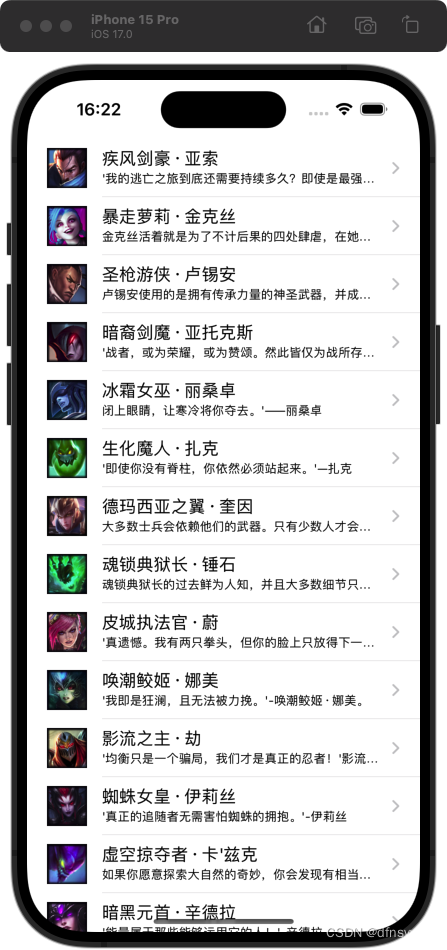
数据展示
实现
- 与之前分组显示数据的区别在于懒加载的数据模型不同。
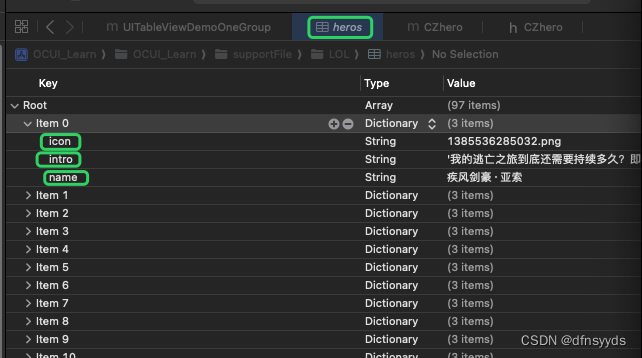
(1)声明数据模型类
类的属性一定要和plist中数据的字段保持一致
@interface CZhero : NSObject
// 图片
@property(nonatomic, copy) NSString *icon;
// info
@property(nonatomic, copy) NSString *intro;
// name
@property(nonatomic, copy) NSArray *name;

// 读取的仍然是字典
- (instancetype)initWithDict:(NSDictionary *)dict;
// 约定俗成:需要实现公有方法,类名+ WithDict
+ (instancetype)heroWithDict:(NSDictionary *)dict;

@end
(2)实现数据模型类
#import "CZhero.h"

@implementation CZhero
- (instancetype)initWithDict:(NSDictionary *)dict{
    if(self = [super init]){
        // KVC的写法:自动获取全部属性,并用字典的键赋值
        [self setValuesForKeysWithDictionary:dict];
    }
    return self;
}
+ (instancetype)heroWithDict:(NSDictionary *)dict{
    return [[self alloc] initWithDict:dict];
}
@end
- 自定义UITableView类
(1)声明:设置行高需要声明代理,显示数据本身需Datasource
成员:UITableView、数组
@interface UITableViewDemoOneGroup : UIView<UITableViewDataSource, UITableViewDelegate>

@property(nonatomic, strong) UITableView *uitableview;
@property(nonatomic, strong) NSArray *herodatas;

@end
(2)实现:
0> 初始化UITableView并设置dataSource、delegate。
1> 懒加载数据:单组数据和分组显示数据的格式都一样,都是从plist中加载字典,基本五个步骤。
2> 注意设置cell样式不同,UITableViewCellStyleSubtitle和StyleDefault不一样。
3> 设置奇偶行高不同。
#import "UITableViewDemoOneGroup.h"

@implementation UITableViewDemoOneGroup

-(instancetype) initWithFrame:(CGRect)frame{
    self = [super initWithFrame:frame];
    if(self){
        // UITableViewStylePlain:单组数据
        _uitableview = [[UITableView alloc]initWithFrame:self.bounds style: UITableViewStylePlain];
        _uitableview.dataSource = self;
        _uitableview.delegate = self;
    }
    // 开始没显示,因为没add
    [self addSubview: _uitableview];
    return self;
}

#pragma mark - 加载数据
-(NSArray *)herodatas{
    if(_herodatas == nil){
        // 懒加载: 1, 获取plist  2. 创建对象数组   3. 添加到对象数组  4. 赋值对象数组给数据group
        NSString *path = [[NSBundle mainBundle] pathForResource:@"heros.plist" ofType:nil];
        NSArray *arrayDict = [NSArray arrayWithContentsOfFile:path];
        NSMutableArray *arrayModel = [NSMutableArray array];
        // 根据字典 创建模型,加入数组
        for(NSDictionary *dict in arrayDict){
            CZhero *model = [CZhero heroWithDict:dict];
            [arrayModel addObject:model];
        }
        _herodatas = arrayModel;
    }
    return _herodatas;
}

#pragma mark - 协议相关样式
// 单组:所有英雄是一个组
- (NSInteger)numberOfSectionsInTableView:(UITableView *)tableView{
    return 1;
}

// 每组几行:
- (NSInteger)tableView:(UITableView *)tableView numberOfRowsInSection:(NSInteger)section{
    return  self.herodatas.count;
}

// 每一行cell
// 因为只有一组,indexPath始终是0
- (UITableViewCell *)tableView:(UITableView *)tableView cellForRowAtIndexPath:(NSIndexPath *)indexPath{
    // indexPath始终是0,所以通过row获取model
    CZhero *model = self.herodatas[indexPath.row];
    // default类型cell,不会显示简介
    UITableViewCell *cell = [[UITableViewCell alloc] initWithStyle:UITableViewCellStyleSubtitle reuseIdentifier:nil];
    cell.imageView.image = [UIImage imageNamed:model.icon];
    cell.textLabel.text = model.name;
    cell.detailTextLabel.text = model.intro;
    // 单元格中显示右边的标记
    cell.accessoryType = UITableViewCellAccessoryDisclosureIndicator;
    return cell;
}

// 设置行高:通过代理方法,也没设置self
- (CGFloat)tableView:(UITableView *)tableView heightForRowAtIndexPath:(NSIndexPath *)indexPath{
    int rowNum = indexPath.row;
    if(rowNum%2 == 0){
        return 60;
    }else{
        return 100;
    }
}

@end
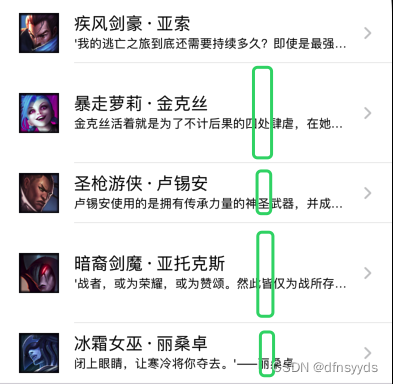
· 关于:设置奇偶行行高不同
如果设置所有行高度相同,用self.tableView.rowHeight属性。
但是要设置不同行的高度不同,通过代理方法实现。所以在自定义类上声明。
注意代理和数据源必须赋值self,否则不显示
如下,奇偶行宽度明显不一样
遇到问题
- 初步声明完自定义类后,运行失败
当你在自定义类中声明某协议后,一定要实现必须实现的方法。
- setValue:forUndefinedKey:]: this class is not key value coding-compliant for the key intro.’
数据模型的属性名要完全和plist中的字段名完全一致。
- Terminating app due to uncaught exception ‘NSInvalidArgumentException’, reason: ‘-[__NSCFString content]: unrecognized selector sent to instance 0x600000c68bd0’
*** First throw call stack:
错误的赋值方式,需要使用下面方式,图片对象来赋值,而直接用图片名赋值会找不到。
[UIImage imageNamed:model.icon]
- UITableViewCellStyleSubtitle和UITableViewCellStyleDefault的区别:
默认状态的cellStyle不会显示cell.detailTextLabel.text = model.intro;
默认状态不会显示信息。


 3656
3656

 被折叠的 条评论
为什么被折叠?
被折叠的 条评论
为什么被折叠?
 到【灌水乐园】发言


