


1. 前言
在Android项目开发的过程,开发者需要根据UI设计师的设计效果图做各种各样的机型适配,这往往是最麻烦和最浪费时间的。下面几种方案可供选择。
AndroidAutoLayout是最省时省力的一个基础库,在这里感谢hongyongAndroid的开源,关于它的介绍可以查阅开源者的介绍博客:Android AutoLayout全新的适配方式 堪称适配终结者,这篇博客主要讲述它的实现原理和使用方法和注意点。
2. 原理
在使用AndroidAutoLayout,需要在对应的项目的AndroidManifest.xml配置:
<meta-data
    android:name="design_width"
    android:value="1080" />
<meta-data
    android:name="design_height"
    android:value="1920" />
这两个配置项对应:设计稿的宽度和高度,单位是像素
这两个配置项目就涉及到了AndroidAutoLayout的实现原理:框架获取到屏幕的宽度和高度,然后通过和配置的设计宽度和高度比较,计算出宽度比例和高度比例,然后应用到我们在AutoLayout中使用到的px单位。你可以理解为这个框架是把设计效果图等比缩放到适配手机。
定位到AutoConfig类,下面代码会获取到配置的设计宽度和高度
mDesignWidth = (int) applicationInfo.metaData.get(KEY_DESIGN_WIDTH);
                mDesignHeight = (int) applicationInfo.metaData.get(KEY_DESIGN_HEIGHT);
AndroidAutoLayout提供了AutoFrameLayout,AutoLinearLayout, AutoRelativeLayout, 这里就拿常用的AutoLinearLayout来研究下它的实现原理,下面这两段代码我们来分析下:
@Override
protected void onMeasure(int widthMeasureSpec, int heightMeasureSpec)
{
    if (!isInEditMode())
        mHelper.adjustChildren();
    super.onMeasure(widthMeasureSpec, heightMeasureSpec);
}

@Override
public LayoutParams generateLayoutParams(AttributeSet attrs)
{
    return new AutoLinearLayout.LayoutParams(getContext(), attrs);
}
generateLayoutParams是override方法,这里提供了自定义的layoutParams,对应的代码
public LayoutParams(Context c, AttributeSet attrs)
    {
        super(c, attrs);
        mAutoLayoutInfo = AutoLayoutHelper.getAutoLayoutInfo(c, attrs);
}这里有个AutoLayoutHelper.getAutoLayoutInfo(c, attrs),它 的意义是获取配置的支持的属性,对应代码
public static AutoLayoutInfo getAutoLayoutInfo(Context context,
                                               AttributeSet attrs) {

    AutoLayoutInfo info = new AutoLayoutInfo();

    TypedArray a = context.obtainStyledAttributes(attrs, R.styleable.AutoLayout_Layout);
    int baseWidth = a.getInt(R.styleable.AutoLayout_Layout_layout_auto_basewidth, 0);
    int baseHeight = a.getInt(R.styleable.AutoLayout_Layout_layout_auto_baseheight, 0);
    a.recycle();

    TypedArray array = context.obtainStyledAttributes(attrs, LL);

    int n = array.getIndexCount();


    for (int i = 0; i < n; i++) {
        int index = array.getIndex(i);
//            String val = array.getString(index);
//            if (!isPxVal(val)) continue;

        if (!DimenUtils.isPxVal(array.peekValue(index))) continue;

        int pxVal = 0;
        try {
            pxVal = array.getDimensionPixelOffset(index, 0);
        } catch (Exception ignore)//not dimension
        {
            continue;
        }
        switch (index) {
            case INDEX_TEXT_SIZE:
                info.addAttr(new TextSizeAttr(pxVal, baseWidth, baseHeight));
                break;
            case INDEX_PADDING:
                info.addAttr(new PaddingAttr(pxVal, baseWidth, baseHeight));
                break;
            case INDEX_PADDING_LEFT:
                info.addAttr(new PaddingLeftAttr(pxVal, baseWidth, baseHeight));
                break;
            case INDEX_PADDING_TOP:
                info.addAttr(new PaddingTopAttr(pxVal, baseWidth, baseHeight));
                break;
            case INDEX_PADDING_RIGHT:
                info.addAttr(new PaddingRightAttr(pxVal, baseWidth, baseHeight));
                break;
            case INDEX_PADDING_BOTTOM:
                info.addAttr(new PaddingBottomAttr(pxVal, baseWidth, baseHeight));
                break;
            case INDEX_WIDTH:
                info.addAttr(new WidthAttr(pxVal, baseWidth, baseHeight));
                break;
            case INDEX_HEIGHT:
                info.addAttr(new HeightAttr(pxVal, baseWidth, baseHeight));
                break;
            case INDEX_MARGIN:
                info.addAttr(new MarginAttr(pxVal, baseWidth, baseHeight));
                break;
            case INDEX_MARGIN_LEFT:
                info.addAttr(new MarginLeftAttr(pxVal, baseWidth, baseHeight));
                break;
            case INDEX_MARGIN_TOP:
                info.addAttr(new MarginTopAttr(pxVal, baseWidth, baseHeight));
                break;
            case INDEX_MARGIN_RIGHT:
                info.addAttr(new MarginRightAttr(pxVal, baseWidth, baseHeight));
                break;
            case INDEX_MARGIN_BOTTOM:
                info.addAttr(new MarginBottomAttr(pxVal, baseWidth, baseHeight));
                break;
            case INDEX_MAX_WIDTH:
                info.addAttr(new MaxWidthAttr(pxVal, baseWidth, baseHeight));
                break;
            case INDEX_MAX_HEIGHT:
                info.addAttr(new MaxHeightAttr(pxVal, baseWidth, baseHeight));
                break;
            case INDEX_MIN_WIDTH:
                info.addAttr(new MinWidthAttr(pxVal, baseWidth, baseHeight));
                break;
            case INDEX_MIN_HEIGHT:
                info.addAttr(new MinHeightAttr(pxVal, baseWidth, baseHeight));
                break;
        }
    }
    array.recycle();
    L.e(" getAutoLayoutInfo " + info.toString());
    return info;
}
这里我们可以发现支持的属性:
- textSize
- padding
- paddingLeft
- paddingTop
- paddingRight
- paddingBottom
- width
- height
- margin
- marginLeft
- marginTop
- marginRight
- marginBottom
- maxWidth
- maxHeight
- minWidth
- minHeight
当然也可以自己实现其他属性。比如下面使用AutoLinearLayout
<com.zhy.autolayout.AutoLinearLayout
    android:layout_width="match_parent"
    android:layout_height="wrap_content"
    android:layout_marginTop="7px"
    android:background="@android:color/white"
    android:orientation="vertical"
    android:paddingBottom="22px"
    android:paddingLeft="15px"
    android:paddingRight="15px"
    android:paddingTop="8px"
    >
    <github.ankushsachdeva.emojicon.EmojiconTextView
        android:id="@+id/tv_channel_desc"
        style="@style/Common.TextView.13"
        android:layout_width="wrap_content"
        android:layout_height="wrap_content"
        android:layout_marginTop="15px"
/></com.zhy.autolayout.AutoLinearLayout>上面,使用到了android:layout_marginTop="15px",看看是layout_marginTop属性是如何做自适配的。定位到MarginTopAttr,会发现如下代码
@Override
protected void execute(View view, int val)
{
    if (!(view.getLayoutParams() instanceof ViewGroup.MarginLayoutParams))
    {
        return;
    }
    ViewGroup.MarginLayoutParams lp = (ViewGroup.MarginLayoutParams) view.getLayoutParams();
    lp.topMargin = val;

}分析上面代码,可以发现topMargin会重置了。然后需要找到val是怎么计算的,定位到AutoAttr,会发现这样一段代码:
public void apply(View view)
{

    boolean log = view.getTag() != null && view.getTag().toString().equals("auto");

    if (log)
    {
        L.e(" pxVal = " + pxVal + " ," + this.getClass().getSimpleName());
    }
    int val;
    if (useDefault())
    {
        val = defaultBaseWidth() ? getPercentWidthSize() : getPercentHeightSize();
        if (log)
        {
            L.e(" useDefault val= " + val);
        }
    } else if (baseWidth())
    {
        val = getPercentWidthSize();
        if (log)
        {
            L.e(" baseWidth val= " + val);
        }
    } else
    {
        val = getPercentHeightSize();
        if (log)
        {
            L.e(" baseHeight val= " + val);
        }
    }

    if (val > 0)
        val = Math.max(val, 1);//for very thin divider
    execute(view, val);
}
通过分析上面代码,我们会发现val被重新计算了, 因为这里是分析的marginTop属性,所以上面调用的是getPercentHeightSize,下面代码是其实现方法
public static int getPercentHeightSizeBigger(int val)
{
    int screenHeight = AutoLayoutConifg.getInstance().getScreenHeight();
    int designHeight = AutoLayoutConifg.getInstance().getDesignHeight();

    int res = val * screenHeight;
    if (res % designHeight == 0)
    {
        return res / designHeight;
    } else
    {
        return res / designHeight + 1;
    }
}
通过分析代码,我们知道上面设置的android:layout_marginTop="15px",先通过获取屏幕高度和设计高度的比例,然后进行缩放了。
通过上面代码知道了其具体实现原理,但是我们还没有分析上面的一系列方法是怎么被调用的,还是定位到AutoLinearLayout, 会发现下面这个方法
@Override
protected void onMeasure(int widthMeasureSpec, int heightMeasureSpec)
{
    if (!isInEditMode())
        mHelper.adjustChildren();
    super.onMeasure(widthMeasureSpec, heightMeasureSpec);
}在onMeasure方法会调用mHelper.adjustChildren(),看下它是怎么实现的
public void adjustChildren()
{
    AutoLayoutConifg.getInstance().checkParams();

    for (int i = 0, n = mHost.getChildCount(); i < n; i++)
    {
        View view = mHost.getChildAt(i);
        ViewGroup.LayoutParams params = view.getLayoutParams();

        if (params instanceof AutoLayoutParams)
        {
            AutoLayoutInfo info =
                    ((AutoLayoutParams) params).getAutoLayoutInfo();
            if (info != null)
            {
                info.fillAttrs(view);
            }
        }
    }

}分析上面代码,举例AutoLinearLayout,它会它的所有直接子view都应用info.fillAttrs(view);,
NOTE:这里需要注意的是只支持直接子view,假如AutoLinearLayout下面还有LinearLayout,那么这个LinearLayout下面的子view不会支持AutoLayout.
回到上面的info.fillAttrs(view);,找到它的代码:
public void fillAttrs(View view)
{
    for (AutoAttr autoAttr : autoAttrs)
    {
        autoAttr.apply(view);
    }
}
OK,通过上面代码,我们知道它会所有支持的属性迭代地应用。
总结下它的原理,通过下面步骤
1. 获取配置的design_width和design_height获取设计稿的宽度和高度
2. 获取所有支持的属性如:textSize, marginTop,
3. 获取AutoLinearLayout/AutoRelativeLayout/AutoFrameLayout下面的所有直接子view
4. 所有的直接子view都对所有的支持属性进行等比缩放转换尺寸。
3. 补充
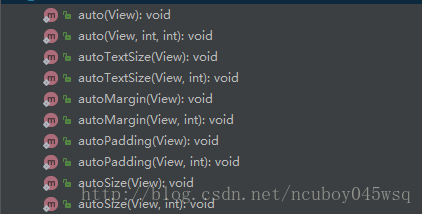
有些时候不方便在layout中使用AutoLayout,也可以在代码里动态的进行适配,AutoUtils提供了一系列方法
4. 自定义扩展
添加对GridView的”android_horinzontalSpacing”属性的支持
1)Attr.java中添加public static final int GRID_HORIZONTAL_SPACING = MAX_HEIGHT << 1;
2)AutoLayoutHelper.java中的ll数组添加android.R.attr.horizontalSpacing,添加private static final int INDEX_HORIZONTAL_SPACING = 17;
3)在getAutoLayoutInfo方法添加
case INDEX_HORIZONTAL_SPACING:
                    info.addAttr(new GridHorizontalSpacingAttr(pxVal, baseWidth, baseHeight));
                    break;
4)创建GridHorizontalSpacingAttr类
public class GridHorizontalSpacingAttr extends AutoAttr
{
    public GridHorizontalSpacingAttr(int pxVal, int baseWidth, int baseHeight)
    {
        super(pxVal, baseWidth, baseHeight);
    }

    @Override
    protected int attrVal()
    {
        return Attrs.GRID_HORIZONTAL_SPACING;
    }

    @Override
    protected boolean defaultBaseWidth()
    {
        return true;
    }

    @Override
    protected void execute(View view, int val)
    {
        if(!(view instanceof GridView))
        {
            return ;
        }
        GridView gridView = (GridView) view;
        gridView.setHorizontalSpacing(val);
    }

    public static GridHorizontalSpacingAttr generate(int val, int baseFlag)
    {
        GridHorizontalSpacingAttr attr = null;
        switch (baseFlag)
        {
            case AutoAttr.BASE_WIDTH:
                attr = new GridHorizontalSpacingAttr(val, Attrs.GRID_HORIZONTAL_SPACING, 0);
                break;
            case AutoAttr.BASE_HEIGHT:
                attr = new GridHorizontalSpacingAttr(val, 0, Attrs.GRID_HORIZONTAL_SPACING);
                break;
            case AutoAttr.BASE_DEFAULT:
                attr = new GridHorizontalSpacingAttr(val, 0, 0);
                break;
        }
        return attr;
    }
}扩展代码在我的fork中:https://github.com/Sherchen/AndroidAutoLayout
5. 缺点
通过上面的代码,我们知道了它的实现原理是在运行时做一系列的计算之后,再重置设置尺寸,当一个layout大量使用AutoLayout后,会一定程度上降低layout的加载速度,影响用户体验,所以使用它的时候也需要多注意下。
https://github.com/Sherchen/AndroidAutoLayout是我的fork版本,我会把我的一些修改和扩展提交上去。


 602
602


 被折叠的 条评论
为什么被折叠?
被折叠的 条评论
为什么被折叠?
 到【灌水乐园】发言


