


leetCode真题
属于基础简单题目
常见的做法有递归和while循环
递归
// 1. 递归参数和返回值
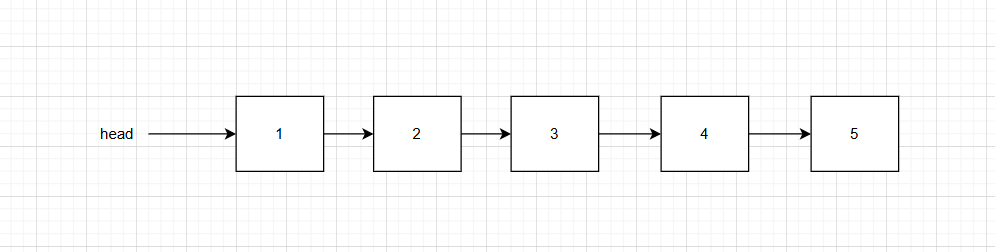
public static ListNode reverseList(ListNode head) {
// 1. 递归终止条件
if (head == null || head.next == null) {
return head;
}
// 递归逻辑
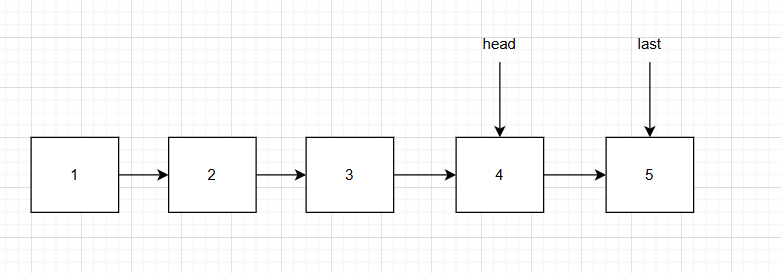
ListNode last = reverseList(head.next);// last是未反转链表的最后一个节点
head.next.next = head;// head和last构成双向
head.next = null;// head的向last的指向取消
return last;
}
不要用自己的大脑想象递归过程,人的大脑记不住几个栈!
这段代码我们要分析其中的实现逻辑
-
我们要反转整个链表(head节点),就要先反转链表的子链表(head.next),然后将head修改到整个链表的第一个位置(head.next.next = head;head.next = null;)
-
而要反转子链表head.next,就需要反转head.next的子链表,也就是head.next.next
-
……直到head.next为null时,此时整个子链表只有一个节点(节点5),单独的一个节点显然已经完成了反转,此时直接return返回,return返回之后,head指向4节点,last指向5节点

-
然后是反转倒数第二个节点(4),4节点的子链表显然已经完成了反转,此时只要将4节点拼接到5节点之后即可完成4,5节点的反转
head.next.next = head;

head.next = null;
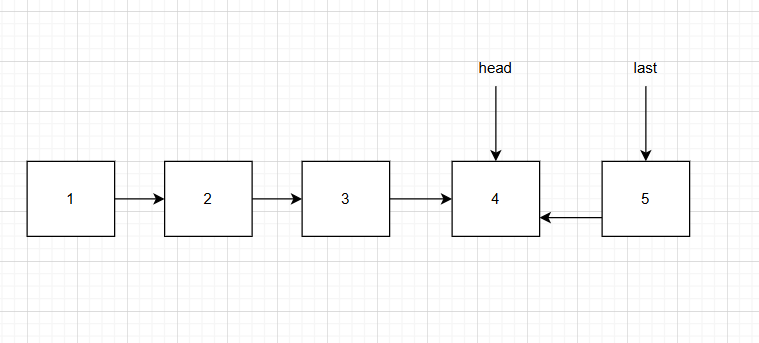
return last;
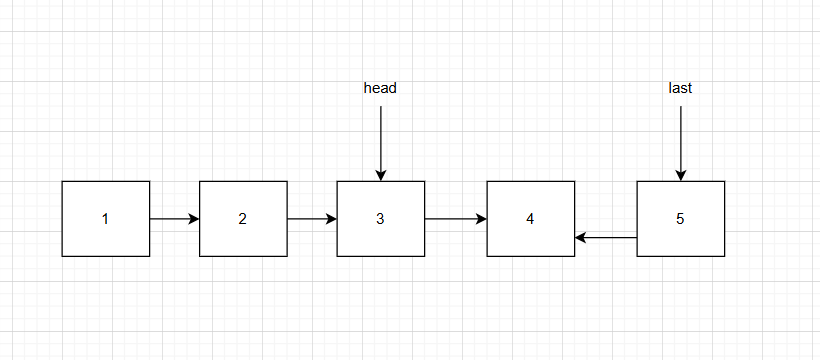
- head指向3节点,重复第四步,直到最后整个链表完成反转
测试demo
ListNode类
public class ListNode {
    public int val;
    public ListNode next;


    public ListNode() {
    }

    public ListNode(int val) {
        this.val = val;
    }

    public ListNode(int val, ListNode next) {
        this.val = val;
        this.next = next;
    }

    public void loop(ListNode head) {
        while (head != null) {
            System.out.print(head.val + "  ");
            head = head.next;
        }

    }
}
反转实现
public class ListTest {
public static void main(String[] args) {
ListNode _5 = new ListNode(5);
ListNode _4 = new ListNode(4, _5);
ListNode _3 = new ListNode(3, _4);
ListNode _2 = new ListNode(2, _3);
ListNode head = new ListNode(1, _2);
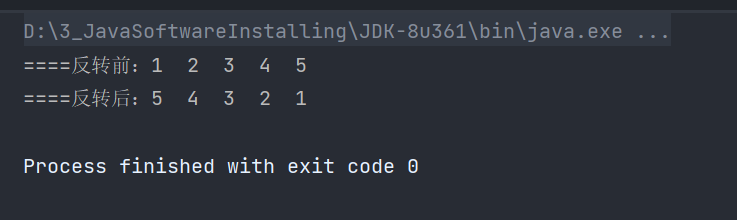
System.out.print("====反转前:");
head.loop(head);
System.out.println();
head = reverseList1(head);
System.out.print("====反转后:");
head.loop(head);
System.out.println();
}
// 1. 递归参数和返回值
public static ListNode reverseList1(ListNode head) {
// 1. 递归终止条件
if (head == null || head.next == null) {
return head;
}
// 递归逻辑
ListNode last = reverseList1(head.next);// last是未反转链表的最后一个节点
head.next.next = head;// head和last构成双向
head.next = null;// head的向last的指向取消
return last;
}
}
while循环
使用递归的好处是,代码简洁,但是当链表数量特别大的时候,递归可能会引起java的虚拟机栈栈溢出
我们提出了第二种方法,就是while循环
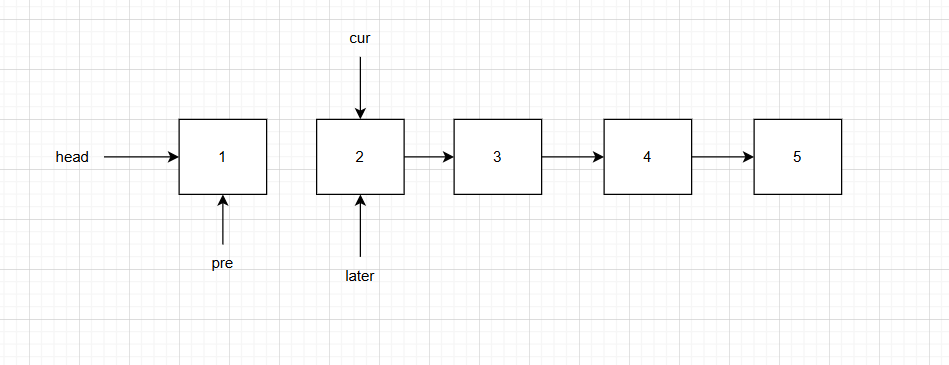
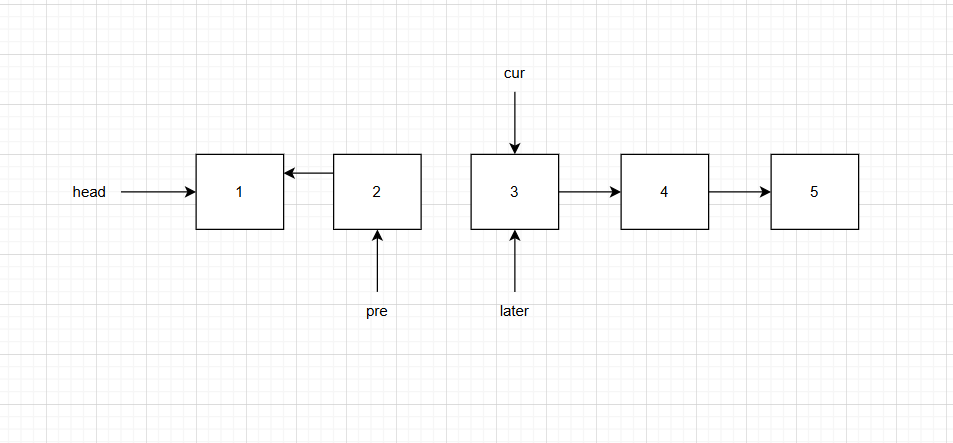
public static ListNode reverseList2(ListNode head) {
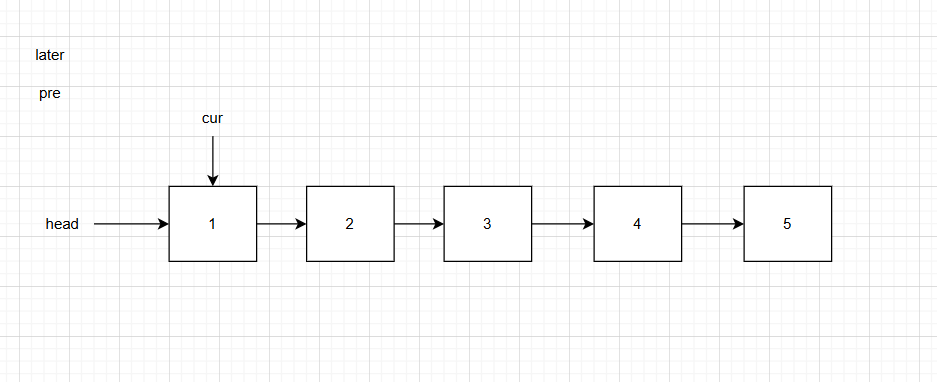
// head节点拷贝,pre和later节点用于暂存cur节点的前节点和后节点
ListNode pre = null, cur = head, later = null;
while (cur != null) {// cur节点代表了要反转的节点,cur节点为null说明所有节点反转完毕
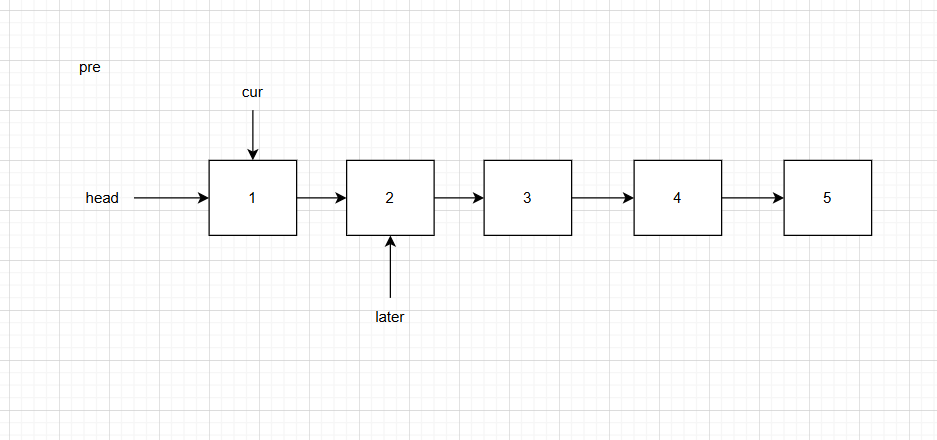
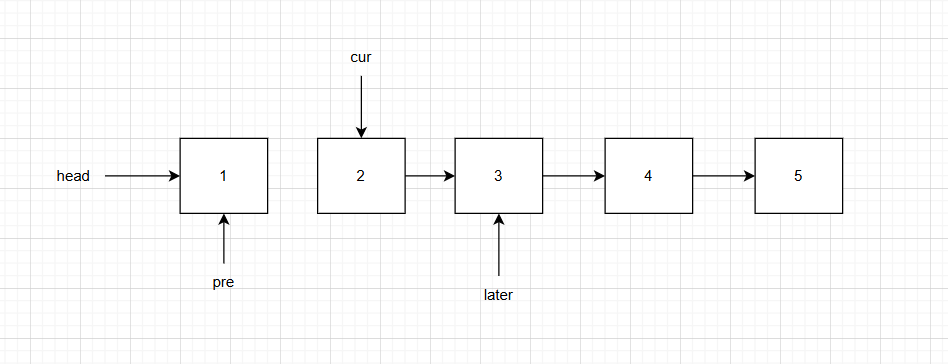
later = cur.next;// 1. later节点指向下一节点
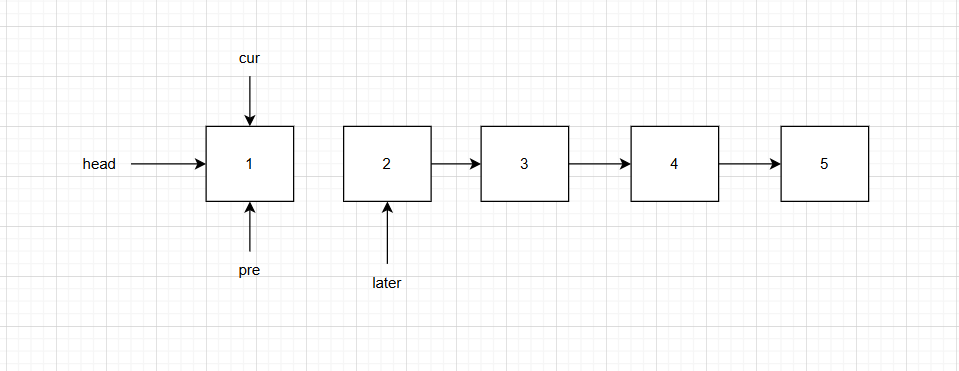
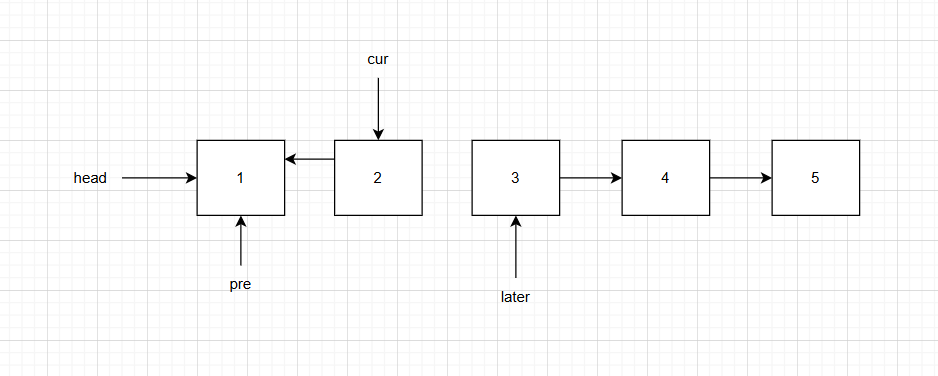
cur.next = pre;// 2. cur节点的next节点指向pre节点
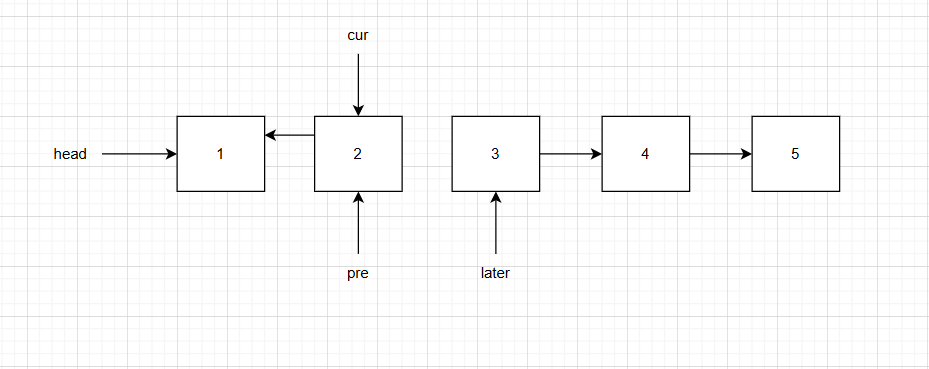
pre = cur;// 3. pre节点指向cur节点
cur = later;// 4. cur节点指向later节点
}
return pre;
}
-
ListNode pre = null, cur = head, temp;
head节点拷贝,pre和later节点用于后续暂存cur节点的前节点和后节点 -
while (cur != null) {}
cur节点代表了要反转的节点,cur节点为null说明所有节点反转完毕
- later = cur.next;
记录cur节点的后节点later
- cur.next = pre;(最核心的一步)
有人此时会说了,pre不是null吗,为什么不能直接cur.next = null;呢?
这行代码的真正含义是新增一条反向的路径,只是第一个节点反转的时候pre恰好为null

-
pre = cur;
记录要反转的节点的上一个节点
-
cur = temp;
相当于cur = cur.next,cur节点遍历到下一个节点位置
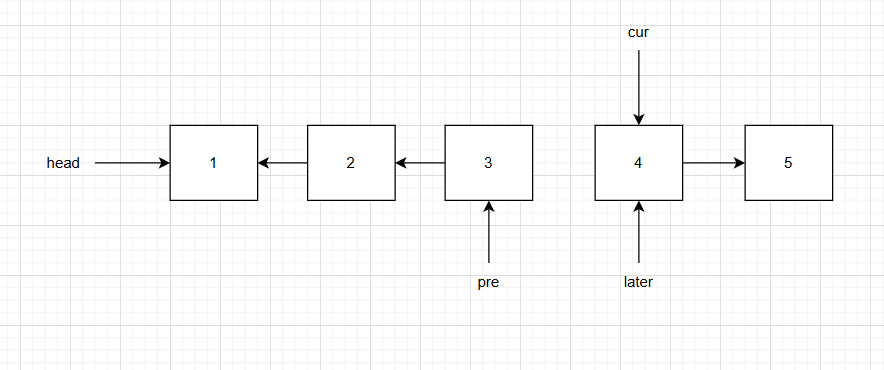
- 重复上述6步
反转节点3
测试demo
同上
总结
递归的代码逻辑清晰,但是消耗内存会比较多,而且可能会栈溢出;
while循环不会栈溢出;
两者的时间复杂度都是O(n)级别的


 745
745

 被折叠的 条评论
为什么被折叠?
被折叠的 条评论
为什么被折叠?
 到【灌水乐园】发言


