


Android自定义一个环形百分比图
项目中有需求,要实现一个环形百分比图,就像这样
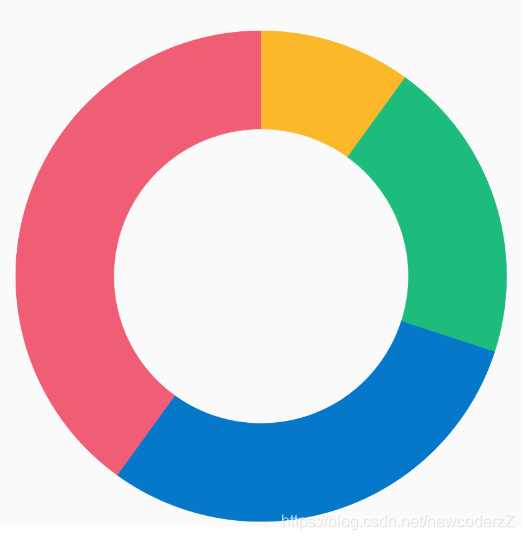
这还不简单,利用Android Canvas的drawArc方法,绘制每一段圆弧就好了,于是三下五除二就撸出了第一版代码。
class PieView1 @JvmOverloads constructor(
        context: Context, attrs: AttributeSet? = null, defStyleAttr: Int = 0
) : View(context, attrs, defStyleAttr) {

    companion object {
        const val DEFAULT_ANIMATION_DURATION = 500L
    }

    private var mArcWidth: Float = 0f
    private var mExtraWidth: Float = 0f
    private var mCircleRadius: Int = 0

    private lateinit var mArcPaint: Paint
    private lateinit var mArcRectF: RectF

    /**
     * 动画进度控制
     */
    private val mProgressAnimator: ObjectAnimator = ObjectAnimator.ofFloat(this, "progress", 0f, 1f)
            .apply {
                duration = DEFAULT_ANIMATION_DURATION
                this.interpolator = DecelerateInterpolator()
            }
    private var mProgress: Float = 1f

    private var mDataArray: FloatArray? = null
    private var mColorArray: IntArray = intArrayOf(R.color.j_yellow, R.color.green, R.color.f_link, R.color.wrong_red, R.color.brown_bright)

    init {
        init(context, attrs, defStyleAttr)
        initPaint()
    }

    private fun init(context: Context?, attrs: AttributeSet?, defStyleAttr: Int) {
        val ta: TypedArray = context!!.obtainStyledAttributes(attrs, R.styleable.PieView1, defStyleAttr, 0)
        mArcWidth = ta.getDimensionPixelOffset(R.styleable.PieView1_pv_arcWidth, context.resources.getDimensionPixelOffset(R.dimen.dp_20)).toFloat()
        mExtraWidth = ta.getDimensionPixelOffset(R.styleable.PieView1_pv_extraWidth, context.resources.getDimensionPixelOffset(R.dimen.dp_30)).toFloat()
        mCircleRadius = ta.getDimensionPixelOffset(R.styleable.PieView1_pv_circleRadius, context.resources.getDimensionPixelOffset(R.dimen.margin_100))
        ta.recycle()

        if (isInEditMode) {
            mDataArray = floatArrayOf(0.1f, 0.2f, 0.3f, 0.4f)
        }
    }

    private fun initPaint() {
        mArcPaint = Paint(Paint.ANTI_ALIAS_FLAG).apply {
            style = Paint.Style.STROKE
            strokeWidth = mArcWidth
            strokeCap = Paint.Cap.BUTT
        }

        //圆弧的外接矩形
        mArcRectF = RectF()
    }

    override fun onMeasure(widthMeasureSpec: Int, heightMeasureSpec: Int) {
        super.onMeasure(widthMeasureSpec, heightMeasureSpec)
        setMeasuredDimension(measureView(widthMeasureSpec), measureView(heightMeasureSpec))
    }

    private fun measureView(measureSpec: Int): Int {
        var result: Int
        val specMode = View.MeasureSpec.getMode(measureSpec)
        val specSize = View.MeasureSpec.getSize(measureSpec)
        if (specMode == View.MeasureSpec.EXACTLY) {
            result = specSize
        } else {
            result = mCircleRadius * 2
            if (specMode == View.MeasureSpec.AT_MOST) {
                result = Math.min(result, specSize)
            }
        }
        return result
    }

    override fun onDraw(canvas: Canvas) {
        super.onDraw(canvas)
        mArcRectF.set((width shr 1) - mCircleRadius + mArcWidth / 2,
                (height shr 1) - mCircleRadius + mArcWidth / 2,
                (width shr 1) + mCircleRadius - mArcWidth / 2,
                (height shr 1) + mCircleRadius - mArcWidth / 2)

        mDataArray?.let {
            //ensure start to draw on the top
            canvas.rotate(-90f, (width shr 1).toFloat(), (height shr 1).toFloat())

            var acc = 0f
            for ((index, e) in it.withIndex()) {
                val angle = e * 359.9f * mProgress
                mArcPaint.color = ContextCompat.getColor(context, mColorArray[index % mColorArray.size])
                canvas.drawArc(mArcRectF, acc, angle, false, mArcPaint)
                acc += angle
            }

            //rotate back
            canvas.rotate(90f, (width shr 1).toFloat(), (height shr 1).toFloat())
        }
    }


    /**
     * 转化数据
     */
    private fun transformData(data: FloatArray): FloatArray {
        val sum = data.sum()
        val array = FloatArray(data.size)
        data.forEachIndexed { index, d ->
            array[index] = d / sum
        }
        return array
    }

    fun setData(dataArr: FloatArray, animate: Boolean) {
        mDataArray = transformData(dataArr)
        if (!animate) {
            invalidate()
            return
        }

        startAnimation()
    }

    fun startAnimation() {
        mProgressAnimator.let {
            if (it.isRunning) {
                it.cancel()
            }

            it.start()
        }
    }

    /**
     * 动画进度控制
     */
    @Keep
    @Suppress("unused")
    private fun setProgress(progress: Float) {
        this.mProgress = progress
        invalidate()
    }
}
还顺手给View增加了一个动画,但是一运行,UI就不满意了。你这里怎么有一条缝隙?

我仔细看了一下,还真有!这什么情况?查了半天也没查出所以然来,只能归结为drawArc方法有问题了。既然缝隙问题没办法解决,就只能换一种实现方法了。这个时候就轮到强大的Path出场了。我就想到,干脆用Path把圆弧计算出来,然后只用Canvas.drawPath来进行绘制不就行了吗?而且Path完全由自己来控制,就不存在缝隙的情况了。
于是又辛辛苦苦撸出来第二套代码。
class RingView3 @JvmOverloads constructor(
        context: Context, attrs: AttributeSet? = null, defStyleAttr: Int = 0
) : View(context, attrs, defStyleAttr) {

    companion object {
        const val DEFAULT_ANIMATION_DURATION = 500L
        const val NO_ITEM_SELECT = -1
        const val DEFAULT_EXTRA_WIDTH = 20f
    }

    /**
     * 动画进度控制
     */
    private val mProgressAnimator: ObjectAnimator = ObjectAnimator.ofFloat(this, "progress", 0f, 1f)
            .apply {
                duration = DEFAULT_ANIMATION_DURATION
                this.interpolator = DecelerateInterpolator()
            }
    private var mProgress: Float = 1f
    /**
     * 圆环宽度
     */
    private var mArcWidth: Float = 0f

    /**
     * 选中状态下额外的宽度
     */
    private var mExtraWidth: Float = DEFAULT_EXTRA_WIDTH

    private var mOuterRadius: Float = 0f
    private var mInnerRadius = 0f

    /**
     * 图形中心点
     */
    private var mCenterX = 0f
    private var mCenterY = 0f

    /**
     * 绘制圆弧的画笔和Path
     */
    private lateinit var mArcPath: Path
    private lateinit var mArcPaint: Paint

    /**
     * 外圆的外接矩形
     */
    private lateinit var mOuterRect: RectF

    /**
     * 内圆的外接矩形
     */
    private lateinit var mInnerRect: RectF

    /**
     * 选中状态下的外接矩形
     */
    private lateinit var mBigRectF: RectF
    private lateinit var mSmallRectF: RectF

    /**
     * 点击区域检测辅助region
     */
    private var mRegion: ArrayList<Region>?= null
    private lateinit var clip: Region

    /**
     * 被选中的item id
     */
    private var onSelectId: Int = NO_ITEM_SELECT

    /**
     * 被选中触发的回调事件
     */
    private var onSelectListener: ((selectId: Int, index: Int) -> Unit)? = null

    private var mDataArray: FloatArray? = null
    private var mColorArray: IntArray = intArrayOf(R.color.j_yellow, R.color.green, R.color.f_link, R.color.wrong_red, R.color.brown_bright)

    init {
        init(context, attrs, defStyleAttr)
        initPaint()
    }

    private fun init(context: Context?, attrs: AttributeSet?, defStyleAttr: Int) {
        val ta: TypedArray = context!!.obtainStyledAttributes(attrs, R.styleable.RingView, defStyleAttr, 0)
        mArcWidth = ta.getDimensionPixelOffset(R.styleable.RingView_rv_arcWidth, context.resources.getDimensionPixelOffset(R.dimen.dp_20)).toFloat()
        mExtraWidth = ta.getDimensionPixelOffset(R.styleable.RingView_rv_extraWidth, DEFAULT_EXTRA_WIDTH.toInt()).toFloat()
        mOuterRadius = ta.getDimensionPixelOffset(R.styleable.RingView_rv_circleRadius, context.resources.getDimensionPixelOffset(R.dimen.margin_100)).toFloat()
        setAnimatorDuration(ta.getInteger(R.styleable.RingView_rv_duration, DEFAULT_ANIMATION_DURATION.toInt()).toLong())
        mInnerRadius = mOuterRadius - mArcWidth

        if (isInEditMode) {
            mDataArray = floatArrayOf(0.1f, 0.2f, 0.3f, 0.4f)
            onSelectId = 0
        }

        if (mInnerRadius <= 0) {
            throw IllegalArgumentException("circleRadius must set bigger than arcWidth!!!")
        }

        if (mInnerRadius < mExtraWidth) {
            throw IllegalArgumentException("circleRadius suggest set bigger than sum of arcWidth and extraWidth)!!!")
        }
        ta.recycle()
    }

    private fun initPaint() {
        mArcPaint = Paint(Paint.ANTI_ALIAS_FLAG).apply {
            style = Paint.Style.FILL_AND_STROKE
        }

        mOuterRect = RectF()

        mInnerRect = RectF()

        mBigRectF = RectF()

        mSmallRectF = RectF()

        mArcPath = Path()

        clip = Region()
    }

    override fun onMeasure(widthMeasureSpec: Int, heightMeasureSpec: Int) {
        super.onMeasure(widthMeasureSpec, heightMeasureSpec)
        val size = ((mOuterRadius + mExtraWidth) * 2).toInt()
        setMeasuredDimension(measureView(widthMeasureSpec, size + paddingLeft + paddingRight),
                measureView(heightMeasureSpec, size + paddingTop + paddingBottom))
    }

    private fun measureView(measureSpec: Int, defaultSize: Int): Int {
        var result: Int
        val specMode = MeasureSpec.getMode(measureSpec)
        val specSize = MeasureSpec.getSize(measureSpec)
        if (specMode == MeasureSpec.EXACTLY) {
            result = specSize
        } else {
            result = defaultSize
            if (specMode == MeasureSpec.AT_MOST) {
                result = Math.min(result, specSize)
            }
        }
        return result
    }

    override fun onSizeChanged(w: Int, h: Int, oldw: Int, oldh: Int) {
        super.onSizeChanged(w, h, oldw, oldh)
        mOuterRadius = (Math.min(w - paddingLeft - paddingRight, h - paddingTop - paddingBottom) shr 1).toFloat() - mExtraWidth
        mCenterX = (w shr 1).toFloat()
        mCenterY = (h shr 1).toFloat()
        clip.set(-w, -h, w, h)

        setRectAndRadii()
    }

    private fun setRectAndRadii() {
        mInnerRadius = mOuterRadius - mArcWidth

        mOuterRect.set(-mOuterRadius, -mOuterRadius, mOuterRadius, mOuterRadius)

        mInnerRect.set(-mInnerRadius, -mInnerRadius, mInnerRadius, mInnerRadius)

        mBigRectF.set(-mOuterRadius - mExtraWidth,
                -mOuterRadius - mExtraWidth,
                mOuterRadius + mExtraWidth,
                mOuterRadius + mExtraWidth)

        mSmallRectF.set(-mInnerRadius + mExtraWidth,
                -mInnerRadius + mExtraWidth,
                mInnerRadius - mExtraWidth,
                mInnerRadius - mExtraWidth)
    }

    override fun onDraw(canvas: Canvas) {
        super.onDraw(canvas)

        canvas.translate(mCenterX, mCenterY)
        mDataArray?.let {
            var accumulateDegree = -90f
            for ((index, e) in it.withIndex()) {
                //将数据从百分比转化为度数(不是弧度!)
                val sweepAngle = e * 359.9f * mProgress
                mArcPaint.color = ContextCompat.getColor(context, mColorArray[index % mColorArray.size])

                resetArcPath(accumulateDegree, sweepAngle, index == onSelectId)
                mRegion?.get(index)?.setPath(mArcPath, clip)
                canvas.drawPath(mArcPath, mArcPaint)

                accumulateDegree += sweepAngle
            }
        }

        canvas.translate(-mCenterX, -mCenterY)
    }

    /**
     * @param degree 圆弧的度数
     * @param selected 是否被选中
     */
    private fun resetArcPath(startAngle: Float, degree: Float, selected: Boolean) {
        //保证从顶部开始绘制,因为Path的0度默认是x轴,所以设置开始角度为-90度,从上面开始绘制
        mArcPath.reset()
//        val startAngle = -90f
        //如果是选中的item 则展示选中状态
        if (selected) {
            /**
             * Path.arcTo 妙用
             * Append the specified arc to the path as a new contour. If the start of
             * the path is different from the path's current last point, then an
             * automatic lineTo() is added to connect the current contour to the
             * start of the arc. However, if the path is empty, then we call moveTo()
             * with the first point of the arc.
             *
             */
            mArcPath.arcTo(mBigRectF, startAngle, degree, false)
            mArcPath.arcTo(mSmallRectF, startAngle + degree, -degree, false)
        } else {
            mArcPath.arcTo(mOuterRect, startAngle, degree, false)
            mArcPath.arcTo(mInnerRect, startAngle + degree, -degree, false)
        }
        mArcPath.close()
    }

    override fun onTouchEvent(event: MotionEvent): Boolean {
        if (MotionEvent.ACTION_DOWN == event.action) {
            val x = event.x
            val y = event.y
            run breaking@{
                mRegion?.forEachIndexed { index, region ->
                    if (region.contains((x - mCenterX).toInt(), (y - mCenterY).toInt())) {
                        onSelectId = if (onSelectId == index) {
                            NO_ITEM_SELECT
                        } else {
                            index
                        }

                        invalidate()
                        onSelectListener?.invoke(onSelectId, index)
                        return@breaking
                    }
                }
            }
        }

        return super.onTouchEvent(event)
    }

    /**
     * 设置颜色数组
     */
    @Suppress("unused")
    fun setColorArray(colors: IntArray?) {
        colors?.let {
            this.mColorArray = it
        }
    }

    fun setOnSelectListener(listener: (selectId: Int, index: Int) -> Unit) {
        this.onSelectListener = listener
    }

    fun setArcWidth(arcWidth: Float) {
        this.mArcWidth = arcWidth
        setRectAndRadii()
        postInvalidate()
    }

    fun setExtraWidth(extraWidth: Float) {
        this.mExtraWidth = extraWidth
        setRectAndRadii()
        postInvalidate()
    }

    fun setAnimatorDuration(duration: Long) {
        mProgressAnimator.duration = duration
    }

    @Suppress("unused")
    fun setAnimatorInterpolator(interpolator: TimeInterpolator) {
        mProgressAnimator.interpolator = interpolator
    }

    fun setData(list: List<Float>?, animate: Boolean = true) {
        setData(list?.toFloatArray(), animate)
    }

    /**
     * 动画进度控制
     */
    @Keep
    @Suppress("unused")
    private fun setProgress(progress: Float) {
        this.mProgress = progress
        invalidate()
    }

    /**
     * @param dataArr 数据源
     * @param animate 是否展示动画
     */
    fun setData(dataArr: FloatArray?, animate: Boolean = true) {
        dataArr?.let {
            onSelectId = NO_ITEM_SELECT
            mDataArray = transformData(dataArr)

            if (!animate) {
                invalidate()
                return
            }

            startAnimation()
        }
    }

    fun startAnimation() {
        onSelectId = NO_ITEM_SELECT

        mProgressAnimator.let {
            if (it.isRunning) {
                it.cancel()
            }

            it.start()
        }
    }

    /**
     * 转化数据,并且初始化辅助Region数组
     */
    private fun transformData(data: FloatArray): FloatArray {
        val sum = data.sum()
        val array = FloatArray(data.size)
        data.forEachIndexed { index, d ->
            array[index] = d / sum
            mRegion?.add(Region())
        }
        return array
    }


    override fun onSaveInstanceState(): Parcelable? {
        val data = Bundle()
        data.putParcelable("superData", super.onSaveInstanceState())
        data.putFloatArray("data_array", mDataArray)
        return data
    }

    override fun onRestoreInstanceState(state: Parcelable) {
        val data = state as Bundle
        val superData = data.getParcelable<Parcelable>("superData")
        super.onRestoreInstanceState(superData)

        mDataArray = data.getFloatArray("data_array")
        initPaint()
        startAnimation()
    }
}
由于UI中间又加了许多需求,所以第二套代码实现的功能比第一套多了一些,比如点击选中某块圆弧要有强调突出效果,像下面这样。

然后我就巧妙的利用了Region,将用于绘制的Path转化成了一个个Region记录下来,然后通过判断点击点坐标落在了哪个Region,就可以判断出点击了那个圆弧,也算是巧妙的解决了不规则View的点击事件问题。(当然这里也可以用圆的一些知识来计算点击点的位于哪个圆弧,但是计算还是相对复杂一些。而且我这里已经有现成的Path了,可以很方便的得到圆弧的Region,因此这里选着使用Region来解决点击事件问题)。
并且注意我这一段代码
    if (isInEditMode) {
         mDataArray = floatArrayOf(0.1f, 0.2f, 0.3f, 0.4f)
        onSelectId = 0
    }
这里是一个自定义View的小技巧,有时候我们自定义View,因为没有数据,很难在xml文件中看到View的实际表现效果,我们就可以利用这样的方式,设置一些初始数据,方便在xml中看到实际效果,并且if里面的代码块在运行时就会被忽略,不会影响到实际使用。
最后在给大家讲解一个Path.arcTo方法的妙用。
    private fun resetArcPath(startAngle: Float, degree: Float, selected: Boolean) {
        //保证从顶部开始绘制,因为Path的0度默认是x轴,所以设置开始角度为-90度,从上面开始绘制
        mArcPath.reset()
        //如果是选中的item 则展示选中状态
        if (selected) {
            /**
             * Path.arcTo 妙用
             * Append the specified arc to the path as a new contour. If the start of
             * the path is different from the path's current last point, then an
             * automatic lineTo() is added to connect the current contour to the
             * start of the arc. However, if the path is empty, then we call moveTo()
             * with the first point of the arc.
             *
             */
            mArcPath.arcTo(mBigRectF, startAngle, degree, false)
            mArcPath.arcTo(mSmallRectF, startAngle + degree, -degree, false)
        } else {
            mArcPath.arcTo(mOuterRect, startAngle, degree, false)
            mArcPath.arcTo(mInnerRect, startAngle + degree, -degree, false)
        }
        mArcPath.close()
    }
本来绘制一段圆弧需要起至少4个数据,绘制内圆起点坐标,然后绘制一条线段到外圆的第二个点坐标,然后绘制一段圆弧,需要角度数据,然后再绘制一条线段到内圆,需要计算第三个点的坐标,然后在反向绘制一段圆弧。
就像下面代码这样
    ...
        mArcPath.moveTo(calculateX(mCenterX, mInnerRadius, startDegree),
                calculateY(mCenterY, mInnerRadius, startDegree))
        mArcPath.lineTo(calculateX(mCenterX, mOuterRadius, startDegree),
                    calculateY(mCenterY, mOuterRadius, startDegree))
        mArcPath.arcTo(mOuterRect, startDegree, degree, false)
        mArcPath.lineTo(calculateX(mCenterX, mInnerRadius, endDegree),
                    calculateY(mCenterY, mInnerRadius, endDegree))
        mArcPath.arcTo(mInnerRect, endDegree, -degree, false)
    ...
    private fun calculateX(x: Float, r: Float, degree: Float): Float {
        return (x + r * Math.cos(Math.toRadians(degree.toDouble()))).toFloat()
    }
但是看我们实现代码并没有把Path先是moveTo绘制起点坐标,然后又是绘制线段又是绘制圆弧的,而是简简单单的绘制了两条圆弧,省去了巨量的计算。但是最终效果是一模一样的。这是为什么?其实可以从Path.arcTo方法的解释中找到答案。
Path.arcTo方法解释中说到,如果Path是空的,就会先调用moveTo方法把绘制起点移动到圆弧的起点,于是我们在绘制第一个圆弧(外弧)的时候就不要调用moveTo方法了。如果Path不为空,则调用lineTo方法,于是我们在绘制第二个圆弧(内弧)的时候,也不需要我们再调用lineTo方法了,最后调用Path.close帮我们闭合Path,于是整个圆弧就绘制出来了。相比与下面的代码,我们省去了大量的计算!


 338
338


 被折叠的 条评论
为什么被折叠?
被折叠的 条评论
为什么被折叠?
 到【灌水乐园】发言


