


Listview总结
- BaseAdapter 传统四个方法及优化:
@Override
    public int getCount() {
        // TODO Auto-generated method stub
        return mDatas.size();//返回listview一共有多少个item
    }

    @Override
    public Object getItem(int arg0) {
        // TODO Auto-generated method stub
        return mDatas.get(arg0);//返回当前的显示的数据
    }

    @Override
    public long getItemId(int arg0) {
        // TODO Auto-generated method stub
        return arg0;//返回当前显示的位置
    }

    @Override
    public View getView(int arg0, View convertView, ViewGroup parent) {
        // TODO Auto-generated method stub
        ViewHolder holder= null;
        if (convertView==null) {
            convertView=miInflater.inflate(R.layout.item_listview,parent,false);
            holder= new ViewHolder();
            holder.mTitle=(TextView) convertView.findViewById(R.id.id_title);
            holder.mDesc=(TextView) convertView.findViewById(R.id.id_desc);
            holder.mTime=(TextView) convertView.findViewById(R.id.id_time);
            holder.mphone=(TextView) convertView.findViewById(R.id.id_phone);

            convertView.setTag(holder);
            }else {
                holder=(ViewHolder) convertView.getTag();
            }
            Bean bean=mDatas.get(arg0);
            holder.mTitle.setText(bean.getTitle());
            holder.mDesc.setText(bean.getDesc());
            holder.mTime.setText(bean.getTime());
            holder.mphone.setText(bean.getPhone());
        return convertView;//返回每一个item项所显示的view
之前比较迷惑setTag(),getTag()的用处:
首先我们要知道setTag方法是干什么的,SDK解释为
Tags
Unlike IDs, tags are not used to identify views. Tags are essentially an extra piece of information that can be associated with a view. They are most often used as a convenience to store data related to views in the views themselves rather than by putting them in a separate structure.
Tag不像ID是用标示view的。Tag从本质上来讲是就是相关联的view的额外的信息。它们经常用来存储一些view的数据,这样做非常方便而不用存入另外的单独结构。
首先我们要知道setTag方法是干什么的,他是给View对象的一个标签,标签可以是任何内容,我们这里把他设置成了一个对象,因为我们是把item_listview.xml的元素抽象出来成为一个类ViewHolder,用了setTag,这个标签就是ViewHolder实例化后对象的一个属性。我们之后对于ViewHolder实例化的对象holder的操作,都会因为java的引用机制而一直存活并改变convertView的内容,而不是每次都是去new一个。我们就这样达到的重用——我希望我说清楚了。
- Listview 下拉刷新
1.第一步:添加提示界面,即Listview的header头布局
2.第二步:监听Listview滚动事件,即OnScollListener()事件
3.第三步:监听Listview的OnTouch()事件
4.第四步 : 加载最新数据
添加布局header_layout.xml
<?xml version="1.0" encoding="utf-8"?>
<LinearLayout xmlns:android="http://schemas.android.com/apk/res/android"
android:layout_width="match_parent"
android:layout_height="match_parent"
android:orientation="vertical" >
<RelativeLayout
android:layout_width="match_parent"
android:layout_height="wrap_content"
android:paddingTop="10dp"
android:paddingBottom="10dp">
<LinearLayout
android:layout_width="wrap_content"
android:layout_height="wrap_content"
android:orientation="vertical"
android:layout_centerInParent="true"
android:id="@+id/layout"
android:gravity="center">
<TextView
android:layout_width="wrap_content"
android:layout_height="wrap_content"
android:id="@+id/tip"
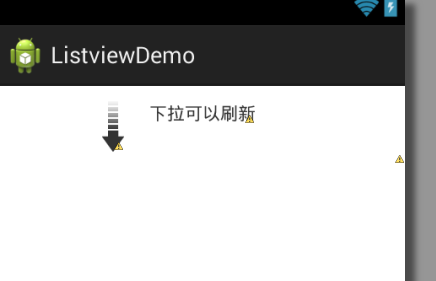
android:text="下拉可以刷新"/>
<TextView
android:layout_width="wrap_content"
android:layout_height="wrap_content"
android:id="@+id/lastupdate_time"
/>
</LinearLayout>
<ImageView
android:layout_width="wrap_content"
android:layout_height="wrap_content"
android:src="@drawable/pull_to_refresh_arrow"
android:id="@+id/arrow"
android:layout_toLeftOf="@id/layout"
android:layout_marginRight="20dp"/>
<ProgressBar
android:layout_width="wrap_content"
android:layout_height="wrap_content"
android:id="@+id/progress"
android:visibility="gone"
android:layout_marginRight="20dp"
style="?android:attr/progressBarStyleSmall"/>
</RelativeLayout>
</LinearLayout>效果图
然后自定义一个ReFlashListView 类继承listview,重写三个构造方法,初始化header_layout.xml
public class ReFlashListView extends ListView{
    View header;//顶部布局文件
    int headerHeight;//顶部布局文件的高
    public ReFlashListView(Context context, AttributeSet attrs, int defStyle) {
        super(context, attrs, defStyle);
        // TODO Auto-generated constructor stub
        initView(context);
    }

    public ReFlashListView(Context context, AttributeSet attrs) {
        super(context, attrs,0);
        // TODO Auto-generated constructor stub
        initView(context);
    }

    public ReFlashListView(Context context) {
        this(context,null);
        // TODO Auto-generated constructor stub
        initView(context);
    }

    /**
     * 初始化,添加顶部文件到listview
     * @param context
     */
    private void initView(Context context){
        LayoutInflater inflater = LayoutInflater.from(context);
        header=inflater.inflate(R.layout.header_layout, null);
        this.addHeaderView(header);


 1万+
1万+

 被折叠的 条评论
为什么被折叠?
被折叠的 条评论
为什么被折叠?
 到【灌水乐园】发言


