前言
雷达扫描是一个比较有科技感的东西,对于科幻迷来说,科幻电影里基本都能看到的画面,一个大大的屏幕上,可以看到雷达扫描的绿幕效果。
下面我们使用三种方式来实现这样的雷达效果。
项目说明
- 工具版本:DevEco Studio 3.0 Release
- SDK版本:3.1.1.2(API Version 8 Release)
- 主要组件:canvas, Row, Image
效果
-
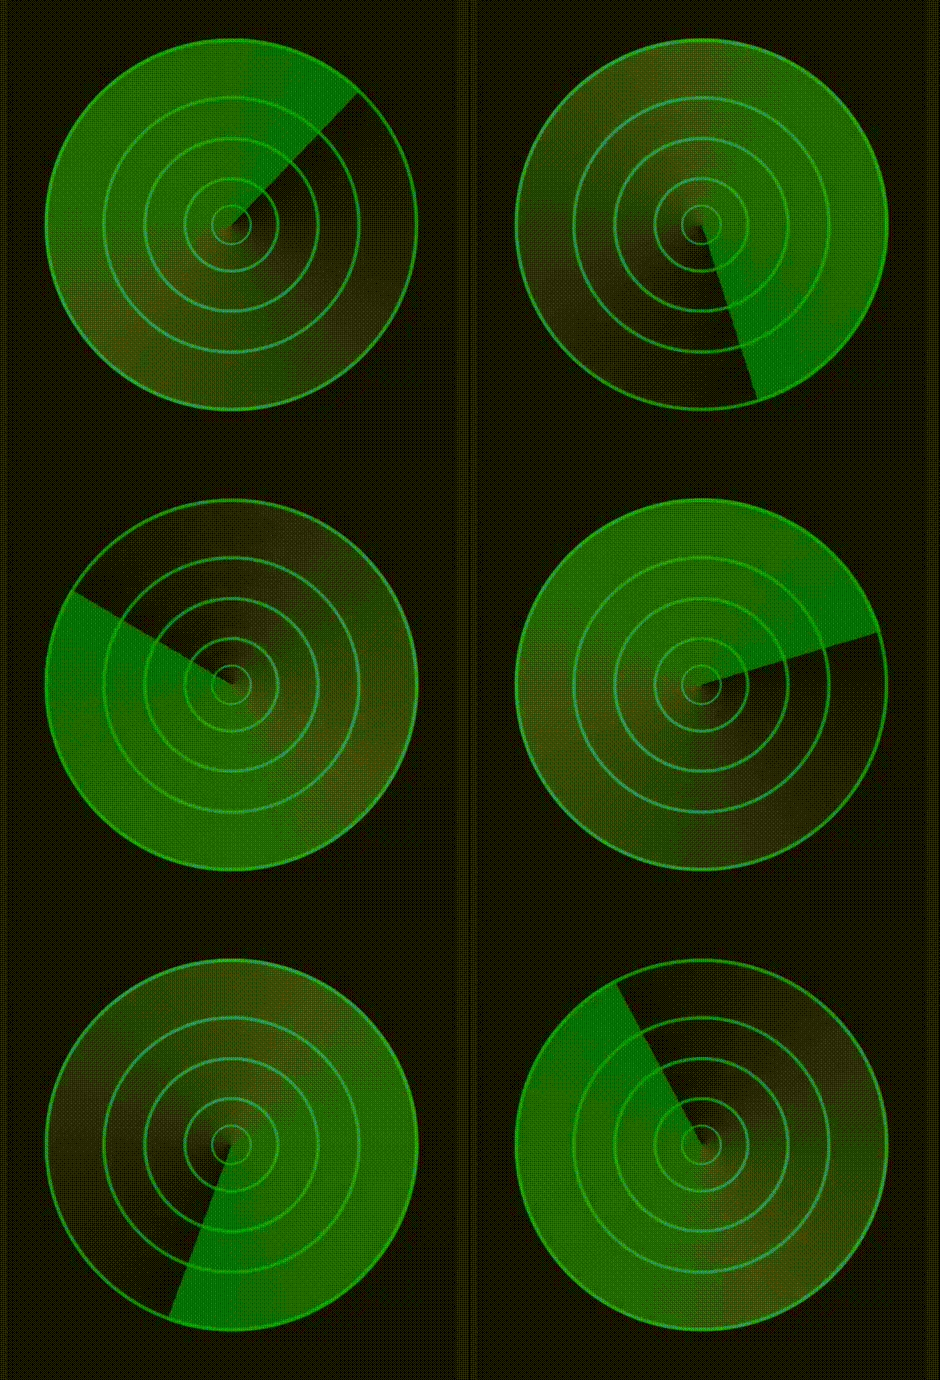
使用Image图片组件方式实现

-
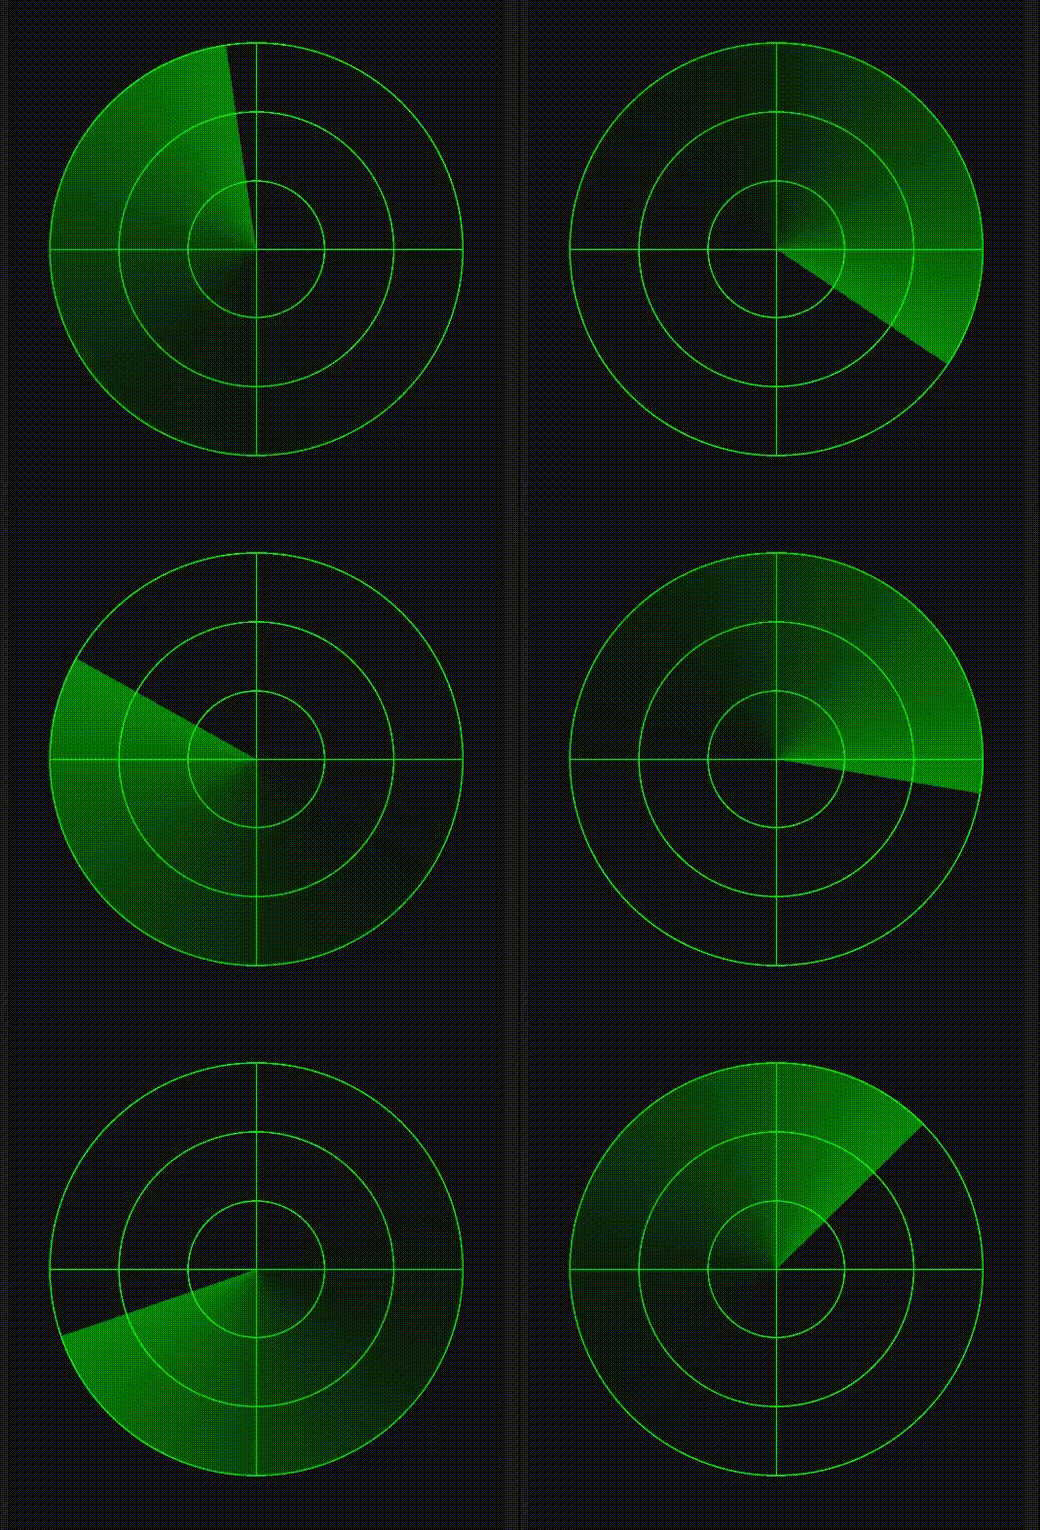
使用canvas组件实现

-
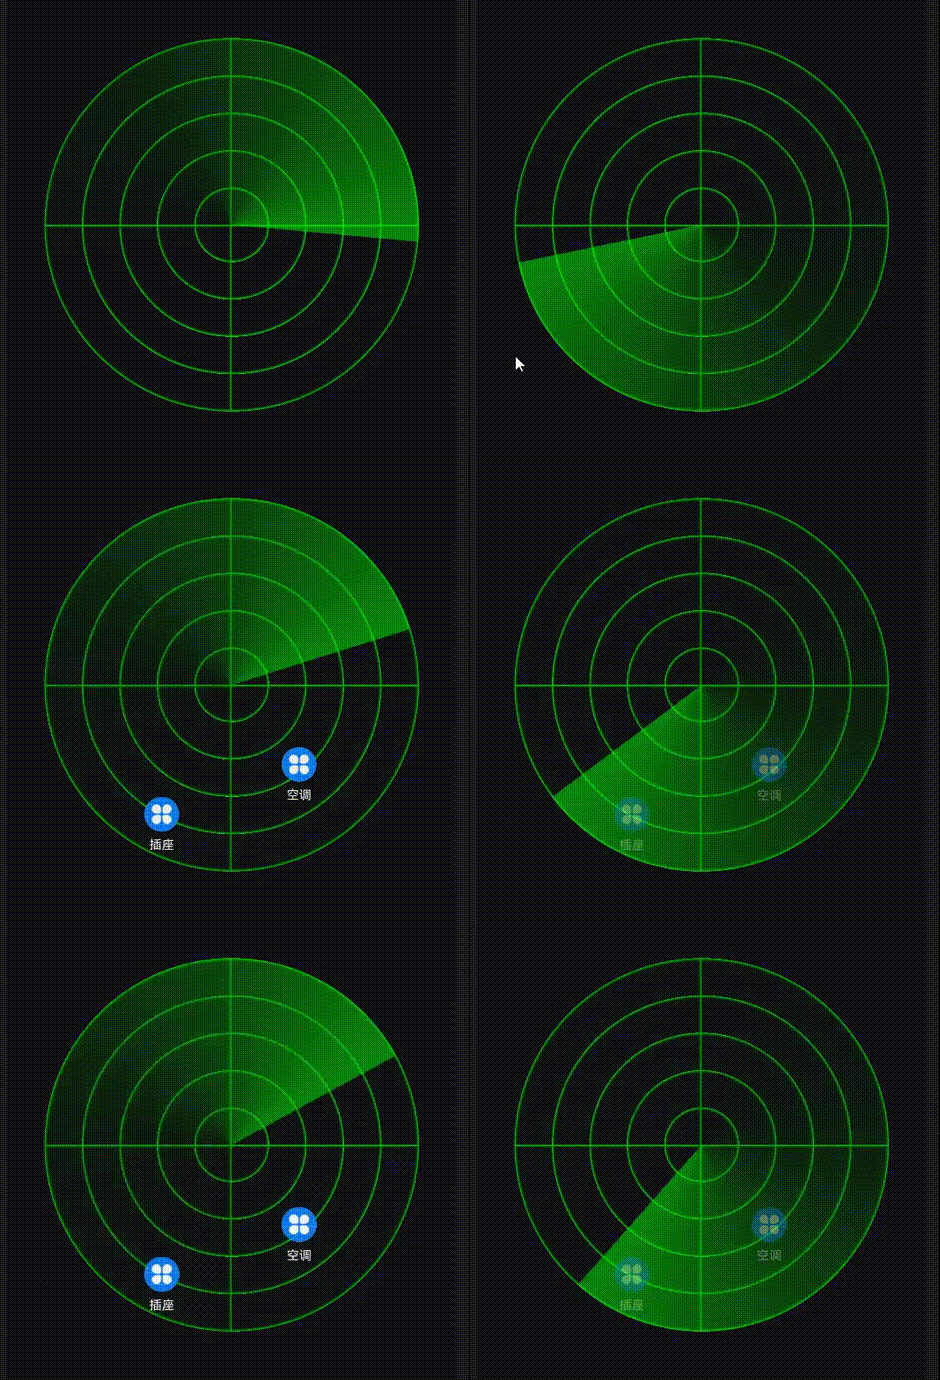
使用Row组件的渐变属性实现

实现过程
需要注意,一个页面里只能有一个@Entry修饰符,所以,下面三种方法在预览的时候,需要注意注释只保留一个@Entry
1. 使用Image方法实现
使用Image组件的方法是最简单的,直接制作两张图片,一张底图,一张扫描的图


将两张图片通过叠加,将扫描的图片通过圆心宣旋转即可,下面使用代码来实现
@Entry
@Component
struct RadarImg {
  @State angle:number = 0;
  aboutToAppear(){
    setTimeout(()=>{
      this.angle = 360
    },200)
  }
  build(){
    Row(){
      Stack(){
        Image($r("app.media.radar_grid"))
          .width(300)
          .height(300)
        Image($r('app.media.radar_sector'))
          .width(300)
          .height(300)
          .rotate({
            z: 1,
            angle: this.angle
          })
          .animation({
            duration: 2000,
            curve:Curve.Linear,
            iterations: -1,
          })
      }
    }
    .justifyContent(FlexAlign.Center)
    .backgroundColor(0x111111)
    .width('100%')
    .height('100%')
  }
}
整体比较简单,旋转主要用到了animation属性,这些在官网API文档可以查看。虽然使用Image组件实现比较简单,但是却是可以实现一些复杂的雷达UI。
2. 使用canvas实现
使用canvas实现的需要用到两个组件,第一个是Canvas组件,用来绘制底图网格,第二个是Row组件,使用角渐变属性实现旋转的扇形。
这里为什么不都使用canvas实现呢,找了一圈,canvas只有线性渐变和径向渐变,切没有角度渐变属性,所以,为了方便就用了row来实现吧。
下面直接上代码。
Row的渐变方式在下一个方法讲解,最终都还是使用animation属性动画实现扇形的旋转效果
@Entry
@Component
struct RadarCanvas {
  private settings: RenderingContextSettings = new RenderingContextSettings(true);
  private ctx: CanvasRenderingContext2D = new CanvasRenderingContext2D(this.settings)
  @State angle:number = 0
  // 绘制网格
  drawGrid = (): void => {
    let ctx = this.ctx;
    ctx.lineWidth = 1
    ctx.strokeStyle = 'green'

    // arr数组是需要绘制的底图圈圈
    let arr:Array<number> = [150, 100, 50]
    for(let i = 0; i < arr.length; i++){
      ctx.beginPath()
      ctx.arc(150, 150, arr[i] - 0.5, 0, 2 * Math.PI)
      ctx.stroke()
    }

    // 绘制十字架
    ctx.beginPath()
    ctx.moveTo(0,150)
    ctx.lineTo(300,150)
    ctx.stroke()

    ctx.beginPath()
    ctx.moveTo(150,0)
    ctx.lineTo(150,300)
    ctx.stroke()
  }

  aboutToAppear(){
    setTimeout(()=>{
      this.angle = 360
    },200)
  }
  build(){
    Row(){
      Stack(){
        Canvas(this.ctx)
          .onReady(()=>{
            this.drawGrid()
          })
          .width(300)
          .height(300)
        Row()
          .width(300)
          .height(300)
          .borderRadius(150)
          .sweepGradient({
            center: [150,150],
            start: 0,
            end: 359,
            colors: [
              ['rgba(0,0,0,0)',0],
              ['rgba(0,0,0,0)',0.4],
              ['rgba(0,255,0,0.5)',1],
            ]
          })
          .rotate({
            z: 1,
            angle: this.angle
          })
          .animation({
            duration: 2000,
            iterations: -1,
            curve: Curve.Linear
          })
      }
    }
      .justifyContent(FlexAlign.Center)
      .backgroundColor(0x111111)
      .width('100%')
      .height('100%')
  }
}
3. 使用Row组件实现
使用Row组件实现的方法稍微复杂一些,这里用到了4个Row组件,其实对于前端童鞋来说,这里可能会比较好里一些,其实就是类似通过div和css来实现的,row组件是div,其属性是css样式。
废话不多说,直接上代码开搞
3.1 实现圆圈圈
首先使用径向渐变属性(radialGradient)来实现底部圈圈的效果
radialGradient属性有几个需要注意的值,radius是渐变的半径,这里使用30。
渐变颜色colors组用了三个数据,可以看出,前两个其实是透明度为0的。
可以理解为
- 第一个渐变颜色到第二个渐变颜色用了90%
- 第二个渐变颜色到第三个渐变颜色,用了10%(100%-90%)
- 也就是说在渐变半径为30的情况下,有90%是透明的,只有10%是透明到green颜色的,这样得到了一个圈圈
- 然后又设置了repeating属性(重复着色)为true
- 所以在半径为150的圆内,可以设置 150 / 3 = 5个圆圈圈
Row()
.width(300)
.height(300)
.borderRadius(150)
.radialGradient({
    center: [150,150],
    radius: 30,
    colors: [
      ['rgba(0,0,0,0)', 0],
      ['rgba(0,0,0,0)', 0.9],
      ['green', 1],
    ],
    repeating: true,
})
我们看看效果

3.2 实现十字架
实现十字架使用了两个Row组件,使用线性渐变属性(linearGradient)分别绘制了一横一竖的效果。
可以看到颜色组colors使用了5个颜色来实现,1,2,4,5的颜色都是透明的
- 第一个颜色到第二个颜色都是透明的,渐变范围是0到49%,
- 第二个颜色到第三个颜色渐变范围是50% - 49% = 1%,也就是在其50%(中间)的地方绘制了一个1%的green线条
- 第三个颜色到第四个颜色不变
- 第三个到第五个颜色也是透明,渐变范围也是50%
上面绘制好之后,我们通过angle属性将线条旋转90度得到一个十字架
Row()
  .width(300)
  .height(300)
  .borderRadius(150)
  .linearGradient({
    angle: 0,
    colors: [
      ['rgba(0,0,0,0)', 0],
      ['rgba(0,0,0,0)',0.49],
      ['green',0.5],
      ['rgba(0,0,0,0)',0.5],
      ['rgba(0,0,0,0)',1]
    ]
  })
Row()
  .width(300)
  .height(300)
  .borderRadius(150)
  .linearGradient({
    angle: 90,
    colors: [
      ['rgba(0,0,0,0)', 0],
      ['rgba(0,0,0,0)',0.49],
      ['green',0.5],
      ['rgba(0,0,0,0)',0.5],
      ['rgba(0,0,0,0)',1]
    ]
  })
来看看效果

3.3 实现旋转扇形
扇形也是用到Row组件,其角度渐变属性(sweepGradient)来实现的。
Row()
  .width(300)
  .height(300)
  .borderRadius(150)
  .sweepGradient({
    center: [150,150],
    start: 0,
    end: 359,
    colors: [
      ['rgba(0,0,0,0)',0],
      ['rgba(0,0,0,0)',this.flag],
      ['rgba(0,255,0,0.5)',1],
    ]
  })
来看看效果

最后设置rotate旋转属性,设置旋转轴为z轴,角度angle为动态更新,这样animation动画属性才会更新。
最终代码
扇形的代码
Row()
  .width(300)
  .height(300)
  .borderRadius(150)
  .sweepGradient({
    center: [150,150],
    start: 0,
    end: 359,
    colors: [
      ['rgba(0,0,0,0)',0],
      ['rgba(0,0,0,0)',this.flag],
      ['rgba(0,255,0,0.5)',1],
    ]
  })
  .rotate({
    z: 1,
    angle: this.angle
  })
  .animation({
    duration: 2000,
    iterations: -1,
    curve: Curve.Linear
  })
这里添加一个扫描周边设备的效果,动态设置了一个数据源,通过ForEach来动态渲染
ForEach(this.scanData,(item: any) => {
  Column(){
    Image($r('app.media.icon'))
      .width(28)
      .height(28)
      .backgroundColor('#fff')
      .borderRadius(19)
    Text(item.name)
      .fontColor('#fff')
      .margin({top: 5})
      .fontSize(10)
  }
  .alignItems(HorizontalAlign.Center)
  .position({x: item.x, y: item.y})
  .scale({x: this.w, y: this.h})
  .animation({
    duration: 1000,
    iterations: 1,
    curve: Curve.Friction
  })
  .opacity(this.opt)
})
最终的代码
// 雷达扫描组件
@Entry
@Component
struct Radar {
  @State angle:number = 0;
  @State scanData: any = []
  @State w:number = 0;
  @State h:number = 0;
  @State opt:number = 1
  @State flag:number = 0.4
  aboutToAppear(){
    setTimeout(()=>{
      this.angle = 360
    },200)
    setTimeout(()=>{
      animateTo({
        duration: 1000, // 动画时长
        curve: Curve.Linear, // 动画曲线
        iterations: -1, // 播放次数
        playMode: PlayMode.AlternateReverse, // 动画模式
        onFinish: () => {
          console.info('play end')
        }
      }, () => {
        this.opt = 0.3
      })
    },2000)
    setTimeout(()=>{
      this.scanData = [
        {
          id: 1,
          x: 190,
          y: 200,
          name: '空调'
        },
        {
          id: 1,
          x: 80,
          y: 240,
          name: '插座'
        },
      ]
      setTimeout(()=>{
        this.w = 1;
        this.h = 1;
      },200)
    },1000)

  }
  build(){
    Row(){
      Stack(){
        Row()
          .width(300)
          .height(300)
          .borderRadius(150)
          .radialGradient({
            center: [150,150],
            radius: 30,
            colors: [
              ['rgba(0,0,0,0)', 0],
              ['rgba(0,0,0,0)', 0.9],
              ['green', 1],
            ],
            repeating: true,
          })
        Row()
          .width(300)
          .height(300)
          .borderRadius(150)
          .linearGradient({
            angle: 0,
            colors: [
              ['rgba(0,0,0,0)', 0],
              ['rgba(0,0,0,0)',0.49],
              ['green',0.5],
              ['rgba(0,0,0,0)',0.5],
              ['rgba(0,0,0,0)',1]
            ]
          })
        Row()
          .width(300)
          .height(300)
          .borderRadius(150)
          .linearGradient({
            angle: 90,
            colors: [
              ['rgba(0,0,0,0)', 0],
              ['rgba(0,0,0,0)',0.49],
              ['green',0.5],
              ['rgba(0,0,0,0)',0.5],
              ['rgba(0,0,0,0)',1]
            ]
          })
        Row()
          .width(300)
          .height(300)
          .borderRadius(150)
          .sweepGradient({
            center: [150,150],
            start: 0,
            end: 359,
            colors: [
              ['rgba(0,0,0,0)',0],
              ['rgba(0,0,0,0)',this.flag],
              ['rgba(0,255,0,0.5)',1],
            ]
          })
          .rotate({
            z: 1,
            angle: this.angle
          })
          .animation({
            duration: 2000,
            iterations: -1,
            curve: Curve.Linear
          })
        ForEach(this.scanData,(item: any) => {
          Column(){
            Image($r('app.media.icon'))
              .width(28)
              .height(28)
              .backgroundColor('#fff')
              .borderRadius(19)
            Text(item.name)
              .fontColor('#fff')
              .margin({top: 5})
              .fontSize(10)
          }
          .alignItems(HorizontalAlign.Center)
          .position({x: item.x, y: item.y})
          .scale({x: this.w, y: this.h})
          .animation({
            duration: 1000,
            iterations: 1,
            curve: Curve.Friction
          })
          .opacity(this.opt)
        })
      }
      .width(300)
      .height(300)
    }
    .justifyContent(FlexAlign.Center)
    .width('100%')
    .height('100%')
    .backgroundColor(0x111111)
  }
}
来看看最终完整的效果

总结
通过这个雷达demo,特别是第三种方法,可以学到了颜色渐变属性中的三种渐变,线性渐变,径向渐变,和角度渐变。也可以学习属性动画的实现。
写在最后
●如果你觉得这篇内容对你还蛮有帮助,我想邀请你帮我两个小忙:
●点赞,转发,有你们的 『点赞和评论』,才是我创造的动力。
●关注小编,同时可以期待后续文章ing🚀,不定期分享原创知识。


 617
617

 被折叠的 条评论
为什么被折叠?


