一.package com.example.android.apis.content;
1.ReadAsset:从asset目录里读出
2.ResourcesSample:在values的strings.xml里取得string,
以及在非activity里取得方法。
Resources res = context.getResources();
CharSequence cs = res.getText(R.string.styled_text);
3.StyledText:在TextView里直接setText带有styled的字符串<string name="styled_text">Plain, <b>bold</b>, <i>italic</i>, <b><i>bold-italic</i></b></string>
二.package com.example.android.apis.graphics;
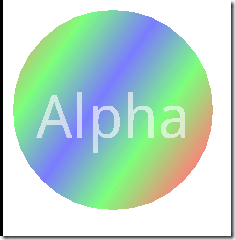
1.AlphaBitmap:应用Paint p.setAntiAlias(true);//抗锯齿,如果没有调用这个方法,写上去的字不饱满,不美观,看地不太清楚
下图为p.setAntiAlias(false)效果
下图为p.setAntiAlias(true)效果
1.1 p.setAlpha(0x80);//透明度
1.2 p.setXfermode(new PorterDuffXfermode(PorterDuff.Mode.SRC));//14例中FingerPaint:手写板有这个用法
1.3 p.setTextSize(60);//设置字体大小
1.4 p.setTextAlign(Paint.Align.CENTER);//基准线
1.5 InputStream is = context.getResources().openRawResource(//从drawable里的图片转到bitmap
R.drawable.app_sample_code);
mBitmap = BitmapFactory.decodeStream(is);
1.6 mShader = new LinearGradient(0, 0, 100, 70, new int[] { Color.RED,//渐变
Color.GREEN, Color.BLUE }, null, Shader.TileMode.MIRROR);
p.setShader(mShader);
2.AnimateDrawables 把一张照片动起来,类似跑马灯的效果,有三个类AnimateDrawables ,AnimateDrawable,ProxyDrawable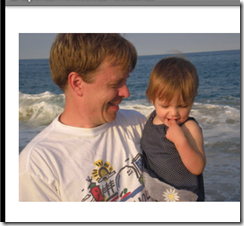
2.1 Drawable dr = context.getResources().getDrawable(R.drawable.beach);//获得Drawable
dr.setBounds(0, 0, dr.getIntrinsicWidth(), dr.getIntrinsicHeight());//设置图的边界,有放大缩小的作用 这是设置为100,100的边界效果
2.2 Animation an = new TranslateAnimation(0, 100, 0, 200);//从0,0点到100,200移动的动画
an.setDuration(2000);//持续时间2秒
an.setRepeatCount(-1);//无限循环
2.3 public void draw(Canvas canvas) {
Drawable dr = getProxy();
if (dr != null) {
int sc = canvas.save();//
Animation anim = mAnimation;
if (anim != null) {
anim.getTransformation(AnimationUtils.currentAnimationTimeMillis()//动起来
mTransformation);//该方法根据当前间 (currentTime) 和 interpolator,计算当前的变换,在 outTransformation 中返回
canvas.concat(mTransformation.getMatrix());//对canvas应用矩阵变换
}
dr.draw(canvas);
canvas.restoreToCount(sc);
}
}
注意:canvas.save();//canvas.restoreToCount(sc);是正对出现的
假设我们将要对canvas进行了一系列的设置,例如旋转,变色等,而又不希望在操作完之后让这些设置影响到后面的绘画。
就需要在设置前先save,使用完之后再restore;带count的恢复,是指直接回复到某个状态
假设我们设置了clip去绘画一张图片的一小部分
一般这么干
canvas.save();
canvas.setclip
canvas.drawBitmap
canvas.restore();
3. Arcs:
3.1 mPaints[0] = new Paint();
mPaints[0].setAntiAlias(true);
mPaints[0].setStyle(Paint.Style.FILL);
mPaints[0].setColor(0x88FF0000);
mUseCenters[0] = false;
mPaints[1] = new Paint(mPaints[0]);
mPaints[1].setColor(0x8800FF00);
mUseCenters[1] = true;
mPaints[2] = new Paint(mPaints[0]);
mPaints[2].setStyle(Paint.Style.STROKE);
mPaints[2].setStrokeWidth(4);
mPaints[2].setColor(0x880000FF);
mUseCenters[2] = false;
3.2 canvas.drawArc(oval, mStart, mSweep, useCenter, paint); //useCenter为是否画中心。mStart起始度数,mSweep跨度
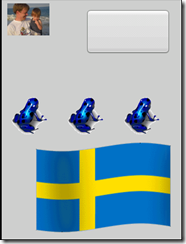
4.BitmapDecode:最下面的国旗是GIF动画
4.1 两种加载图片,再转成bitmap的方法
// now opts.outWidth and opts.outHeight are the dimension of the
// bitmap, even though bm is null
opts.inJustDecodeBounds = false; // this will request the bm
opts.inSampleSize = 4; // scaled down by 4 面试变成1/4大小
bm = BitmapFactory.decodeStream(is, null, opts);
mBitmap = bm;
// decode an image with transparency
is = context.getResources().openRawResource(R.drawable.frog);
mBitmap2 = BitmapFactory.decodeStream(is);
4.2 mBitmap2.getPixels(pixels, 0, w, 0, 0, w, h);//获得mBitmap2的像素颜色值,赋值给pixels,第三个参数为一行的像素数(矩形的宽)
mBitmap3 = Bitmap.createBitmap(pixels, 0, w, w, h,
Bitmap.Config.ARGB_8888);//用上面的pixels颜色数组创建一个Bitmap
4.3 mDrawable = context.getResources().getDrawable(R.drawable.button);
mDrawable.setBounds(150, 20, 300, 100);//设置button9的面积(只有Drawable才有这个方法)
4.4 canvas.drawBitmap(mBitmap4, 210, 170, null); //Bitmap的画法
mDrawable.draw(canvas);//Drawable的画法
4.5 is = context.getResources().openRawResource(R.drawable.animated_gif);//获得GIF动画流
mMovie = Movie.decodeStream(is);//把流转成Movie
//画Movie动画
long now = android.os.SystemClock.uptimeMillis();//当前时间
if (mMovieStart == 0) { // first time
mMovieStart = now;
}
if (mMovie != null) {
int dur = mMovie.duration();//GIF持续时间
if (dur == 0) {
dur = 1000;
}
int relTime = (int) ((now - mMovieStart) % dur);
mMovie.setTime(relTime);
mMovie.draw(canvas, getWidth() - mMovie.width(), getHeight()//画动画,参数为X,Y点
- mMovie.height());
invalidate();//刷新,不停的画
}
5. BitmapMesh:(没看)
5.1 mBitmap = BitmapFactory.decodeResource(getResources(), R.drawable.beach); //生成Bitmap
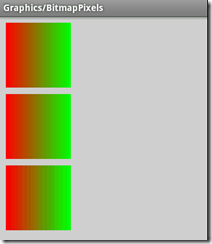
6.BitmapPixels:(没看)
7. CameraPreview:(没看)内容同SDK开发大全中的7.15例
7.1 // Hide the window title.隐藏标题
requestWindowFeature(Window.FEATURE_NO_TITLE);
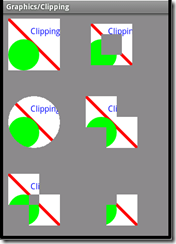
8. Clipping:
8.1
//定好样式
mPaint = new Paint();
mPaint.setAntiAlias(true);
mPaint.setStrokeWidth(6);//画笔的宽
mPaint.setTextSize(16);
mPaint.setTextAlign(Paint.Align.RIGHT);
canvas.drawLine(0, 0, 100, 100, mPaint);//画线 画的线为mPaint指定的宽度
8.2
canvas.save();
canvas.translate(160, 10);
canvas.clipRect(10, 10, 90, 90);
canvas.clipRect(30, 30, 70, 70, Region.Op.DIFFERENCE);
drawScene(canvas);
canvas.restore();
8.3
canvas.save();
canvas.translate(10, 160);
mPath.reset();
canvas.clipPath(mPath); // makes the clip empty
mPath.addCircle(50, 50, 50, Path.Direction.CCW);
canvas.clipPath(mPath, Region.Op.REPLACE);
drawScene(canvas);
canvas.restore();
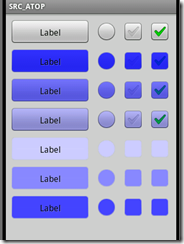
9. ColorFilters:
9.1
Paint.FontMetrics fm = mPaint.getFontMetrics();//不知道是什么意思??????
float mPaintTextOffset = (fm.descent + fm.ascent) * 0.5f;
9.2
mColors = new int[] { 0, 0xCC0000FF, 0x880000FF, 0x440000FF, 0xFFCCCCFF,
0xFF8888FF, 0xFF4444FF, };
mModes = new PorterDuff.Mode[] { PorterDuff.Mode.SRC_ATOP,//过滤器的方式
PorterDuff.Mode.MULTIPLY, };
mModeIndex = 0;
filter = new PorterDuffColorFilter(mColors [i], mModes[mModeIndex]);//用mColors [i]和porter-duff mode的颜色创建一个颜色过滤
mDrawable.setColorFilter(filter);
mDrawable.draw(canvas);
10.ColorMatrixTest
private void setContrast(ColorMatrix cm, float contrast) {
float scale = contrast + 1.f;
float translate = (-.5f * scale + .5f) * 255.f;
cm.set(new float[] { scale, 0, 0, 0, translate, 0, scale, 0, 0,
translate, 0, 0, scale, 0, translate, 0, 0, 0, 1, 0 });
}
ColorMatrix cm = new ColorMatrix();
mAngle += 2;
if (mAngle > 180) {
mAngle = 0;
}
float contrast = mAngle / 180.f;
setContrast(cm, contrast);
paint.setColorFilter(new ColorMatrixColorFilter(cm));//设置颜色过滤
canvas.drawBitmap(mBitmap, x + mBitmap.getWidth() + 10, y, paint);
invalidate();
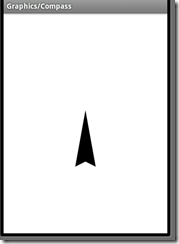
11.Compass指南针:(没看)
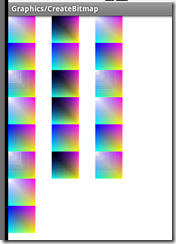
12.CreateBitmap:
12.1 创建颜色数组(说实话没看懂)
private static int[] createColors() {
int[] colors = new int[STRIDE * HEIGHT];
for (int y = 0; y < HEIGHT; y++) {
for (int x = 0; x < WIDTH; x++) {
int r = x * 255 / (WIDTH - 1);
int g = y * 255 / (HEIGHT - 1);
int b = 255 - Math.min(r, g);
int a = Math.max(r, g);
colors[y * STRIDE + x] = (a << 24) | (r << 16) | (g << 8) | b;
}
}
return colors;
}
12.2
private static Bitmap codec(Bitmap src, Bitmap.CompressFormat format,
int quality) {
ByteArrayOutputStream os = new ByteArrayOutputStream();
src.compress(format, quality, os); //压缩
byte[] array = os.toByteArray();
return BitmapFactory.decodeByteArray(array, 0, array.length);
}
mJPEG[i] = codec(mBitmaps[i], Bitmap.CompressFormat.JPEG, 80);//用JPEG编码
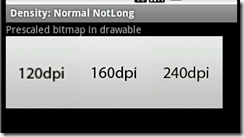
13.DensityActivity
13.1
1: LinearLayout root = new LinearLayout(this);//设置一个线性布局root
2: root.setOrientation(LinearLayout.VERTICAL); //方向垂直
3:
4: LinearLayout layout = new LinearLayout(this);//在root布局内,又建一个layout布局
5: addBitmapDrawable(layout, R.drawable.logo120dpi, true);//以logo120dpi为View的背景,并把view加下布局
6:
7:
8: addBitmapDrawable(layout, R.drawable.logo160dpi, true);
9: //addBitmapDrawable(layout, R.drawable.logo240dpi, true);
10: addLabelToRoot(root, "Prescaled bitmap in drawable");//加入一个TextView到root
11: addChildToRoot(root, layout);
12: setContentView(scrollWrap(root));
13:
14: }
15:
16:
1: private void addLabelToRoot(LinearLayout root, String text) {
2: TextView label = new TextView(this);
3: label.setText(text);
4: root.addView(label, new LinearLayout.LayoutParams(
5: LinearLayout.LayoutParams.FILL_PARENT,
6: LinearLayout.LayoutParams.WRAP_CONTENT));
7: }
8:
9: private void addChildToRoot(LinearLayout root, LinearLayout layout) {
10: root.addView(layout, new LinearLayout.LayoutParams(
11: LinearLayout.LayoutParams.FILL_PARENT,
12: LinearLayout.LayoutParams.WRAP_CONTENT));
13: }
14:
15:
16: private Bitmap loadAndPrintDpi(int id, boolean scale) {
17: Bitmap bitmap;
18: if (scale) {
19: bitmap = BitmapFactory.decodeResource(getResources(), id);
20: } else {
21: BitmapFactory.Options opts = new BitmapFactory.Options();
22: opts.inScaled = false;
23: bitmap = BitmapFactory.decodeResource(getResources(), id, opts);
24: }
25: return bitmap;
26: }
27:
28:
//将bitmap为作View的背景,并把view加下布局
1: private void addBitmapDrawable(LinearLayout layout, int resource,
2: boolean scale) {
3: Bitmap bitmap;
4: bitmap = loadAndPrintDpi(resource, scale);
5:
6: final View view = new View(this);
7: view.setOnClickListener(new View.OnClickListener() {//给当前veiw设置OnOnClickListener
8: @Override
9: public void onClick(View v) {
10: //Toast.makeText(NewViewTest.this,"View onClick" , Toast.LENGTH_LONG).show();
11: }
12: });
13: view.setOnTouchListener(new View.OnTouchListener() {//给当前view设置OnTouchListener
14: @Override
15: public boolean onTouch(View v, MotionEvent event) {
16: Toast.makeText(NewViewTest.this,"x="+event.getX()+" y="+event.getY() , Toast.LENGTH_LONG).show();
17: v.setBackgroundColor(Color.BLUE);
18:
19: return false;
20: }
21: });
22: final BitmapDrawable d = new BitmapDrawable(getResources(), bitmap);
23: if (!scale)
24: d.setTargetDensity(getResources().getDisplayMetrics());
25: view.setBackgroundDrawable(d);
26:
27: view.setLayoutParams(new LinearLayout.LayoutParams(d.getIntrinsicWidth(), d
28: .getIntrinsicHeight()));
29: layout.addView(view);
30: }
31: private View scrollWrap(View view) {
32: ScrollView scroller = new ScrollView(this);
33: scroller.addView(view, new ScrollView.LayoutParams(
34: ScrollView.LayoutParams.FILL_PARENT,
35: ScrollView.LayoutParams.FILL_PARENT));
36: return scroller;
37: }
38:
39:
14. FingerPaint:手写板
14.1
1: MaskFilter mEmboss = new EmbossMaskFilter(new float[] { 1, 1, 1 }, 0.4f, 6, 3.5f); //浮雕
2:
3: MaskFilter mBlur = new BlurMaskFilter(8, BlurMaskFilter.Blur.NORMAL);//模糊
4:
14.2
//触摸事件
1: public boolean onTouchEvent(MotionEvent event) {
2: float x = event.getX();
3: float y = event.getY();
4:
5: switch (event.getAction()) {
6: case MotionEvent.ACTION_DOWN:
7: touch_start(x, y);
8: invalidate();
9: break;
10: case MotionEvent.ACTION_MOVE:
11: touch_move(x, y);
12: invalidate();
13: break;
14: case MotionEvent.ACTION_UP:
15: touch_up();
16: invalidate();
17: break;
18: }
19: return true;
20: }
21:
14.3 画路径
1: private float mX, mY;
2: private static final float TOUCH_TOLERANCE = 4;
3:
4: private void touch_start(float x, float y) {
5: mPath.reset();
6: mPath.moveTo(x, y);//设置起始点
7: mX = x;
8: mY = y;
9: }
10:
11: private void touch_move(float x, float y) {
12: float dx = Math.abs(x - mX);
13: float dy = Math.abs(y - mY);
14: if (dx >= TOUCH_TOLERANCE || dy >= TOUCH_TOLERANCE) {
15: mPath.quadTo(mX, mY, (x + mX) / 2, (y + mY) / 2);
16: mX = x;
17: mY = y;
18: }
19: }
20:
21: private void touch_up() {
22: mPath.lineTo(mX, mY);
23: // commit the path to our offscreen
24: mCanvas.drawPath(mPath, mPaint);
25: // kill this so we don't double draw
26: mPath.reset();
27: }
28:
29:
14.4此程序实现了接口implements
ColorPickerDialog.OnColorChangedListener
所以要实现方法
1: public void colorChanged(int color) {
2: mPaint.setColor(color);
3: Toast.makeText(FingerPaint.this, "colorChanged", Toast.LENGTH_LONG).show();
4: }
5:
在菜单选项中选择COLOR_MENU_ID时new ColorPickerDialog(this, this, mPaint.getColor()).show();//
1: public boolean onOptionsItemSelected(MenuItem item) {
2: mPaint.setXfermode(null);
3: mPaint.setAlpha(0xFF);
4:
5: switch (item.getItemId()) {
6: case COLOR_MENU_ID:
7: new ColorPickerDialog(this, this, mPaint.getColor()).show();//
8: return true;
9: case EMBOSS_MENU_ID:
10: if (mPaint.getMaskFilter() != mEmboss) {
11: mPaint.setMaskFilter(mEmboss);//设置为浮雕
12: } else {
13: mPaint.setMaskFilter(null);
14: }
15: return true;
16: case BLUR_MENU_ID:
17: if (mPaint.getMaskFilter() != mBlur) {
18: mPaint.setMaskFilter(mBlur);
19: } else {
20: mPaint.setMaskFilter(null);
21: }
22: return true;
23: case ERASE_MENU_ID:
24: mPaint.setXfermode(new PorterDuffXfermode(PorterDuff.Mode.CLEAR));//设置Xfermode为擦除
25: return true;
26: case SRCATOP_MENU_ID:
27: mPaint.setXfermode(new PorterDuffXfermode(PorterDuff.Mode.SRC_ATOP));//此方法在VIEW上画完就清除
28: mPaint.setAlpha(0x80);
29: return true;
30: }
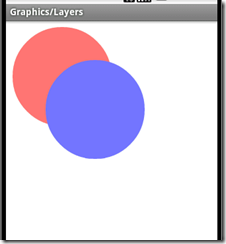
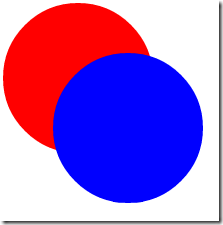
15. Layers:
1: private static final int LAYER_FLAGS = Canvas.MATRIX_SAVE_FLAG
2: | Canvas.CLIP_SAVE_FLAG | Canvas.HAS_ALPHA_LAYER_SAVE_FLAG
3: | Canvas.FULL_COLOR_LAYER_SAVE_FLAG | Canvas.CLIP_TO_LAYER_SAVE_FLAG;
4: @Override
5: protected void onDraw(Canvas canvas) {
6: canvas.drawColor(Color.WHITE);
7:
8: canvas.translate(10, 10);
9:
10: canvas.saveLayerAlpha(0, 0, 200, 200, 0x88, LAYER_FLAGS);
11:
12: mPaint.setColor(Color.RED);
13: canvas.drawCircle(75, 75, 75, mPaint);
14: mPaint.setColor(Color.BLUE);
15: canvas.drawCircle(125, 125, 75, mPaint);
16:
17: canvas.restore();
18: }
16. MeasureText:
Paint的样式属性:
1: mPaint = new Paint();
2: mPaint.setAntiAlias(true);
3: mPaint.setStrokeWidth(5);
4: mPaint.setStrokeCap(Paint.Cap.ROUND);//在画点时,此句有效The shape of the point is controlled by the paint's Cap type
5: mPaint.setTextSize(64);
6: mPaint.setTypeface(Typeface.create(Typeface.SERIF, Typeface.ITALIC));
画字符的方法:
1: private void showText(Canvas canvas, String text, Paint.Align align) {
2: // mPaint.setTextAlign(align);
3:
4: Rect bounds = new Rect();
5: float[] widths = new float[text.length()];
6: //获得字符串text中每个字符的像素宽存于widths中,返回字符串text的长度(有几个字符)
7: int count = mPaint.getTextWidths(text, 0, text.length(), widths);
8: //获得字符串text整个像素宽
9: float w = mPaint.measureText(text, 0, text.length());
10: //将字符串text所占矩形空间(最小,正好包起来)坐标存在bounds里
11: mPaint.getTextBounds(text, 0, text.length(), bounds);
12:
13: mPaint.setColor(0xFF88FF88);
14: canvas.drawRect(bounds, mPaint);
15: mPaint.setColor(Color.BLACK);
16: canvas.drawText(text, 0, 0, mPaint);
17: //计算每个字符的刚好占的宽的点坐标
18: float[] pts = new float[2 + count * 2];
19: float x = 0;
20: float y = 0;
21: pts[0] = x;
22: pts[1] = y;
23: for (int i = 0; i < count; i++) {
24: x += widths[i];
25: pts[2 + i * 2] = x;
26: pts[2 + i * 2 + 1] = y;
27: }
28: mPaint.setColor(Color.RED);
29: mPaint.setStrokeWidth(0);
30: canvas.drawLine(0, 0, w, 0, mPaint);
31: mPaint.setStrokeWidth(5);
32:
33: canvas.drawPoints(pts, 0, (count + 1) << 1, mPaint);//pts Array of points to draw [x0 y0 x1 y1 x2 y2 ...]
34: }
onDraw方法:
1: @Override
2: protected void onDraw(Canvas canvas) {
3: canvas.drawColor(Color.WHITE);
4:
5: canvas.translate(mOriginX, mOriginY);//置换原点坐标
6:
7: showText(canvas, "Measure", Paint.Align.LEFT);
8: canvas.translate(0, 80);
9: showText(canvas, "wiggy!", Paint.Align.CENTER);
10: canvas.translate(0, 80);
11: showText(canvas, "Text", Paint.Align.RIGHT);
12: }
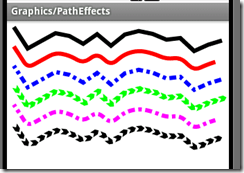
17 .PathEffects:画动态路径,按中间键还能变换路径(没看)
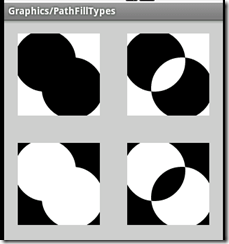
18.PathFillTypes
path为两个圆:
1: mPath = new Path();
2: mPath.addCircle(40, 40, 45, Path.Direction.CCW);
3: mPath.addCircle(80, 80, 45, Path.Direction.CCW);
DrawPath方法:
1: private void showPath(Canvas canvas, int x, int y, Path.FillType ft,
2: Paint paint) {
3: canvas.save();//
4:
5: canvas.translate(x, y);
6: canvas.clipRect(0, 0, 120, 120);
7: canvas.drawColor(Color.WHITE);
8: mPath.setFillType(ft);//设置填充方式
9: canvas.drawPath(mPath, paint);
10:
11: canvas.restore();
12: }
onDraw方法:
1: @Override
2: protected void onDraw(Canvas canvas) {
3: Paint paint = mPaint;
4:
5: canvas.drawColor(0xFFCCCCCC);
6:
7: canvas.translate(20, 20);
8:
9: paint.setAntiAlias(true);
10: //用四种填充方式画4次path
11: showPath(canvas, 0, 0, Path.FillType.WINDING, paint);
12: showPath(canvas, 160, 0, Path.FillType.EVEN_ODD, paint);
13: showPath(canvas, 0, 160, Path.FillType.INVERSE_WINDING, paint);
14: showPath(canvas, 160, 160, Path.FillType.INVERSE_EVEN_ODD, paint);
15: }
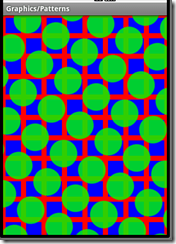
19.Patterns: 触摸拖动时,上面的一层可以动
上层的图形(小图)
1: private static Bitmap makeBitmap2() {
2: Bitmap bm = Bitmap.createBitmap(64, 64, Bitmap.Config.ARGB_8888);
3: Canvas c = new Canvas(bm);
4: Paint p = new Paint(Paint.ANTI_ALIAS_FLAG);
5: p.setColor(Color.GREEN);
6: p.setAlpha(0xCC);// 0XFF为完全透明,0X00为完全不透明
7: c.drawCircle(32, 32, 27, p);
8: return bm;
9: }
View的构造方法中创建mShader2 :
1: public SimlpeView(Context context) {
2: super(context);
3: setFocusable(true);
4: setFocusableInTouchMode(true);
5:
6: mFastDF = new PaintFlagsDrawFilter(Paint.FILTER_BITMAP_FLAG
7: | Paint.DITHER_FLAG, 0);// 不懂是什么意思?
8: mShader2 = new BitmapShader(makeBitmap2(), Shader.TileMode.REPEAT,
9: Shader.TileMode.REPEAT);// 用张小图,拼成一个地转多块的大图
10:
11: Matrix m = new Matrix();
12: m.setRotate(30);
13: mShader2.setLocalMatrix(m);// 图mShader2设置30度的旋转
14:
15: mPaint = new Paint(Paint.FILTER_BITMAP_FLAG);
16: }
onDraw方法:
1: @Override
2: protected void onDraw(Canvas canvas) {
3: super.onDraw(canvas);
4: canvas.setDrawFilter(mDF);
5: canvas.translate(mTouchCurrX - mTouchStartX, mTouchCurrY - mTouchStartY);// 用触摸的位移作为原点,让图动起来
6:
7: mPaint.setShader(mShader2);//把整个图形作为样式
8: canvas.drawPaint(mPaint);//重要
9: }
onTouchEvent方法(控制原点坐标为触摸相对位移):
1: @Override
2: public boolean onTouchEvent(MotionEvent event) {
3: float x = event.getX();
4: float y = event.getY();
5: switch (event.getAction()) {
6: case MotionEvent.ACTION_DOWN:
7: mTouchCurrX = mTouchStartX = x;
8: mTouchCurrY = mTouchStartY = y;
9: mDF = mFastDF;
10: invalidate();
11: break;
12: case MotionEvent.ACTION_MOVE:
13: mTouchCurrX = x;
14: mTouchCurrY = y;
15: invalidate();
16: break;
17: case MotionEvent.ACTION_UP:
18: mDF = null;
19: invalidate();
20: break;
21: default:
22: break;
23: }
24: return true;// super.onTouchEvent(event);此处一定是true才能触摸起作用
25: }
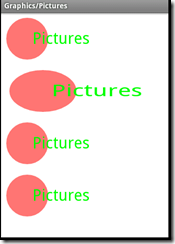
20.Pictures:针对Picture对象的画法
新建Picture对象,从beginRecording开始记录画图命令,到endRecording,其间画的图全画在Picture里了(第2,3行):
第5行表明可以从一个Picture对象,得到一个Drawable
1: mPicture = new Picture();//新建一个Picture对象
2: drawSomething(mPicture.beginRecording(200, 100));//在mPicture上作画。记录所有draw命令,beginRecording为开始记录
3: mPicture.endRecording();//结束记录
4:
5: mDrawable = new PictureDrawable(mPicture);//从Picture得到一个Drawable
drawSomething()方法:在Picture上画一个圆和字符串
1: static void drawSomething(Canvas canvas) {
2: Paint p = new Paint(Paint.ANTI_ALIAS_FLAG);
3:
4: p.setColor(0x88FF0000);
5: canvas.drawCircle(50, 50, 40, p);
6:
7: p.setColor(Color.GREEN);
8: p.setTextSize(30);
9: canvas.drawText("Pictures", 60, 60, p);
10: }
Picture的几法画法:
1: @Override
2: protected void onDraw(Canvas canvas) {
3: canvas.drawColor(Color.WHITE);
4:
5: canvas.drawPicture(mPicture);//画Picture
6:
7: canvas.drawPicture(mPicture, new RectF(0, 100, getWidth(), 200));//stretched 拉申在这矩形里
8:
9: mDrawable.setBounds(0, 200, getWidth(), 300);
10: mDrawable.draw(canvas);
11:
12: ByteArrayOutputStream os = new ByteArrayOutputStream();
13: mPicture.writeToStream(os);//Picture可以写入流中
14: InputStream is = new ByteArrayInputStream(os.toByteArray());
15: canvas.translate(0, 300);
16: canvas.drawPicture(Picture.createFromStream(is));//从流中创建Picture对象
17: }
21. PolyToPoly:
paint的属性:
1: mPaint.setStrokeWidth(4);
2: mPaint.setTextSize(40);
3: mPaint.setTextAlign(Paint.Align.CENTER);
4:
5: mFontMetrics = mPaint.getFontMetrics();//
画图方法:
1: private Paint mPaint = new Paint(Paint.ANTI_ALIAS_FLAG);
2: private FontMetrics mFontMetrics;
3:
4: private void doDraw(Canvas canvas, float src[], float dst[]) {
5: canvas.save();
6:
7: mPaint.setColor(Color.GRAY);
8: mPaint.setStyle(Paint.Style.STROKE);
9: canvas.drawRect(0, 0, 64, 64, mPaint);
10: canvas.drawLine(0, 0, 64, 64, mPaint);
11: canvas.drawLine(0, 64, 64, 0, mPaint);
12:
13: mPaint.setColor(Color.RED);
14: mPaint.setStyle(Paint.Style.FILL);
15: float x = 64 / 2;
16: float y = 64 / 2-(mFontMetrics.ascent+mFontMetrics.descent)/2;
17: canvas.drawText(src.length / 2 + "", x, y, mPaint);
18: canvas.restore();
19: }
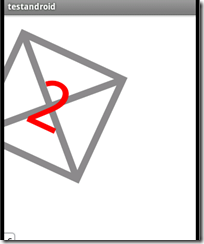
注意:如果没有mFontMetrics = mPaint.getFontMetrics();//和第16句的话,画出来的图是
在上面代码的基础上加入mMatrix.setPolyToPoly
1: private void doDraw(Canvas canvas, float src[], float dst[]) {
2: canvas.save();
3:
4: mMatrix.setPolyToPoly(src, 0, dst, 0, src.length >> 1);//
5: canvas.concat(mMatrix);//
6:
7: mPaint.setColor(Color.GRAY);
8: mPaint.setStyle(Paint.Style.STROKE);
9: canvas.drawRect(0, 0, 64, 64, mPaint);
10: canvas.drawLine(0, 0, 64, 64, mPaint);
11: canvas.drawLine(0, 64, 64, 0, mPaint);
12:
13: mPaint.setColor(Color.RED);
14: mPaint.setStyle(Paint.Style.FILL);
15: float x = 64 / 2;
16: float y = 64 / 2 - (mFontMetrics.ascent + mFontMetrics.descent) / 2;
17: canvas.drawText(src.length / 2 + "", x, y, mPaint);
18: canvas.restore();
19: }
onDraw方法:
1: @Override
2: protected void onDraw(Canvas canvas) {
3: super.onDraw(canvas);
4: canvas.drawColor(Color.WHITE);
5: doDraw(canvas, new float[] { 0, 0,64,32 }, new float[] { 32, 32,160,192 });
6: }
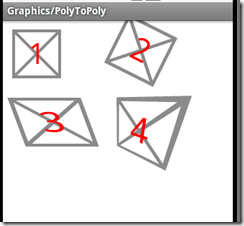
现在画出的图为:
可以看出在new float[] { 0, 0,64,32 }, new float[] { 32, 32,160,192 }两个数组中的坐标为,(0,0)点置换到(32,32)点,(64,32)点(也就是1图的右边中间点)置换到(160,192)也就是屏幕中间X坐标
doDraw(canvas, new float[] { 0, 0,64,32 }, new float[] { 32, 32,160,192 });
22. Regions
画两个空心矩形方法:加上inset线条会很细,不加是这样的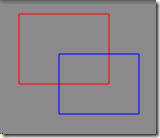 加了是
加了是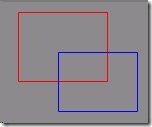
1: private static void drawCentered(Canvas c, Rect r, Paint p) {
2: float inset = p.getStrokeWidth() * 0.5f;
3: if (inset == 0) { // catch hairlines
4: inset = 0.5f;
5: }
6: c.drawRect(r.left + inset, r.top + inset, r.right - inset, r.bottom
7: - inset, p);
8: }
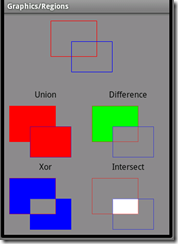
上面4个图的核心画法:
1: private void drawRgn(Canvas canvas, int color, String str, Region.Op op) {
2: if (str != null) {
3: mPaint.setColor(Color.BLACK);
4: canvas.drawText(str, 80, 24, mPaint);
5: }
6:
7: Region rgn = new Region();
8: rgn.set(mRect1);
9: rgn.op(mRect2, op);
10:
11: mPaint.setColor(color);
12: RegionIterator iter = new RegionIterator(rgn);
13: Rect r = new Rect();
14:
15: canvas.translate(0, 30);
16: mPaint.setColor(color);
17: while (iter.next(r)) {
18: canvas.drawRect(r, mPaint);
19: }
20: drawOriginalRects(canvas, 0x80);
21: }
onDraw方法:
1: @Override
2: protected void onDraw(Canvas canvas) {
3: canvas.drawColor(Color.GRAY);
4:
5: canvas.save();
6: canvas.translate(80, 5);
7: drawOriginalRects(canvas, 0xFF);
8: canvas.restore();
9:
10: mPaint.setStyle(Paint.Style.FILL);
11:
12: canvas.save();
13: canvas.translate(0, 140);
14: drawRgn(canvas, Color.RED, "Union", Region.Op.UNION);
15: canvas.restore();
16:
17: canvas.save();
18: canvas.translate(0, 280);
19: drawRgn(canvas, Color.BLUE, "Xor", Region.Op.XOR);
20: canvas.restore();
21:
22: canvas.save();
23: canvas.translate(160, 140);
24: drawRgn(canvas, Color.GREEN, "Difference", Region.Op.DIFFERENCE);
25: canvas.restore();
26:
27: canvas.save();
28: canvas.translate(160, 280);
29: drawRgn(canvas, Color.WHITE, "Intersect", Region.Op.INTERSECT);
30: canvas.restore();
31: }














 3384
3384

 被折叠的 条评论
为什么被折叠?


