


前言:记录在项目上遇到的bug和群友提供的解决方案。
背景
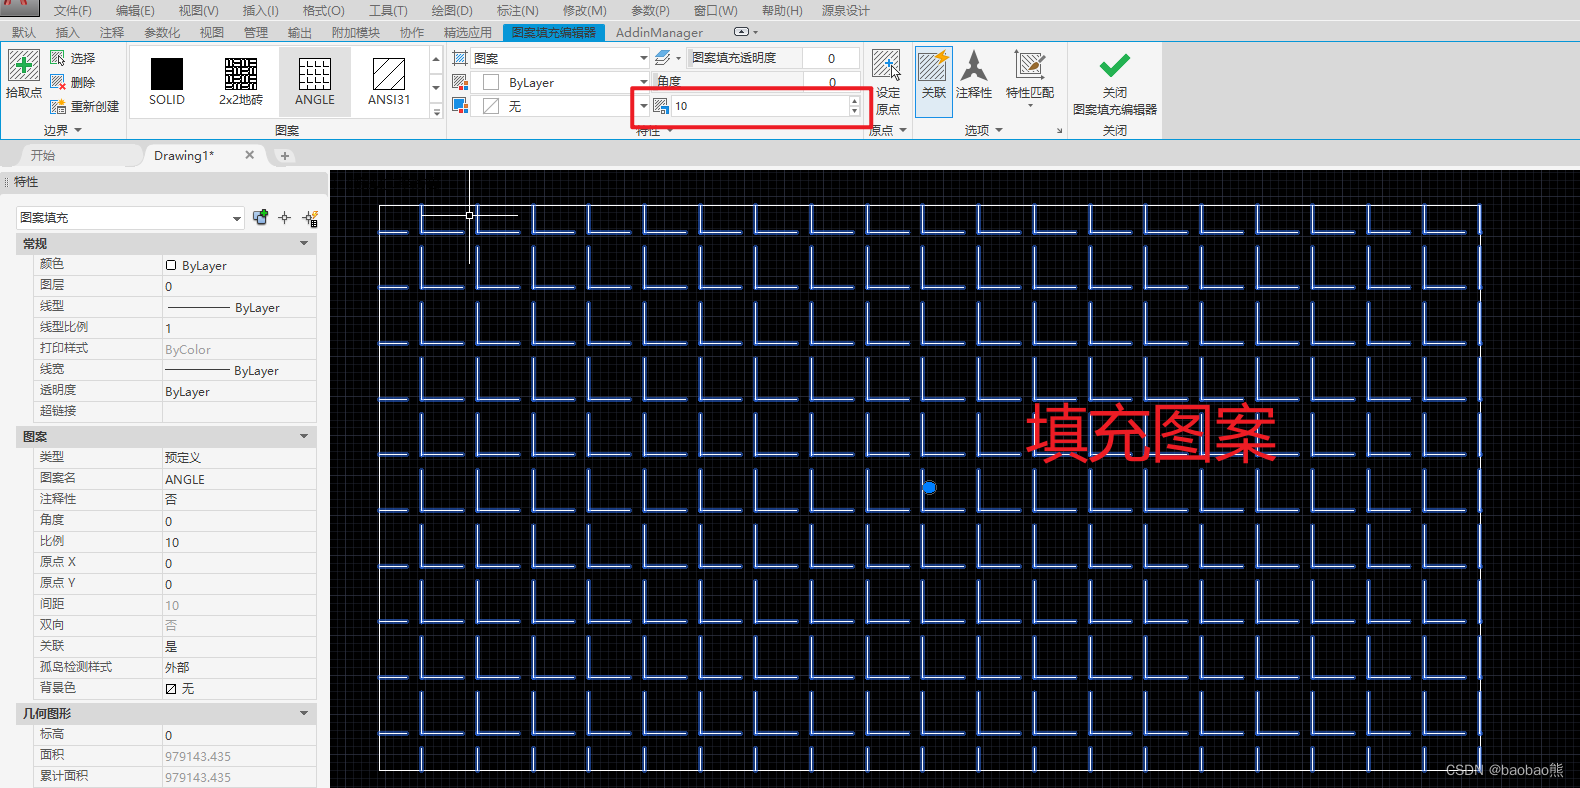
在项目中需要用程序自动修改填充图案Hatch的填充图案比例属性(PatternScale属性),把比例10改成比例20,但是修改后发现填充图案比例数值已经修改为20,但是图案显示的比例还是10,并没有刷新。因此有了这篇文章的记录
原填充:
使用代码修改

代码
using Autodesk.AutoCAD.ApplicationServices;
using Autodesk.AutoCAD.DatabaseServices;
using Autodesk.AutoCAD.EditorInput;
using Autodesk.AutoCAD.Runtime;
using System;
using System.Collections.Generic;
using System.Linq;
using System.Text;
using System.Threading.Tasks;
[assembly:CommandClass(typeof(CADBlogDemo.HatchUnableToUpdateCmd))]

namespace CADBlogDemo
{
    public class HatchUnableToUpdateCmd
    {
        [CommandMethod(nameof(HatchUnableToUpdate))]
        public void HatchUnableToUpdate()
        {
            //选择一个填充图案
            Document doc = Autodesk.AutoCAD.ApplicationServices.Core.Application.DocumentManager.MdiActiveDocument;
            PromptEntityResult selResult = doc.Editor.GetEntity(new Autodesk.AutoCAD.EditorInput.PromptEntityOptions("选择修改的填充图案"));
            if (selResult.Status != PromptStatus.OK) return;
            using(Transaction trans = doc.TransactionManager.StartTransaction())
            {
                Hatch targetHacth = trans.GetObject(selResult.ObjectId,OpenMode.ForWrite) as Hatch;
                if(targetHacth == null)
                {
                    trans.Abort();
                    return;
                }
                //修改填充图案的比例
                targetHacth.PatternScale = 20;
                targetHacth.SetHatchPattern(targetHacth.PatternType, targetHacth.PatternName);
                trans.Commit();
            }

        }
    }
}
代码解析
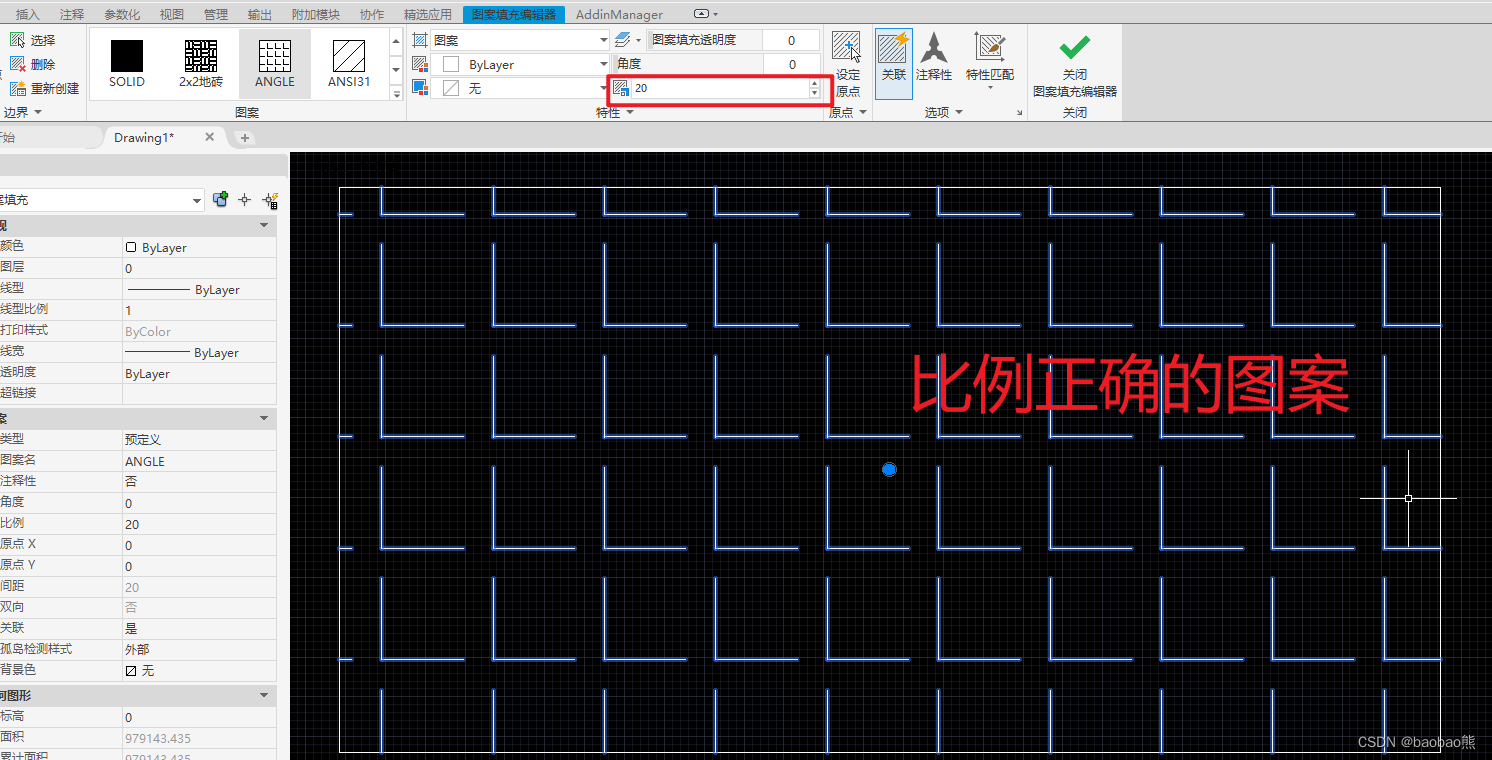
SetHatchPattern方法
重新设置填充图案的图案,这样子就可以解决填充图案无法自动更新的问题
解决后
写在最后
这里需要注意一个问题,使用者环境中没有加载到填充图案的时候,直接修改会报无效构件的错误信息。因此,如果你的图案是自定义图案,最好可以跟着程序文件一起移动,然后在受信任路径中添加对应的路径就可以使用了。希望可以帮你避开不必要的坑~~~


 825
825


 被折叠的 条评论
为什么被折叠?
被折叠的 条评论
为什么被折叠?
 到【灌水乐园】发言


