


目前分布式配置中心框架还是比较多的,主流的有:
- Diamond
- Disconf
- Apollo
- SpringCloud Config
- Netflixarchaius
这里介绍SpringCloud Config,但是感觉看网上使用Apollo比较多,以后了解了Apollo再做对比吧
为什么要使用分布式配置中心?
– 在微服务项目中,如果使用传统的方式管理配置文件就会变得很复杂,如果配置文件需要修改的时候,则需要重新打包部署,很不方便;
– 搭建分布式配置中心统一管理所有服务的配置文件信息,当服务正在运行的时候,如果配置文件信息发生改变,可以实现不重启服务器实时更改配置文件信息
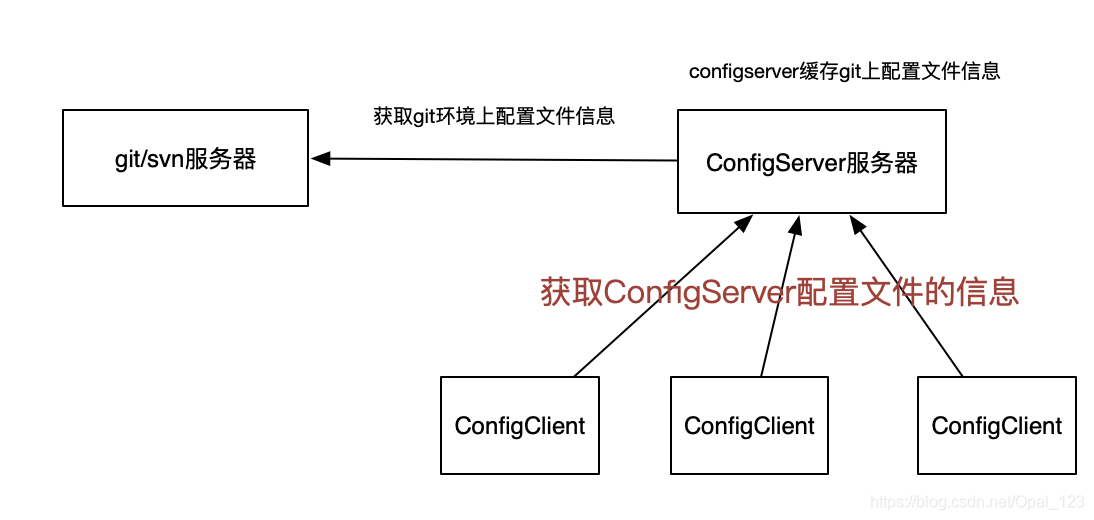
搭建分布式配置中心步骤:
先搭建git服务器,将配置文件上传到git上去
配置文件命名规范:configclient服务名称-环境.properties(yml)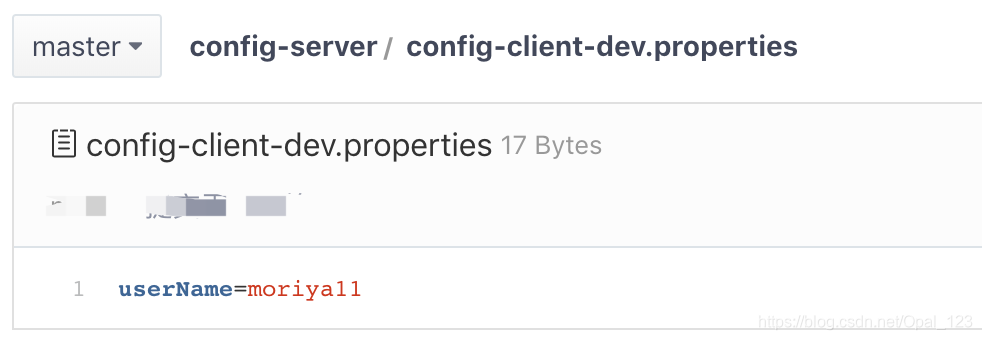
ConfigServer项目
-
依赖
<dependency> <groupId>org.springframework.cloud</groupId> <artifactId>spring-cloud-config-server</artifactId> </dependency> -
配置文件
server.port=8889 spring.application.name=config-server #config-server读取git环境地址 spring.cloud.config.server.git.uri=自己的git地址 spring.cloud.config.server.git.search-paths=config-server #读取分支环境 spring.cloud.config.label=master spring.cloud.config.server.git.username=git用户名,没有则不填 spring.cloud.config.server.git.password=git密码,没有则不填 eureka.client.serviceUrl.defaultZone=http://localhost:8888/eureka/ -
启动类
package com.example.configserver;

import org.springframework.boot.SpringApplication;
import org.springframework.boot.autoconfigure.SpringBootApplication;
import org.springframework.cloud.config.server.EnableConfigServer;

@SpringBootApplication
@EnableConfigServer
public class ConfigServerApplication {

    public static void main(String[] args) {
        SpringApplication.run(ConfigServerApplication.class, args);
    }

}
ConfigClient项目:
-
依赖
<dependency> <groupId>org.springframework.cloud</groupId> <artifactId>spring-cloud-starter-config</artifactId> </dependency> -
配置文件:必须改成bootstrap.properties
spring.application.name=config-client server.port=8881 spring.cloud.config.label=master #读取版本环境 spring.cloud.config.profile=dev spring.cloud.config.uri=http://localhost:8889/ eureka.client.serviceUrl.defaultZone=http://localhost:8888/eureka/ #开启Config服务发现支持 spring.cloud.config.discovery.enabled=true #指定server端的name,也就是server spring.cloud.config.discovery.service-id=config-server #手动刷新配置文件,开启所有端点 management.endpoints.web.exposure.include=* -
启动类
package com.example.configclient; import org.springframework.boot.SpringApplication; import org.springframework.boot.autoconfigure.SpringBootApplication; import org.springframework.cloud.netflix.eureka.EnableEurekaClient; @SpringBootApplication @EnableEurekaClient public class ConfigClientApplication { public static void main(String[] args) { SpringApplication.run(ConfigClientApplication.class, args); } } -
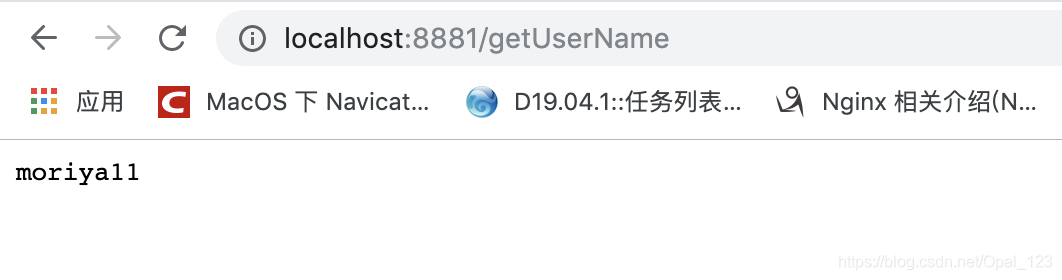
测试
package com.example.configclient.controller; import org.springframework.beans.factory.annotation.Value; import org.springframework.cloud.context.config.annotation.RefreshScope; import org.springframework.web.bind.annotation.RequestMapping; import org.springframework.web.bind.annotation.RestController; @RestController @RefreshScope//配置文件自动刷新 public class TestController { @Value("${userName}") private String userName; @RequestMapping(value = "/getUserName",produces = "application/json;charset=utf8") public String getUserName1(){ return userName; } } -
运行项目
依次启动Eureka、ConfigServer、ConfigClient
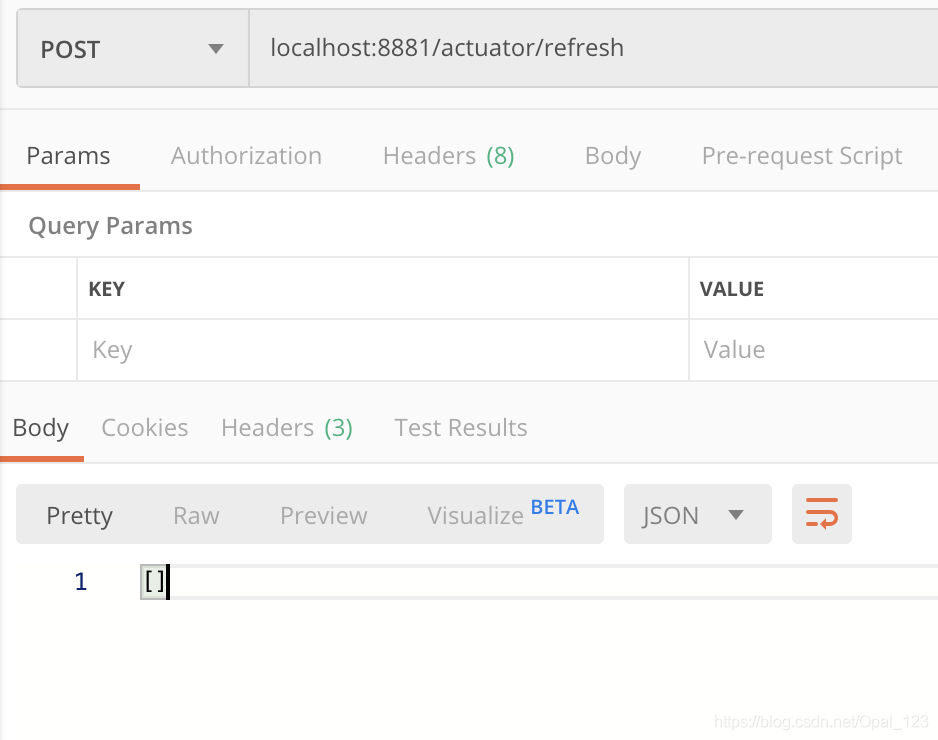
每次更改了配置文件都要手动刷新,调用/actuator/refresh接口


 171
171


 被折叠的 条评论
为什么被折叠?
被折叠的 条评论
为什么被折叠?
 到【灌水乐园】发言


