


SpringBoot对静态资源的映射规则
SpringBoot中的SpringMVC自动配置在WebMvcAutoConfiguration类中
public void addResourceHandlers(ResourceHandlerRegistry registry) {
    if (!this.resourceProperties.isAddMappings()) {
        logger.debug("Default resource handling disabled");
    } else {
        Duration cachePeriod = this.resourceProperties.getCache().getPeriod();
        CacheControl cacheControl = this.resourceProperties.getCache().getCachecontrol().toHttpCacheControl();
        if (!registry.hasMappingForPattern("/webjars/**")) {
            this.customizeResourceHandlerRegistration(registry.addResourceHandler(new String[]{"/webjars/**"}).addResourceLocations(new String[]{"classpath:/META-INF/resources/webjars/"}).setCachePeriod(this.getSeconds(cachePeriod)).setCacheControl(cacheControl));
        }

        String staticPathPattern = this.mvcProperties.getStaticPathPattern();
        if (!registry.hasMappingForPattern(staticPathPattern)) {
            this.customizeResourceHandlerRegistration(registry.addResourceHandler(new String[]{staticPathPattern}).addResourceLocations(WebMvcAutoConfiguration.getResourceLocations(this.resourceProperties.getStaticLocations())).setCachePeriod(this.getSeconds(cachePeriod)).setCacheControl(cacheControl));
        }

    }
}
1、所有/webjars/**请求,都会去classpath:/META-INF/resources/webjars/找资源
webjars:会以jar包的形式引入静态资源,资源库地址https://www.webjars.org/
以jQuery为例,在POM文件中导入其依赖,在访问的时候只需要写webjars下面资源的名称即可
<dependency>
    <groupId>org.webjars</groupId>
    <artifactId>jquery</artifactId>
    <version>3.3.1</version>
</dependency>
2、对/**请求,访问当前项目的任何资源,默认会去以下路径下查找,访问时地址不用加上静态资源文件夹
"classpath:/META-INF/resources/",
 "classpath:/resources/",
 "classpath:/static/",
 "classpath:/public/"
3、欢迎页,默认是寻找静态资源文件夹下的所有index.html页面,被/**映射
如localhost:8080/ 会去静态文件夹下找index页面
@Bean
public WelcomePageHandlerMapping welcomePageHandlerMapping(
      ResourceProperties resourceProperties) {
   return new WelcomePageHandlerMapping(resourceProperties.getWelcomePage(),
         this.mvcProperties.getStaticPathPattern());
}
4、设置图标**/favicon.ico,浏览器图标默认是从静态资源文件夹下寻找favicon.ico
    @Configuration
   @ConditionalOnProperty(value = "spring.mvc.favicon.enabled", matchIfMissing = true)
   public static class FaviconConfiguration {

      private final ResourceProperties resourceProperties;

      public FaviconConfiguration(ResourceProperties resourceProperties) {
         this.resourceProperties = resourceProperties;
      }

      @Bean
      public SimpleUrlHandlerMapping faviconHandlerMapping() {
         SimpleUrlHandlerMapping mapping = new SimpleUrlHandlerMapping();
         mapping.setOrder(Ordered.HIGHEST_PRECEDENCE + 1);
         mapping.setUrlMap(Collections.singletonMap("**/favicon.ico",
               faviconRequestHandler()));
         return mapping;
      }

      @Bean
      public ResourceHttpRequestHandler faviconRequestHandler() {
         ResourceHttpRequestHandler requestHandler = new ResourceHttpRequestHandler();
         requestHandler
               .setLocations(this.resourceProperties.getFaviconLocations());
         return requestHandler;
      }

   }

}
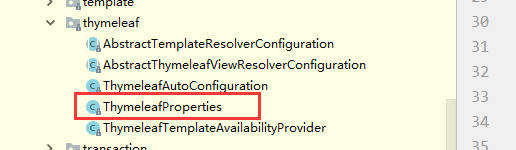
模板引擎

SpringBoot推荐使用Thymeleaf,导入thymeleaf的starter依赖,查看如何配置,只需要在自动配置类中查看相应的properties即可

对于返回视图,thymeleaf会自动转发到类路径下的templates目录下的对应的html,thymeleaf的使用可具体查看官网教程。
导入thymeleaf的名称空间,以便有提示
<html lang="en" xmlns:th="http://www.thymeleaf.org">
开发期间模板引擎页面修改以后,要实时生效
1、禁用模板引擎的缓存,spring.thymeleaf.cache=false
2、页面修改完成以后,需要在IDEA中ctrl+F9,使其重新编译
SpringBoot扩展SpringMVC
如果想要保留SpringBoot SpringMVC的一些特性,但是又想添加新的配置,如拦截器,视图控制器,则可以创建@Configuration标注的WebMvcConfigurerAdapter类型的类,,且不能标注@EnableWebMvc注解
@Configuration
public class MyConfigureAdapter extends WebMvcConfigurerAdapter {

    @Override
    public void addViewControllers(ViewControllerRegistry registry) {

        registry.addViewController("/cmzy").setViewName("success");
    }
}
SpringBoot会自动将自定义的WebMvcConfigurerAdapter加载,和容器中所有的WebMvcConfigurer一起起作用,如果配置了@EnableWebMvc注解,那么SpringBoot对SpringMVC的自动配置都不需要了,而是所有的配置都是自定义的。
SpringBoot国际化
SpringBoot国际化是使用的SpringMVC的,已经默认自动配置了。
1、配置国际化资源文件
2、SpringBoot自动配置国际化类,MessageSourceAutoConfiguration,并自动注入了ResourceBundleMessageSource ,默认情况下是获取类路径下的message名称的国际化资源文件,所以在全局配置文件中,可以使用spring.messages.basename设置资源文件的基础名,可以在前面设置包名,指定具体的位置
@Configuration
@ConditionalOnMissingBean(value = MessageSource.class, search = SearchStrategy.CURRENT)
@AutoConfigureOrder(Ordered.HIGHEST_PRECEDENCE)
@Conditional(ResourceBundleCondition.class)
@EnableConfigurationProperties
@ConfigurationProperties(prefix = "spring.messages")
public class MessageSourceAutoConfiguration {

    private String basename = "messages";

    @Bean
    public MessageSource messageSource() {
       ResourceBundleMessageSource messageSource = new ResourceBundleMessageSource();
       if (StringUtils.hasText(this.basename)) {
           //此处会设置资源文件的基础名(也就是不包含国家和地区代码的名字)
          messageSource.setBasenames(StringUtils.commaDelimitedListToStringArray(
                StringUtils.trimAllWhitespace(this.basename)));
       }
       if (this.encoding != null) {
          messageSource.setDefaultEncoding(this.encoding.name());
       }
       messageSource.setFallbackToSystemLocale(this.fallbackToSystemLocale);
       messageSource.setCacheSeconds(this.cacheSeconds);
       messageSource.setAlwaysUseMessageFormat(this.alwaysUseMessageFormat);
       return messageSource;
    }
3、在页面使用thymeleaf获取资源文件
上述都是使用浏览器默认的语言设置来判断国际化的,当界面上定义了相关中英文按钮,手动切换的话,SpringMVC根据Locale信息来判断,而具体生成的类是在LocaleResolver中生成的Locale,从请求头中根据语言信息生成Locale,在SpringBoot自动配置SpringMVC的配置类中自动注入了LocaleResolver ,其中默认是AcceptHeaderLocaleResolver,可以自己定义LocaleResolver 改变Locale的生成方式
@Bean
@ConditionalOnMissingBean
@ConditionalOnProperty(prefix = "spring.mvc", name = "locale")
public LocaleResolver localeResolver() {
   if (this.mvcProperties
         .getLocaleResolver() == WebMvcProperties.LocaleResolver.FIXED) {
      return new FixedLocaleResolver(this.mvcProperties.getLocale());
   }
   AcceptHeaderLocaleResolver localeResolver = new AcceptHeaderLocaleResolver();
   localeResolver.setDefaultLocale(this.mvcProperties.getLocale());
   return localeResolver;
}
AcceptHeaderLocaleResolver中获取Locale是从请求头中获取,自定义可以设置一个参数,带上语言信息,然后自己定义LocaleResolver ,并加入到容器中
@Override
public Locale resolveLocale(HttpServletRequest request) {
   Locale defaultLocale = getDefaultLocale();
   if (defaultLocale != null && request.getHeader("Accept-Language") == null) {
      return defaultLocale;
   }
   Locale requestLocale = request.getLocale();
   if (isSupportedLocale(requestLocale)) {
      return requestLocale;
   }
   Locale supportedLocale = findSupportedLocale(request);
   if (supportedLocale != null) {
      return supportedLocale;
   }
   return (defaultLocale != null ? defaultLocale : requestLocale);
}
SpringBoot 错误处理
其自动配置类ErrorMvcAutoConfiguration,其给容器中自动添加了一些组件:
DefaultErrorAttributes:用于添加一些发生错误时的信息,以便客户端可以调用
@Override
public Map<String, Object> getErrorAttributes(RequestAttributes requestAttributes,
      boolean includeStackTrace) {
   Map<String, Object> errorAttributes = new LinkedHashMap<String, Object>();
   errorAttributes.put("timestamp", new Date());
   addStatus(errorAttributes, requestAttributes);
   addErrorDetails(errorAttributes, requestAttributes, includeStackTrace);
   addPath(errorAttributes, requestAttributes);
   return errorAttributes;
}

private void addStatus(Map<String, Object> errorAttributes,
      RequestAttributes requestAttributes) {
   Integer status = getAttribute(requestAttributes,
         "javax.servlet.error.status_code");
   if (status == null) {
      errorAttributes.put("status", 999);
      errorAttributes.put("error", "None");
      return;
   }
   errorAttributes.put("status", status);
   try {
      errorAttributes.put("error", HttpStatus.valueOf(status).getReasonPhrase());
   }
   catch (Exception ex) {
      // Unable to obtain a reason
      errorAttributes.put("error", "Http Status " + status);
   }
}

private void addErrorDetails(Map<String, Object> errorAttributes,
      RequestAttributes requestAttributes, boolean includeStackTrace) {
   Throwable error = getError(requestAttributes);
   if (error != null) {
      while (error instanceof ServletException && error.getCause() != null) {
         error = ((ServletException) error).getCause();
      }
      errorAttributes.put("exception", error.getClass().getName());
      addErrorMessage(errorAttributes, error);
      if (includeStackTrace) {
         addStackTrace(errorAttributes, error);
      }
   }
   Object message = getAttribute(requestAttributes, "javax.servlet.error.message");
   if ((!StringUtils.isEmpty(message) || errorAttributes.get("message") == null)
         && !(error instanceof BindingResult)) {
      errorAttributes.put("message",
            StringUtils.isEmpty(message) ? "No message available" : message);
   }
}

private void addErrorMessage(Map<String, Object> errorAttributes, Throwable error) {
   BindingResult result = extractBindingResult(error);
   if (result == null) {
      errorAttributes.put("message", error.getMessage());
      return;
   }
   if (result.getErrorCount() > 0) {
      errorAttributes.put("errors", result.getAllErrors());
      errorAttributes.put("message",
            "Validation failed for object='" + result.getObjectName()
                  + "'. Error count: " + result.getErrorCount());
   }
   else {
      errorAttributes.put("message", "No errors");
   }
}
BasicErrorController:用于处理默认的/error请求,里面实现了两种处理方法,用于返回不同的形式。一个是html形式的,一个是json形式的,通过请求的请求头来判断的,如果是浏览器,则accept为text/html,如果是其他客户端则是*/*
@Controller
@RequestMapping("${server.error.path:${error.path:/error}}")
public class BasicErrorController extends AbstractErrorController {
    @RequestMapping(produces = "text/html")
    public ModelAndView errorHtml(HttpServletRequest request,
          HttpServletResponse response) {
       HttpStatus status = getStatus(request);
       Map<String, Object> model = Collections.unmodifiableMap(getErrorAttributes(
             request, isIncludeStackTrace(request, MediaType.TEXT_HTML)));
       response.setStatus(status.value());
       ModelAndView modelAndView = resolveErrorView(request, response, status, model);
       return (modelAndView == null ? new ModelAndView("error", model) : modelAndView);
    }

    @RequestMapping
    @ResponseBody
    public ResponseEntity<Map<String, Object>> error(HttpServletRequest request) {
       Map<String, Object> body = getErrorAttributes(request,
             isIncludeStackTrace(request, MediaType.ALL));
       HttpStatus status = getStatus(request);
       return new ResponseEntity<Map<String, Object>>(body, status);
    }
ErrorPageCustomizer:系统出现错误之后会来到error请求
    @Value("${error.path:/error}")
    private String path = "/error";
DefaultErrorViewResolver:用于BasicErrorController处理完后生成ModelAndView
public class DefaultErrorViewResolver implements ErrorViewResolver, Ordered {

   private static final Map<Series, String> SERIES_VIEWS;

   static {
      Map<Series, String> views = new HashMap<Series, String>();
      views.put(Series.CLIENT_ERROR, "4xx");
      views.put(Series.SERVER_ERROR, "5xx");
      SERIES_VIEWS = Collections.unmodifiableMap(views);
   }

    @Override
    public ModelAndView resolveErrorView(HttpServletRequest request, HttpStatus status,
          Map<String, Object> model) {
       ModelAndView modelAndView = resolve(String.valueOf(status), model);
       if (modelAndView == null && SERIES_VIEWS.containsKey(status.series())) {
          modelAndView = resolve(SERIES_VIEWS.get(status.series()), model);
       }
       return modelAndView;
    }

    private ModelAndView resolve(String viewName, Map<String, Object> model) {
        //SpringBoot默认去哪个错误页面 error/4xx、5xx
        String errorViewName = "error/" + viewName;
        //模板引擎可以解析这个页面地址就用模板引擎解析
        TemplateAvailabilityProvider provider = this.templateAvailabilityProviders
             .getProvider(errorViewName, this.applicationContext);
       if (provider != null) {
           //如果模板引擎可以解析就返回模板引擎解析的页面
          return new ModelAndView(errorViewName, model);
       }
       //如果没有模板引擎,则去静态资源文件夹下去寻找相应的页面
       return resolveResource(errorViewName, model);
    }

    private ModelAndView resolveResource(String viewName, Map<String, Object> model) {
       for (String location : this.resourceProperties.getStaticLocations()) {
          try {
             Resource resource = this.applicationContext.getResource(location);
             resource = resource.createRelative(viewName + ".html");
             if (resource.exists()) {
                return new ModelAndView(new HtmlResourceView(resource), model);
             }
          }
          catch (Exception ex) {
          }
       }
       return null;
    }
步骤:
一旦系统出现4xx或5xx之类的错误,ErrorPageCustomizer就会生效(定制错误的响应规则),就会来到/error请求,接着该请求就会被BasicErrorController处理,处理完返回的视图是由DefaultErrorViewResolver解析得到的。
如何定制错误响应
定制错误页面:
有模板引擎的情况下;error/状态码(将错误页面命名为错误状态码.html放在模板引擎文件夹里面的error文件夹下,发生此状态码的错误就会找到对应的页面)。可以使用4xx和5xx作为错误页面的文件名来匹配这种类型的额所有错误,精确优先(先匹配精确地错误码,如果没有匹配则使用该页面)
没有模板引擎(或模板引擎中找不到错误页面),就会在静态资源文件夹下找。
以上都没有找到错误页面,就使用SpringBoot默认的错误提示页面。
配置嵌入式Servlet容器
1、ConfigurableEmbeddedServletContainer
2、EmbeddedServletContainerCustomizer
3、注册Servlet、Filter、Listener
ServletRegistrationBean
FilterRegistrationBean
ServletListenerRegistrationBean
4、使用其他的Servlet容器,Jetty、Undertow.
SpringBoot默认使用Tomcat作为嵌入式的Servlet容器
修改和Server相关的配置(SpringBoot默认自动配置类对应的属性类ServerProperties)
@ConfigurationProperties(prefix = "server", ignoreUnknownFields = true)
public class ServerProperties
      implements EmbeddedServletContainerCustomizer, EnvironmentAware, Ordered {

   /**
    * Server HTTP port.
    */
   private Integer port;

   /**
    * Network address to which the server should bind to.
    */
   private InetAddress address;

   /**
    * Context path of the application.
    */
   private String contextPath;

   /**
    * Display name of the application.
    */
   private String displayName = "application";
通用设置
server.port=8080
servper.contextPath=/project

tomcat相关的设置
server.tomcat.xxx
也可以通过编写EmbeddedServletContainerCustomizer的实现类,来定制嵌入式的Servlet容器的配置。并将其加入容器。
@Bean
public EmbeddedServletContainerCustomizer embeddedServletContainerCustomizer(){
    EmbeddedServletContainerCustomizer containerCustomizer = new EmbeddedServletContainerCustomizer(){

        //container表示传入的是默认的嵌入式的tomcat容器
        @Override
        public void customize(ConfigurableEmbeddedServletContainer container) {
            container.setPort(8083);
            container.setContextPath("/test");
        }
    };
    return containerCustomizer;
}
在配置文件中配置其原理也是一样的,ServerProperties也是实现类EmbeddedServletContainerCustomizer,并在customize方法中设置属性
@Override
public void customize(ConfigurableEmbeddedServletContainer container) {
   if (getPort() != null) {
      container.setPort(getPort());
   }
   if (getAddress() != null) {
      container.setAddress(getAddress());
   }
   if (getContextPath() != null) {
      container.setContextPath(getContextPath());
   }
   if (getDisplayName() != null) {
      container.setDisplayName(getDisplayName());
   }
   if (getSession().getTimeout() != null) {
      container.setSessionTimeout(getSession().getTimeout());
   }
   container.setPersistSession(getSession().isPersistent());
   container.setSessionStoreDir(getSession().getStoreDir());
   if (getSsl() != null) {
      container.setSsl(getSsl());
   }
   if (getJspServlet() != null) {
      container.setJspServlet(getJspServlet());
   }
   if (getCompression() != null) {
      container.setCompression(getCompression());
   }
   container.setServerHeader(getServerHeader());
   if (container instanceof TomcatEmbeddedServletContainerFactory) {
      getTomcat().customizeTomcat(this,
            (TomcatEmbeddedServletContainerFactory) container);
   }
   if (container instanceof JettyEmbeddedServletContainerFactory) {
      getJetty().customizeJetty(this,
            (JettyEmbeddedServletContainerFactory) container);
   }

   if (container instanceof UndertowEmbeddedServletContainerFactory) {
      getUndertow().customizeUndertow(this,
            (UndertowEmbeddedServletContainerFactory) container);
   }
   container.addInitializers(new SessionConfiguringInitializer(this.session));
   container.addInitializers(new InitParameterConfiguringServletContextInitializer(
         getContextParameters()));
}
注册Servlet、Filter、Listener
ServletRegistrationBean
FilterRegistrationBean
ServletListenerRegistrationBean
由于SpringBoot默认是以jar包的方式启动嵌入式的Servlet容器来启动SpringBoot的Web应用,没有web.xml文件,所以要注册三大组件Servlet、Filter、Listener,需要使用上面的对应的包装类。以Filter为例
@Bean
public FilterRegistrationBean filterRegistrationBean(){
    FilterRegistrationBean filterRegistrationBean = new FilterRegistrationBean();
    //绑定相关的Filter
    filterRegistrationBean.setFilter(new MyFilter());
    //设置Filter过滤的url
    filterRegistrationBean.setUrlPatterns(Arrays.asList("/hello","/test"));
    return filterRegistrationBean;

}
SpringBoot自动配置SpringMVC的时候,自动注册了SpringMVC的前端控制器,DispatcherServlet,在DispatcherServletAutoConfiguration中
@Bean(name = DEFAULT_DISPATCHER_SERVLET_REGISTRATION_BEAN_NAME)
@ConditionalOnBean(value = DispatcherServlet.class, name = DEFAULT_DISPATCHER_SERVLET_BEAN_NAME)
public ServletRegistrationBean dispatcherServletRegistration(
      DispatcherServlet dispatcherServlet) {

     //默认拦截:/,表示所有请求,包括静态资源,但是不拦截jsp请求,/*会拦截jsp请求
       //可以通过server.servletPath来修改SpringMVC的前端过滤访问
   ServletRegistrationBean registration = new ServletRegistrationBean(
         dispatcherServlet, this.serverProperties.getServletMapping());
   registration.setName(DEFAULT_DISPATCHER_SERVLET_BEAN_NAME);
   registration.setLoadOnStartup(
         this.webMvcProperties.getServlet().getLoadOnStartup());
   if (this.multipartConfig != null) {
      registration.setMultipartConfig(this.multipartConfig);
   }
   return registration;
}
“/”和“/”含义是不一样的,“/”属于路径匹配,并且可以匹配所有请求,由于路径匹配的优先级仅次于精确匹配,所以“/*”会覆盖所有的扩展名匹配,故不推荐使用。“/”是servlet中特殊的匹配模式,优先
级最低(第(4)级),不会覆盖其他任何匹配模式,只是会替换servlet容器的内建default servlet ,该模式同样会匹配所有请求。
使用其他的Servlet容器
Jetty(适合做长连接的业务,如聊天)
Undertow(不支持Jsp,但是并发性能好)
SpringBoot默认支持的是tomcat,Jetty,undertow,在配置默认Servlet属性时ConfigurableEmbeddedServletContainer,其实现类

SpringBoot默认是使用tomcat,主要在于添加初始化依赖时默认使用的tomcat依赖

所以在切换不同的Servlet容器时,只需要将tomcat的依赖移除,并添加相应容器的依赖。
嵌入式Servlet容器自动配置原理
在自动配置类EmbeddedServletContainerAutoConfiguration中实现。
@AutoConfigureOrder(Ordered.HIGHEST_PRECEDENCE)
@Configuration
@ConditionalOnWebApplication
@Import(BeanPostProcessorsRegistrar.class)
public class EmbeddedServletContainerAutoConfiguration {

   /**
    * Nested configuration if Tomcat is being used.
    */
   @Configuration
   @ConditionalOnClass({ Servlet.class, Tomcat.class })
   @ConditionalOnMissingBean(value = EmbeddedServletContainerFactory.class, search = SearchStrategy.CURRENT)
   public static class EmbeddedTomcat {

      @Bean
      public TomcatEmbeddedServletContainerFactory tomcatEmbeddedServletContainerFactory() {
         return new TomcatEmbeddedServletContainerFactory();
      }

   }
通过对应的容器工厂,在容器工厂中生成对应的嵌入式容器
@Override
public EmbeddedServletContainer getEmbeddedServletContainer(
      ServletContextInitializer... initializers) {
   Tomcat tomcat = new Tomcat();
   File baseDir = (this.baseDirectory != null ? this.baseDirectory
         : createTempDir("tomcat"));
   tomcat.setBaseDir(baseDir.getAbsolutePath());
   Connector connector = new Connector(this.protocol);
   tomcat.getService().addConnector(connector);
   customizeConnector(connector);
   tomcat.setConnector(connector);
   tomcat.getHost().setAutoDeploy(false);
   configureEngine(tomcat.getEngine());
   for (Connector additionalConnector : this.additionalTomcatConnectors) {
      tomcat.getService().addConnector(additionalConnector);
   }
   prepareContext(tomcat.getHost(), initializers);
   return getTomcatEmbeddedServletContainer(tomcat);
}
protected TomcatEmbeddedServletContainer getTomcatEmbeddedServletContainer(
      Tomcat tomcat) {
   return new TomcatEmbeddedServletContainer(tomcat, getPort() >= 0);
}
并且在生成嵌入式容器时会启动容器
public TomcatEmbeddedServletContainer(Tomcat tomcat, boolean autoStart) {
   Assert.notNull(tomcat, "Tomcat Server must not be null");
   this.tomcat = tomcat;
   this.autoStart = autoStart;
   initialize();
}

private void initialize() throws EmbeddedServletContainerException {
   TomcatEmbeddedServletContainer.logger
         .info("Tomcat initialized with port(s): " + getPortsDescription(false));
   synchronized (this.monitor) {
      try {
         addInstanceIdToEngineName();
         try {
            // Remove service connectors to that protocol binding doesn't happen
            // yet
            removeServiceConnectors();

            // Start the server to trigger initialization listeners
            this.tomcat.start();

            // We can re-throw failure exception directly in the main thread
            rethrowDeferredStartupExceptions();

            Context context = findContext();
            try {
               ContextBindings.bindClassLoader(context, getNamingToken(context),
                     getClass().getClassLoader());
            }
            catch (NamingException ex) {
               // Naming is not enabled. Continue
            }

            // Unlike Jetty, all Tomcat threads are daemon threads. We create a
            // blocking non-daemon to stop immediate shutdown
            startDaemonAwaitThread();
         }
         catch (Exception ex) {
            containerCounter.decrementAndGet();
            throw ex;
         }
      }
      catch (Exception ex) {
         throw new EmbeddedServletContainerException(
               "Unable to start embedded Tomcat", ex);
      }
   }
}
在修改嵌入式容器属性的时候通过@Import(BeanPostProcessorsRegistrar.class)导入一个后置处理器,该处理器中会将所有的EmbeddedServletContainerCustomizer拿到然后执行其customize方法,并把当期嵌入式容器作为参数传入到customize方法中。
总结:
1、SpringBoot根据导入的依赖情况,给容器中添加相应的嵌入式容器工厂;
2、容器中某个组件要创建对象就会触发后置处理器
3、后置处理器会拿到容器中所有的EmbeddedServletContainerCustomizer,然后执行其customize
使用外置的Servlet容器
嵌入式Servlet容器缺点:默认不支持jsp、优化定制比较复杂。
外置的Servlet容器:外面安装Tomcat,应用WAR包形式
1、创建一个一个WAR项目(创建好相应的目录)
2、将嵌入式的Tomcat指定为Provided
<dependency>
    <groupId>org.springframework.boot</groupId>
    <artifactId>spring-boot-starter-tomcat</artifactId>
    <scope>provided</scope>
</dependency>
3、必须编写一个SpringBootServletInitializer的实现类,并调用configure方法
public class ServletInitializer extends SpringBootServletInitializer {

    @Override
    protected SpringApplicationBuilder configure(SpringApplicationBuilder application) {
        //将SpringBoot的主程序传入
        return application.sources(SpringbootApplication.class);
    }

}

Servlet3.0规范定义了相应的规则:
1、服务器启动(文本应用启动)会创建当前web应用里面每一个jar包里面ServletContainerInitializer实例
2、ServletContainerInitializer的实现放在jar包的META-INF/services文件夹下,有一个名为javax.servlet.ServletContainerInitializer的文件,内容就是ServletContainerInitializer的实现类全类名,SpringBoot是放在web模板下的jar包

3、还可以使用@HandlesTypes,在应用启动的时候加载我们感兴趣的类。
启动流程:
1、启动Tomcat
2、org/springframework/spring-web/5.1.9.RELEASE/spring-web-5.1.9.RELEASE.jar!/META-INF/services/javax.servlet.ServletContainerInitializer,加载该文件中定义的org.springframework.web.SpringServletContainerInitializer类,@HandlesTypes({WebApplicationInitializer.class})标注的所有这个类型的类传入到onStartup方法 Set<Class<?>> webAppInitializerClasses参数中,并在方法中创建其实例。
3、每一个WebApplicationInitializer都会调用自己的onStartup方法,其实现类如下

而我们创建的war工程就是实现了SpringBootServletInitializer,所以会执行其onStartup方法,在该方法中会创建SpringBoot的应用程序,而configure方法是为了告诉SpringBoot的主程序在什么地方。


 4694
4694


 被折叠的 条评论
为什么被折叠?
被折叠的 条评论
为什么被折叠?
 到【灌水乐园】发言


