


swagger:超好用的接口API工具,对于后台来说不需要专门写测试页面就可以对接口进行调试。
接下来,给我一分钟!来完成spring+springmvc+mybaties框架上集成swagger。
第一步:maven引入所需jar包
<!-- swagger -->
<dependency>
<groupId>com.mangofactory</groupId>
<artifactId>swagger-springmvc</artifactId>
<version>1.0.2</version>
</dependency>
<dependency>
<groupId>io.springfox</groupId>
<artifactId>springfox-swagger2</artifactId>
<version>2.6.1</version>
</dependency>
<dependency>
<groupId>io.springfox</groupId>
<artifactId>springfox-swagger-ui</artifactId>
<version>2.6.1</version>
</dependency>
<dependency>
<groupId>com.fasterxml.jackson.core</groupId>
<artifactId>jackson-databind</artifactId>
<version>2.7.5</version>
</dependency>
第二步:自定义相关配置
package com.test.document;
import org.springframework.context.annotation.Bean;
import org.springframework.context.annotation.Configuration;
import org.springframework.web.servlet.mvc.method.RequestMappingInfoHandlerMapping;
import org.springframework.web.servlet.mvc.method.annotation.RequestMappingHandlerMapping;
import springfox.documentation.builders.PathSelectors;
import springfox.documentation.builders.RequestHandlerSelectors;
import springfox.documentation.spi.DocumentationType;
import springfox.documentation.spring.web.plugins.Docket;
import springfox.documentation.swagger2.annotations.EnableSwagger2;
@Configuration
@EnableSwagger2 //Loads the spring beans required by the framework
public class MySwaggerConfig {
@Bean
public Docket userApi() {
return new Docket(DocumentationType.SWAGGER_2)
.select() // 选择那些路径和api会生成document
.apis(RequestHandlerSelectors.any()) // 对所有api进行监控
.paths(PathSelectors.any()) // 对所有路径进行监�?
.build();
}
@Bean
public RequestMappingInfoHandlerMapping requestMapping(){
return new RequestMappingHandlerMapping();
}
}
第三步:在applicationContext.xml文件进行配置
<!-- 引入swagger相关 -->
<bean class="com.test.document.MySwaggerConfig"/>
<mvc:resources mapping="swagger-ui.html" location="classpath:/META-INF/resources/" />
<mvc:resources mapping="/webjars/**" location="classpath:/META-INF/resources/webjars/" />
第四步:在springMVC配置文件中引入swagger相关配置包
<bean class="springfox.documentation.swagger2.configuration.Swagger2DocumentationConfiguration" id="swagger2Config"/>
第五步:在controller层配置controller及方法
package com.test.controller;
import org.springframework.stereotype.Controller;
import org.springframework.web.bind.annotation.RequestMapping;
import org.springframework.web.bind.annotation.RequestMethod;
import org.springframework.web.bind.annotation.ResponseBody;
import com.wordnik.swagger.annotations.ApiOperation;
import io.swagger.annotations.Api;
@Controller
@RequestMapping(value="/TestExcelFast")
@Api(value = "restful", description = "测试")
public class TestExcelFastController {
@ApiOperation(value = "测试专用")
@RequestMapping(value="/test",method=RequestMethod.GET)
@ResponseBody
public String test(){
String str = "123";
System.out.println(1);
return str;
}
}
第六步:配置已经完毕,启动项目,输入访问地址
http://localhost:8080/项目名称/swagger-ui.html

执行!try
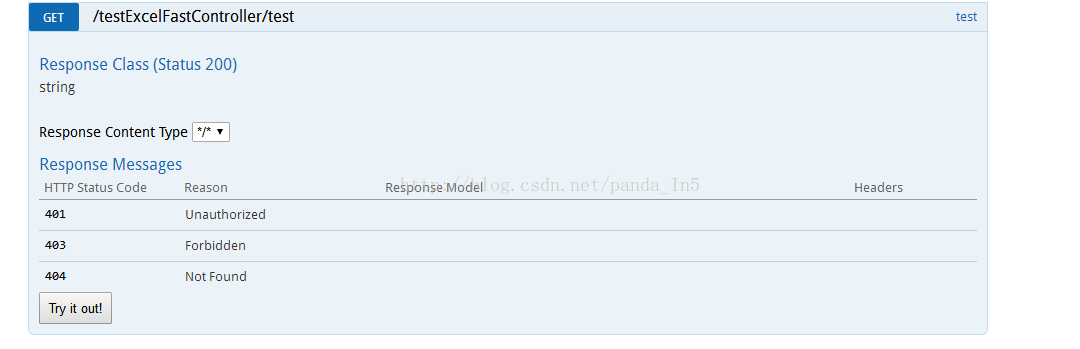
输出结果:
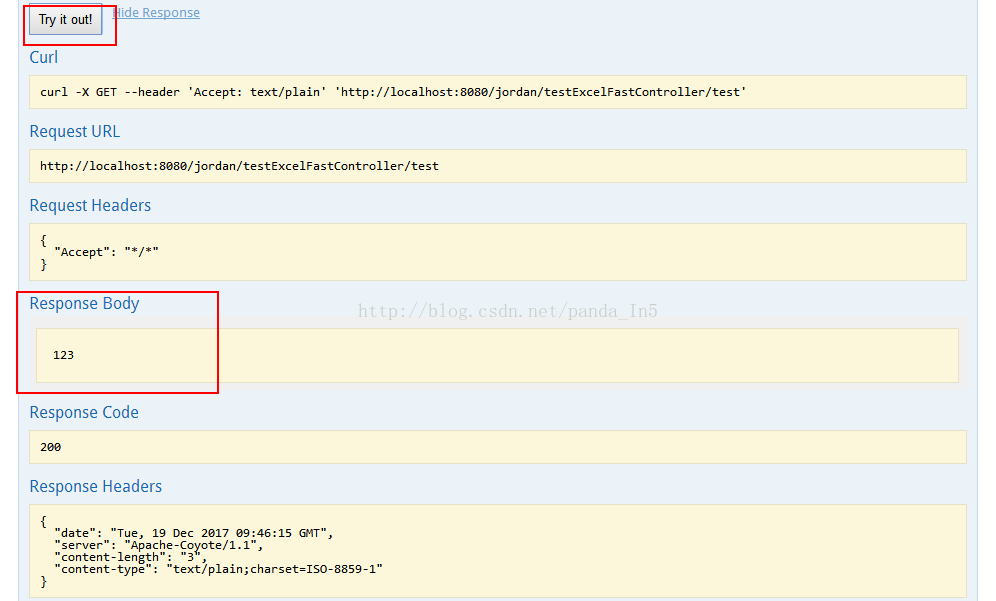
到此为止!
swagger已经集成完毕!


 2999
2999

 被折叠的 条评论
为什么被折叠?
被折叠的 条评论
为什么被折叠?
 到【灌水乐园】发言


