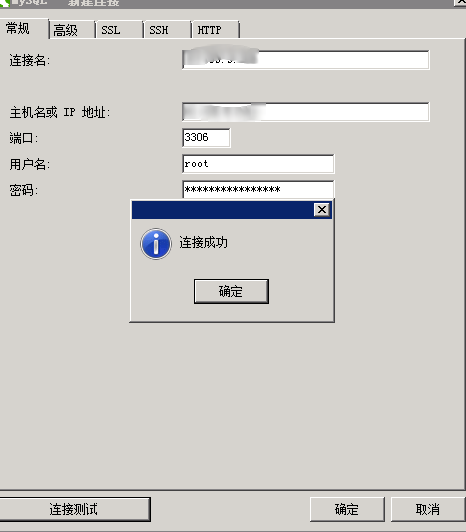
Linux安装MySQL。
一、安装文件
mysql官网,我是没有找到怎么下载。所以,我上传到百度云上供大家免费下载。
二、安装
①、上传文件
使用linux的sz、rz命令可以上传,也可以使用filezila工具上传,上传完毕后,见文件如下:

②、清理mysql
这一步非常关键,保证在安装mysql之前,Linux上对mysql是干净的,否则经常会导致安装失败。
升级mysql到5.7,这篇文章中有详细介绍,可参照。
③、安装MySQL-server
[root@iZ23gsv94suZ soft]# rpm -ivh MySQL-server-5.7.4_m14-1.el6.x86_64.rpm
Preparing...                ########################################### [100%]
find: `/var/lib/mysql': No such file or directory
   1:MySQL-server           ########################################### [100%]

A RANDOM PASSWORD HAS BEEN SET FOR THE MySQL root USER !
You will find that password in '/root/.mysql_secret'.

You must change that password on your first connect,
no other statement but 'SET PASSWORD' will be accepted.
See the manual for the semantics of the 'password expired' flag.


Please report any problems at http://bugs.mysql.com/

The latest information about MySQL is available on the web at

  http://www.mysql.com

Support MySQL by buying support/licenses at http://shop.mysql.com
- 1
- 2
- 3
- 4
- 5
- 6
- 7
- 8
- 9
- 10
- 11
- 12
- 13
- 14
- 15
- 16
- 17
- 18
- 19
- 20
- 1
- 2
- 3
- 4
- 5
- 6
- 7
- 8
- 9
- 10
- 11
- 12
- 13
- 14
- 15
- 16
- 17
- 18
- 19
- 20
tips:
- 注意’/root/.mysql_secret’这个文件。
- 注意
no other statement but 'SET PASSWORD' will be accepted。
④、安装MySQL-client
rpm -ivh MySQL-client-5.7.4_m14-1.el6.x86_64.rpm
五、启动mysql服务
[root@iZ23gsv94suZ mysql]
Starting MySQL. SUCCESS!
⑥、连接mysql
[root@iZ23gsv94suZ mysql]# mysql -uroot -p
Enter password:
ERROR 1045 (28000): Access denied for user 'root'@'localhost' (using password: NO)
密码在“/root/.mysql_secret”这个文件中。
⑦、修改默认密码
mysql> use mysql
ERROR 1820 (HY000): You must SET PASSWORD before executing this statement
此时出现了错误,我们需要:
mysql> set password=password("root")
Query OK, 0 rows affected (0.00 sec)
⑧、修改密码
mysql> use mysql
Reading table information for completion of table and column names
You can turn off this feature to get a quicker startup with -A

Database changed
mysql> update user set password=PASSWORD("lixiaoli") where user="root";
Query OK, 1 row affected (0.00 sec)
Rows matched: 1  Changed: 1  Warnings: 0

mysql> flush privileges;
Query OK, 0 rows affected (0.00 sec)
哈哈,请不要相信我的密码是“lixiaoli”,我只不过是喜欢她而已!没错,就是李孝利。
⑨、开启防火墙
为了保证Linux的安全期间,我们需要开启防火墙,同时,将mysql的3306端口释放出去。
请注意先关闭防火墙
service iptables stop
vim /etc/sysconfig/iptables
打开以上文件,增加如下内容:
-A INPUT -p tcp -m state --state NEW -m tcp --dport 3306 -j ACCEPT
service iptables save
service iptables start
⑩、开启远程访问权限
mysql> grant all privileges on *.* to root@'192.168.44.11' identified by "lixiaoli";
Query OK, 0 rows affected (0.00 sec)

mysql> flush privileges;
Query OK, 0 rows affected (0.00 sec)
- “grant all privileges”:开启所有权限,包括增删改查了!
- “.”:当有数据库的数据表。
- “root”:user名了!
- “‘192.168.44.11’”自然就是对那一台机器开启远程权限了。
- “‘lixiaoli’”:自然是对应的密码了


 12万+
12万+

 被折叠的 条评论
为什么被折叠?


