


以上一篇文章中的注册中心Eureka工程为基础,今天写一个服务提供和一个服务调用的具体例子。
服务的提供
- 新建一个springboot项目,然后在pom文件中加入以下依赖:
<dependency>
    <groupId>org.springframework.boot</groupId>
    <artifactId>spring-boot-starter-test</artifactId>
    <scope>test</scope>
</dependency>
<dependency>
    <groupId>org.springframework.cloud</groupId>
    <artifactId>spring-cloud-starter</artifactId>
    <version>1.3.5.RELEASE</version>
</dependency>
<dependency>
    <groupId>org.springframework.cloud</groupId>
    <artifactId>spring-cloud-starter-eureka-server</artifactId>
    <version>1.3.6.RELEASE</version>
</dependency>
- 接着我们在application.properties文件里配置如下:
spring.application.name=spring-cloud-producer
server.port=9000
eureka.client.serviceUrl.defaultZone=http://localhost:8000/eureka/
- 在启动类新增@EnableDiscoveryClient注解
@SpringBootApplication
@EnableDiscoveryClient
public class SpringCloudProducerApplication {

    public static void main(String[] args) {
        SpringApplication.run(SpringCloudProducerApplication.class, args);
    }
}
- 编写controller
@RestController
public class HelloController {

    @RequestMapping("/hello")
    public String hello(@RequestParam String name){
        return "hello "+name+",this is first message by producer";
    }
}
添加@EnableDiscoveryClient注解后,项目就具有了服务注册的功能。启动工程后,就可以在注册中心的页面看到SPRING-CLOUD-PRODUCER服务

至此,服务的提供者配置完成。
服务的调用
- 新建一个springboot项目,然后在pom文件中加入以下依赖:
<dependencies>
	<dependency>
		<groupId>org.springframework.cloud</groupId>
		<artifactId>spring-cloud-starter-eureka</artifactId>
	</dependency>
	<dependency>
		<groupId>org.springframework.boot</groupId>
		<artifactId>spring-boot-starter-test</artifactId>
		<scope>test</scope>
	</dependency>
</dependencies>
- 配置application.properties文件
spring.application.name=spring-cloud-consumer
server.port=9100
eureka.client.serviceUrl.defaultZone=http://localhost:8000/eureka/

feign.hystrix.enabled=true
- 启动类添加@EnableDiscoveryClient和@EnableFeignClients注解。
@SpringBootApplication
@EnableDiscoveryClient
@EnableFeignClients
public class SpringCloudConsumeApplication {

    public static void main(String[] args) {
        SpringApplication.run(SpringCloudConsumeApplication.class, args);
    }
}
@EnableDiscoveryClient :启用服务注册与发现
@EnableFeignClients:启用feign进行远程调用
- feign调用的实现
编写HelloRemote接口
@FeignClient(name = "spring-cloud-producer", fallback = HelloRemoteHystrix.class)
public interface HelloRemote {

    @RequestMapping("/hello")
    String hello(@RequestParam("name") String name);
}
name:远程服务名,及spring.application.name配置的名称
此类中的方法和远程服务中contoller中的方法名和参数需保持一致。
- controller层调用远程服务
@RestController
public class HelloController {

    @Autowired
    private HelloRemote helloRemote;

    @RequestMapping("/hello/{name}")
    public String index(@PathVariable("name") String name){
        return helloRemote.hello(name);
    }
}
至此服务的调用者也配置完成了。
测试
简单调用
依次启动spring-cloud-eureka注册中心、spring-cloud-producer生产者、spring-cloud-consumer消费者三个工程
先在浏览器访问生产者服务器状态:http://localhost:9000/hello?name=fyf
返回:hello fyf,this is first messge by producer
说明spring-cloud-producer正常启动,提供的服务也正常。
浏览器中输入:http://localhost:9100/hello/fyf
返回:hello fyf,this is first messge by producer
说明客户端已经成功的通过feign调用了远程服务hello,并且将结果返回到了浏览器。
负载均衡
- 复制一个生产者项目为spring-cloud-producer
- 修改项目配置文件的端口为9001
- 修改controller文件的hello方法
@RestController
public class HelloController {

    @RequestMapping
    public String index(@RequestParam String name){
        return "hello "+name+",this is first message by producer2";
    }
}
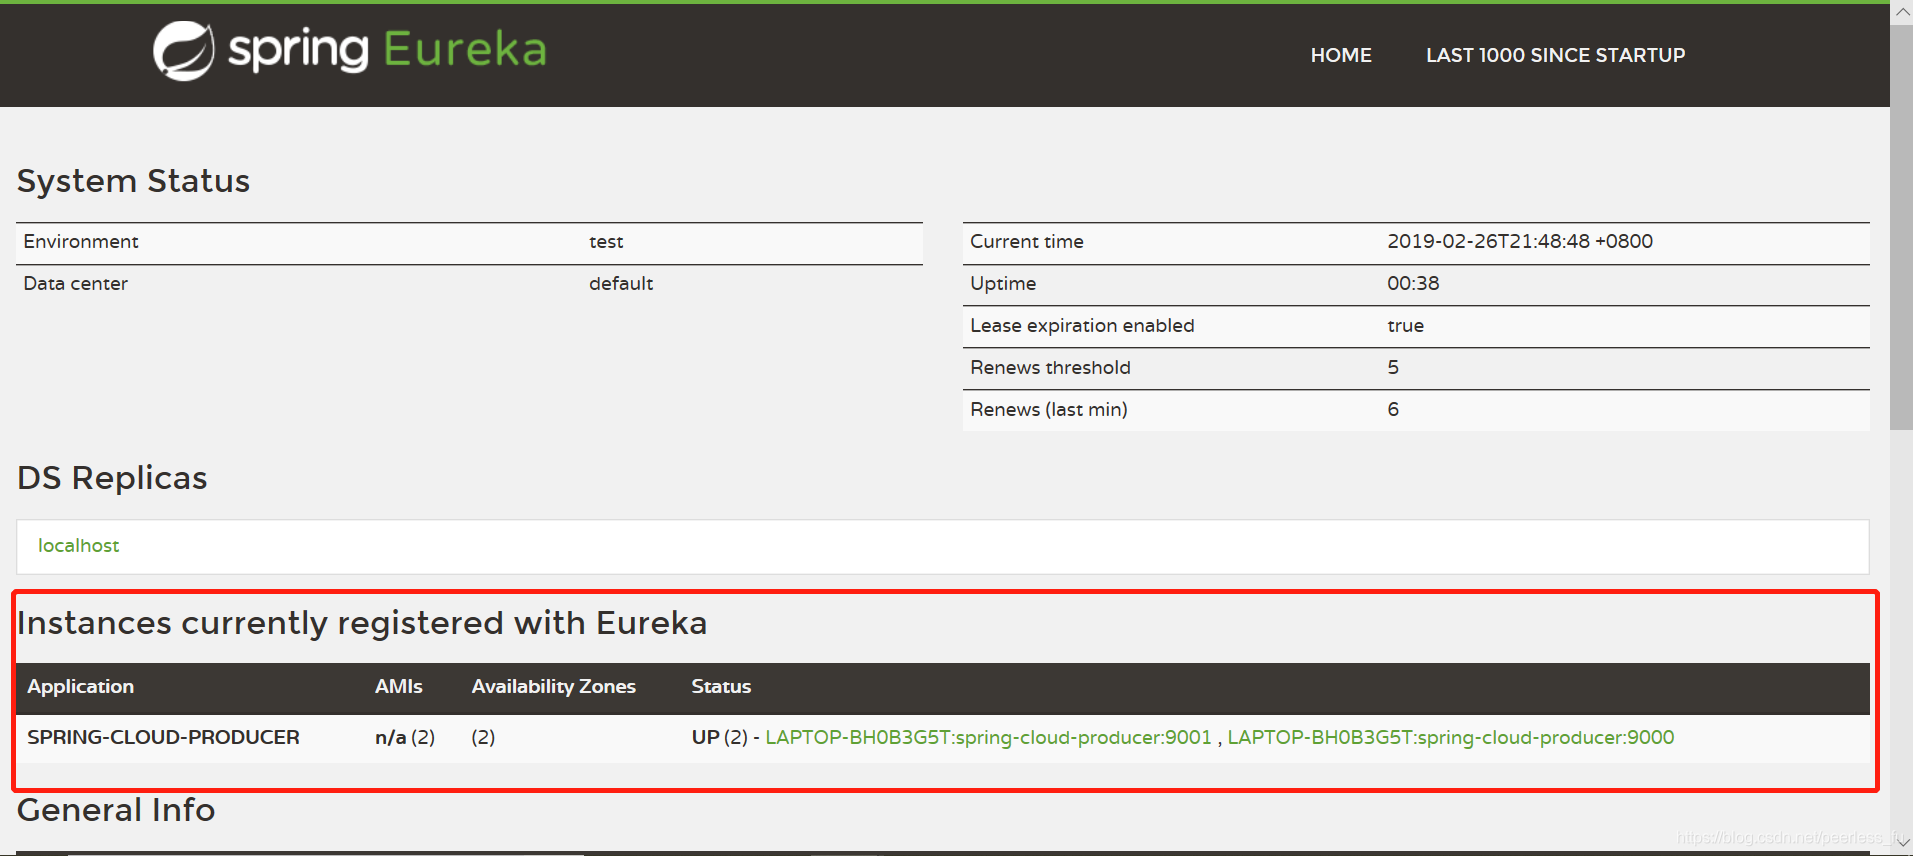
- 启动服务,注册中心会出现两个生产者服务
再在浏览器中进行测试,输入地址:http://localhost:9100/hello/fyf
浏览器第一次返回:hello fyf,this is first messge by producer
浏览器第二次返回: hello fyf,this is first messge by producer2
由此可见,达到了负载均衡的效果。


 461
461


 被折叠的 条评论
为什么被折叠?
被折叠的 条评论
为什么被折叠?
 到【灌水乐园】发言


