


方案一,
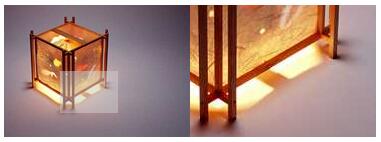
原生JS实现
<!DOCTYPE html>
<html>
<head>
	<meta http-equiv="content-type" content="text/html;charset=utf-8" />
	<meta http-equiv="Author" content="author" />
	<title>zoomImage</title>
</head>

<body>

<!-- 注意dom结构: div>img[data-bigimg] -->
<!-- img标签上的属性都是必须的 -->
<!-- 两个图片的尺寸必须是同比例的 -->
<div id="img-viewer">
	<img width="186" height="132" src="http://pic2.sc.chinaz.com/Files/pic/pic/s/shenghuoyp_48s.JPG" data-bigimg="http://pic.sc.chinaz.com/files/pic/pic/b/shenghuoyp_48b.jpg" />
</div>

<script type="text/javascript">

/* @function imgViewer
 * @desc 简单的图片放大镜功能,完全采用原生js代码
 */
function imgViewer( target ){
	//定义放大显示的区域大小
	var viewSize = { width: 186,height: 132	};

	var container = document.getElementById(target);
	var simg = container.getElementsByTagName('img')[0], bimg=new Image;
	var sWidth = simg.width, sHeight = simg.height, bWidth, bHeight;
	var bimgBox = document.createElement('div'), handBox = document.createElement('div');
	var handBoxSize = {width: 0, height: 0};

	container.appendChild(bimgBox);
	container.appendChild(handBox);

	setStyles(container, {position: 'relative'});
	setStyles(bimgBox, {
		display: 'none',
		position: 'absolute',
		width: viewSize.width+'px', height: viewSize.height+'px', overflow: 'hidden',
		left: sWidth+'px', top: 0
	});
	setStyles(handBox, {
		display: 'none',
		position: 'absolute',
		backgroundColor: '#ccc',
		opacity: 0.5,
		filter: 'alpha(opacity=50)',
		//border: '1px solid #ccc',
		left: 0, top: 0
	});
	setStyles(bimg, {position: 'absolute', left: 0, top: 0});

	bimg.onload = function(){
		bWidth = this.width;
		bHeight = this.height;
		handBoxSize.width = (viewSize.width/bWidth)*sWidth;
		handBoxSize.height = (viewSize.height/bHeight)*sHeight;
		setStyles(handBox, {
			width: handBoxSize.width + 'px',
			height: handBoxSize.height + 'px'
		});
		bimgBox.appendChild(this);
		bindEvent();
	};

	bimg.src = simg.getAttribute('data-bigimg');

	function setStyles(dom, rules){
		for (var key in rules )
		{
			dom.style[key] = rules[key];
		}
	}

	function bindEvent( options ){
		var timeout = 0;
		function on(dom, type, fn){
			if (dom.addEventListener)
			{
				dom.addEventListener(type, fn, false);
			}else if (dom.attachEvent)
			{
				dom.attachEvent('on'+type, fn);
			}
		}
		function showArea(x, y){
			var handBoxLeft = Math.min(Math.max(x - handBoxSize.width/2, 0), sWidth-handBoxSize.width),
				handBoxTop = Math.min(Math.max(y - handBoxSize.height/2, 0), sHeight-handBoxSize.height);
			var bimgLeft = handBoxLeft*(bWidth/sWidth), bimgTop = handBoxTop*(bHeight/sHeight);
			setStyles(handBox, {
				left: handBoxLeft + 'px',
				top: handBoxTop + 'px',
				display: 'block'
			});
			setStyles(bimg, {
				left: -bimgLeft + 'px',
				top: -bimgTop + 'px'
			});
			bimgBox.style.display = 'block';

		}

		on(simg, 'mousemove',function(e){
			showArea(e.offsetX || e.layerX, e.offsetY || e.layerY);
		});
		on(handBox, 'mousemove', function(e){
			var x = parseFloat(handBox.style.left)+(e.offsetX||e.layerX),
				y = parseFloat(handBox.style.top)+(e.offsetY||e.layerY);

			showArea(x, y);
		});
		on(handBox, 'mouseout', function(e){
			bimgBox.style.display = 'none';
			handBox.style.display = 'none';
		});
	}
}

//传入div的id
new imgViewer('img-viewer');

</script>
</body>
</html>方案二,
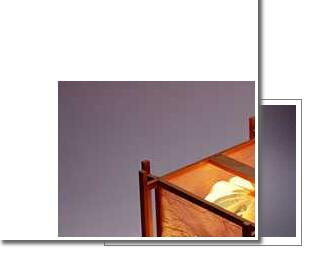
也是原生JS实现。区别用方案一的是不会在旁边显示。
<!DOCTYPE html>
<html>
<head>
<title>zoomImage</title>
<meta http-equiv="Content-Type" content="text/html; charset=utf-8" />
<style type="text/css">
.zoomPan{margin-top:100px;width:186px;left:100px;position:relative; border:1px solid grey; padding:5px }
.sh{zoom:1;background:#eee;filter:progid:DXImageTransform.Microsoft.dropShadow(color='#54000000', OffX=2,OffY=2);-webkit-box-shadow:4px 4px 4px #666;-moz-box-shadow:4px 4px 4px #666;}
#zoom{position:absolute;width:254px;height:254px;border:3px solid #fff;left:-9999px;top:0;overflow:hidden;background:#fff;}
#zoom img{position:relative;}
h1{color:#FF0080;border-bottom:5px solid #ddd;padding:10px;}
h4{text-align:right;padding:20px;border-top:1px solid #ddd;color:#ccc;}
</style>
</head>
<body>

<div class="zoomPan" id="zoomPan">
    <img src="http://pic2.sc.chinaz.com/Files/pic/pic/s/shenghuoyp_48s.JPG" alt=""  />
    <div id="zoom" class="sh"><img src="http://pic.sc.chinaz.com/files/pic/pic/b/shenghuoyp_48b.jpg" alt="" /></div>
</div>
</body>
<script type="text/javascript">
//<![CDATA[
function zoomBox() {this.index.apply(this, arguments)}
zoomBox.prototype = {
    index: function(win,zoom) {
        var win=document.getElementById(win);
        var box=document.getElementById(zoom);
        var img=box.getElementsByTagName('IMG')[0];
        var zoom=img.width/win.getElementsByTagName('IMG')[0].width;
        var z=Math.round(box.offsetWidth/2);
        win.οnmοusemοve=function (e){
            e = e || window.event;
            var x=e.clientX,y=e.clientY, ori=win.getBoundingClientRect();
            if (x>ori.right+20||y>ori.bottom+20||x<ori.left-20||y<ori.top-20)box.style.display='none';
            x-=ori.left;
            y-=ori.top;
            box.style.left=x-z+'px';
            box.style.top=y-z+'px';
            img.style.left=-x*zoom+z+'px';
            img.style.top=-y*zoom+z+'px';
        }
        win.οnmοuseοver=function (){box.style.display=''}
    }
};
window.οnlοad=function (){
    x=new zoomBox('zoomPan','zoom')
}
 //]]>
</script>
</html>方案三,
使用了打包的插件,一言难尽。
Find more here: www.lanrentuku.com/js/


 268
268

 被折叠的 条评论
为什么被折叠?
被折叠的 条评论
为什么被折叠?
 到【灌水乐园】发言


