


目录
ps: 有两种写法 rabbitTemplate和AmqpTemplate
3.1 创建俩springboot工程(正常创建 不用加依赖)
-> 下一篇: 03-rabbitmq在springboot中如何使用(下篇)
前言: 上文传送
-> 安装rabbitmq传送门:
-> rabbitmq使用出现问题解决传送门:
1. rabbitmq的六大模式:
1.1 简单模式: (一对一)
发送者向队列发送消息,接收者从队列接收消息。
-> 业务场景:
订单创建, 邮件发送 等一切消费者不关心过程的操作
1.2 工作模式: (一对多)
多个工作者同时从同一个队列中接收消息,并处理这些消息,每个消息只被一个工作者处理。
-> 业务场景:
多个消费者一起抗压, 共同接收, 与一类似
1.3 发布与订阅模式: (广播)
一个发送者将消息发送到交换机,交换机将消息分发到多个队列中,每个队列都有一个接收者。
1.4 路由模式:
与发布/订阅模式类似,不同之处在于消息通过“路由键”(Routing Key)匹配到队列中的接收者。
-> 业务场景
用于日志收集, 不同订单处理等 能用路由模式就不要用主题模式
1.5 主题模式: (路由升级版)
使用了更加灵活的通配符匹配规则。
-> 业务场景
电商平台可以使用主题模式将商品销售信息发送到不同的队列
1.6 RPC异步调用模式
需要一个唯一的标识符,在客户端发送请求时带上该标识符,服务端在处理完请求后将标识符带上响应一起发送回客户端,这样客户端就能正确地匹配请求和响应。
-> 业务场景
例如,电商平台可以使用异步调用模式实现库存管理系统与订单系统的交互,当有订单创建时,订单系统会调用库存管理系统减少商品库存,库存管理系统处理完毕后将结果发送到回调队列,订单系统从回调队列中获取处理结果并进行相应的流程处理。
2. RabbitMQ 的工作机制主要包括:
消息生产者(Publisher):向 RabbitMQ 中发送消息的应用程序;
消息队列(Queue):用于存放消息的缓冲区,可以根据需要设置队列的属性,如队列最大长度、队列消息的过期时间等;
交换机(Exchange):用于接收生产者发送的消息,并将消息路由到相应的队列中,交换机的类型包括直接模式、主题模式、扇形模式和头部模式;
绑定(Binding):将交换机和队列通过指定的路由键(Routing Key)进行绑定,绑定关系可以是多对多的;
消息消费者(Consumer):从队列中取出消息,并进行处理的应用程序;
虚拟主机(Virtual Host):RabbitMQ 允许通过虚拟主机实现逻辑上的消息隔离,不同的虚拟主机之间互相独立,可以拥有自己独立的交换机、队列、权限等。
在整个工作机制中,生产者将消息发送到指定的交换机中,交换机根据路由键将消息分发到相应的队列中,消费者从队列中取出消息进行处理。RabbitMQ 还可以进行消息的持久化、消息的优先级设置、消息的事务处理等操作,具备较高的可靠性和可用性。
3. springboot整合rabbitMq准备工作
ps: 有两种写法 rabbitTemplate和AmqpTemplate
这俩可以理解成俩公司封装的两套功能 实现了一种效果 都可以实现 选择其一即可
准备工作
3.1 创建俩springboot工程(正常创建 不用加依赖)
rabbitmq-provider 生产者
rabbitmq-consumer 消费者
模拟微服务俩工程 不需要注册中心
3.2 添加依赖
        <dependency>
            <groupId>org.springframework.boot</groupId>
            <artifactId>spring-boot-starter</artifactId>
        </dependency>

        <dependency>
            <groupId>org.springframework.boot</groupId>
            <artifactId>spring-boot-starter-test</artifactId>
            <scope>test</scope>
        </dependency>
        <dependency>
            <groupId>org.springframework.boot</groupId>
            <artifactId>spring-boot-starter-amqp</artifactId>
        </dependency>
3.3 修改application.yml
spring:
  rabbitmq:
    host: *
    username: pzy
    password: *
    virtual-host: pingzhuyan
    listener:
      simple:
        prefetch: 1 #设置每次预抓取的数量是1,处理完之前不收下一条 默认250
server:
  port: 9501
spring:
rabbitmq:
host: *
username: pzy
password: *
virtual-host: pingzhuyan
listener:
simple:
prefetch: 1 #设置每次预抓取的数量是1,处理完之前不收下一条 默认250
server:
port: 95023.4 启动测试
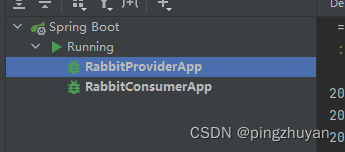
启动失败解决方案
1. 端口号冲突: 换端口
2. bean冲突: 清缓存重启
3. 删除后pom,xml变成灰色 鼠标右键 点击添加maven project即可
其他百度, rabbitmq连接不上的 看看服务起没起
4. 六大模式实际操作
4.0 调用模拟(定时调度任务)
异步线程池看其他文章 这里不做介绍
-> 4.0.1 生产者启动类
package cn.pingzhuyan.rabbitmq;

import org.springframework.boot.SpringApplication;
import org.springframework.boot.autoconfigure.SpringBootApplication;
import org.springframework.scheduling.annotation.EnableAsync;
import org.springframework.scheduling.annotation.EnableScheduling;

@EnableAsync
@EnableScheduling
@SpringBootApplication
public class RabbitProviderApp {

    public static void main(String[] args) {
        SpringApplication.run(RabbitProviderApp.class, args);
    }

}
->4.0.2 消费者启动类
package cn.pingzhuyan.rabbitmq;

import org.springframework.boot.SpringApplication;
import org.springframework.boot.autoconfigure.SpringBootApplication;

@SpringBootApplication
public class RabbitConsumerApp {

    public static void main(String[] args) {
        SpringApplication.run(RabbitConsumerApp.class, args);
    }

}
4.1 简单模式
package cn.pingzhuyan.rabbitmq.config;

import org.springframework.amqp.core.Queue;
import org.springframework.context.annotation.Bean;
import org.springframework.context.annotation.Configuration;

/**
 * @author pzy
 * @version 0.1.0
 * @description: TODO
 */
@Configuration
public class RabbitConfig {

    /**
     * 声明一个简单队列
     * @return
     */
    @Bean
    public Queue helloQueue(){
//        return new Queue("PZY",true,false,false);
        return new Queue("PZY");
    }


}
-> 4.1.1 生产者代码
package cn.pingzhuyan.rabbitmq.singleM1;

import org.springframework.amqp.core.AmqpTemplate;
import org.springframework.beans.factory.annotation.Autowired;
import org.springframework.scheduling.annotation.Async;
import org.springframework.scheduling.annotation.EnableAsync;
import org.springframework.scheduling.annotation.EnableScheduling;
import org.springframework.scheduling.annotation.Scheduled;
import org.springframework.stereotype.Component;

/**
 * 简单模式生产者
 * @author pzy
 * @version 0.1.0
 * @description: TODO
 */

@Component
public class SingleM1Provider {

    @Autowired
    private AmqpTemplate amqpTemplate;

    @Scheduled(cron = "*/1 * * * * ?" )
    public void singleSend01() {
        System.out.println("生产者: <简单队列>定时(1次/s)发送 -> 今天天气真好!");

        amqpTemplate.convertAndSend("PZY", "今天天气真好!");
    }

}
-> 4.1.2 消费者代码
package cn.pingzhuyan.rabbitmq.singleM1;

import org.springframework.amqp.rabbit.annotation.RabbitListener;
import org.springframework.stereotype.Component;

/**
 * @author pzy
 * @version 0.1.0
 * @description: TODO
 */
//@Component
public class RabbitConsumerM1 {


    @RabbitListener(queues = "PZY")
    public void singleReceive1(String msg) {

        System.out.printf("消费者接收到: %s\n", msg);
    }


}
4.2 工作模式
-> 4.2.1 生产者代码
package cn.pingzhuyan.rabbitmq.workM2;

import org.springframework.amqp.core.AmqpTemplate;
import org.springframework.beans.factory.annotation.Autowired;
import org.springframework.scheduling.annotation.Async;
import org.springframework.scheduling.annotation.Scheduled;
import org.springframework.stereotype.Component;

/**
 * 简单模式生产者
 * @author pzy
 * @version 0.1.0
 * @description: TODO
 */

@Component
public class WorkM2Provider {

    @Autowired
    private AmqpTemplate amqpTemplate;

    @Async
    @Scheduled(cron = "*/1 * * * * ?" )
    public void workSend01() {
        System.out.println("生产者1: <工作模式>定时(1次/s)发送 -> 今天天气真好!");

        amqpTemplate.convertAndSend("PZY", "今天天气真好!");
    }
    @Async
    @Scheduled(cron = "*/1 * * * * ?" )
    public void workSend02() {
        System.out.println("生产者2: <工作模式>定时(1次/s)发送 -> 今天天气真好!");

        amqpTemplate.convertAndSend("PZY", "今天天气真好!");
    }

}
-> 4.2.2 消费者代码
package cn.pingzhuyan.rabbitmq.workM2;

import org.springframework.amqp.rabbit.annotation.RabbitListener;
import org.springframework.stereotype.Component;

/**
 * @author pzy
 * @version 0.1.0
 * @description: TODO
 */
@Component
public class RabbitConsumerM2 {


    @RabbitListener(queues = "PZY")
    public void workReceiveM2One(String msg) {

        System.out.printf("消费者1 接收到: %s\n", msg);
    }

    @RabbitListener(queues = "PZY")
    public void workReceiveM2Two(String msg) {

        System.out.printf("消费者2 接收到: %s\n", msg);
    }


}
4.3 消息和订阅模式(广播)
-> 4.3.0 消费者中声明fanout交换机
package cn.pingzhuyan.rabbitmq.config;

import org.springframework.amqp.core.FanoutExchange;
import org.springframework.amqp.core.Queue;
import org.springframework.context.annotation.Bean;
import org.springframework.context.annotation.Configuration;

/**
 * rabbitmq的默认手动确认模式
 * @author pzy
 * @version 0.1.0
 * @description: TODO
 */
@Configuration
public class RabbitConfig {

    /**
     * 创建(声明)一个简单队列
     * @return
     */
    @Bean
    public Queue helloQueue(){
//        return new Queue("PZY",true,false,false);
        return new Queue("PZY");
    }

    /**
     * 创建radioFanout交换机
     * 消费者需要绑定此交换机
     * @return
     */
    @Bean
    public FanoutExchange radioFanout(){
        return new FanoutExchange("PZY_RADIO",false,false);
    }


}
-> 4.3.1 消费者代码
package cn.pingzhuyan.rabbitmq.faoutM3;

import org.springframework.amqp.rabbit.annotation.Exchange;
import org.springframework.amqp.rabbit.annotation.Queue;
import org.springframework.amqp.rabbit.annotation.QueueBinding;
import org.springframework.amqp.rabbit.annotation.RabbitListener;
import org.springframework.stereotype.Component;

/**
 * 发布与订阅模式的消费者
 *
 * @author pzy
 * @version 0.1.0
 * @description: TODO
 */
@Component
public class FanoutF3Consumer {

    @RabbitListener(bindings = @QueueBinding(
            value = @Queue,  //不写就是随机队列, false true true
            exchange = @Exchange(name = "PZY_RADIO", declare = "false")//交换机(PZY_RADIO, 不创建并使用已经存在的交换机)
    ))
    public void radioFanoutMessage1(String msg) {
        System.out.printf("消费者1接收到: %s\n", msg);
    }

    @RabbitListener(bindings = @QueueBinding(
            value = @Queue,
            exchange = @Exchange(name = "PZY_RADIO", declare = "false")//队列绑定交换机
    ))
    public void radioFanoutMessage2(String msg) {
        System.out.printf("消费者2接收到: %s\n", msg);
    }

}
-> 4.3.2 生产者代码
package cn.pingzhuyan.rabbitmq.fanoutM3;

import org.springframework.amqp.core.AmqpTemplate;
import org.springframework.beans.factory.annotation.Autowired;
import org.springframework.scheduling.annotation.Async;
import org.springframework.scheduling.annotation.Scheduled;
import org.springframework.stereotype.Component;

/**
 * 发布和订阅模式生产者
 *
 * @author pzy
 * @version 0.1.0
 * @description: TODO
 */

@Component
public class FanoutF3Provider {

    @Autowired
    private AmqpTemplate amqpTemplate;


    /**
     * 注意一下:
     * 下面发送的时候 一定要绑定交换机 不要绑定路由键(没有意义 全是默认)
     *  amqpTemplate.convertAndSend("PZY_RADIO", str);//错误写法
     */
    @Async
    @Scheduled(cron = "*/1 * * * * ?")
    public void fanoutSend01() {

        String str = Math.random() * 1000 + "" + Math.random() * 1000;

        System.out.println("生产者1: <发布和订阅模式>定时(1次/s)发送 -> " + str);

        amqpTemplate.convertAndSend("PZY_RADIO","", str);
    }


}
本篇总结及下篇传送门
前三种最常见的本篇已经写完了
rabbitTemplate写法与这个很相似, 实现效果完全相同
-> 下一篇: 03-rabbitmq在springboot中如何使用(下篇)
介绍后3种模式


 199
199


 被折叠的 条评论
为什么被折叠?
被折叠的 条评论
为什么被折叠?
 到【灌水乐园】发言


