


在使用springboot的时候,由于它的自动配置的存在,一开始很容易上手进行应用开发,但是等需要进行深度自定义配置的时候,很多人蒙圈,哪些内容可以自定义配置,配置参数是什么等等问题接踵而来,刚好我有个任务要进行springboot tomcat有那些配置参数可以配置的说明,所以就借这个机会告诉大家怎么查看某一个模块的配置参数有哪些。
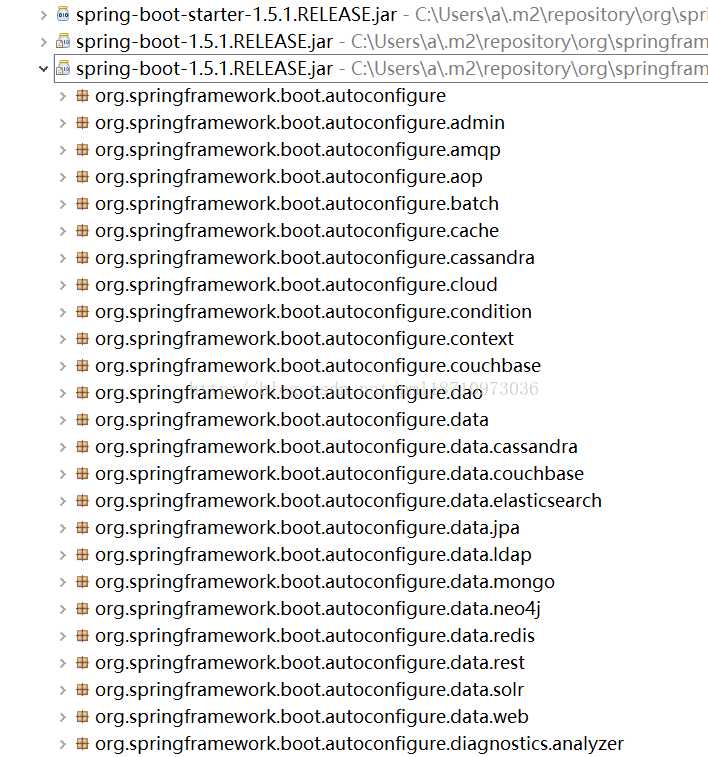
首先,springboot的大部分自动配置类都在一个叫spring-boot-autoconfigure-X.x.x.jar包里,如下所示:
而tomcat的配置在org.springframework.boot.autoconfigure.web包里的ServerProperties,它包括tomcat和jetty、undertow的配置都在里面,当然有公用的和具体服务器独立的配置,我们先看下它的类定义:
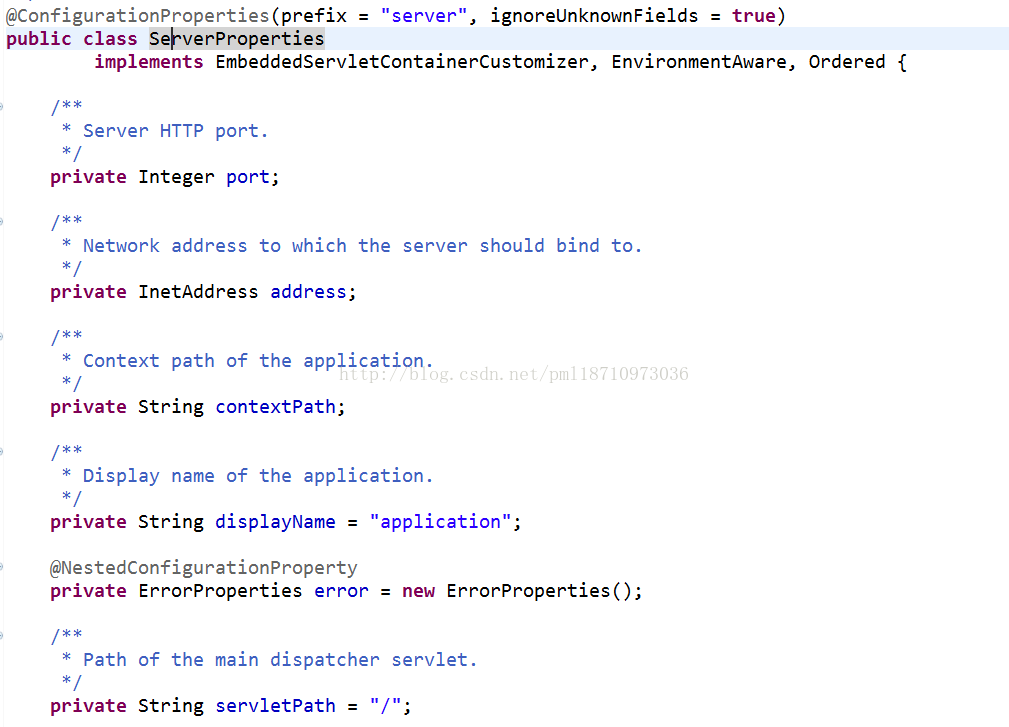

@ConfigurationProperties是spring 4.x新特性,通过读取配置文件数据来注入我们的实体属性,如ServerProperties就是读取配置文件里server开头的配置选项来进行注入,比如我们在配置文件里配置了 server.port = 1000,则ServerProperties的port端口就是1000;ServerPropertis的属性就整个应用的web容器的公用配置选项,我们可以看出有哪些。
接下来看下tomcat的配置有哪些,在同一个类里,我们找到tomcat的类定义,如下图所示:
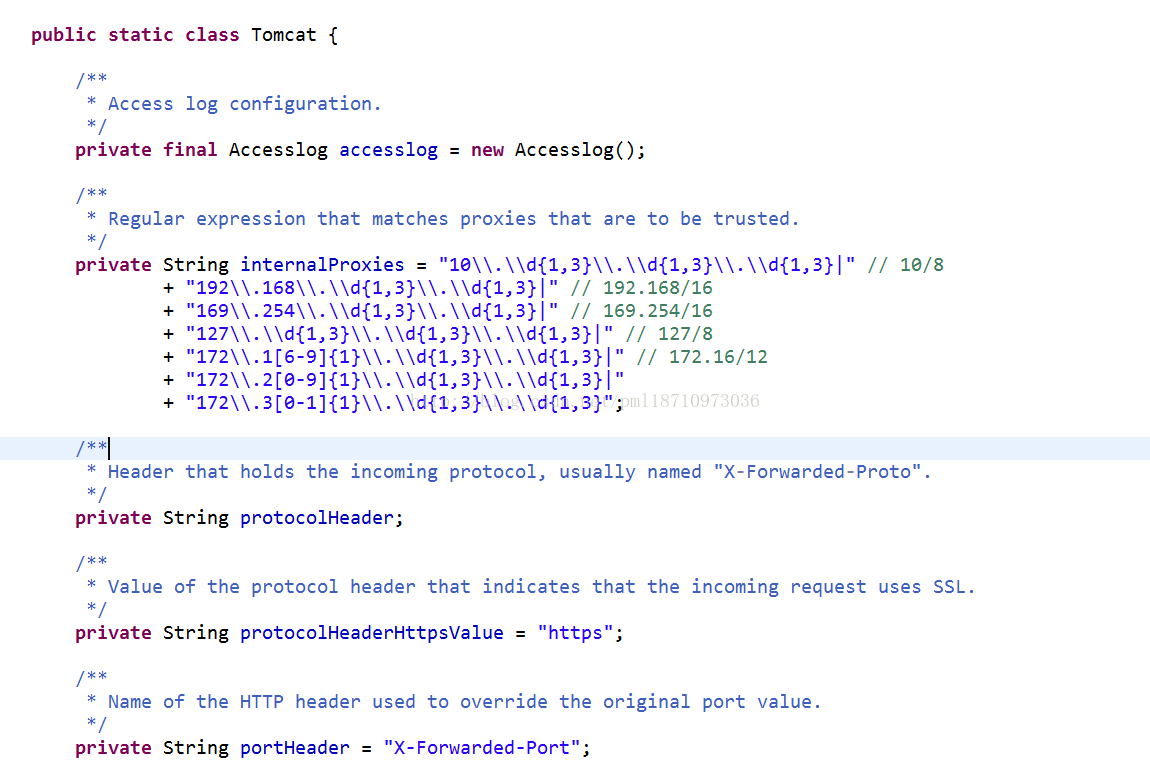
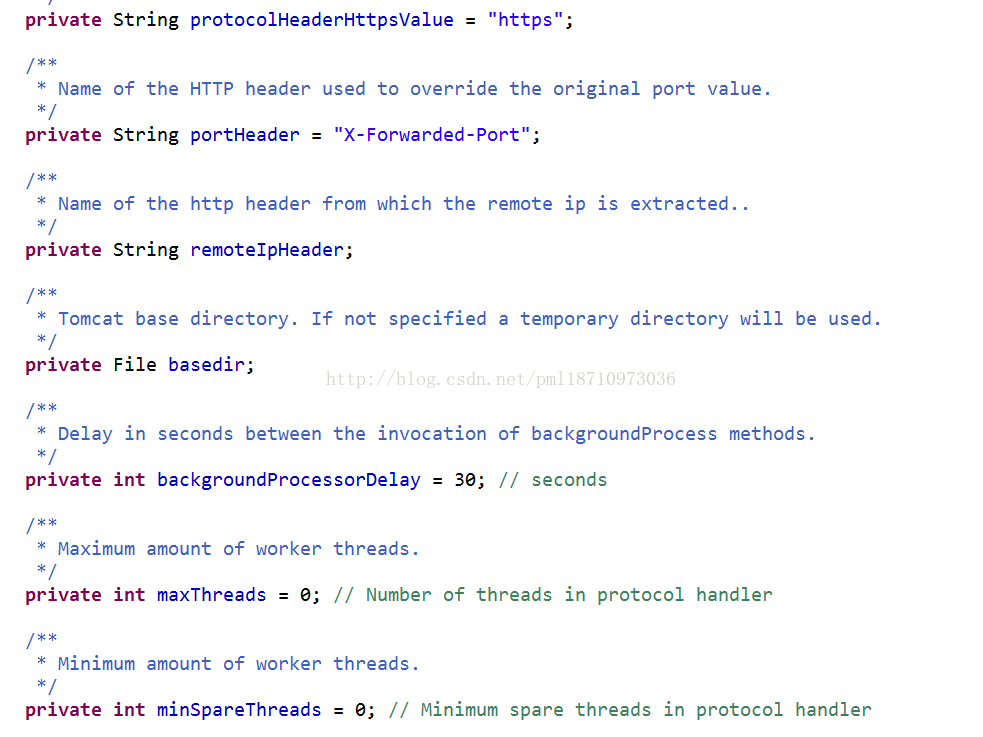

从上面tomcat定义的属性就可以看出,我们可以配置哪些熟悉,包括我们现在项目进行配置的accesslog配置,我点进Accesslog的定义,就知道怎么在springboot配置文件自定义配置accesslog,如下图:
如果我们要配置accesslog的enabled属性,只需要在application.properties文件里定义
Server.tomcat.accesslog.enabled= true;

Tomcat的所有配置选项如下:
server. Port = xxxx
server. Address =
server. contextPath =
server. displayName =
server. servletPath =
server. contextParameters =
server. useForwardHeaders =
server. serverHeader =
server. maxHttpHeaderSize =
server. maxHttpPostSize =
server. connectionTimeout =
server. session.timeout =
server. session.trackingModes =
server. session.persistent =
server.session.storeDir =
server.cookie. name =
server.cookie. domain =
server.cookie. path =
server.cookie. comment =
server.cookie. httpOnly =
server.cookie. secure =
server.cookie. maxAge =
server. ssl. Enabled =
server.ssl. clientAuth =
server.ssl. ciphers =
server.ssl. enabledProtocols =
server.ssl. keyAlias =
server.ssl. keyPassword =
server.ssl. keyStore =
server.ssl. keyStorePassword =
server.ssl. keyStoreType =
server.ssl. keyStoreProvider =
server.ssl. trustStore =
server.ssl. trustStorePassword =
server.ssl. trustStoreType =
server.ssl. trustStoreProvider =
server.ssl. protocol =
server.compression. enabled =
server.compression.mimeTypes =
server.compression.excludedUserAgents =
server.compression.minResponseSize =
server. jspServlet. className =
server.jspServlet. initParameters =
server.jspServlet.registered =
server.tomcat.accesslog.enabled =
server.tomcat.accesslog.pattern =
server.tomcat.accesslog.directory =
server.tomcat.accesslog.prefix =
server.tomcat.accesslog.suffix =
server.tomcat.accesslog.rotate =
server.tomcat.accesslog.renameOnRotate =
server.tomcat.accesslog.requestAttributesEnabled=
server.tomcat.accesslog.buffered =
server.tomcat.internalProxies =
server.tomcat.protocolHeader =
server.tomcat.protocolHeaderHttpsValue =
server.tomcat.portHeader =
server.tomcat.remoteIpHeader=
server.tomcat.basedir =
server.tomcat.backgroundProcessorDelay =
server.tomcat.maxThreads =
server.tomcat.minSpareThreads =
server.tomcat.maxHttpPostSize =
server.tomcat.maxHttpHeaderSize =
server.tomcat.redirectContextRoot =
server.tomcat.uriEncoding =
server.tomcat.maxConnections =
server.tomcat.acceptCount =
server.tomcat.additionalTldSkipPatterns =


 525
525


 被折叠的 条评论
为什么被折叠?
被折叠的 条评论
为什么被折叠?
 到【灌水乐园】发言


