


1.yaml
1.1配置文件格式
SpringBoot使用一个全局的配置文件 , 配置文件名称是固定的
-
application.properties
-
语法结构 :key=value
-
-
application.yml
-
语法结构 :key:空格 value
-
1.2给实体类注入
1.2.1简单类
①在springboot项目中的resources目录下新建一个文件 application.yml
②新建一个实体类,注意加入有参无参构造,get、set、tostring方法
@Component //注册bean
public class Dog {
    @Value("阿黄")
    private String name;
    @Value("18")
    private Integer age;
}
③在SpringBoot的测试类下注入狗狗输出一下;
@SpringBootTest
class DemoApplicationTests {

    @Autowired //将狗狗自动注入进来
    Dog dog;

    @Test
    public void contextLoads() {
        System.out.println(dog); //打印看下狗狗对象
    }

}
1.2.3复杂类
/*
@ConfigurationProperties作用:
将配置文件中配置的每一个属性的值,映射到这个组件中;
告诉SpringBoot将本类中的所有属性和配置文件中相关的配置进行绑定
参数 prefix = “person” : 将配置文件中的person下面的所有属性一一对应
*/
@Component //注册bean
@ConfigurationProperties(prefix = "person")
public class Person {
    private String name;
    private Integer age;
    private Boolean happy;
    private Date birth;
    private Map<String,Object> maps;
    private List<Object> lists;
    private Dog dog;
}
yaml注入属性
person:
  name: qinjiang
  age: 3
  happy: false
  birth: 2000/01/01
  maps: {k1: v1,k2: v2}
  lists:
   - code
   - girl
   - music
  dog:
    name: 旺财
    age: 1
开启注解@ConfigurationProperties(prefix="")需要导入依赖
@PropertySource(value="")加载指定的配置文件
<!-- 导入配置文件处理器,配置文件进行绑定就会有提示,需要重启 -->
<dependency>
  <groupId>org.springframework.boot</groupId>
  <artifactId>spring-boot-configuration-processor</artifactId>
  <optional>true</optional>
</dependency>
1.3配置文件占位符
person:
    name: qinjiang${random.uuid} # 随机uuid
    age: ${random.int}  # 随机int
    dog:
      name: ${person.hello:other}_旺财 //如果没有赋值就默认为hello
      age: 1
1.4注解对比
@value("${user.name}")需要为每个属性单独注解赋值,比较麻烦
@ConfigurationProperties(prefix="")则只需要在类之前注释一次即可
1、@ConfigurationProperties只需要写一次即可 , @Value则需要每个字段都添加
2、松散绑定:这个什么意思呢? 比如我的yml中写的last-name,这个和lastName是一样的, - 后面跟着的字母默认是大写的。这就是松散绑定。可以测试一下
3、JSR303数据校验 , 这个就是我们可以在字段是增加一层过滤器验证 , 可以保证数据的合法性
4、复杂类型封装,yml中可以封装对象 , 使用value就不支持
1.5多环境切换
springboot 启动会扫描以下位置的application.properties或者application.yml文件作为Spring boot的默认配置文件
优先级1:项目路径下的config文件夹配置文件优先级2:项目路径下配置文件优先级3:资源路径下的config文件夹配置文件优先级4:资源路径下配置文件
server:
  port: 8081
#选择要激活那个环境块
spring:
  profiles:
    active: prod

---
server:
  port: 8083
spring:
  profiles: dev #配置环境的名称


---

server:
  port: 8084
spring:
  profiles: prod  #配置环境的名称
2.JSR303数据校验
@NotNull(message="名字不能为空")
private String userName;
@Max(value=120,message="年龄最大不能查过120")
private int age;
@Email(message="邮箱格式错误")
private String email;

空检查
@Null       验证对象是否为null
@NotNull    验证对象是否不为null, 无法查检长度为0的字符串
@NotBlank   检查约束字符串是不是Null还有被Trim的长度是否大于0,只对字符串,且会去掉前后空格.
@NotEmpty   检查约束元素是否为NULL或者是EMPTY.

Booelan检查
@AssertTrue     验证 Boolean 对象是否为 true
@AssertFalse    验证 Boolean 对象是否为 false

长度检查
@Size(min=, max=) 验证对象(Array,Collection,Map,String)长度是否在给定的范围之内
@Length(min=, max=) string is between min and max included.

日期检查
@Past       验证 Date 和 Calendar 对象是否在当前时间之前
@Future     验证 Date 和 Calendar 对象是否在当前时间之后
@Pattern    验证 String 对象是否符合正则表达式的规则

.......等等
除此以外,我们还可以自定义一些数据校验规则
3.thymeleaf
类似于视图解析器
3.1导入依赖
<!--thymeleaf-->
<dependency>
    <groupId>org.springframework.boot</groupId>
    <artifactId>spring-boot-starter-thymeleaf</artifactId>
</dependency>
3.2导入命名空间的约束
需要在html文件中导入命名空间的约束,方便提示;
xmlns:th="http://www.thymeleaf.org"
<!DOCTYPE html>
<html lang="en" xmlns:th="http://www.thymeleaf.org">
<head>
    <meta charset="UTF-8">
    <title>Title</title>
</head>
<body>
<h1>测试页面</h1>
<div th:text="${msg}"></div>
<div th:utext="${msg}"></div>
<<hr>
<h3 th:each="user:${list}" th:text="${user}"></h3>
</body>
</html>
th:utest: 这个会对后端传得数据进行转义,如<h1></h1>
th:each="user:${users}" th:test="${user}" 即拿到users类中中的每一个对象,并且引用
3.3测试
编写TestController
@RequestMapping("/t1")
    public String test1(Model model){
        model.addAttribute("msg","<h1>hello world</h1>");
        model.addAttribute("list", Arrays.asList("kuangsheng","liyukang"));
        //classpath:/templates/test.html
        return "test";
    }
4.mvc自动配置
@EnableWebMvc将WebMvcConfigurationSupport组件导入进来了;
而导入的WebMvcConfigurationSupport只是SpringMVC最基本的功能!
所以springboot可以全面接管springmvc的自动配置,但是开发中不推荐如此使用。
5.员工管理系统
5.1首页配置
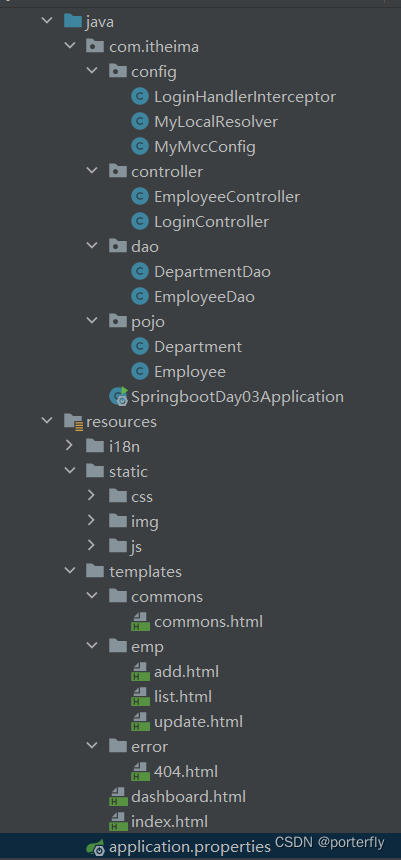
所有的静态资源都需要由thymeleaf接管(导依赖+html标签头加约束:xmlns:th="http://www.thymeleaf.org"),其中css样式应该放在static目录下,而html则需要放在 template下。注意:跳转地址如(src,href这些都需要变成th:src="@{/css/signin.css}" ,th:href)
5.2国际化
即一个页面中可以实现找中英文切换的效果
5.3登陆
5.3.1工具类
①在MyMvcConfig工具类中实现webMvcConfigurer
然后重写(ctrl+O)addViewControllers方法,这里的registry.addViewController("url").setViewName("html") 即访问url时就会跳转到html页面。
②重写addInterceptor(new HandlerIntercepror),链式编程调用addPathPatterns来添加限制路径(/**表所有路劲)即excludePathPatterns
@Configuration
public class MyMvcConfig implements WebMvcConfigurer {

    @Override
    public void addViewControllers(ViewControllerRegistry registry) {
        registry.addViewController("/").setViewName("index");
        registry.addViewController("/index.html").setViewName("index");
        registry.addViewController("/main.html").setViewName("dashboard");
    }

    @Bean
    public MyLocalResolver localResolver() {
        return new MyLocalResolver();
    }

    @Override
    public void addInterceptors(InterceptorRegistry registry) {
        registry.addInterceptor(new LoginHandlerInterceptor())
                .addPathPatterns("/**")
                .excludePathPatterns("/user/login","/index.html","/","/css/*","/js/**","/img/**");
    }
}
5.3.2controller
编写LoginController,
- 登录成功时给session注入属性,让loginUser携带有username,还有就是重定向到main页面;
- 登录失败时就会利用model给前端传去错误信息,并返回登录页。
@Controller
public class LoginController {
    @RequestMapping("/user/login")
    public String hello(@RequestParam("username") String username, @RequestParam("password") String password, Model model, HttpSession session){
        if (!StringUtils.isEmpty(username) &&"123456".equals(password)){
            session.setAttribute("loginUser",username);
            return "redirect:/main.html";
        }else {
            model.addAttribute("msg","用户名于或者密码错误");
            return "index";
        }
    }
}
LoginHandlerInterceptor
public class LoginHandlerInterceptor implements HandlerInterceptor {
        @Override
        public boolean preHandle(HttpServletRequest request, HttpServletResponse response, Object handler) throws Exception {
            //登录成功后,应该有用户的session
            Object loginUser = request.getSession().getAttribute("loginUser");
            //未登录
            if (loginUser==null){
                request.setAttribute("msg","没有权限请先登陆");
                request.getRequestDispatcher("index.html").forward(request,response);
                return false;
            }else {
                return true;
            }
        }
    }
5.4展示员工
①在首页点击员工管理时会跳转到员工管理页面,通过th:href="@{/url}"实现绑定
②跳转到emps,首先会调用dao层去查所有员工集合,并且通过model把集合返回给前端
model.addAttribute("msg",list);msg==给前端引用的id
③跳转到emp下的list.html
5.4.1前端
<li class="nav-item">
                <a th:class="${active=='list.html'?'nav-link active':'nav-link'}"  th:href="@{/emps}">
                    <svg xmlns="http://www.w3.org/2000/svg" width="24" height="24" viewBox="0 0 24 24" fill="none" stroke="currentColor" stroke-width="2" stroke-linecap="round" stroke-linejoin="round" class="feather feather-users">
                        <path d="M17 21v-2a4 4 0 0 0-4-4H5a4 4 0 0 0-4 4v2"></path>
                        <circle cx="9" cy="7" r="4"></circle>
                        <path d="M23 21v-2a4 4 0 0 0-3-3.87"></path>
                        <path d="M16 3.13a4 4 0 0 1 0 7.75"></path>
                    </svg>
                    员工管理
                </a>
            </li>
list.html 注意th:each="(emp:${emps})"用法,接着就可以通过¥{emp.get()}引用其属性
  <main role="main" class="col-md-9 ml-sm-auto col-lg-10 pt-3 px-4">
            <h2>Section title</h2>
            <div class="table-responsive">
                <table class="table table-striped table-sm">
                    <thead>
                    <tr>
                        <th>id</th>
                        <th>lastName</th>
                        <th>email</th>
                        <th>gender</th>
                        <th>department</th>
                        <th>birth</th>
                        <th>操作</th>
                    </tr>
                    </thead>
                    <tbody>
                    <tr th:each="emp:${allEmp}">
                        <td th:text="${emp.getId()}"></td>
                        <td th:text="${emp.getLastName()}"></td>
                        <td th:text="${emp.getEmail()}"></td>
                        <td th:text="${emp.getGender()==0?'女':'男'}"></td>
                        <td th:text="${emp.getDepartment().getDepartmentName()}"></td>
                        <td th:text="${#dates.format(emp.getBirth(),'yyyy-MM-dd HH:mm:ss')}"></td>
                        <td>
                            <button class="btn btn-sm btn-primary">编辑</button>
                            <button class="btn btn-sm btn-danger">删除</button>
                        </td>

                    </tr>

                    </tbody>
                </table>
            </div>
        </main>
5.4.2controller
@Controller
public class EmployeeController {
    @Resource
    private EmployeeDao employeeDao;

    @RequestMapping("/emps")
    public String getAllEmp(Model model){
        Collection<Employee> allEmp = employeeDao.getAll();
        model.addAttribute("allEmp",allEmp);
        return "emp/list";

    }
}
5.5增加员工
在员工展示页面新增按钮,采用restful风格绑定跳转方法(在a标签中默认请求方式都是以get请求)
<h2>
     <a class="btn btn-sm btn-success" th:href="@{/emp}">
                        添加员工
     </a>
 </h2>
在controller层中定义toAddPaper,然后跳转到emp下的add.html页面
 @GetMapping("/emp")
    public String toAddPaper(Model model){
        Collection<Department> departments = departmentDao.getDepartments();
        model.addAttribute("departments",departments);
        return "emp/add";
    }
@PostMapping("/emp")
    public String addEmp(Employee employee){
        //添加操作
        System.out.println("debug=>"+employee);
        employeeDao.add(employee);
        //添加成功重定向到员工页面
        return "redirect:/emps";
    }
add.html页面复制list.html,然后就主要修改main里面的内容,即添加一个表单,然后当我们点击提交按钮时,这个form表单(注意里面的input属性都要添加一个name做标识)的th:action属性就会到控制器(controller)下寻找emp下以post方法请求的方法
<main role="main" class="col-md-9 ml-sm-auto col-lg-10 pt-3 px-4">
<form th:action="@{/emp}" method="post">
<div class="form-group">
<label>LastName</label>
<input type="text" name="lastName" class="form-control" placeholder="海绵宝宝">
</div>
<div class="form-group">
<label>Email</label>
<input type="email" name="email" class="form-control" placeholder="1176244270@qq.com">
</div>
<div class="form-group">
<label>Gender</label><br>
<div class="form-check form-check-inline">
<input class="form-check-input" type="radio" name="gender" value="1">
<label class="form-check-label">男</label>
</div>
<div class="form-check form-check-inline">
<input class="form-check-input" type="radio" name="gender" value="0">
<label class="form-check-label">女</label>
</div>
<div class="form-group">
<label>department</label>
<select class="form-control" name="department.id">
<option th:each="dept:${departments}" th:text="${dept.getDepartmentName()}" th:value="${dept.getId()}">1</option>
</select>
</div>
<div class="form-group">
<label>Birth</label>
<input type="text"name="birth" class="form-control" placeholder="">
<!--<!– -->
<button class="btn btn-primary">添加</button>
</div>
</div>
</form>
</main>5.6修改员工
前端部分同样是定义一个a标签(注意这里我们需要给后端一个id让其去回显员工信息)
然后里面去引用地址th:href="@{ }" ${}这个则是值引用
<a th:href="@{/emp/}+${emp.getId()}" class="btn btn-sm btn-primary">编辑</a>controller,控制器编写toUpdatePaper方法,注意这里我们需要利用前端传来的id去回显员工信息,我们利用这个id去查找信息,然后再通过model给前端回显。
而且这里我们还需要员工的部门信息,所以我们需要把所有部门都放在集合里
最后我们跳转到update页面
@GetMapping("/emp/{id}")
    public String toUpdatePaper(@PathVariable("id") Integer id,Model model){
//        回显员工信息
        Employee employee = employeeDao.getById(id);
        model.addAttribute("employee",employee);
        Collection<Department> departments = departmentDao.getDepartments();
        model.addAttribute("departments",departments);

        return "emp/update";
    }
    @PostMapping("/updateEmp")
    public String updateEmp(Employee employee){
        //添加操作
        System.out.println("debug=>"+employee);
        employeeDao.add(employee);
        //添加成功重定向到员工页面
        return "redirect:/emps";
    }
update.html中我们利用${employee.getID}来取值 ,在部门那里我们需要去遍历所有部门集合,然后通过th:select去选择部门id跟用户的部门id一致的。
最后通过form标签中的action方法再跳转到控制器中的updateEmp方法
注意前端每个传给后端的参数都有自己的name,这个name要与mapper.xml文件中保持一致,后端才能接受到
<body>
<!-- 插入顶部栏-->
<div th:replace="~{commons/commons::topbar}"></div>
<div class="container-fluid">
<div class="row">
<!-- //插入侧边栏-->
<div th:replace="~{commons/commons::sidebar(active='list.html')}"></div>
<main role="main" class="col-md-9 ml-sm-auto col-lg-10 pt-3 px-4">
<form th:action="@{/updateEmp}" method="post">
<input type="hidden" name="id" th:value="${employee.getId()} ">
<div class="form-group">
<label>LastName</label>
<input type="text" name="lastName" class="form-control" th:value="${employee.getLastName()}">
</div>
<div class="form-group">
<label>Email</label>
<input type="email" name="email" class="form-control" th:value="${employee.getEmail()}">
</div>
<div class="form-group">
<label>Gender</label><br>
<div class="form-check form-check-inline">
<input class="form-check-input" type="radio" name="gender" value="1" th:checked="${employee.getGender()==1}">
<label class="form-check-label">男</label>
</div>
<div class="form-check form-check-inline">
<input class="form-check-input" type="radio" name="gender" value="0" th:checked="${employee.getGender()==0}">
<label class="form-check-label">女</label>
</div>
<div class="form-group">
<label>department</label>
<select class="form-control" name="department.id">
<option th:selected="${dept.getId()==employee.getDepartment().getId()}" th:each="dept:${departments}" th:text="${dept.getDepartmentName()}" th:value="${dept.getId()}">1</option>
</select>
</div>
<div class="form-group">
<label>Birth</label>
<input th:value="${#dates.format(employee.getBirth(),'yyyy/MM/dd HH:mm')}" type="text"name="birth" class="form-control" placeholder="">
<!--<!– -->
<button class="btn btn-primary">修改</button>
</div>
</div>
</form>
</main>
</div>
</div>
<!-- Bootstrap core JavaScript
================================================== -->
<!-- Placed at the end of the document so the pages load faster -->
<script type="text/javascript" src="asserts/js/jquery-3.2.1.slim.min.js"></script>
<script type="text/javascript" src="asserts/js/popper.min.js"></script>
<script type="text/javascript" src="asserts/js/bootstrap.min.js"></script>
<!-- Icons -->
<script type="text/javascript" src="asserts/js/feather.min.js"></script>
<script>
feather.replace()
</script>
<!-- Graphs -->
<script type="text/javascript" src="asserts/js/Chart.min.js"></script>
<script>
var ctx = document.getElementById("myChart");
var myChart = new Chart(ctx, {
type: 'line',
data: {
labels: ["Sunday", "Monday", "Tuesday", "Wednesday", "Thursday", "Friday", "Saturday"],
datasets: [{
data: [15339, 21345, 18483, 24003, 23489, 24092, 12034],
lineTension: 0,
backgroundColor: 'transparent',
borderColor: '#007bff',
borderWidth: 4,
pointBackgroundColor: '#007bff'
}]
},
options: {
scales: {
yAxes: [{
ticks: {
beginAtZero: false
}
}]
},
legend: {
display: false,
}
}
});
</script>
</body>5.7删除员工
在删除的按钮中添加th:href="";随后点击就会调到控制器
<a th:href="@{/del/}+${emp.getId()}" class="btn btn-sm btn-danger">删除</a>控制器中
 @GetMapping("/del/{id}")
    public String deleteEmp(@PathVariable("id") Integer id){
        System.out.println("删除的员工id"+id);
        employeeDao.delete(id);
        return "redirect:/emps";
    }
5.8注销跟404
注销就是在注销按钮绑定一个logout跳转路径
<a class="nav-link" th:href="@{/user/logout}">注销</a>在loginController中写出对应方法,然后只需要将session设置过期还有重定向就可以了。
@RequestMapping("/user/logout")
    public String logout(HttpSession session){
        session.invalidate();
        return "redirect:/index.html";

    }
404就是在template下新建一个error包然后把404.html放入其中就可以了
6.怎么写一个网站

7.整合jdbc
jdbcTemplate就是一个模版,并且他已经被spring容器接管,所以我们可以直接注入,然后调用里面的方法。注意这里的增删改都是用的的update方法。
@RestController
public class UserController {
    @Autowired
    JdbcTemplate jdbcTemplate;

    @GetMapping("select")
    public List<Map<String, Object>> select(){
        String sql = "select * from mybatis.tb_user";
        List<Map<String, Object>> maps = jdbcTemplate.queryForList(sql);
        return maps;
    }
    @GetMapping("addUser")
    public String addUser(){
        String sql = "insert into mybatis.tb_user(username,password,gender,addr) values('lyk','123456','男','梅州')";

        jdbcTemplate.update(sql);
        return "addUser--Ok";
    }
    @GetMapping("updateUser/{id}")
    public String updateUser(@PathVariable("id") Integer id){
        String sql = "update mybatis.tb_user set username = ?,password = ? where id = "+id;
        Object[] objects = new Object[2];
        objects[0] = "李二";
        objects[1] = "damage";
        jdbcTemplate.update(sql,objects);
        return "updateUser--Ok";
    }
    @GetMapping("deleteUser/{id}")
    public String deleteUser(@PathVariable("id") Integer id){
        String sql = "delete from mybatis.tb_user where id = "+id;
        jdbcTemplate.update(sql,id);
        return "deleteUser--Ok";
    }
}
8.整合druid
1、添加上 Druid 数据源依赖。
<dependency>
    <groupId>com.alibaba</groupId>
    <artifactId>druid</artifactId>
    <version>1.1.21</version>
</dependency>
2、切换数据源;默认使用 com.zaxxer.hikari.HikariDataSource 数据源,但可以 通过 spring.datasource.type 指定数据源。
spring:
  datasource:
    username: root
    password: 123456
    #?serverTimezone=UTC解决时区的报错
    url: jdbc:mysql://localhost:3306/springboot?serverTimezone=UTC&useUnicode=true&characterEncoding=utf-8
    driver-class-name: com.mysql.cj.jdbc.Driver
    type: com.alibaba.druid.pool.DruidDataSource

    #Spring Boot 默认是不注入这些属性值的,需要自己绑定
    #druid 数据源专有配置
    initialSize: 5
    minIdle: 5
    maxActive: 20
    maxWait: 60000
    timeBetweenEvictionRunsMillis: 60000
    minEvictableIdleTimeMillis: 300000
    validationQuery: SELECT 1 FROM DUAL
    testWhileIdle: true
    testOnBorrow: false
    testOnReturn: false
    poolPreparedStatements: true

    #配置监控统计拦截的filters,stat:监控统计、log4j:日志记录、wall:防御sql注入
    #如果允许时报错  java.lang.ClassNotFoundException: org.apache.log4j.Priority
    #则导入 log4j 依赖即可,Maven 地址:https://mvnrepository.com/artifact/log4j/log4j
    filters: stat,wall,log4j
    maxPoolPreparedStatementPerConnectionSize: 20
    useGlobalDataSourceStat: true
    connectionProperties: druid.stat.mergeSql=true;druid.stat.slowSqlMillis=500
3.添加log4J
<dependency>
    <groupId>log4j</groupId>
    <artifactId>log4j</artifactId>
    <version>1.2.17</version>
</dependency>
4.在DruicConfig中配置数据源监控,还有数据源过滤器等
//配置 Druid 监控管理后台的Servlet;
//内置 Servlet 容器时没有web.xml文件,所以使用 Spring Boot 的注册 Servlet 方式
@Bean
public ServletRegistrationBean statViewServlet() {
    ServletRegistrationBean bean = new ServletRegistrationBean(new StatViewServlet(), "/druid/*");

    // 这些参数可以在 com.alibaba.druid.support.http.StatViewServlet
    // 的父类 com.alibaba.druid.support.http.ResourceServlet 中找到
    Map<String, String> initParams = new HashMap<>();
    initParams.put("loginUsername", "admin"); //后台管理界面的登录账号
    initParams.put("loginPassword", "123456"); //后台管理界面的登录密码

    //后台允许谁可以访问
    //initParams.put("allow", "localhost"):表示只有本机可以访问
    //initParams.put("allow", ""):为空或者为null时,表示允许所有访问
    initParams.put("allow", "");
    //deny:Druid 后台拒绝谁访问
    //initParams.put("kuangshen", "192.168.1.20");表示禁止此ip访问

    //设置初始化参数
    bean.setInitParameters(initParams);
    return bean;
}
9.整合mybatis(重点)
新建项目时注意勾选springweb,jdbc Api,mysql Driver。
这里就会生成对应的依赖
        <dependency>
            <groupId>org.springframework.boot</groupId>
            <artifactId>spring-boot-starter-jdbc</artifactId>
        </dependency>
        <dependency>
            <groupId>org.springframework.boot</groupId>
            <artifactId>spring-boot-starter-web</artifactId>
        </dependency>

        <dependency>
            <groupId>com.mysql</groupId>
            <artifactId>mysql-connector-j</artifactId>
            <scope>runtime</scope>
        </dependency>
        <dependency>
            <groupId>org.springframework.boot</groupId>
            <artifactId>spring-boot-starter-test</artifactId>
            <scope>test</scope>
        </dependency>
9.1导依赖
导入mybatis依赖
 <dependency>
            <groupId>org.mybatis.spring.boot</groupId>
            <artifactId>mybatis-spring-boot-starter</artifactId>
            <version>2.1.1</version>
 </dependency>
9.2配置文件
两种方法,第一种是application.properties 第二种是application.yml
主要是编写数据库四个连接信息,还有就是整合mybatis起别名还有扫描包位置
这里连接数据库的用户名记得是username,然后mapper-location是当mapper接口和mapper接口对应的配置文件命名或路径不同时使用,classpath*:
spring.application.username=springboot-mybatis
spring.datasource.name=root
spring.datasource.password=654321
spring.datasource.url=jdbc:mysql://localhost:3306/mybatis?serverTimezone=UTC&useUnicode=true&characterEncoding=utf-8
#整合mybatis
#给pojo包下的所有类起别名,默认包名小写,这样在mapper.xml文件中的resultType直接写别名
mybatis.type-aliases-package=com.itheima.pojo
#mapper.xml文件所在位置,classpath这里表resources
mybatis.mapper-locations=classpath*:mybatis/mapper/*.xml
spring:
  datasource:
    username: root
    password: 123456
    #?serverTimezone=UTC解决时区的报错
    url: jdbc:mysql://localhost:3306/springboot?serverTimezone=UTC&useUnicode=true&characterEncoding=utf-8
    driver-class-name: com.mysql.cj.jdbc.Driver
    type: com.alibaba.druid.pool.DruidDataSource

    #Spring Boot 默认是不注入这些属性值的,需要自己绑定
    #druid 数据源专有配置
    initialSize: 5
    minIdle: 5
    maxActive: 20
    maxWait: 60000
    timeBetweenEvictionRunsMillis: 60000
    minEvictableIdleTimeMillis: 300000
    validationQuery: SELECT 1 FROM DUAL
    testWhileIdle: true
    testOnBorrow: false
    testOnReturn: false
    poolPreparedStatements: true

    #配置监控统计拦截的filters,stat:监控统计、log4j:日志记录、wall:防御sql注入
    #如果允许时报错  java.lang.ClassNotFoundException: org.apache.log4j.Priority
    #则导入 log4j 依赖即可,Maven 地址:https://mvnrepository.com/artifact/log4j/log4j
    filters: stat,wall,log4j
    maxPoolPreparedStatementPerConnectionSize: 20
    useGlobalDataSourceStat: true
    connectionProperties: druid.stat.mergeSql=true;druid.stat.slowSqlMillis=500
9.3测试
测试这些配置成功,可以在test下注入数据源,然后看看是否可以获得datasource.
   @Autowired
    DataSource  dataSource;
    @Test
    void contextLoads() throws SQLException {
        System.out.println(dataSource.getClass());
    }
9.4编写类
9.4.1pojo
根据数据库中信息,新建一个对应类,加上构造函数。注意如果数据库中字段为brang_name 则在类中跟根据驼峰命名规则应该为brandName;这个还需要再application.properties中开启配置
# 开启驼峰命名与数据库字段相匹配
mybatis.configuration.map-underscore-to-camel-case=true
@NoArgsConstructor
@Data
public class User {
    private int id;
    private String username;
    private String password;
    private String gender;
    private String addr;

    public User(String username, String password, String gender, String addr) {
        this.username = username;
        this.password = password;
        this.gender = gender;
        this.addr = addr;
    }
    public User(int id, String username, String password, String gender, String addr) {
        this.id = id;
        this.username = username;
        this.password = password;
        this.gender = gender;
        this.addr = addr;
    }
}
9.4.2mapper
@Mapper:这个是mybatis特有的注解,即会扫描到这个包 <=> 在主程序加上ComponentScan
mapper找不到可能是mybatis-spring-boot-starter版本太低
@Mapper
@Repository
public interface UserMapper {
    User queryUserById(Integer id);
    List<User> queryUsers();

    int addUser(User user);
    int deleteUser(Integer id);
    int updateUserById(User user);
}
9.4.3mapper.xml
这里的resultType由于我们开启了缩写,所以我们可以直接写Pojo包下的类名的小写来简化
<?xml version="1.0" encoding="UTF-8" ?>
<!DOCTYPE mapper
        PUBLIC "-//mybatis.org//DTD Mapper 3.0//EN"
        "http://mybatis.org/dtd/mybatis-3-mapper.dtd">
<mapper namespace="com.itheima.mapper.UserMapper">
    <insert id="addUser" parameterType="user">
        insert into mybatis.tb_user(username, password, gender, addr) VALUES (#{username},#{password},#{gender},#{addr});
    </insert>
    <update id="updateUserById" parameterType="user">
        update mybatis.tb_user set username = #{username} , password = #{password},gender = #{gender},addr = #{addr} where id = #{id};
    </update>
    <delete id="deleteUser" parameterType="int">
        delete from mybatis.tb_user where id = #{id}
    </delete>

    <select id="queryUserById" resultType="com.itheima.pojo.User" parameterType="java.lang.Integer">
        select *
        from mybatis.tb_user where id = #{id};
    </select>
    <select id="queryUsers" resultType="user">
        select * from mybatis.tb_user;
    </select>

    <select id="queryBrand" resultType="brand" >
        select *
        from mybatis.tb_brand where brand_name = #{brandName};
    </select>
</mapper>
9.4.4controller
注意就算8080服务正常开启,也可能404,需要我们去controller中调用测试。
@RestController
public class UserController {
    @Autowired
    private UserMapper userMapper;

    @GetMapping("/test")
    public String test(){
        return "test";
    }

    @GetMapping("/queryUserById/{id}")
    public User queryUserById(@PathVariable("id") Integer id){
        System.out.println("id"+id);
        return userMapper.queryUserById(id);
    }

    @GetMapping("/allUser")
    public List<User> queryUsers(){
        List<User> users = userMapper.queryUsers();
        for (User user : users) {
            System.out.println(user);
        }
        return users;
    }

    @GetMapping("deleteUser/{id}")
    public String deleteUser(@PathVariable("id") int id){
        userMapper.deleteUser(id);
        return "deleteUser -ok";
    }

    @GetMapping("/addUser")
    public String addUser(){
        userMapper.addUser(new User("fei","654321","男","梅州"));
        return "addUser -ok";
    }
    @GetMapping("updateUser")
    public String updateUser(){
        userMapper.updateUserById(new User(7,"lyk","654321","男","汕头"));
        return "updateUser-ok";
    }

    @GetMapping("/queryBrandByName")
    public Brand queryBrandByName(){
        Brand brand = userMapper.queryBrand("小米");
        return brand;
    }
}
9.5员工管理系统再完善
在原来的基础上整合进去数据库,即导依赖,编写配置文件,测试数据库数据源。接着就可以编写实体类,然后就是mapper接口还有对应xml文件,最后在控制层调用mapper接口。
9.5.1实体类
Employee
@AllArgsConstructor
@Data
@NoArgsConstructor
public class Employee {
    private Integer id;
    private String lastName;
    private String email;
    private String gender;
    private String department;
    private Date birth;

}
Department
@Data
@AllArgsConstructor
@NoArgsConstructor
public class Department {
    private Integer id;
    private String departmentName;
}
9.5.2mapper
EmployMapper
@Mapper
@Repository
public interface EmployMapper {
    List<Employee> getAllEmp();
    Employee getEmpById(int id);
    int addEmp(Employee employee);
    int deleteEmpById(int id);
    int updateEmp(Employee employee);
}
DepartmentMapper
@Mapper
@Repository
public interface DepartmentMapper {
    List<Department> getAllDept();
}
9.5.2mapper.xml
DepartmentMapper.xml
<?xml version="1.0" encoding="UTF-8" ?>
<!DOCTYPE mapper
        PUBLIC "-//mybatis.org//DTD Mapper 3.0//EN"
        "http://mybatis.org/dtd/mybatis-3-mapper.dtd">
<mapper namespace="com.itheima.dao.DepartmentMapper">
    <select id="getAllDept" resultType="com.itheima.pojo.Department">
        select * from emp_manage.dept;
    </select>
</mapper>
EmployMapper.xml
<?xml version="1.0" encoding="UTF-8" ?>
<!DOCTYPE mapper
        PUBLIC "-//mybatis.org//DTD Mapper 3.0//EN"
        "http://mybatis.org/dtd/mybatis-3-mapper.dtd">
<mapper namespace="com.itheima.dao.EmployMapper">
    <insert id="addEmp">
        insert into emp_manage.emp(last_name, email, gender, department, birth) values (#{lastName},#{email},#{gender},#{department},#{birth})
    </insert>

    <update id="updateEmp">
        update emp_manage.emp
        set last_name = #{lastName} ,email =#{email},gender =#{gender},department=#{department},birth = #{birth}
        where id = #{id}
    </update>
    <delete id="deleteEmpById">
        delete  from emp_manage.emp where id = #{id}
    </delete>

    <select id="getAllEmp" resultType="com.itheima.pojo.Employee">
        select * from emp_manage.emp ;
    </select>
    <select id="getEmpById" resultType="com.itheima.pojo.Employee" parameterType="int">
        select * from emp_manage.emp where id = #{id}
    </select>
</mapper>
9.5.3controller
重定向的会刷新页面,一般用于更新数据之后的操作,而跳转到某个页面的时候一般直接return
@Autowired
    private EmployMapper employMapper;
    @Autowired
    private DepartmentMapper departmentMapper;
    @RequestMapping("/emps")
    public String getALlEmp(Model model){
        List<Employee> allEmp = employMapper.getAllEmp();
        for (Employee emp : allEmp){
            System.out.println(emp);
        }
        model.addAttribute("allEmp",allEmp);
        return "/emp/list";
    }

    @GetMapping("/emp")
    public String toAddPaper(Model model){
//        Collection<Department> departments = departmentDao.getDepartments();
//        model.addAttribute("departments",departments);
        List<Department> departments = departmentMapper.getAllDept();
        model.addAttribute("departments",departments);
        return "emp/add";
    }
    @PostMapping("/emp")
    public String addEmp(Employee employee){
        System.out.println("添加的员工信息:"+employee);
        employMapper.addEmp(employee);
        return "redirect:/emps";
    }

    @GetMapping("/emp/{id}")
    public String  toUpdatePaper(@PathVariable("id") int id,Model model){
        Employee employee = employMapper.getEmpById(id);
        System.out.println("回显员工:"+employee);
        model.addAttribute("employee",employee);
        List<Department> allDept = departmentMapper.getAllDept();
        model.addAttribute("departments",allDept);
        return "emp/update";
    }

    @PostMapping("/updateEmp")
    public String updateEmp(Employee employee){
        //添加操作
        System.out.println("debug=>"+employee);
        employMapper.updateEmp(employee);
        //添加成功重定向到员工页面
        return "redirect:/emps";
    }
    @GetMapping("/del/{id}")
    public String deleteEmp(@PathVariable("id") Integer id){
        System.out.println("删除的员工id"+id);
        employMapper.deleteEmpById(id);
        return "redirect:/emps";
    }
10.Swagger
前后端通过API进行交互,为响应前后端需求的变更,故出现Swagger。优点如下:
-
Restful Api 文档在线自动生成器 => API 文档 与API 定义同步更新
-
直接运行,在线测试API
10.1Swagger使用
- 新建一个个springboot 项目
- 导入依赖(swagger2,swagger-ui)这是swagger2的两个依赖,这两个的版本与springboot的版本有关系
<!-- https://mvnrepository.com/artifact/io.springfox/springfox-swagger2 -->
<dependency>
   <groupId>io.springfox</groupId>
   <artifactId>springfox-swagger2</artifactId>
   <version>2.9.2</version>
</dependency>
<!-- https://mvnrepository.com/artifact/io.springfox/springfox-swagger-ui -->
<dependency>
   <groupId>io.springfox</groupId>
   <artifactId>springfox-swagger-ui</artifactId>
   <version>2.9.2</version>
</dependency>- 新建一个HelloController
- 使用Swagger,我们需要编写一个配置类-SwaggerConfig来配置 Swagger
@Configuration
@EnableSwagger2WebMvc
public class SwaggerConfig {

}- 访问 Http://localhost:8080/swagger-ui.html 即可访问到swagger页面
10.2配置
10.2.1配置文档信息及扫描接口
1.Swagger实例Bean是Docket,所以通过配置Docket实例来配置Swaggger具体参数。
参数解释如下:
.select()方法,去配置扫描接口,RequestHandlerSelectors配置如何扫描接口
注意这里的basePackage可以更换为其他方式,有扫描所有接口的any;还有
withMethodAnnotation(GetMapping.class)只扫描get请求;withClassAnnotation(Controller.class)只扫描有controller注解的类中的接口)
.path是配置过滤请求,.paths(PathSelectors.ant("/kuang/**")),这里只扫描请求以/kuang开头的接口
2.通过apiInfo()属性配置文档信息
3.Docket 实例关联上 apiInfo()
即return new Docket(DocumentationType.SWAGGER_2).apiInfo(apiInfo())
@Bean
    public Docket api() {
        return new Docket(DocumentationType.SWAGGER_2)
                .select()
                .apis(RequestHandlerSelectors.basePackage("com.example.controllers"))
                .paths(PathSelectors.any())
                .build()
                .apiInfo(apiInfo());
    }

    private ApiInfo apiInfo() {
        return new ApiInfoBuilder()
                .title("My API")
                .description("API documentation for My Application")
                .version("1.0")
                .build();
    }
10.2.2配置swagger开关
通过docket中的enable()方法,若为false,swagger将不能在浏览器中访问,这个主要应用在服务上线后,为了接口安全性考虑。
多服务即不同的配置文件,一般有test,dev两种,在application.properties中配置了不同的端口号
@Bean
public Docket docket(Environment environment) {
   // 设置要显示swagger的环境
   Profiles of = Profiles.of("dev", "test");
   // 判断当前是否处于该环境
   // 通过 enable() 接收此参数判断是否要显示
   boolean b = environment.acceptsProfiles(of);

   return new Docket(DocumentationType.SWAGGER_2)
      .apiInfo(apiInfo())
      .enable(b) //配置是否启用Swagger,如果是false,在浏览器将无法访问
      .select()// 通过.select()方法,去配置扫描接口,RequestHandlerSelectors配置如何扫描接口
      .apis(RequestHandlerSelectors.basePackage("com.kuang.swagger.controller"))
       // 配置如何通过path过滤,即这里只扫描请求以/kuang开头的接口
      .paths(PathSelectors.ant("/kuang/**"))
      .build();
}
10.2.3配置Api分组
多个docket代表不同的分组,不同的docket访问到的接口都是不一样的,有了这一分组,每个人所负责的Api就可以很明显的看出,这只需要在docket中引用groupName()方法即可配置分组:
@Bean
public Docket docket1(){
   return new Docket(DocumentationType.SWAGGER_2).groupName("group1");
}
10.3常用注解
@Api(tags = "xxx模块说明")
@ApiModel为类添加注释
@ApiModelProperty为类属性添加注释
@ApiOperation("xxx接口说明")
@ApiParam("xxx参数说明")
@ApiModel("用户实体")
public class User {
   @ApiModelProperty("用户名")
   public String username;
   @ApiModelProperty("密码")
   public String password;
}

@ApiOperation("狂神的接口")
@PostMapping("/kuang")
@ResponseBody
public String kuang(@ApiParam("这个名字会被返回")String username){
   return username;
}
11.任务
11.1异步任务
异步任务即前台瞬间响应,后台代码依旧执行!这就要依靠springboot线程池的功能,要使用这一功能我们需要在主程序上添加@EnableAsync注解,还有在方法上添加@Async注解,告诉spring这是一个异步任务.
@Service
public class AsyncService {
    @Async //告诉spring这是一个异步方法
    public void hello(){
        try {
            Thread.sleep(3000);
        } catch (InterruptedException e) {
            throw new RuntimeException(e);
        }
        System.out.println("正在处理");
    }
}

@RestController
public class AsyncController {
    @Autowired
    AsyncService asyncService;
    @RequestMapping("hello")
    public String hello(){
        asyncService.hello();
        return "hello";
    }
}

@SpringBootApplication
@EnableAsync//开启异步注解功能
public class SpringbootTask01Application {
    public static void main(String[] args) {
        SpringApplication.run(SpringbootTask01Application.class, args);
    }
}
11.2定时任务
定时任务即在方法上加@Scheduled(corn = "")注解,设置何时执行任务,一般用于日志的记录
开启这个功能需要在主程序上增加@EnableScheduling
corn表达式:0 0 12 * * ? 每天中午12点触发 0/2 * * * * ? 表示每2秒 执行任务
(*表任意,?表日/星期冲突)
@Service
public class ScheduleService {

    //从小到大 秒 分 时 日 月 星期
    //每周的四月2号18点03分20秒
    @Scheduled(cron = "20 3 18 2 4 0-7")
    public void hello2(){
        System.out.println("damage....");
    }
}

@SpringBootApplication
@EnableAsync//开启异步注解功能
@EnableScheduling//开启基于注解的定时任务
public class SpringbootTask01Application {
    public static void main(String[] args) {
        SpringApplication.run(SpringbootTask01Application.class, args);
    }
}
11.3邮件任务
1.引入依赖
<dependency>
   <groupId>org.springframework.boot</groupId>
   <artifactId>spring-boot-starter-mail</artifactId>
</dependency>
2.配置文件
spring.mail.username=24736743@qq.com
spring.mail.password=你的qq授权码
spring.mail.host=smtp.qq.com # qq需要配置ssl spring.mail.properties.mail.smtp.ssl.enable=true
获取授权码:在QQ邮箱中的设置->账户->开启pop3和smtp服务
3.测试
注入一个mailSender ,这个是javaMailSenderImpl封装的交给spring管理
新建一个SimpleMailMessage,然后设置邮件的主题,正文,接收人,发送人
最后通过mailSender的send方法把message发送出去
@Autowired
JavaMailSenderImpl mailSender;

@Test
public void contextLoads() {
   //邮件设置1:一个简单的邮件
   SimpleMailMessage message = new SimpleMailMessage();
   message.setSubject("通知-明天来狂神这听课");
   message.setText("今晚7:30开会");

   message.setTo("24736743@qq.com");
   message.setFrom("24736743@qq.com");
   mailSender.send(message);
}

@Test
public void contextLoads2() throws MessagingException {
   //邮件设置2:一个复杂的邮件
   MimeMessage mimeMessage = mailSender.createMimeMessage();
   MimeMessageHelper helper = new MimeMessageHelper(mimeMessage, true);

   helper.setSubject("通知-明天来狂神这听课");
   helper.setText("<b style='color:red'>今天 7:30来开会</b>",true);

   //发送附件
   helper.addAttachment("1.jpg",new File(""));


   helper.setTo("24736743@qq.com");
   helper.setFrom("24736743@qq.com");

   mailSender.send(mimeMessage);
}
12.分布式系统
分布式系统是利用多台机器来处理大量数据,实现一台机器所无法做到的数据处理。
12.1RPC
Rpc是指远程过程调用,是一种进程间通信方式,他是一种技术思想,又叫做分布式服务架构,是在垂直应用架构(MVC)上将核心业务抽取出来,实现复用。两个核心:通讯,序列化。
12.2zookeeper
下载:在官网下载了最新版3.9.2,
运行:点击/bin/zkServer.cmd ,初次运行会报错(一闪而过:所以我们需要再最后加上一个pause看错误提示),没有zoo.cfg配置文件;
配置:将conf文件夹下面的zoo_sample.cfg复制一份改名为zoo.cfg即可。dataDir=“”(这里是临时数据存储的目录,可以在子目录中创建一个data,之后写其绝对路径)
测试:使用zkCli.cmd测试
create –e /kuangshen 123:创建一个kuangshen节点,值为123

get /kuangshen:获取/kuangshen节点的值
12.3dubbo
dubbo就是一个jar包,能够帮你的java程序连接到zookeeper,并利用zookeeper消费、提供服务。
官方提供了一个可视化的监控程序(页面)dubbo-admin,不过这个监控即使不装也不影响使用。
12.4服务拆分
springboot+dubbo+zookeeper
导入依赖,在服务提供者跟消费者模块中都导入。
<!--dubbo-->
<!-- Dubbo Spring Boot Starter -->
<dependency>
   <groupId>org.apache.dubbo</groupId>
   <artifactId>dubbo-spring-boot-starter</artifactId>
   <version>2.7.3</version>
</dependency>
<!--zookeeper-->
<!-- https://mvnrepository.com/artifact/com.github.sgroschupf/zkclient -->
<dependency>
   <groupId>com.github.sgroschupf</groupId>
   <artifactId>zkclient</artifactId>
   <version>0.1</version>
</dependency>
<!-- 引入zookeeper -->
<dependency>
   <groupId>org.apache.curator</groupId>
   <artifactId>curator-framework</artifactId>
   <version>2.12.0</version>
</dependency>
<dependency>
   <groupId>org.apache.curator</groupId>
   <artifactId>curator-recipes</artifactId>
   <version>2.12.0</version>
</dependency>
<dependency>
   <groupId>org.apache.zookeeper</groupId>
   <artifactId>zookeeper</artifactId>
   <version>3.4.14</version>
   <!--排除这个slf4j-log4j12-->
   <exclusions>
       <exclusion>
           <groupId>org.slf4j</groupId>
           <artifactId>slf4j-log4j12</artifactId>
       </exclusion>
   </exclusions>
</dependency>
配置springboot中的参数,两个模块都需要,但是消费者模块中只需要前两个。
#当前应用名字
dubbo.application.name=provider-server
#注册中心地址
dubbo.registry.address=zookeeper://127.0.0.1:2181
#扫描指定包下服务
dubbo.scan.base-packages=com.kuang.provider.service
最后就是利用@Reference在消费者中注入服务者,然后实现不同模块服务的调用。


 1000
1000


 被折叠的 条评论
为什么被折叠?
被折叠的 条评论
为什么被折叠?
 到【灌水乐园】发言


