


最近在搞小程序,前台页面效果应用微信官方的wxml+wxss+js等,后台应用为了快速上线选用springboot搭建环境。具体过程不在此处称述,网上大把帖子。此处记录自己maven打包以及linux服务器的shell脚本执行应用。
官方推荐的是 spring-boot-maven-plugin 打包插件
    <plugin>
                <groupId>org.springframework.boot</groupId>
                <artifactId>spring-boot-maven-plugin</artifactId>
                <configuration>
                    <fork>true</fork>
                </configuration>
            </plugin>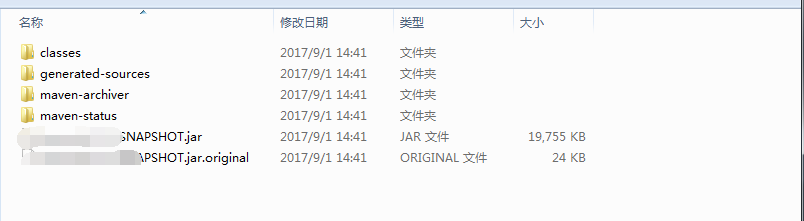
这种方式打包后会生成xx.jar和xx.jar.original两个类jar包文件,期中xx.jar.original是本身项目的jar包而xx.jar则一种fast-jar(即spring_boot根据项目会把相关依赖包配置文件等都打进去)linux环境如果jdk已经具备,键入java -jar xx.jar即可运行,但是这种有一个弊端,每次都是全量包,改动替换费劲。
经过一番折腾决定用maven的 maven-jar-plugin 以及 maven-assembly-plugin来搭配打包使用
            <plugin>
                <groupId>org.apache.maven.plugins</groupId>
                <artifactId>maven-jar-plugin</artifactId>
                <version>2.6</version>
                <configuration>
                    <archive>
                        <!-- 添加index则不从mainfest中读取classpath,而是从Index.list中读取 -->
                        <manifest>
                            <mainClass>xx.xx.small.Application</mainClass><!--指定MANIFEST.MF中的Main-Class-->
                            <addClasspath>true</addClasspath>  <!-- 会在MANIFEST.MF加上Class-Path项并配置依赖包 -->
                            <classpathPrefix>lib/</classpathPrefix><!-- 指定依赖包所在目录 -->
                        </manifest>
                        <manifestEntries>
                            <Class-Path>./</Class-Path>
                        </manifestEntries>
                    </archive>
                    <excludes>
                        <exclude>conf/**</exclude>
                    </excludes>
                </configuration>
            </plugin>

            <!-- maven-assembly-plugin  -->
            <plugin>
                <artifactId>maven-assembly-plugin</artifactId>
                <version>2.5.4</version>
                <configuration>
                    <!-- not append assembly id in release file name -->
                    <appendAssemblyId>false</appendAssemblyId>
                    <descriptors>
                        <descriptor>src/main/build/package.xml</descriptor>
                    </descriptors>
                </configuration>
                <executions>
                    <execution>
                        <id>make-assembly</id>
                        <phase>package</phase>
                        <goals>
                            <goal>single</goal>
                        </goals>
                    </execution>
                </executions>
            </plugin>
附上package.xml文件
<?xml version="1.0" encoding="UTF-8"?>
<assembly xmlns="http://maven.apache.org/plugins/maven-assembly-plugin/assembly/1.1.3"
          xmlns:xsi="http://www.w3.org/2001/XMLSchema-instance"
          xsi:schemaLocation="http://maven.apache.org/plugins/maven-assembly-plugin/assembly/1.1.3
          http://maven.apache.org/xsd/assembly-1.1.3.xsd">
    <id>package</id>
    <formats>
        <!-- 最终压缩的文件格式 zip fileSets中配置了我需要将那些文件打包到最终压缩包中  -->
        <format>zip</format>
    </formats>
    <includeBaseDirectory>true</includeBaseDirectory>
    <fileSets>
        <fileSet>
            <directory>bin</directory>
            <outputDirectory>/bin</outputDirectory>
        </fileSet>
        <fileSet>
            <directory>src/main/resources</directory>
            <outputDirectory>/conf</outputDirectory>
        </fileSet>
        <fileSet>
            <directory>${project.build.directory}</directory>
            <outputDirectory>/</outputDirectory>
            <includes>
                <include>*.jar</include>
            </includes>
        </fileSet>
    </fileSets>
    <dependencySets>
        <dependencySet>
            <outputDirectory>lib</outputDirectory>
            <scope>runtime</scope>
            <!--<unpack>false</unpack> -->
            <excludes>
                <!--<exclude>${project.name}-${project.version}</exclude> -->
                <!--<exclude>${groupId}:${artifactId}</exclude> 排除不需要的依赖包-->
                <exclude>org.springframework.boot:spring-boot-devtools</exclude>
            </excludes>
        </dependencySet>
    </dependencySets>
</assembly>
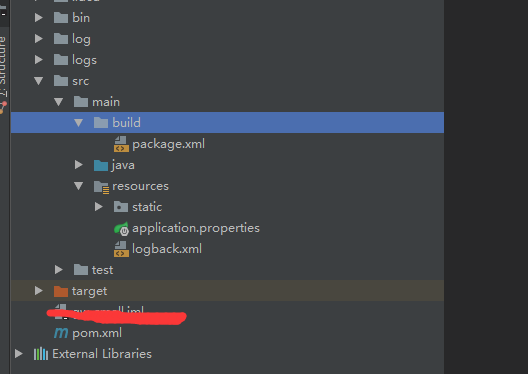
并附上项目的目录结构:
打包后生成相应xx.zip文件解压后相关目录如下:
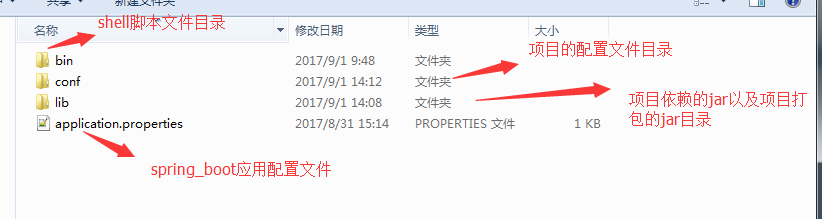
至此打包文件,后续就可以打增量包替换或者lib目录下相关jar文件并用bin目录下相应的shell脚本执行命令即可。shell稍后整理出来。


 452
452

 被折叠的 条评论
为什么被折叠?
被折叠的 条评论
为什么被折叠?
 到【灌水乐园】发言


