


在Android开发中,View作为与用户交互的媒介,其重要意义不用多说,虽然Google官方提供了不少优秀的View,但还是有很多复杂的视图,是需要开发者自己去实现的,不知不觉我也写了7篇博客了,感觉怎么也该写篇关于自定义View的了,想起以前朋友说需要做一个计步器,好像还不太顺利,也不知道是怎样的需求,我就随便简单写一个吧。
首先装作很厉害的样子讲下自定义view的划分,一般按继承来分,第一类是继承官方已经封装一定功能的view:如TextView、Button等等,第二类是直接继承View。Android进阶神书《Android开发艺术》中,大神刚哥把自定义View分成了继承View、ViewGroup、官方封装好的View和ViewGroup四类,不过ViewGroup也是继承自View,封装了管理子view的功能,所以说分成两类我觉得也是合适的,不过这都不是重点,可以忽略,Android萌新如果碰到无聊的面试官问可以这么跟他吹下。
接下来就来实现刻度计步器:
一、首先要继承View,重写构造类,一般选择前三个。
public class StepNumView extends View {
    public StepNumView(Context context) {
        this(context, null);
    }

    public StepNumView(Context context, @Nullable AttributeSet attrs) {
        this(context, attrs, 0);
    }

    public StepNumView(Context context, @Nullable AttributeSet attrs, int defStyleAttr) {
        super(context, attrs, defStyleAttr);
    }
}
这三个构造器第一个是java代码初始化View时用到的,第二个是xml文件布局中用到的,第三个是自定义view时,其中defStyleAttr用于自定义属性。为了简便需要在构造器中初始化的操作,所以让构造器依次调用下来,保证不管用什么方式初始化View,都能走到三个参数的构造器方法,然后我们只需在三个参数的构造器方法中做初始化操作就好了。
二、一般我们还需要重写onMeasure方法
@Override
    protected void onMeasure(int widthMeasureSpec, int heightMeasureSpec) {
        super.onMeasure(widthMeasureSpec, heightMeasureSpec);
        int widthMode = MeasureSpec.getMode(widthMeasureSpec);
        int widthSize = MeasureSpec.getSize(widthMeasureSpec);
        int heightMode = MeasureSpec.getMode(heightMeasureSpec);
        int heightSize = MeasureSpec.getSize(heightMeasureSpec);
        if (widthMode == MeasureSpec.AT_MOST && heightMode == MeasureSpec.AT_MOST) {
            setMeasuredDimension(stepViewWidth, stepViewHeight);
        } else if (heightMode == MeasureSpec.AT_MOST) {
            setMeasuredDimension(widthSize, stepViewHeight);
        } else if (widthMode == MeasureSpec.AT_MOST) {
            setMeasuredDimension(stepViewWidth, heightSize);
        }
    }
这个方法基本都通用了,获取View的布局方式和大小,如果布局方式为wrap_content(自适应,对应MeasureSpec的AT_MOST),那么就需要我们给一个默认大小。一般如果自定义ViewGroup还需要重写onLayout方法,用来排布子View。
三、最重要的就是画View了
1.首先写出来步数
初始化画笔和文字区域
textRect = new Rect();
textPaint = new Paint();
textPaint.setAntiAlias(true);
textPaint.setStyle(Paint.Style.FILL);
textPaint.setColor(textColor);
textPaint.setTextSize(textSize);private void drawText(Canvas canvas) {
String stepStr = stepNum + "";
textPaint.getTextBounds(stepStr, 0, stepStr.length(), textRect);
canvas.drawText(stepStr, toCenterX - textRect.width() / 2, toCenterY, textPaint);
}2.然后刻度计步器要有一个刻度盘,我们将Canvas移动到刻度盘圆心点高度,然后逆时针旋转60度,画一条短线,然后旋转3度再画一条,知道旋转180+60+60=300度的时候停止,Canvas恢复save记录位置。
private void drawDevice(Canvas canvas) {
canvas.save();
canvas.translate(0, toCenterY);//移动到圆心所在直线
canvas.drawLine(0, 0, toCenterX, 0, devicePaint);
canvas.rotate(-60, toCenterX, 0);//逆时针旋转60度
canvas.drawLine(radiusView, 0, toCenterX, 0, devicePaint);
for (int i = 1; i < 100; i++) {
canvas.drawLine(toCenterX - radiusView, 0, toCenterX - radiusView + 7, 0, devicePaint);//在距离圆心半径位置画一条7单位的短线
canvas.rotate(3, toCenterX, 0);//顺时针旋转3个单位
}
canvas.drawLine(radiusView, 0, toCenterX, 0, devicePaint);
canvas.restore();
}3.步数进度,与刻度盘做法类似,我这里是每一百步画一条线
private void drawStep(Canvas canvas) {
canvas.save();
canvas.translate(0, toCenterY);//移动到圆心所在直线
canvas.rotate(-60, toCenterX, 0);//逆时针旋转60度
for (int i = 1; i < stepNum / 100; i++) {
canvas.drawLine(toCenterX - radiusView, 0, toCenterX - radiusView + 7, 0, stepPaint);//在距离圆心半径位置画一条7单位的短线
canvas.rotate(3, toCenterX, 0);//顺时针旋转3个单位
}
canvas.restore();
}最后在onDraw方法里依次调用这三个方法就可以了,定义一个set方法接受传进来的步数,然后重绘,就能显示进度和步数了。整体代码如下:
自定义属性:
<?xml version="1.0" encoding="utf-8"?>
<resources>
<declare-styleable name="StepNumView">
<attr name="radiusView" format="dimension"/>
<attr name="heightView" format="dimension"/>
<attr name="colorDevice" format="color"/>
<attr name="colorStep" format="color"/>
<attr name="textColor" format="color"/>
<attr name="textSize" format="dimension"/>
</declare-styleable>
</resources>package com.example.administrator;
import android.content.Context;
import android.content.res.TypedArray;
import android.graphics.Canvas;
import android.graphics.Color;
import android.graphics.Paint;
import android.graphics.Rect;
import android.support.annotation.Nullable;
import android.util.AttributeSet;
import android.view.View;
/**
* Created by Administrator on 2018/4/4.
*/
public class StepNumView extends View {
private final int stepViewWidth = 300;
private final int stepViewHeight = 300;
private Paint devicePaint;//计步器画笔
private Paint stepPaint;//步数画笔
private Paint textPaint;//数字字符串画笔
private int radiusView;//计步器半径
private int heightView;//计步器view顶部距离canvas的高度
private int colorDevice;//计步器颜色
private int stepColor;//步数进度颜色
private int textColor;//数字字符串颜色
private int textSize;//数字字符大小
private Rect textRect;
public StepNumView(Context context) {
this(context, null);
}
public StepNumView(Context context, @Nullable AttributeSet attrs) {
this(context, attrs, 0);
}
public StepNumView(Context context, @Nullable AttributeSet attrs, int defStyleAttr) {
super(context, attrs, defStyleAttr);
TypedArray ta = getContext().obtainStyledAttributes(attrs, R.styleable.StepNumView, defStyleAttr, 0);
radiusView = ta.getDimensionPixelSize(R.styleable.StepNumView_radiusView, 100);
heightView = ta.getDimensionPixelSize(R.styleable.StepNumView_heightView, 10);
colorDevice = ta.getColor(R.styleable.StepNumView_colorDevice, Color.GRAY);
stepColor = ta.getColor(R.styleable.StepNumView_colorStep, Color.RED);
textColor = ta.getColor(R.styleable.StepNumView_textColor, Color.BLACK);
textSize = ta.getDimensionPixelSize(R.styleable.StepNumView_textSize, 18);
ta.recycle();
devicePaint = new Paint();
devicePaint.setAntiAlias(true);
devicePaint.setStyle(Paint.Style.FILL);
devicePaint.setColor(colorDevice);
stepPaint = new Paint();
stepPaint.setAntiAlias(true);
stepPaint.setStyle(Paint.Style.FILL);
stepPaint.setColor(stepColor);
textRect = new Rect();
textPaint = new Paint();
textPaint.setAntiAlias(true);
textPaint.setStyle(Paint.Style.FILL);
textPaint.setColor(textColor);
textPaint.setTextSize(textSize);
}
@Override
protected void onMeasure(int widthMeasureSpec, int heightMeasureSpec) {
super.onMeasure(widthMeasureSpec, heightMeasureSpec);
int widthMode = MeasureSpec.getMode(widthMeasureSpec);
int widthSize = MeasureSpec.getSize(widthMeasureSpec);
int heightMode = MeasureSpec.getMode(heightMeasureSpec);
int heightSize = MeasureSpec.getSize(heightMeasureSpec);
if (widthMode == MeasureSpec.AT_MOST && heightMode == MeasureSpec.AT_MOST) {
setMeasuredDimension(stepViewWidth, stepViewHeight);
} else if (heightMode == MeasureSpec.AT_MOST) {
setMeasuredDimension(widthSize, stepViewHeight);
} else if (widthMode == MeasureSpec.AT_MOST) {
setMeasuredDimension(stepViewWidth, heightSize);
}
}
private int stepNum = 0;//步数
private int toCenterY;//画布Y轴移动这个距离
private int toCenterX;//圆心x轴位置位置
@Override
protected void onDraw(Canvas canvas) {
super.onDraw(canvas);
int width = getMeasuredWidth();
int height = getMeasuredHeight();
toCenterY = radiusView+heightView;
toCenterX = width / 2;
drawText(canvas);
drawDevice(canvas);
drawStep(canvas);
}
private void drawText(Canvas canvas) {
        String stepStr = stepNum + "";
        textPaint.getTextBounds(stepStr, 0, stepStr.length(), textRect);
        canvas.drawText(stepStr, toCenterX - textRect.width() / 2, toCenterY, textPaint);
    }
 private void drawDevice(Canvas canvas) {
        canvas.save();
        canvas.translate(0, toCenterY);//移动到圆心所在直线
        canvas.drawLine(0, 0, toCenterX, 0, devicePaint);
        canvas.rotate(-60, toCenterX, 0);//逆时针旋转60度
        canvas.drawLine(radiusView, 0, toCenterX, 0, devicePaint);
        for (int i = 1; i < 100; i++) {
            canvas.drawLine(toCenterX - radiusView, 0, toCenterX - radiusView + 7, 0, devicePaint);//在距离圆心半径位置画一条7单位的短线
            canvas.rotate(3, toCenterX, 0);//顺时针旋转3个单位
        }
        canvas.drawLine(radiusView, 0, toCenterX, 0, devicePaint);
        canvas.restore();
    }
private void drawStep(Canvas canvas) {
        canvas.save();
        canvas.translate(0, toCenterY);//移动到圆心所在直线
        canvas.rotate(-60, toCenterX, 0);//逆时针旋转60度
        for (int i = 1; i < stepNum / 100; i++) {
            canvas.drawLine(toCenterX - radiusView, 0, toCenterX - radiusView + 7, 0, stepPaint);//在距离圆心半径位置画一条7单位的短线
            canvas.rotate(3, toCenterX, 0);//顺时针旋转3个单位
        }
        canvas.restore();
    }
public void setStepNum(int stepNum) {
this.stepNum = stepNum;
if (stepNum != 0) {
invalidate();
}
}
}
效果图如下
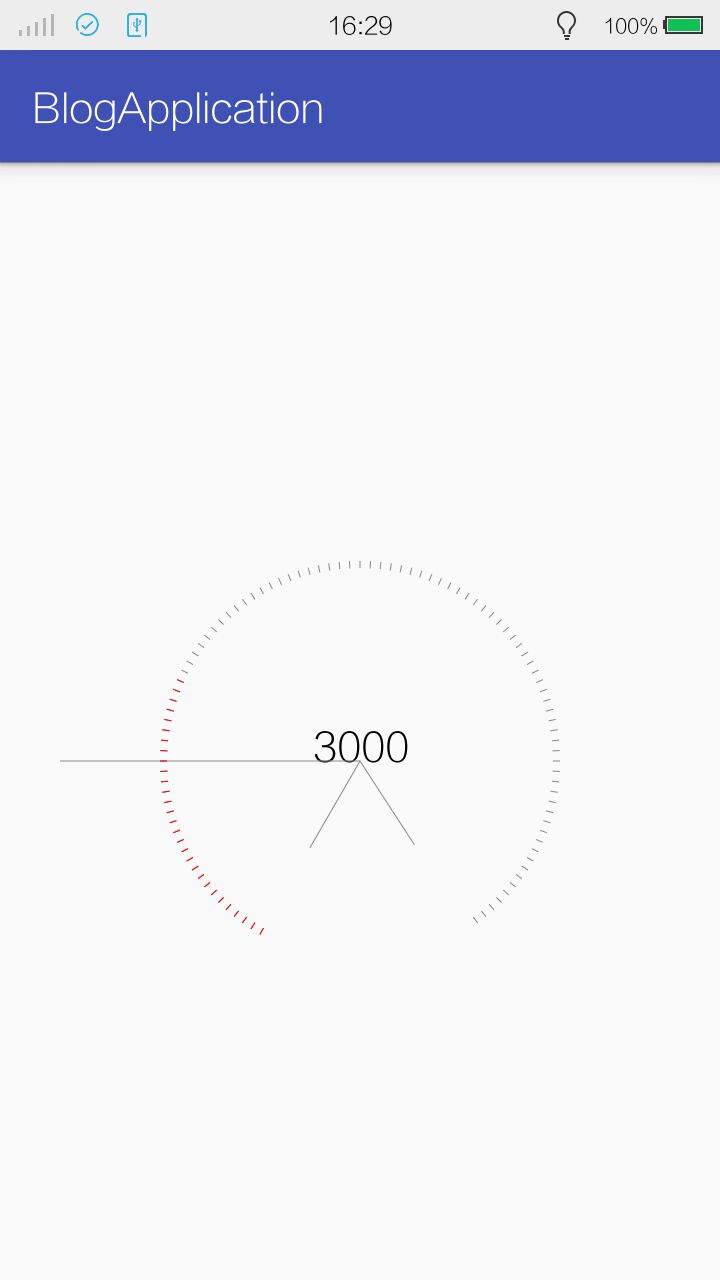
多画三条线看先水平和转动前后的几个位置。
其实自定义View理解起来不算难,不过当效果过于华丽的时候就很麻烦,可能需要用很多方法甚至像贝塞尔曲线或者其他辅助自定义View的工具,当然如果只是用到这些还不最难,慢慢理解运用,熟悉就好了,最可怕的是形状或者运动轨迹过于复杂,这就可能很考验数学功底了,没准都得拿出演草纸算一下... ...不过我觉得当一个开发者能经常受到这样的需求,没事就头脑风暴一下也是不错的,就像学生时代做数学题一样,譬如这个计步器我最开始就打算把刻度表正好放到Canva底部,这就需要用一下勾股定理算角度或者边长了,以前我也见过大神写的极其复杂的View,代码写的真跟数学题一样,各种算,当时我就迷弟了。
这次博客比较简单,一方面不想把博客都写的那么老长,一方面也是没想出来应该再添加点什么效果体验,但还是希望能给有需要的朋友一点点帮助吧,以后有什么想法了再去尝试整理。


 1710
1710

 被折叠的 条评论
为什么被折叠?
被折叠的 条评论
为什么被折叠?
 到【灌水乐园】发言


