


传统的Servlet在spring boot中怎么实现的?
本文主要内容:
1:springboot一些介绍
2:传统的servlete项目在spring boot项目中怎么实现的?web.xml、url-patterns怎么设置?
3:有几种实现方式?分别是什么?
4:代码位置
spring boot 三大特性
组件自动装配:webMVC、webFlux、JDBC等
嵌入式Web容器:Tomcat、Jetty以及undertow
生产准备特性:指标、健康检查、外部化部署等
组件自动装配:
激活自动装配注解:@EnableAutoConfiguration
配置:/META-INF/spring.factories
实现:XXXAutoConfiguration.
我们以spring-boot-autoconfigure的jar下spring.factories为示例:

可以看到key是接口后没是实现。实现就是XXXAutoConfiguration.
嵌入式web 容器:
Web Servlet容器:Tomcat、Jetty以及undertow
Web Reactive容器:Netty Web Server
生产准备特性:
指标:/actuator/metrices
健康检查:/actuator/health
外部化配置:/actuator/configprops
Web应用:
传统的Servlet应用
Servlet组件:Servlet、Filter、listener
Servlet注册到spring boot中:Servlet注解、Spring Bean、RegistrationBean
异步非阻塞:异步Servlet(web 3.0特效)、非阻塞Servlet(servlet 3.1特性)。
来源:凯哥Java(kaigejava)
传统Servelt应用:
一:添加pom依赖
<dependency>
<groupId>org.springframework.boot</groupId>
<artifactId>spring-boot-starter-web</artifactId>
</dependency>
二:Servlet组件讲解
我们先来回忆下使用Sevlet怎么写的:
1:写个类继承月HttpServlet。然后重新doGet、doPost方法。如下图:

2:在web.xml文件中需要配置servlet-name、servlet-calss、servlete-mapping中需要配置url-pattern。如下图:
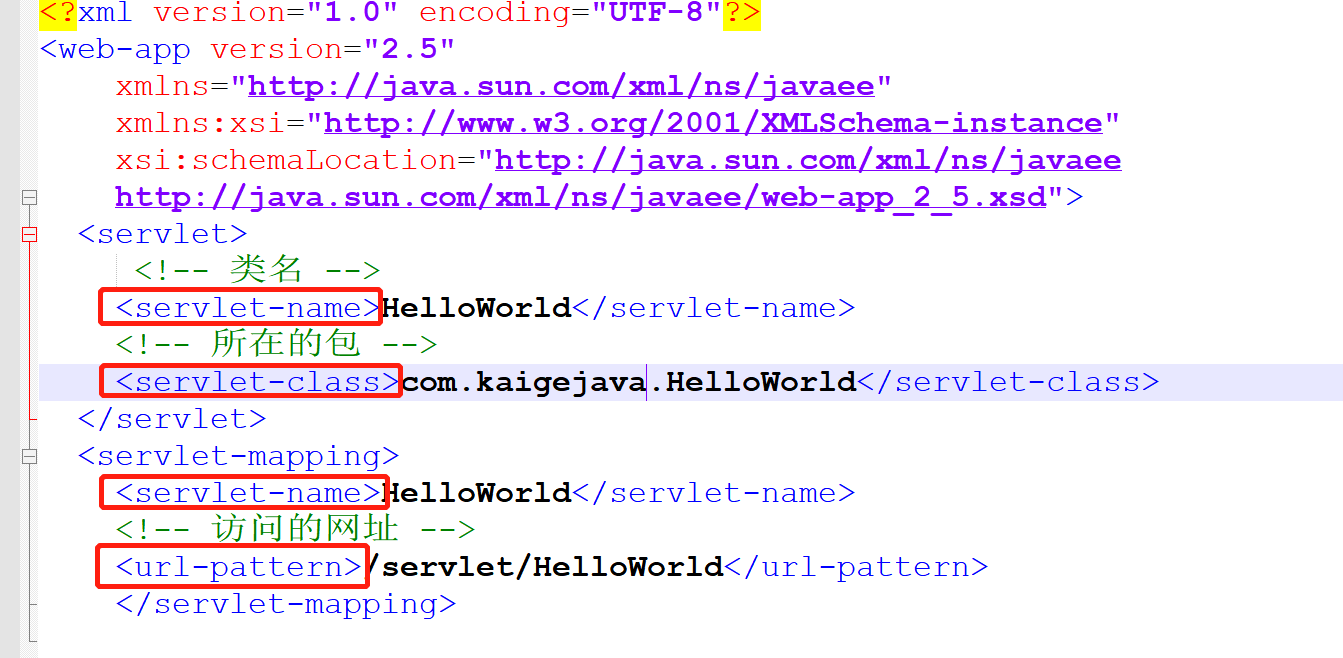
然后启动tomcat之后,在地址栏中输入xxx:xx/servlet/HelloWorld.
上面是Servlet的步骤。
在spring boot中,提倡使用注解。那么上面的servlet使用spring boot怎么使用?
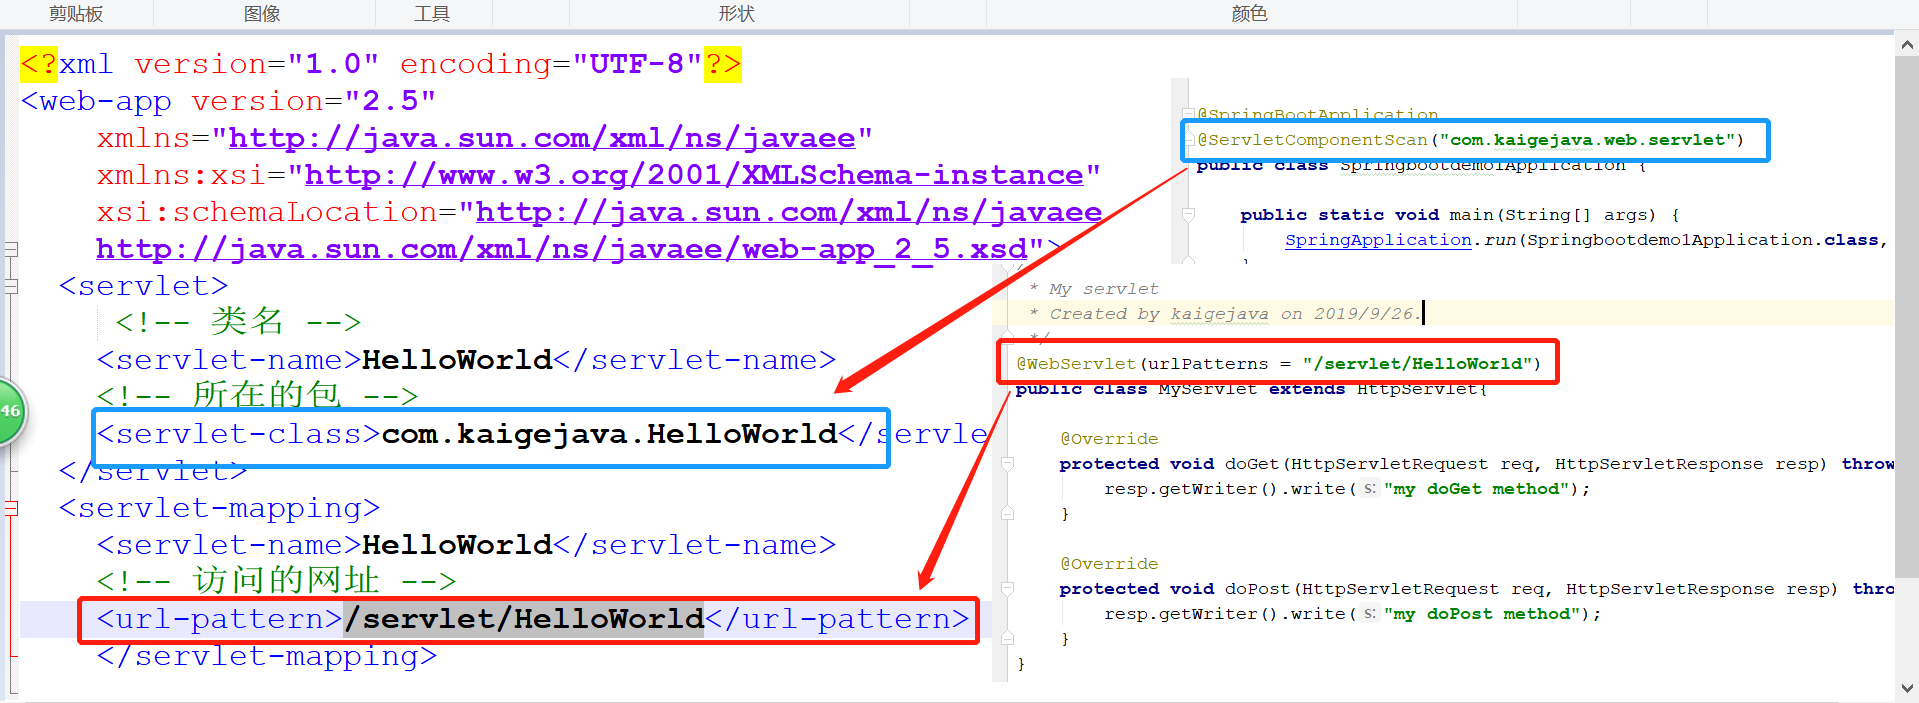
spring boot没有web.xml怎么配置?访问url怎么配置?
请看下面代码:
@WebServlet(urlPatterns = "/servlet/HelloWorld")
public class MyServlet extends HttpServlet{
@Override
protected void doGet(HttpServletRequest req, HttpServletResponse resp) throws ServletException, IOException {
resp.getWriter().write("my doGet method");
}
@Override
protected void doPost(HttpServletRequest req, HttpServletResponse resp) throws ServletException, IOException {
resp.getWriter().write("my doPost method");
}
}

其中@WebServlet注解和UrlPatterns的功能同web.xml中<servlet-mapping>中的urlpattern.
我们在来看看启动类上添加:
@SpringBootApplication
@ServletComponentScan("com.kaigejava.web.servlet")
public class Springbootdemo1Application {
public static void main(String[] args) {
SpringApplication.run(Springbootdemo1Application.class, args);
}
}
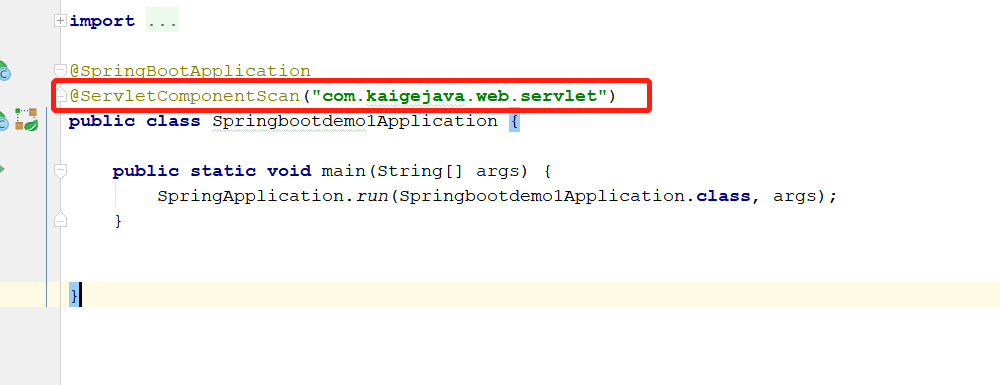
其中的ServletComponentScan就是扫描servlet的。可以看做是web.xml中<servlet>标签下的<sevlet-class>。
两者对比:
启动项目,访问:
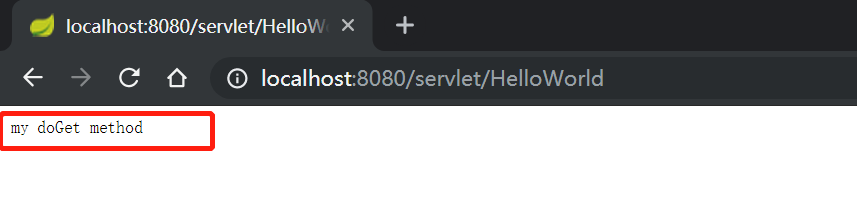
达到预期效果。说明传统的servlet在springboot项目中可以很好的兼容。
我们总结下:
SpringBoot中使用传统的Servlet。
实现方式:
创建一个类添加@WebServlet,继承HttpServlet,注册到spring boot容器中。
其中URL映射使用注解:@WebServlet(urlPatterns = "/servlet/HelloWorld")
将servlet注册到spring容器中使用注解:ServletComponentScan(basePackages=“com.kaigejava.web.servlet”)
我们知道Sevlete还有其他两个组件:Filter和Listener.
那么这两个组件在springboot中又分别使用那些注解呢?
根据servlet注解我们可以看到是@webServlet.
所以,filter对应的就是@WebFilter、listener对应的就是@WebListener注解。
实现方式有三种方式:
第一种:使用servlet注解。如上面我们演示的@Webservlet注解。
其实就是@ServletComponentScan+@webServlet
或者+@WebFilter或者+@WebListener注解
方式二:使用spring注解
@Bean+Servlet(Filter\Listener)
方式三:使用RegistrationBean方法
ServletRegistrationBean
FilterRegistrationBean
ServletListenerRegistrationBean
以上三种都可以。
想要学习Java开发的同学,可以参考成都Java培训班提供的学习大纲;


 426
426


 被折叠的 条评论
为什么被折叠?
被折叠的 条评论
为什么被折叠?
 到【灌水乐园】发言


