


之前的学习,我们把视图写在AppDelegate里,从今开始,一律写在试图控制器里。
首先,在AppDelegate里写如下代码:
- (BOOL)application:(UIApplication *)application didFinishLaunchingWithOptions:(NSDictionary *)launchOptions {
    self.window = [[UIWindow alloc] initWithFrame:[[UIScreen mainScreen] bounds]];
    // Override point for customization after application launch.
    self.window.backgroundColor = [UIColor whiteColor];
    [self.window makeKeyAndVisible];
    //初始化根视图控制器
    RootViewController_WYX *rootViewController = [[RootViewController_WYX alloc]init];
    self.window.rootViewController = rootViewController;

    /*
     模拟rootViewcontroller的setter方法
     -(void)setRootViewController:(UIViewController*)rootViewController{

       if (_rootViewController!=rootViewController){
          [_rootViewController release];
          _rootViewController = rootViewController;
          //self 代表的是window
          [self addSubView:rootViewController];
       }
     }

     */
    return YES;
}
这是将控制器里的视图加载到window上。
然后创建UIViewController
RootViewController_WYX.m- (void)viewDidLoad {
[super viewDidLoad];
[self.view setBackgroundColor:[UIColor whiteColor]];
// Do any additional setup after loading the view from its nib.
#pragma mark - 登录界面
//常见登录界面的背景
UIView *loginView = [[UIView alloc]initWithFrame:[UIScreen mainScreen].bounds];
//设置顶部标题
UILabel *titlelabel = [[UILabel alloc]initWithFrame:CGRectMake(0, 20, CGRectGetWidth(loginView.frame), 44)];
[titlelabel setText:@"登 录"];
//设置背景颜色
[titlelabel setBackgroundColor:[UIColor lightGrayColor]];
//标题颜色
[titlelabel setTextColor:[UIColor whiteColor]];
//字体
[titlelabel setFont:[UIFont fontWithName:@"Optima-Bold" size:25]];
//对齐方式
[titlelabel setTextAlignment:NSTextAlignmentCenter];
//显示
[loginView addSubview:titlelabel];
//设置背景颜色
[loginView setBackgroundColor:[UIColor whiteColor]];
// [loginView setUserInteractionEnabled:YES];
//创建lable和text,有规律的控件,所以可以用for循环创建
NSArray *labelTextNameArray = [NSArray arrayWithObjects:@"用户名",@"密码", nil];
NSArray *textfieldNameArray = [NSArray arrayWithObjects:@"请输入用户名",@"请输入密码", nil];
for (int i = 0; i < 2; i ++) {
//每循环一次创建一行控件,一行包括label和textfiled
UILabel *myLable = [[UILabel alloc]initWithFrame:CGRectMake(kLable_X, 200+i*50, kLable_Width, 30)];
[myLable setText:labelTextNameArray[i]];
//右对齐
[myLable setTextAlignment:NSTextAlignmentRight];
UITextField *myTextField = [[UITextField alloc]initWithFrame:CGRectMake(kLable_X + kLable_Width + 20, 200+i*50, kLable_Width*1.6, 30)];
//边界风格
[myTextField setBorderStyle:UITextBorderStyleRoundedRect];
//设置占位符
[myTextField setPlaceholder:textfieldNameArray[i]];
//设置代理
[myTextField setDelegate:self];
//设置tag值,方便touch事件管理
[myTextField setTag:1010+i];
[loginView addSubview:myLable];
[loginView addSubview:myTextField];
}
UITextField *pwdField = (UITextField*)[loginView viewWithTag:1011];
[pwdField setSecureTextEntry:YES];
NSArray *btnNameArray = [NSArray arrayWithObjects:@"登录",@"找回密码",@"注册", nil];
for (int i = 0; i < 3 ; i++) {
UIButton *myBtn = [UIButton buttonWithType:UIButtonTypeRoundedRect];
[myBtn setFrame:CGRectMake(50+i*(70+40), 320, 70, 30)];
//设置标题
[myBtn setTitle:btnNameArray[i] forState:UIControlStateNormal];
//设置tag值
[myBtn setTag:1000+i];
//设置字体颜色
[myBtn setTitleColor:[UIColor whiteColor] forState:UIControlStateNormal];
//设置背景颜色
[myBtn setBackgroundColor:[UIColor colorWithRed:0.0 green:128/255.0 blue:255.0 alpha:1]];
//圆角按钮
[myBtn.layer setMasksToBounds:YES];
[myBtn.layer setCornerRadius:5.0];
//添加按钮
[loginView addSubview:myBtn];
}
[self.view addSubview:loginView];
UIButton *registerBtn = (UIButton *)[loginView viewWithTag:1002];
[registerBtn addTarget:self action:@selector(jumpToRegisterViewAction:) forControlEvents:UIControlEventTouchUpInside];
// UIButton *loginBtn = (UIButton *)[loginView viewWithTag:1000];
// [loginBtn addTarget:self action:@selector(jumpTologinViewAction:) forControlEvents:UIControlEventTouchUpInside];
UIButton *findScretBtn = (UIButton *)[loginView viewWithTag:1001];
[findScretBtn addTarget:self action:@selector(jumpToFindPWDViewAction:) forControlEvents:UIControlEventTouchUpInside];
//调试语句
NSLog(@"视图加载完毕");
#pragma mark - 上课实验
}
所以要实现的视图代码写在这里。上述代码生成了这样一个页面:
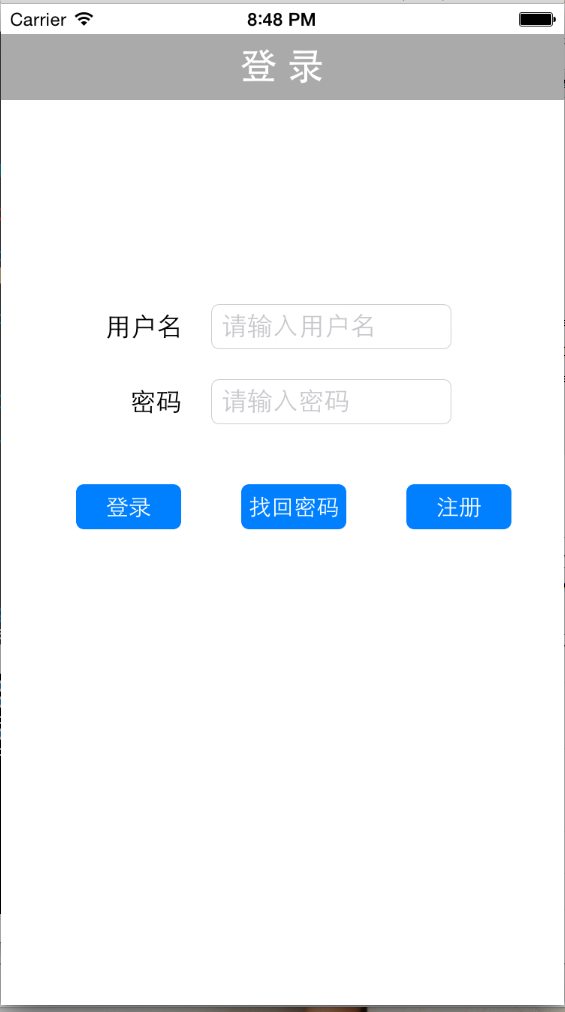
那么注意在上面写了button的回调时间,注意实现。
在这里实现了注册按钮跳转注册页面和找回密码按钮跳转找回密码界面。
代码如下:
//点击注册按钮的方法
-(void)jumpToRegisterViewAction:(UIButton*)sender{
    //跳转注册的视图控制器,这种方式叫做模态
    //初始化注册视图控制器
    RegisterViewController_WYX *registerVC = [[RegisterViewController_WYX alloc]init];
    /*
     第一个参数:即将出现的视图
     第二个参数:是否需要动画
     第三个参数:是一个block参数,目前可以理解为代码片。其作用是跳转完成之后,所执行的操作
     */
    registerVC.modalTransitionStyle = UIModalTransitionStyleCoverVertical;
    [self presentViewController:registerVC animated:YES completion:^{
        NSLog(@"sb");
    }];
}

-(void)jumpToFindPWDViewAction:(UIButton*)sender{
    PasswordViewController_WYX *passWord = [[PasswordViewController_WYX alloc]init];
    [self presentViewController:passWord animated:YES completion:^{
    }];
}
注意跳转页面的参数传递,最后一个代码片为跳转完成后执行的代码。
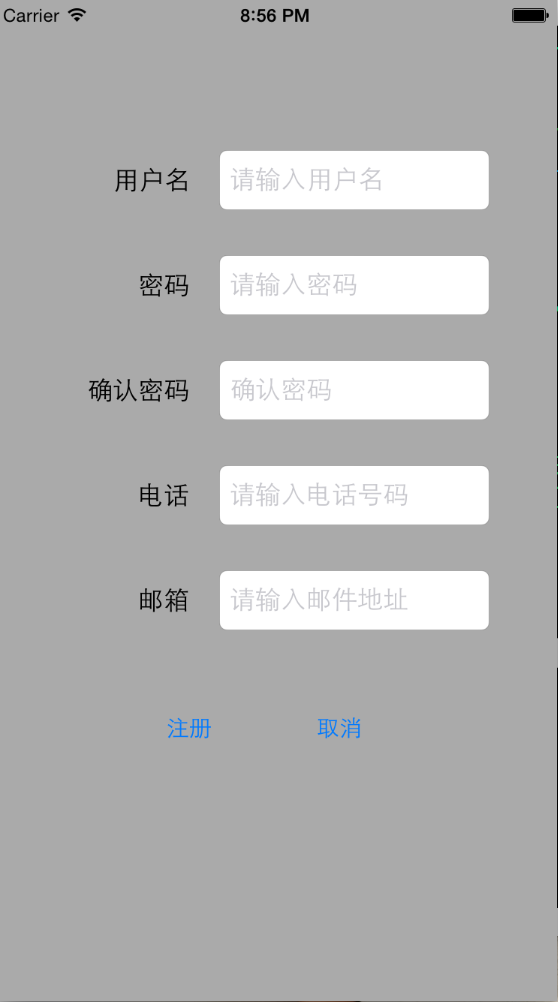
同样要实现这些功能,首先要创建其他两个页面,并将其头文件导入到根视图控制器的.m文件才可以实现。
另外两个界面的代码就不上了,效果图如下:

爱这里重点记住几个方法:
#pragma mark - 视图出现和消失是,所执行的方法。
//任何时候在视图即将出现的时候,都会执行方法。
-(void)viewWillAppear:(BOOL)animated{
    [super viewWillAppear:animated];
   //调试语句//
    NSLog(@"%s--视图即将出现",__FUNCTION__);
}

//视图已经出现
-(void)viewDidAppear:(BOOL)animated{
    [super viewDidAppear:animated];
    NSLog(@"%s---视图已经出现",__FUNCTION__);
}
//视图即将消失
-(void)viewWillDisappear:(BOOL)animated{
    [super viewWillDisappear:animated];
     NSLog(@"%s---视图即将消失",__FUNCTION__);
}
//视图已经消失
-(void)viewDidDisappear:(BOOL)animated{
    [super viewDidDisappear:animated];
     NSLog(@"%s---视图已经消失",__FUNCTION__);

}
#pragma mark - 视图释放的时候,执行的方法
-(void)dealloc{
    //ARC下,不需要写superdealloc;MRC下需要写[super dealloc]

}
这几个方法在视图出现和消失的前后都会调用,可以在视图控制器里重写,重写之后就可已完成想要的功能了。
比方说重新打开时刷新页面等等。
之前学习的代理,也可以在这里实现。


 6482
6482


 被折叠的 条评论
为什么被折叠?
被折叠的 条评论
为什么被折叠?
 到【灌水乐园】发言


