


是什么?
- SiteMesh是一个网页布局和装饰框架以及Web应用程序集成框架,可帮助创建由页面组成的网站,这些页面需要一致的外观,导航和布局方案。
- SiteMesh会拦截对通过Web服务器请求的任何静态或动态生成的HTML页面的请求,处理内容,然后将其与一个或多个装饰器合并以生成最终结果。
- SiteMesh也可以用于组成较小页面和布局的大页面。
- SiteMesh速度很快。真快。
- SiteMesh可以在基于Java的Web应用程序中使用,也可以作为脱机作业应用于内容。
- SiteMesh是可扩展的。

在Web应用程序中,SiteMesh充当服务者过滤器。它允许Servlet引擎正常处理请求,但是生成的HTML(称为content)将在返回给浏览器之前被拦截。截获的内容具有提取的某些属性(通常是<title>,<head>和<body>标记的内容,然后传递到第二个请求,该请求应返回该站点的通用外观(称为decorator装饰器)。装饰器包含占位符,用于将从内容中提取的属性插入到这些占位符。在幕后,SiteMesh体系结构的关键组件是content processor内容处理器。这是用于从HTML内容转换和提取内容的高效引擎。对于大多数用户来说,可以使用它,但也可以定义自己的转换和提取规则。SiteMesh不在乎使用什么技术来生成内容或装饰器。它们可能是静态文件,Servlet,JSP,其他过滤器,MVC框架等。只要由Servlet引擎提供服务,SiteMesh便可以使用它,说白了就是母版页。
怎么玩?
1. 引入jar包
<dependency>
			<groupId>org.sitemesh</groupId>
			<artifactId>sitemesh</artifactId>
			<version>3.0.1</version>
		</dependency>
2. web.xml 增加filter
  <filter>
    <filter-name>sitemesh</filter-name>
    <filter-class>org.sitemesh.config.ConfigurableSiteMeshFilter</filter-class>
  </filter>

  <filter-mapping>
    <filter-name>sitemesh</filter-name>
    <url-pattern>/*</url-pattern>
  </filter-mapping>
3. 创建demo.jsp,一会我们用来请求的页面,为什么不用demo.html?有页面缓存和中文乱码问题,懒得解决了。
<%@ page language="java" contentType="text/html; charset=UTF-8" pageEncoding="UTF-8"%>

<!DOCTYPE html>
<html>
<head>
<meta http-equiv="Pragma" content="no-cache">
<meta http-equiv="Cache-Control" content="no-cache">
<meta http-equiv="Expires" content="0">
<title>my demo</title>
<style>
	p {
		color: blue /* 文字蓝色 */
	}

	.bg{
		background-color: gray; /* 背景灰色 */
	}
</style>
</head>
<body color="bg">
<p>this is a demo</p>
</body>
</html>
3. 创建decorator.html(名字可以随便取),也就是母版页,这里只是告知html也可以作为母版页,实际开发中使用jsp或者通过springmvc渲染的页面
<!DOCTYPE html>
<html>
<head>
<meta charset="UTF-8">

<!-- demo.jsp的<head></head>之间的内容会填充到这里,title除外 -->
<title><sitemesh:write property='title'/></title>

<style>
h1{
	color:red  /* 标题红色 */
}
</style>

<!-- demo.jsp的<head></head>之间的内容会填充到这里,title除外 -->
<sitemesh:write property='head'/>

</head>

<!-- demo.jsp的<body>的属性值会填充到这里-->
<body class="<sitemesh:write property='body.color'/>">

<h1>我是母版页</h1>

<!-- demo.jsp的<body></body>之间的内容会填充到这里-->
<sitemesh:write property='body'/>

</body>
</html>
4. 创建/WEB-INF/sitemesh3.xml
<?xml version="1.0" encoding="UTF-8"?>
<sitemesh>
    <!--默认情况下,sitemesh 只对 HTTP 响应头中 Content-Type 为 text/html 的类型进行拦截和装饰,可以添加更多的 mime 类型-->
    <mime-type>text/html</mime-type>

    <!-- 默认装饰器,当下面的path路径都不匹配时,启用该装饰器进行装饰 -->
    <mapping decorator="/decorator.html"/>

    <!-- 对不同的路径,启用不同的装饰器,path:http请求路径,decorator:工程路径  -->
    <!-- <mapping path="/admin/*" decorator="/other-decorator.html" /> -->

    <!-- 对同一路径,启用多个装饰器 -->
    <!-- <mapping>
      <path>/articles/*</path>
      <decorator>/decorators/article.html</decorator>
      <decorator>/decorators/two-page-layout.html</decorator>
      <decorator>/decorators/common.html</decorator>
    </mapping> -->

    <!-- 排除,不进行装饰的路径 -->
    <!-- <mapping path="/img/*" exclude="true" />
    <mapping path="/images/*" exclude="true" />
    <mapping path="/login.do" exclude="true" /> -->
</sitemesh>
5. 创建好的工程结构

5. 访问demo.jsp

自定义TagRule
Sitemesh3默认只提供了 body、title、head的处理,但是有时候我们希望把一些js脚本放在html的后面,这时候该如何处理?
1. 新建java类实现TagRuleBundle接口,重写install方法
public class MyTagRuleBundle implements TagRuleBundle  {

	@Override
	public void install(State defaultState, ContentProperty contentProperty, SiteMeshContext siteMeshContext) {
		//添加自定义的tag
		defaultState.addRule("myconent", new ExportTagToContentRule(siteMeshContext, contentProperty.getChild("myconent"), false));
	}

	@Override
	public void cleanUp(State defaultState, ContentProperty contentProperty, SiteMeshContext siteMeshContext) {
		// TODO Auto-generated method stub

	}

}我是怎么知道install方法如何重写的?使用eclipse快捷键Ctrl+T打开TagRuleBundle的实现类
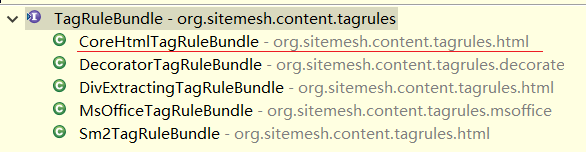
public class CoreHtmlTagRuleBundle implements TagRuleBundle {

    public void install(State defaultState, ContentProperty contentProperty, SiteMeshContext siteMeshContext) {
        // Core rules for SiteMesh to be functional.
        defaultState.addRule("head", new ExportTagToContentRule(siteMeshContext, contentProperty.getChild("head"), false));
        defaultState.addRule("title", new ExportTagToContentRule(siteMeshContext, contentProperty.getChild("title"), false));
        defaultState.addRule("body", new ExportTagToContentRule(siteMeshContext, contentProperty.getChild("body"), false));
        defaultState.addRule("meta", new MetaTagRule(contentProperty.getChild("meta")));

        // Ensure that while in <xml> tag, none of the other rules kick in.
        // For example <xml><book><title>hello</title></book></xml> should not affect the title of the page.
        defaultState.addRule("xml", new StateTransitionRule(new State()));
    }

    public void cleanUp(State defaultState, ContentProperty contentProperty, SiteMeshContext siteMeshContext) {
        // In the event that no <body> tag was captured, use the default buffer contents instead
        // (i.e. the whole document, except anything that was written to other buffers).
        if (!contentProperty.getChild("body").hasValue()) {
            contentProperty.getChild("body").setValue(contentProperty.getValue());
        }
    }
}
2. sitemesh3.xml 添加配置
<content-processor>
		<tag-rule-bundle class="cn.fg.sitemesh3.MyTagRuleBundle" />
	</content-processor>
3. demo.jsp 使用自定义的tag<myconent>
<!-- 省略其他代码 -->
</html>

<myconent>
<script type="text/javascript" src="jquery-2.1.4.min.js"></script>
<script>
$(function(){
	//追加一段橙色文本
	$("body").append("<p style='color:orange'>this is mycontent</p>")
})
</script>
</myconent>
4. decorator.html 显示myconent的输出
<!-- 省略部分代码 -->
</html>

<sitemesh:write property='myconent'/>
5. 访问demo.jsp,js被顺利执行

使用其他TagRuleBundle
除了使用自定义Tag规则外,也可以使用官方定义的规则,如Sm2TagRuleBundle(这是sitemesh2的规则)、DivExtractingTagRuleBundle 等,其中CoreHtmlTagRuleBundle是默认规则,无须配置,其他规则和自定规则一样都需要在sitemesh3.xml配置,这里我们介绍一下它们的使用
<!-- sitemesh3.xml -->
<content-processor>
    <tag-rule-bundle class="org.sitemesh.content.tagrules.html.DivExtractingTagRuleBundle" />
    <tag-rule-bundle class="org.sitemesh.content.tagrules.html.Sm2TagRuleBundle" />
</content-processor
<%@ page language="java" contentType="text/html; charset=UTF-8" pageEncoding="UTF-8"%>
<!-- demo.jsp -->
<!DOCTYPE html>
<html>
<head>
<meta http-equiv="Pragma" content="no-cache">
<meta http-equiv="Cache-Control" content="no-cache">
<meta http-equiv="Expires" content="0">
<title>my demo</title>
<style>
</style>
</head>
<body>
<!-- DivExtractingTagRuleBundle -->
<div id="content">我是div的内容</div>
</body>
</html>
<!-- Sm2TagRuleBundle,tag的值可以随便取 -->
<content tag="js">
<script type="text/javascript" src="https://cdn.bootcss.com/twitter-bootstrap/3.4.1/js/bootstrap.min.js"></script>
</content>
<!-- decorator.html -->

<!DOCTYPE html>
<html>
<head>
<meta charset="UTF-8">
<title>demo</title>

<style>
h1{
	color:red  /* 标题红色 */
}
p{
	color:blue;\  /* 文字蓝色 */
}
</style>
</head>

<h1>我是母版页</h1>

<!-- 只填充demo.jsp body中<div id="content"></div>之间的内容 -->
<p><sitemesh:write property='div.content'/></p>

</body>
</html>

<!--
    填充demo.jsp <content tag="js"></content之间的内容
    page.js 要对应tag="js"
-->
<sitemesh:write property='page.js'/>

使用java编码的方式配置sitemesh3
上面所讲的都是基于xml的配置方式,另外还可以使用java编码配置,两者也可以同时使用,具体请看官网http://wiki.sitemesh.org/wiki/display/sitemesh3/Configuring+SiteMesh+3


 235
235


 被折叠的 条评论
为什么被折叠?
被折叠的 条评论
为什么被折叠?
 到【灌水乐园】发言


