


通用信息
linux版本:ubantu 20.04.1
以下组件皆由apt安装部署,所有首先确认apt是否能正常使用,apt相关问题见最底部
注:
1.apt安装组件的文件位置:
配置文件:/etc/xxx
日志文件:/var/log/xxx
PID文件:/run/xxx.pid
2.查询安装成功与否:systemctl status xxx
3.apt安装的组件通常都已自启动,可以通过systemctl is-enabled xxx判断,若显示disable,则使用 systemctl enable xxx开启自启动
4.apt autoremove 不要轻易使用,特别是他提示你输入Yes, do as I say!的时候,有可能会把服务器必要的依赖删掉
端口信息统计:
nginx:80
es:9200
kibana:5601
kafka:9092
zookeeper:2181
rocketmq:9876
mqtt:1883/18083
mysql:3306
pgsql:6232
redis:6210
mongo:27017
gofastdfs:8080/8088
1.Nginx
apt-get update
安装
apt-get install nginx
2.Docker
① 更新系统软件包:
sudo apt update sudo apt upgrade
② 安装 Docker CE
1.添加 Docker 官方 GPG 密钥:
curl -fsSL https://download.docker.com/linux/ubuntu/gpg | sudo apt-key add -
2.添加 Docker 包源:
add-apt-repository "deb [arch=amd64] https://download.docker.com/linux/ubuntu $(lsb_release -cs) stable"
3.更新包缓存,并安装 Docker:
sudo apt update
sudo apt install docker-ce
验证 Docker 是否已经成功安装:
docker version
3.Elasticsearch组件
① 安装
1.升级软件包索引,并且安装必要的依赖软件包,来添加一个新的 Https 软件源:
sudo apt update
sudo apt install apt-transport-https ca-certificates wget
2.导入软件源的 GPG key:
wget -qO - https://artifacts.elastic.co/GPG-KEY-elasticsearch | sudo apt-key add -
3.添加 Elasticsearch 软件源到系统:
sudo sh -c 'echo "deb https://artifacts.elastic.co/packages/7.x/apt stable main" > /etc/apt/sources.list.d/elastic-7.x.list'
4.更新/安装
apt update
apt install elasticsearch
5.验证 Elasticsearch 正在运行
curl -X GET "localhost:9200/"
② 修改配置文件:
1.limits.conf增加配置
vi /etc/security/limits.conf
#设置打开文件数
elasticsearch - nofile 65536
# 设置线程数
elasticsearch - nproc 32768
# 开启锁定内存
elasticsearch - memlock unlimited
2.su注释配置
vi /etc/pam.d/su
#session required pam_limits.so
3.sysctl.conf 增加配置
vi /etc/sysctl.conf
vm.max_map_count=262144
执行sysctl -p 生效
③ 修改es配置文件:
1.elasticsearch.yml
vi /etc/elasticsearch/elasticsearch.yml
http.port: 9200
node.name: node-43 (节点名称)
network.host: 44.64.135.43 (本机IP)
discovery.seed_hosts: ["44.64.135.43", "44.64.135.44","44.64.135.45"] (所有节点IP)
cluster.initial_master_nodes: ["node-43", "node-44","node-45"] (需要设置为主节点的节点名称)
\#开启X-Pack配置
http.cors.enabled: true
http.cors.allow-origin: "*"
xpack.security.enabled: true
xpack.security.transport.ssl.enabled: true
2.修改配置文件 config/jvm.options 设置内存大小,根据实际机器的内存设定
-Xms8g
-Xmx8g
集群则重复按以上所有步骤设置N台服务器
④ 初始化密码
/usr/share/elasticsearch/bin/elasticsearch-setup-passwords interactive
一直重复设置密码xxx
⑤ 创建集群证书
-
生成证书
bin/elasticsearch-certutil ca
生成ca证书,在期间,会提示我们输入生成文件名(可直接回车跳过),提示我们输入证书密码(可直接回车跳过,也可以设置一个密码,密码尽量统一);
这样,我们就可以得到一个以.p12结尾的ca证书,其文件名默认为elastic-stack-ca.p12
2.对生成的证书进行验证
bin/elasticsearch-certutil cert --ca elastic-stack-ca.p12
bin/elasticsearch-keystore add xpack.security.transport.ssl.keystore.secure_password #并输入第一步输入的密码
bin/elasticsearch-keystore add xpack.security.transport.ssl.truststore.secure_password #并输入第一步输入的密码
此时在根目录将得到2个文件,分别是elastic-certificates.p12、elastic-stack-ca.p12
将这三个文件拷贝到conf目录下,同时,将这三个文件也拷贝到另外两个节点的conf路径下
mv elastic-certificates.p12 /etc/elasticsearch/
mv elastic-stack-ca.p12 /etc/elasticsearch/
4.Kibana组件
① 安装
1.下载并安装 Kibana 的 GPG 密钥、配置 Elastic APT 存储库(安装过es的可以跳过此步)
wget -qO - https://artifacts.elastic.co/GPG-KEY-elasticsearch | sudo apt-key add -
echo "deb https://artifacts.elastic.co/packages/7.x/apt stable main" | sudo tee /etc/apt/sources.list.d/elastic-7.x.list
2.安装:
apt-get install kibana
② 修改配置文件:
vi /etc/kibana/kibana.yml
server.name: kibana
server.host: "ip"
elasticsearch.hosts: ["http://ip:9200"]
xpack.monitoring.ui.container.elasticsearch.enabled: true
elasticsearch.username: "elastic"          #账号
elasticsearch.password: "123456"           #密码
③ 重启
systemctl restart kibana
# 查看成功与否
ip:5601
5.Kafka组件
下载对应的包
tar -zvxf kafka_2.12-3.5.1.tgz
#修改/config/server.properties host.name=内网IP # 如果操作topic时,报could not be established. Broker may not be available 错误 # 将listeners=PLAINTEXT: 改为 host:port:=PLAINTEXT: listeners=PLAINTEXT://内网IP:9092 #主要给外网访问,常在云服务器上配置 # advertised.listeners=PLAINTEXT://公网IP:9092 # 配置/config/zookeeper.properties # 先创建,再指定zookeeper的数据与日志目录,这里在kafka的安装主目录下创 建/zookeeper/data 与 /zookeeper/log dataDir=/zookeeper/data dataLogDir=/zookeeper/log # 如果启动zookeeper时,报上面地址访问不到,则使用绝对路径即可解决 #启动 nohup bin/kafka-server-start.sh config/server.properties 2>&1 &
6.Zookeeper组件
tar -zvxf apache-zookeeper-3.9.0-bin.tar.gz
#进入zookeeper的文件夹,cd到conf文件夹下,把zoo_sample.cfg文件改成 zoo.cfg文件
mv zoo_sample.cfg zoo.cfg
#进入bin文件夹,启动
./zkServer.sh start
#查询是否启动成功
netstat -tunple | grep 2181
-
Rocketmq组件
① 安装
# 安装maven
apt-get install maven
mvn -version
# 设置国内镜像
vim /etc/maven/settings.xml
<mirror>
    <id>alimaven</id>
    <mirrorOf>central</mirrorOf>
    <name>aliyun maven</name>
    <url>http://maven.aliyun.com/nexus/content/groups/public/</url>
  </mirror>
  <mirror>
    <id>ui</id>
    <mirrorOf>central</mirrorOf>
    <name>Human Readable Name for this Mirror.</name>
    <url>http://uk.maven.org/maven2/</url>
  </mirror>
  <mirror>
    <id>jboss-public-repository-group</id>
    <mirrorOf>central</mirrorOf>
    <name>JBoss Public Repository Group</name>
    <url>http://repository.jboss.org/nexus/content/groups/public</url>
</mirror>
② 下载源代码及编译:
git clone -b develop https://github.com/apache/rocketmq.git
cd rocketmq
mvn -Prelease-all -DskipTests clean install -U
cd distribution/target/apache-rocketmq(如果没有这个那就是xxx-SNAPSHOT)
③ 启动 nameserver
nohup sh bin/mqnamesrv &
tail -f ~/logs/rocketmqlogs/namesrv.log
The Name Server boot success...
④ 启动broker
nohup sh bin/mqbroker -n localhost:9876 &
tail -f ~/logs/rocketmqlogs/broker.log
The broker[%s, 172.30.30.233:10911] boot success...
7.mqtt组件
① 配置 EMQX Apt 源
curl -s https://assets.emqx.com/scripts/install-emqx-deb.sh | sudo bash
② 安装 EMQX
sudo apt-get install emqx
③ 启动 EMQX
sudo systemctl start emqx
打开ip:10183测试安装是否成功
④(可选)下载安装MQTTX测试
下载桌面版:MQTTX 下载
配置连接:host=mqtt://10.49.136.3
Port = 1883
Username=admin
Password=ropeok@1018
8.Mysql数据库
① 安装
# 添加 MySQL 源
vim /etc/apt/sources.list.d/mysql.list
deb http://repo.mysql.com/apt/ubuntu/ bionic mysql-apt-config
deb http://repo.mysql.com/apt/ubuntu/ bionic mysql-5.7
deb http://repo.mysql.com/apt/ubuntu/ bionic mysql-tools
deb-src http://repo.mysql.com/apt/ubuntu/ bionic mysql-5.7
# 更新
apt update
# 查询可以安装的版本
apt-cache policy mysql-server
# 选择状态为500的版本安装
apt install mysql-server=5.7.40-1ubuntu18.04
如果缺少什么依赖,就依次安装该版本依赖,例如:
apt install mysql-community-server=5.7.42-1ubuntu18.04
apt install mysql-client=5.7.42-1ubuntu18.04
apt install mysql-community-client=5.7.42-1ubuntu18.04
apt install libtinfo5
② 修改配置文件:
vi /etc/mysql/mysql.conf.d/mysqld.cnf
bind-address = 0.0.0.0
重启:systemctl restart mysql
③ 修改用户权限
# 进入mysql客户端
mysql -uroot
# 修改密码
ALTER USER 'root'@'localhost' IDENTIFIED WITH mysql_native_password BY '123456';
flush privileges;
# 修改权限
update user set host = '%' where user ='root';
# 查询是权限是否修改成功
select user,host,plugin from user;
# 退出
exit
9.pg数据库
① 安装
apt-get install postgresql
(自动创建了postgres用户)
② 修改配置文件:
vi etc/postgresql/xx/main/postgresql.conf
# 允许远程访问
listen_addresses = '*'
# 端口
port = 6232
vi /etc/postgresql/xx/main/pg_hba.conf
在最底下加上:
host all all 0.0.0.0/0 trust
③ 创建ropeok用户
sudo -u postgres psql
create user ropeok with password 'ropeok@1018';
③ 重启
systemctl restart postgresql
备注:
1.查询pg版本:sudo -u postgres psql -c "SELECT version();"
2.导入sql文件:
1.将rup/sql/nacos_20230811.sql放到/home
2.退出postgresql(输入exit)
3.psql nacos < /home/nacos_20230811.sql
3.退出psql: \q
10.Redis组件
① 安装
apt-get install redis-server
② 修改配置文件:
vi /etc/redis/redis.conf
# 密码
requirepass xxx
# 端口
port xxx
# 开启远程访问
bind 0.0.0.0
③ 重启
systemctl restart redis-server
备注:
1.查看状态:systemctl status redis
2.redis-cli:redis-cli -p 6210 -a ropeok@1018
11.Mongo组件
① 安装(注意mongo版本是否适配linux版本)
1.导入公共密钥:
wget -qO - https://www.mongodb.org/static/pgp/server-4.4.asc | sudo apt-key add -
2.添加MongoDB存储库软件源到系统:
echo "deb [ arch=amd64,arm64 ] https://repo.mongodb.org/apt/ubuntu focal/mongodb-org/4.4 multiverse" | sudo tee /etc/apt/sources.list.d/mongodb-org-4.4.list
ps:如果报gpg: no valid OpenPGP data found.
vi /etc/resolv.conf
添加:
nameserver 8.8.8.8
nameserver 114.114.114.114
3.更新/安装
apt update
apt install mongodb-org
5.验证
systemctl status mongod
12.gofastdfs组件
1.将gofastdfs压缩包解压,把里面的文件拷到服务器上
2.授权 chmod +x fileserver,chmod +x start.sh
3.启动 sh starh.sh
4.查询启动是否成功:ip:8080
5.启动后台管理系统:nohup java -jar go-fastdfs-web.jar > /dev/null 2>&1 &
6.查询后台管理系统是否启动成功:ip:8088
13.apt相关问题
一、证书失效:Certificate verification failed
Certificate verification failed: The certificate is NOT trusted. The certificate chain uses expired certificate. Could not handshake: Error in the certificate verification.
证书失效,需要重新安装ca-certificates
手动下载 ca-certificates deb 文件重新安装最新版,下载地址:
http://archive.ubuntu.com/ubuntu/pool/main/c/ca-certificates/
选择自己Ubuntu对应的版本的deb文件下载.
查看Ubuntu版本命令:
lsb_release -a
当前版本为20.04,所以选择该版本的deb文件: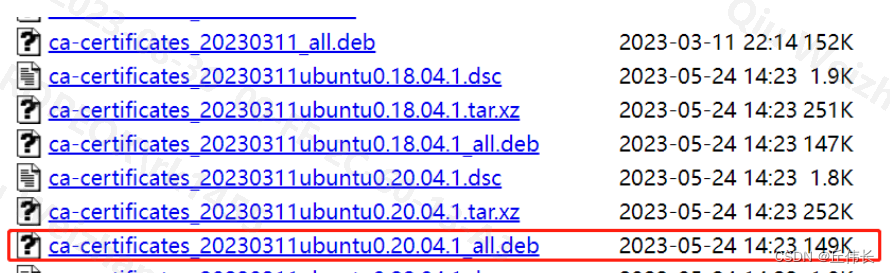
下载完成后,对其进行解压安装:
dpkg -i ca-certificates_20230311ubuntu0.20.04.1_all.deb
安装完成后,再输入apt update命令就不报错了
二、换源
# 编辑源配置文件,将下面的阿里源和清华源加入 vim /etc/apt/sources.list #添加阿里源 deb http://mirrors.aliyun.com/ubuntu/ focal main restricted universe multiverse deb-src http://mirrors.aliyun.com/ubuntu/ focal main restricted universe multiverse deb http://mirrors.aliyun.com/ubuntu/ focal-security main restricted universe multiverse deb-src http://mirrors.aliyun.com/ubuntu/ focal-security main restricted universe multiverse deb http://mirrors.aliyun.com/ubuntu/ focal-updates main restricted universe multiverse deb-src http://mirrors.aliyun.com/ubuntu/ focal-updates main restricted universe multiverse deb http://mirrors.aliyun.com/ubuntu/ focal-proposed main restricted universe multiverse deb-src http://mirrors.aliyun.com/ubuntu/ focal-proposed main restricted universe multiverse deb http://mirrors.aliyun.com/ubuntu/ focal-backports main restricted universe multiverse deb-src http://mirrors.aliyun.com/ubuntu/ focal-backports main restricted universe multiverse #添加清华源 deb https://mirrors.tuna.tsinghua.edu.cn/ubuntu/ focal main restricted universe multiverse # deb-src https://mirrors.tuna.tsinghua.edu.cn/ubuntu/ focal main restricted universe multiverse deb https://mirrors.tuna.tsinghua.edu.cn/ubuntu/ focal-updates main restricted universe multiverse # deb-src https://mirrors.tuna.tsinghua.edu.cn/ubuntu/ focal-updates main restricted universe multiverse deb https://mirrors.tuna.tsinghua.edu.cn/ubuntu/ focal-backports main restricted universe multiverse # deb-src https://mirrors.tuna.tsinghua.edu.cn/ubuntu/ focal-backports main restricted universe multiverse deb https://mirrors.tuna.tsinghua.edu.cn/ubuntu/ focal-security main restricted universe multiverse # deb-src https://mirrors.tuna.tsinghua.edu.cn/ubuntu/ focal-security main restricted universe multiverse multiverse #更新源 sudo apt-get update #如出现依赖问题,解决方式如下: sudo apt-get -f install #更新软件: sudo apt-get upgrade
三、域名解析失败:Temporary failure resolving
/etc/resolv.conf #加入 nameserver 202.96.134.133 nameserver 8.8.8.8


 2万+
2万+


 被折叠的 条评论
为什么被折叠?
被折叠的 条评论
为什么被折叠?
 到【灌水乐园】发言


