什么是Quartz2D?二维的绘图引擎
什么是二维?平面
什么是引擎?经包装的函数库,方便开发者使用。也就是说苹果帮我们封装了一套绘图的函数库
同时支持iOS和Mac系统什么意思?用Quartz2D写的同一份代码,既可以运行在iphone上又可以运行在mac上,可以跨平台开发。
开发中比较常用的是截屏/裁剪/自定义UI控件。
Quartz2D在iOS开发中的价值就是自定义UI控件。
使用图形上下文画图,要遵循一下四个步骤
1.获取图像上下文
2.创建路径
3.将路径添加到图形上下文(add)
4.渲染图像上下文(fill,stroke)
以下方法请在UIView的drawRect方法中调用~
一.绘制一条直线的方法
- #pragma mark - 直接使用图形上下文画图
- - (void)oneMethod
- {
-
- CGContextRef ctx = UIGraphicsGetCurrentContext();
-
-
-
- CGContextMoveToPoint(ctx, 10, 50);
-
- CGContextAddLineToPoint(ctx, 10,100);
-
-
- CGContextStrokePath(ctx);
-
- }
- #pragma mark - 图形上下文 + CGPathRef画线
- - (void)twoMethod
- {
-
- CGContextRef ctx = UIGraphicsGetCurrentContext();
-
-
- CGMutablePathRef path = CGPathCreateMutable();
-
-
- CGPathMoveToPoint(path, NULL, 20, 50);
- CGPathAddLineToPoint(path, NULL, 20, 100);
-
-
- CGContextAddPath(ctx, path);
-
-
- CGContextStrokePath(ctx);
- }
- #pragma mark - 贝塞尔曲线
- - (void)threeMethod
- {
-
- UIBezierPath *path = [UIBezierPath bezierPath];
-
-
- [path moveToPoint:CGPointMake(30, 50)];
- [path addLineToPoint:CGPointMake(30, 100)];
-
-
- [path stroke];
- }
- #pragma mark - 图形上下文 + 贝塞尔曲线
- - (void)fourMethod
- {
-
- CGContextRef ctx = UIGraphicsGetCurrentContext();
-
-
- UIBezierPath *path = [UIBezierPath bezierPath];
-
-
- [path moveToPoint:CGPointMake(40, 50)];
- [path addLineToPoint:CGPointMake(40, 100)];
-
-
- CGContextAddPath(ctx, path.CGPath);
-
-
- CGContextStrokePath(ctx);
- }
二.画两个相交的线,并且设置属性
- #pragma mark - 画两个相交的线,并设置属性
- - (void)drawTwoLineCrossSetAttribute
- {
-
- CGContextRef ctx = UIGraphicsGetCurrentContext();
-
-
- CGContextMoveToPoint(ctx, 123, 45);
- CGContextAddLineToPoint(ctx, 45, 80);
-
-
- CGContextAddLineToPoint(ctx, 223, 159);
-
-
- [[UIColor greenColor] set];
-
- CGContextSetLineWidth(ctx, 10);
-
- CGContextSetLineJoin(ctx, kCGLineJoinRound);
-
- CGContextSetLineCap(ctx, kCGLineCapRound);
-
-
- CGContextStrokePath(ctx);
- }
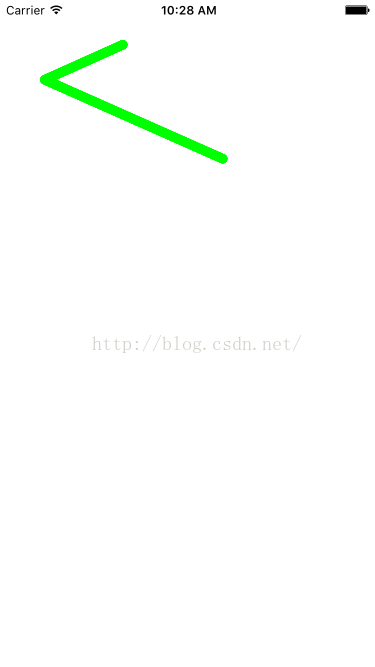
画出了两条有链接的线,其中设置颜色的时候,是区分
设置线的颜色
,和
设置图片的颜色
的,可以设置他们各自的属性(但是经常设置错误),懒得去区分并且保证不会设置错误,建议设置
[[UIColor greenColor] set]
就不用考虑实线还是填充图形了。还有,
CGContextSetLineJoin
是设置连接处的样式,是枚举,
CGContextSetLineCap
是设置线的顶部的样式,也是枚举。
注意:设置各种属性的时候,一定要记住在渲染之前,否则无效
三.绘制两条不相交的线,并且设置各自属性
- #pragma mark - 画两个不相交的线,并且设置各自属性
- - (void)drawTwoLineNoCrossSetAttribute
- {
-
- UIBezierPath *path = [UIBezierPath bezierPath];
-
-
- [path moveToPoint:CGPointMake(12, 49)];
- [path addLineToPoint:CGPointMake(68, 34)];
- [[UIColor redColor] set];
- [path setLineWidth:5];
-
- [path stroke];
-
-
- UIBezierPath *path2 = [UIBezierPath bezierPath];
- [path2 moveToPoint:CGPointMake(145, 167)];
- [path2 addLineToPoint:CGPointMake(98, 34)];
- [[UIColor greenColor] set];
- [path2 setLineWidth:10];
- [path2 setLineCapStyle:kCGLineCapRound];
- [path2 stroke];
-
- }
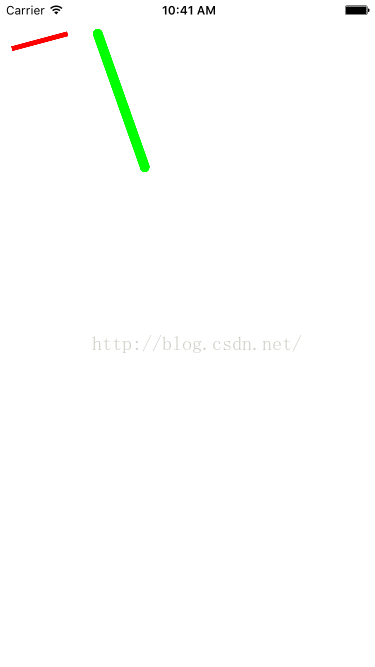
使用贝塞尔曲线画图的好处在于,1.每一个贝塞尔底层都有一个图形上线文,如果是用CGContextMoveToPoint画图,实际上就是一个图形上下文,不好去控制,所以建议没多条线可以使用贝塞尔曲线或者说使用底层的CGMutablePathRef画线,比较靠谱。
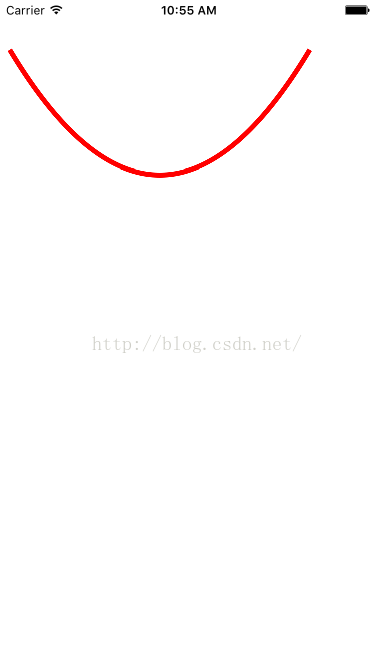
四.绘制曲线
- #pragma mark - 绘制曲线
- - (void)drawQuadCurve
- {
-
- CGContextRef ctx = UIGraphicsGetCurrentContext();
-
-
- CGContextMoveToPoint(ctx, 10, 50);
-
-
-
-
-
-
-
-
-
-
-
- CGContextAddQuadCurveToPoint(ctx, 160, 300, 310, 50);
-
-
- [[UIColor redColor] set];
-
- CGContextSetLineWidth(ctx, 5);
-
-
- CGContextStrokePath(ctx);
- }
五.绘制带有圆角边框的正方形
- #pragma mark - 绘制一个带有圆角边框的正方形
- - (void)drawRoundSquare
- {
-
-
- UIBezierPath *path = [UIBezierPath bezierPathWithRoundedRect:CGRectMake(10, 50, 100, 40) cornerRadius:5];
-
- [[UIColor redColor] set];
-
- [path stroke];
-
-
-
- UIBezierPath *path2 = [UIBezierPath bezierPathWithRoundedRect:CGRectMake(10, 140, 100, 100) cornerRadius:5];
-
- [[UIColor orangeColor] set];
-
- [path2 fill];
-
-
-
- UIBezierPath *path3 = [UIBezierPath bezierPathWithRoundedRect:CGRectMake(10, 290, 100, 100) cornerRadius:50];
-
- [[UIColor blueColor] set];
-
- [path3 fill];
-
- }
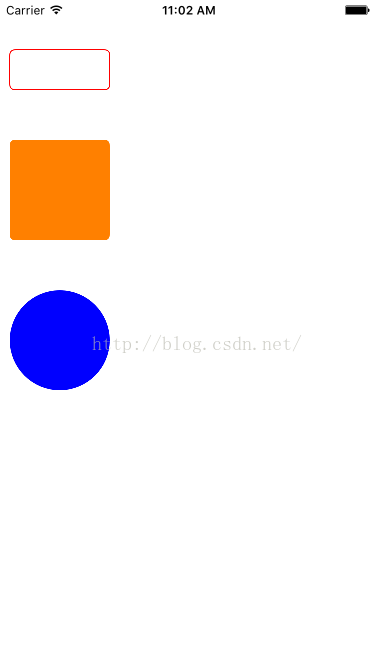
- 1.
stroke设置边框的颜色,fill填充内部的颜色 - 2.
fill并不是随意使用的,必须是封闭的图形。 - 3.可以通过设置圆角是正方形的高度,生成一个原形,但不是最规范绘制原形的方法,不过也可以使用。
六.绘制一个弧度曲线
- #pragma mark - 绘制一个弧度曲线
- - (void)drawCurve
- {
-
-
-
-
-
-
-
-
-
-
-
-
- UIBezierPath *path = [UIBezierPath bezierPathWithArcCenter:CGPointMake(150, 150) radius:50 startAngle:0 endAngle:M_PI clockwise:YES];
- [[UIColor redColor] set];
- [path setLineWidth:10];
- [path setLineCapStyle:(kCGLineCapRound)];
-
- [path stroke];
-
-
-
- UIBezierPath *path2 = [UIBezierPath bezierPathWithArcCenter:CGPointMake(150, 350) radius:50 startAngle:0 endAngle:270/360.0*(M_PI * 2) clockwise:YES];
- [[UIColor yellowColor] set];
- [path2 setLineWidth:10];
- [path2 setLineCapStyle:(kCGLineCapRound)];
-
- [path2 stroke];
-
-
-
- UIBezierPath *path3 = [UIBezierPath bezierPathWithArcCenter:CGPointMake(150, 550) radius:50 startAngle:0 endAngle:(M_PI * 2) clockwise:YES];
- [[UIColor blueColor] set];
- [path3 setLineWidth:10];
- [path3 setLineCapStyle:(kCGLineCapRound)];
-
- [path3 stroke];
-
- }
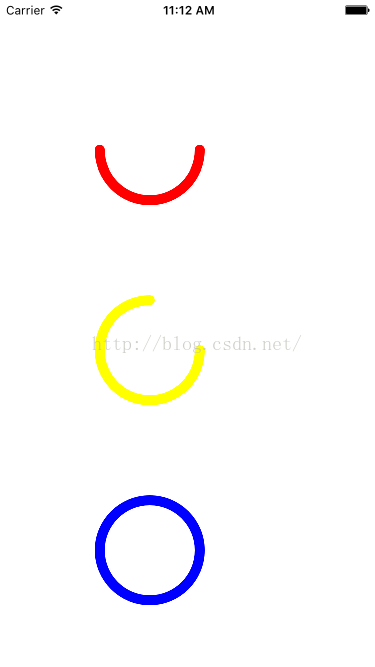
1.M_PI是180度.M_PI_2是90°
2.这里的角度都是弧度制度,如果我们需要15°,可以用15°/180°*π得到。
3.clockwise这个是顺时针,如果穿1,就是顺时针,穿0,是逆时针
七.绘制一个一个扇形
- <span style="font-size:18px;">#pragma mark - 绘制扇形
- - (void)drawFanShaped
- {
-
- CGContextRef ctx = UIGraphicsGetCurrentContext();
-
- CGFloat centerX = 100;
- CGFloat centerY = 100;
- CGFloat radius = 50;
-
- CGContextMoveToPoint(ctx, centerX, centerY);
- CGContextAddArc(ctx, centerX, centerY, radius, M_PI, (230 / 360.0)*(M_PI * 2), NO);
-
-
- CGContextClosePath(ctx);
-
- CGContextFillPath(ctx);
-
- }</span>
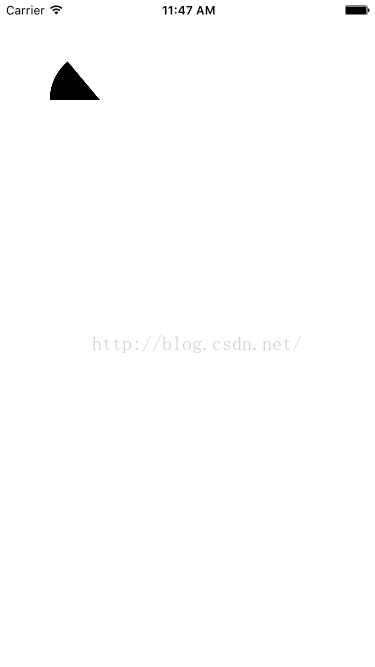
1.线添加一个点CGContextMoveToPoint
2.添加一个圆弧CGContextAddArc
3.闭合绘图CGContextClosePath
4.给路径设置颜色CGContextStrokePath,或者给图形内部设置颜色CGContextFillPath
5.使用贝塞尔曲线,也要设置闭合路径CGContextClosePath
学有所成,来个小练习~
八.简单下载进度的demo
自定义一个View
CustomProgressView.h
- @interface CustomProgressView : UIView
- @property (nonatomic,assign) CGFloat progressValue;
- @end
CustomProgressView.m
- @implementation CustomProgressView
- - (void)setProgressValue:(CGFloat)progressValue
- {
- _progressValue = progressValue;
- [self setNeedsDisplay];
- }
- -(void)drawRect:(CGRect)rect
- {
- UIBezierPath *path = [UIBezierPath bezierPathWithArcCenter:self.center radius:100 startAngle:-M_PI_2 endAngle:(_progressValue / 100.0) *(22 * M_PI) - M_PI_2 clockwise:YES];
- [[UIColor redColor] set];
- [path setLineWidth:10];
- [path setLineCapStyle:(kCGLineCapRound)];
- [path stroke];
- }
-
- @end
ViewController.m
- @interface ViewController ()
- @property (nonatomic,retain) UISlider *slider;
- @property (nonatomic,retain) CustomProgressView *progressView;
- @property (nonatomic,retain) UILabel *label;
- @end
-
- @implementation ViewController
-
- - (void)viewDidLoad {
- [super viewDidLoad];
- self.progressView = [[CustomProgressView alloc]initWithFrame:CGRectMake(0, 0, self.view.frame.size.width, self.view.frame.size.width)];
- self.progressView.backgroundColor = [UIColor whiteColor];
-
- self.label = [[UILabel alloc]initWithFrame:CGRectMake(0, 0, 80, 50)];
- self.label.center = self.progressView.center;
- self.label.textAlignment = NSTextAlignmentCenter;
- [self.progressView addSubview:self.label];
-
- [self.view addSubview:self.progressView];
-
-
- self.slider = [[UISlider alloc]initWithFrame:CGRectMake(10, 500, self.view.frame.size.width - 20, 50)];
- self.slider.minimumValue = 0;
- self.slider.maximumValue = 100;
- [self.slider addTarget:self action:@selector(changeValue:) forControlEvents:(UIControlEventValueChanged)];
- [self.view addSubview:self.slider];
- }
- - (void)changeValue:(UISlider *)sender
- {
- self.progressView.progressValue = sender.value;
- self.label.text = [NSString stringWithFormat:@"%.f%%",sender.value];
- }
- - (void)didReceiveMemoryWarning {
- [super didReceiveMemoryWarning];
-
- }
-
- @end
想调用这个方法drawRect:(CGRect)rect,必须要使用setNeedsDisplay,其他的无效。
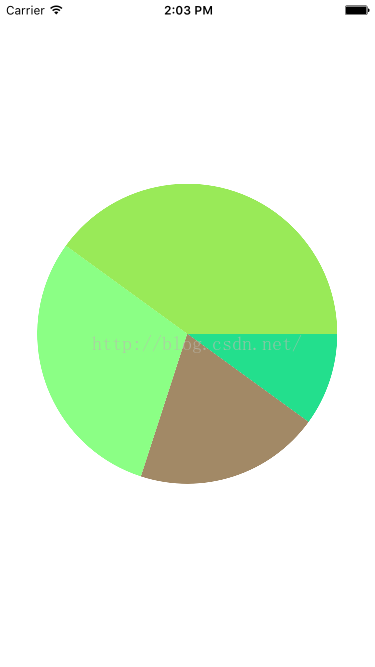
九.饼状图
PieView.m
- @interface PieView ()
- @property (nonatomic,retain) NSArray *nums;
- @property (nonatomic,assign) NSInteger total;
- @end
- @implementation PieView
- - (NSInteger)total
- {
- if (_total == 0) {
- for (int i = 0; i < self.nums.count ; i ++) {
- _total += [self.nums[i] integerValue];
- }
- }
- return _total;
- }
- - (NSArray *)nums
- {
- if (!_nums) {
- self.nums = @[@"10",@"20",@"30",@"40"];
- }
- return _nums;
- }
- - (void)drawRect:(CGRect)rect
- {
-
- CGFloat radius = 150;
- CGFloat startA = 0;
- CGFloat endA = 0;
-
- for (int i = 0; i < self.nums.count; i++) {
- NSNumber *num = self.nums[i];
- startA = endA;
- endA = startA + [num floatValue]/self.total * (22 * M_PI);
- UIBezierPath *path = [UIBezierPath bezierPathWithArcCenter:self.center radius:radius startAngle:startA endAngle:endA clockwise:YES];
- [path addLineToPoint:self.center];
-
- CGFloat randRed = arc4random_uniform(256)/255.0;
- CGFloat randGreen = arc4random_uniform(256)/255.0;
- CGFloat randBlue = arc4random_uniform(256)/255.0;
- UIColor *randomColor = [UIColor colorWithRed:randRed green:randGreen blue:randBlue alpha:1];
- [randomColor set];
-
- [path fill];
- }
- }
-
- @end
ViewController.m
- PieView *pie = [[PieView alloc]initWithFrame:[UIScreen mainScreen].bounds];
- pie.backgroundColor = [UIColor whiteColor];
- [self.view addSubview:pie];
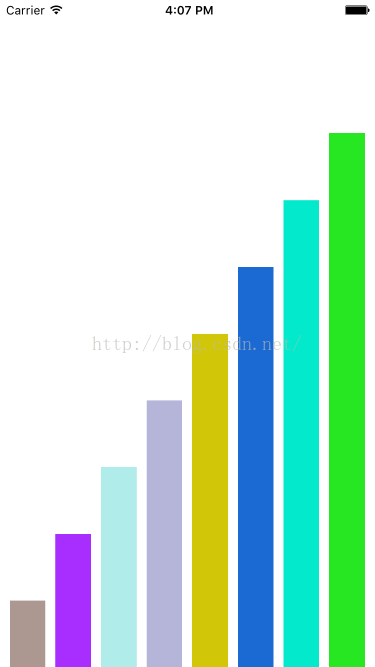
- @interface BarChartView()
- @property (nonatomic,retain) NSArray *nums;
- @end
- @implementation BarChartView
- - (NSArray *)nums
- {
- if (!_nums) {
- self.nums = @[@"10",@"20",@"30",@"40",@"50",@"60",@"70",@"80"];
- }
- return _nums;
- }
- - (void)drawRect:(CGRect)rect
- {
-
- CGContextRef ctz = UIGraphicsGetCurrentContext();
-
-
- CGFloat margin = 30;
-
- if (self.nums.count > 5) {
- margin = 10;
- }
-
- CGFloat width = (rect.size.width - (self.nums.count + 1) *margin) / self.nums.count;
- for (int i = 0; i < self.nums.count; i++) {
-
-
- CGFloat num = [self.nums[i] floatValue]/100;
-
- CGFloat x = margin + (width + margin) * i ;
- CGFloat y = rect.size.height * (1 - num);
- CGFloat height = rect.size.height * num;
-
- CGRect rectA = CGRectMake(x, y, width, height);
- CGContextAddRect(ctz, rectA);
-
- CGFloat randRed = arc4random_uniform(256)/255.0;
- CGFloat randGreen = arc4random_uniform(256)/255.0;
- CGFloat randBlue = arc4random_uniform(256)/255.0;
- UIColor *randomColor = [UIColor colorWithRed:randRed green:randGreen blue:randBlue alpha:1];
-
- [randomColor set];
-
- CGContextFillPath(ctz);
-
- }
- }
-
-
-
-
-
-
-
-
- @end
ViewController.m
- BarChartView *view = [[BarChartView alloc]initWithFrame:[UIScreen mainScreen].bounds];
- view.backgroundColor = [UIColor whiteColor];
- [self.view addSubview:view];
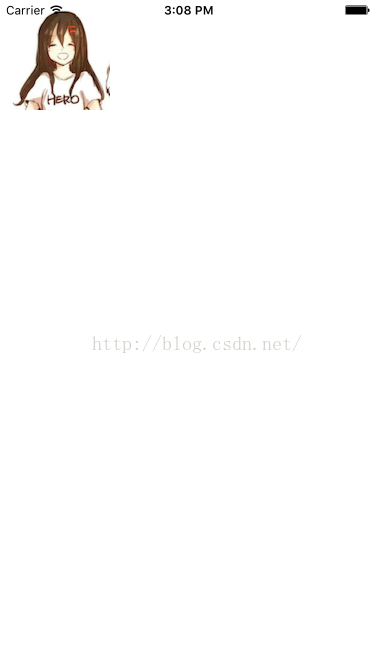
十一.绘制图片
- -(void)drawRect:(CGRect)rect
- {
-
-
-
- UIImage *image = [UIImage imageNamed:@"image"];
-
-
-
- [image drawInRect:rect];
-
-
- [image drawAtPoint:CGPointMake(10, 10)];
-
-
- [image drawAsPatternInRect:rect];
- }

- [image drawAtPoint:CGPointMake(10, 10)];
- [image drawAsPatternInRect:rect];
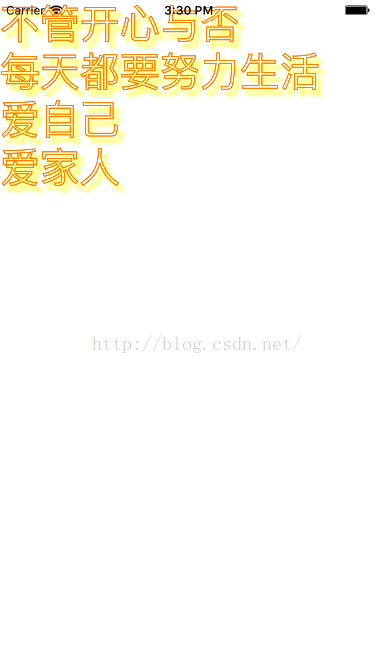
十二.绘制富文本
- - (void)drawRect:(CGRect)rect
- {
- NSString *str = @"不管开心与否\n每天都要努力生活\n爱自己\n爱家人";
-
- NSMutableDictionary * paras = [NSMutableDictionary dictionary];
-
- paras[NSFontAttributeName] = [UIFont systemFontOfSize:40];
-
- paras[NSForegroundColorAttributeName] = [UIColor blackColor];
-
- paras[NSStrokeColorAttributeName] = [UIColor orangeColor];
-
- paras[NSStrokeWidthAttributeName] = @3;
-
-
- NSShadow *shodow = [[NSShadow alloc] init];
-
- shodow.shadowColor = [UIColor yellowColor];
-
- shodow.shadowOffset = CGSizeMake(5, 6);
-
- shodow.shadowBlurRadius = 4;
-
- paras[NSShadowAttributeName] = shodow;
- [str drawAtPoint:CGPointZero withAttributes:paras];
- }
十三.雪花飘动
- (void)drawRect:(CGRect)rect {
UIImage *image = [UIImage imageNamed:@"snow"];
_snowY += 10;
[image drawAtPoint:CGPointMake(0, _snowY)];
if (_snowY >= rect.size.height) {
_snowY = 0;
}
}
- (void)awakeFromNib
{
CADisplayLink *link = [CADisplayLink displayLinkWithTarget:self selector:@selector(timeChange)];
[link addToRunLoop:[NSRunLoop mainRunLoop] forMode:NSDefaultRunLoopMode];
}
- (void)timeChange{
[self setNeedsDisplay];
}
1.本质就是调用drawRect方法,一直刷新雪花的y值
2.每一次调用drawRect,都创建大量的对象,有人说可能性能不好,不过你可能多虑了,没吃都是在内存加载,不会创建新的UIImage
十四.图形上下文栈
我自己详细的介绍了一下,上下文栈,可以看一下~
图形上下文详解
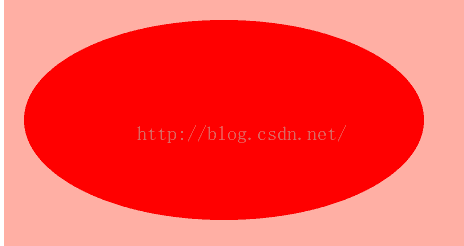
十五.图形上下文矩阵
到底是个啥?
就是图形上下文画出的东西永远是方方正正的,你要是想画个偏离的矩形,按照过去的方法画不出来,只能使用矩阵的方式。分别有偏移,缩放,旋转
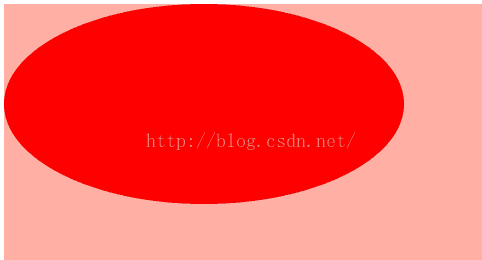
正常尺寸的椭圆
x,y各自平移10px后的椭圆
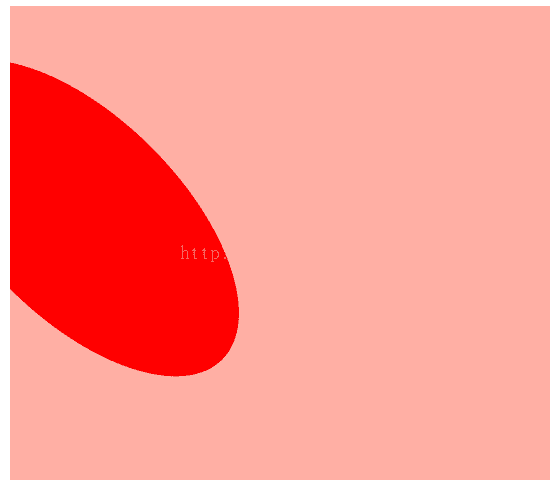
旋转后的椭圆
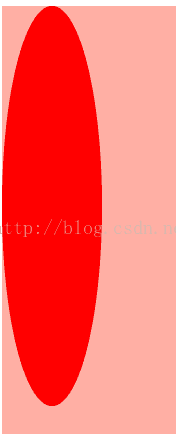
缩放后的椭圆
- (void)drawRect:(CGRect)rect {
CGContextRef ctx = UIGraphicsGetCurrentContext();
CGPathRef path = CGPathCreateWithEllipseInRect(CGRectMake(0, 0, 200, 100),nil);
[[UIColor redColor] set];
CGContextScaleCTM(ctx, 0.25, 2);
CGContextAddPath(ctx, path);
CGContextFillPath(ctx);
}
1.绘制变化的图形的步骤
- 先绘制path
- 设置图形上下文矩阵
- 将path添加到图形上下文(这一步很重要,一定按照步骤来)
- 渲染
2.绘图的时候,我们要使用底层的 CGPathRef,或者贝塞尔,然后 CGContextRef+path的方式。
如不这样,我注释的CGContextAddEllipseInRect(ctx, CGRectMake(100, 100, 100, 100))方法,这个方法中已经先去添加了path到图形上下文,即使我们在去添加图形上下文矩阵,也是无效
3.可以和图形上下文栈一起使用,给特定的一些图案设置一些属性,还有一些不会受到影响


 3813
3813

 被折叠的 条评论
为什么被折叠?
被折叠的 条评论
为什么被折叠?
 到【灌水乐园】发言


