


一个月前在不懂任何
rails知识的情况,就已经把这个入门项目搭建成功,足以说明rails on ruby做web开发的简单,经过一个月的学习对rails有了一定的了解,今天趁着周末再来试着搭建一遍,增加自己的认识。更重要的是我们来看看用rails来开发到底方便在哪里?
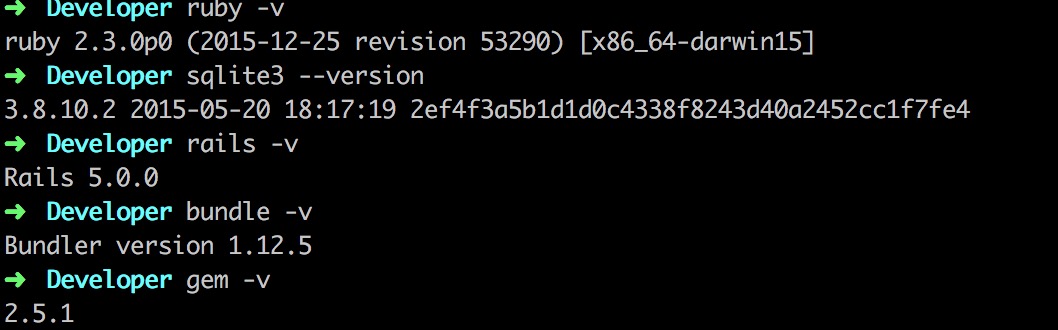
环境信息
默认已经安装好环境所需要的各种工具
创建新项目
一个好的框架,创建一个项目时,会自动把一些共有的文件都初始化,不需要我们再手动添加。来看看rails怎么创建:
➜  Developer rails new blog
      create
      create  README.md
      create  Rakefile
      create  config.ru
      create  .gitignore
      create  Gemfile
      create  app
      create  app/assets/config/manifest.js
      create  app/assets/javascripts/application.js
      create  app/assets/javascripts/cable.js
      create  app/assets/stylesheets/application.css
      create  app/channels/application_cable/channel.rb
      create  app/channels/application_cable/connection.rb
      create  app/controllers/application_controller.rb
      create  app/helpers/application_helper.rb
      create  app/jobs/application_job.rb
      create  app/mailers/application_mailer.rb
      create  app/models/application_record.rb
      create  app/views/layouts/application.html.erb
      create  app/views/layouts/mailer.html.erb
      create  app/views/layouts/mailer.text.erb
      create  app/assets/images/.keep
      create  app/assets/javascripts/channels
      create  app/assets/javascripts/channels/.keep
      create  app/controllers/concerns/.keep
      create  app/models/concerns/.keep
      create  bin
      create  bin/bundle
      create  bin/rails
      create  bin/rake
      create  bin/setup
      create  bin/update
      create  config
      create  config/routes.rb
      create  config/application.rb
      create  config/environment.rb
      create  config/secrets.yml
      create  config/cable.yml
      create  config/puma.rb
      create  config/spring.rb
      create  config/environments
      create  config/environments/development.rb
      create  config/environments/production.rb
      create  config/environments/test.rb
      create  config/initializers
      create  config/initializers/application_controller_renderer.rb
      create  config/initializers/assets.rb
      create  config/initializers/backtrace_silencers.rb
      create  config/initializers/cookies_serializer.rb
      create  config/initializers/cors.rb
      create  config/initializers/filter_parameter_logging.rb
      create  config/initializers/inflections.rb
      create  config/initializers/mime_types.rb
      create  config/initializers/new_framework_defaults.rb
      create  config/initializers/session_store.rb
      create  config/initializers/wrap_parameters.rb
      create  config/locales
      create  config/locales/en.yml
      create  config/boot.rb
      create  config/database.yml
      create  db
      create  db/seeds.rb
      create  lib
      create  lib/tasks
      create  lib/tasks/.keep
      create  lib/assets
      create  lib/assets/.keep
      create  log
      create  log/.keep
      create  public
      create  public/404.html
      create  public/422.html
      create  public/500.html
      create  public/apple-touch-icon-precomposed.png
      create  public/apple-touch-icon.png
      create  public/favicon.ico
      create  public/robots.txt
      create  test/fixtures
      create  test/fixtures/.keep
      create  test/fixtures/files
      create  test/fixtures/files/.keep
      create  test/controllers
      create  test/controllers/.keep
      create  test/mailers
      create  test/mailers/.keep
      create  test/models
      create  test/models/.keep
      create  test/helpers
      create  test/helpers/.keep
      create  test/integration
      create  test/integration/.keep
      create  test/test_helper.rb
      create  tmp
      create  tmp/.keep
      create  tmp/cache
      create  tmp/cache/assets
      create  vendor/assets/javascripts
      create  vendor/assets/javascripts/.keep
      create  vendor/assets/stylesheets
      create  vendor/assets/stylesheets/.keep
      remove  config/initializers/cors.rb
         run  bundle install
Fetching gem metadata from https://rubygems.org/
Fetching version metadata from https://rubygems.org/
Fetching dependency metadata from https://rubygems.org/
Resolving dependencies.....
Using rake 11.2.2
Using concurrent-ruby 1.0.2
Using i18n 0.7.0
Using minitest 5.9.0
Using thread_safe 0.3.5
Using builder 3.2.2
Using erubis 2.7.0
Using mini_portile2 2.1.0
Using pkg-config 1.1.7
Using rack 2.0.1
Using nio4r 1.2.1
Using websocket-extensions 0.1.2
Using mime-types-data 3.2016.0521


Your user account isn't allowed to install to the system Rubygems.
  You can cancel this installation and run:

      bundle install --path vendor/bundle

  to install the gems into ./vendor/bundle/, or you can enter your password
  and install the bundled gems to Rubygems using sudo.

  Password:
Installing arel 7.1.1
Using bundler 1.12.5
Using byebug 9.0.5
Using coffee-script-source 1.10.0
Using execjs 2.7.0
Using method_source 0.8.2
Using thor 0.19.1
Using debug_inspector 0.0.2
Installing ffi 1.9.14 with native extensions
Using multi_json 1.12.1
Using rb-fsevent 0.9.7
Installing puma 3.6.0 with native extensions
Using sass 3.4.22
Using tilt 2.0.5
Using spring 1.7.2
Using sqlite3 1.3.11
Using turbolinks-source 5.0.0
Using tzinfo 1.2.2
Using nokogiri 1.6.8
Using rack-test 0.6.3
Using sprockets 3.7.0
Using websocket-driver 0.6.4
Using mime-types 3.1
Using coffee-script 2.4.1
Installing uglifier 3.0.1
Using rb-inotify 0.9.7
Installing turbolinks 5.0.1
Using activesupport 5.0.0
Using loofah 2.0.3
Using mail 2.6.4
Using listen 3.0.8
Using rails-dom-testing 2.0.1
Installing globalid 0.3.7
Using activemodel 5.0.0
Using jbuilder 2.6.0
Using rails-html-sanitizer 1.0.3
Using spring-watcher-listen 2.0.0
Using activejob 5.0.0
Using activerecord 5.0.0
Using actionview 5.0.0
Using actionpack 5.0.0
Using actioncable 5.0.0
Using actionmailer 5.0.0
Using railties 5.0.0
Using sprockets-rails 3.1.1
Using coffee-rails 4.2.1
Using jquery-rails 4.1.1
Using web-console 3.3.1
Using rails 5.0.0
Using sass-rails 5.0.6
Bundle complete! 15 Gemfile dependencies, 63 gems now installed.
Use `bundle show [gemname]` to see where a bundled gem is installed.
         run  bundle exec spring binstub --all
* bin/rake: spring inserted
* bin/rails: spring inserted这一个命令就已经把所有项目目录文件创建完毕,且安装好所有的依赖,回头想想gradle创建项目的过程,先创建项目,再添加依赖jar包,至少两个命令,所以看看rails on ruby就知道有多爽了。
目录
➜  blog tree
.
├── Gemfile
├── Gemfile.lock
├── README.md
├── Rakefile
├── app
│   ├── assets
│   │   ├── config
│   │   │   └── manifest.js
│   │   ├── images
│   │   ├── javascripts
│   │   │   ├── application.js
│   │   │   ├── cable.js
│   │   │   └── channels
│   │   └── stylesheets
│   │       └── application.css
│   ├── channels
│   │   └── application_cable
│   │       ├── channel.rb
│   │       └── connection.rb
│   ├── controllers
│   │   ├── application_controller.rb
│   │   └── concerns
│   ├── helpers
│   │   └── application_helper.rb
│   ├── jobs
│   │   └── application_job.rb
│   ├── mailers
│   │   └── application_mailer.rb
│   ├── models
│   │   ├── application_record.rb
│   │   └── concerns
│   └── views
│       └── layouts
│           ├── application.html.erb
│           ├── mailer.html.erb
│           └── mailer.text.erb
├── bin
│   ├── bundle
│   ├── rails
│   ├── rake
│   ├── setup
│   ├── spring
│   └── update
├── config
│   ├── application.rb
│   ├── boot.rb
│   ├── cable.yml
│   ├── database.yml
│   ├── environment.rb
│   ├── environments
│   │   ├── development.rb
│   │   ├── production.rb
│   │   └── test.rb
│   ├── initializers
│   │   ├── application_controller_renderer.rb
│   │   ├── assets.rb
│   │   ├── backtrace_silencers.rb
│   │   ├── cookies_serializer.rb
│   │   ├── filter_parameter_logging.rb
│   │   ├── inflections.rb
│   │   ├── mime_types.rb
│   │   ├── new_framework_defaults.rb
│   │   ├── session_store.rb
│   │   └── wrap_parameters.rb
│   ├── locales
│   │   └── en.yml
│   ├── puma.rb
│   ├── routes.rb
│   ├── secrets.yml
│   └── spring.rb
├── config.ru
├── db
│   └── seeds.rb
├── lib
│   ├── assets
│   └── tasks
├── log
├── public
│   ├── 404.html
│   ├── 422.html
│   ├── 500.html
│   ├── apple-touch-icon-precomposed.png
│   ├── apple-touch-icon.png
│   ├── favicon.ico
│   └── robots.txt
├── test
│   ├── controllers
│   ├── fixtures
│   │   └── files
│   ├── helpers
│   ├── integration
│   ├── mailers
│   ├── models
│   └── test_helper.rb
├── tmp
│   └── cache
│       └── assets
└── vendor
    └── assets
        ├── javascripts
        └── stylesheets

44 directories, 57 files
初始化的项目包含44个目录和57个文件,详细解释见参考文档
启动
经过上面一个命令我们的helloworld项目就已经创建完成了,现在启动
➜  blog rails s
=> Booting Puma
=> Rails 5.0.0 application starting in development on http://localhost:3000
=> Run `rails server -h` for more startup options
Puma starting in single mode...
* Version 3.6.0 (ruby 2.3.0-p0), codename: Sleepy Sunday Serenity
* Min threads: 5, max threads: 5
* Environment: development
* Listening on tcp://localhost:3000
Use Ctrl-C to stop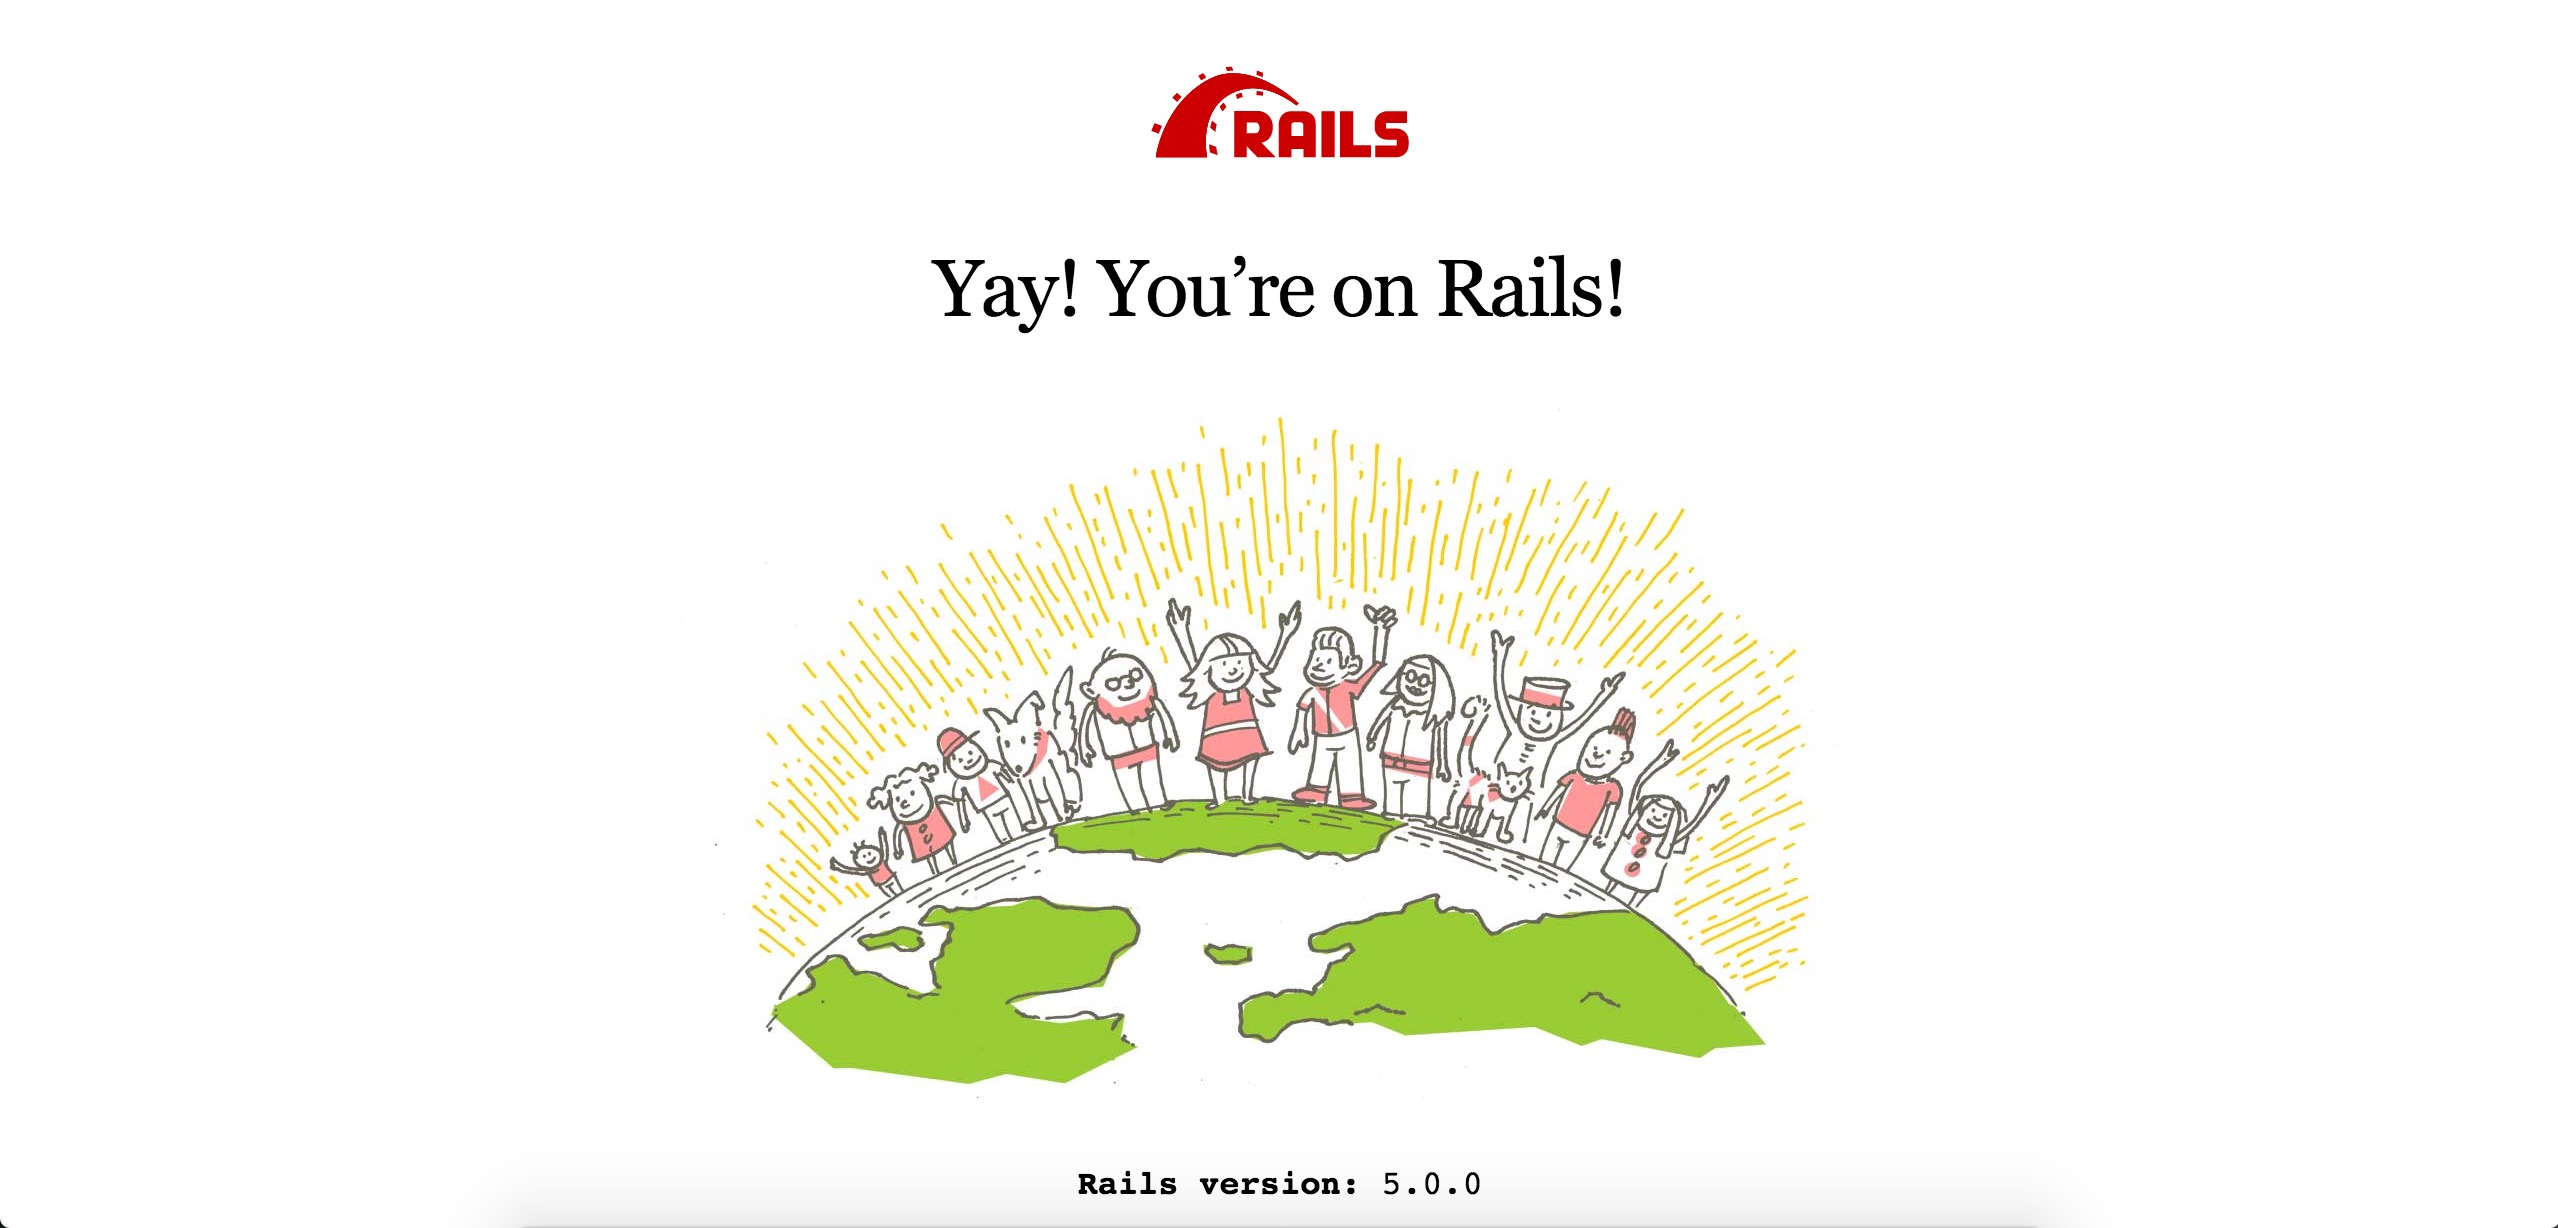
就这样一个项目就创建了并启动成功了。是不是so easy!
添加controller
我目前在做php开发,php框架里创建一个controller是这样的,首先在controller的main文件,添加一个路由。然后在actions里添加一个处理请求的action,然后在model里创建一个page和data还有一个dao,这这些都是手动创建过程,且你必须按照人家框架的要求定义命名规范,那既然框架都已经有要求来规范你的命名,那么框架为何不直接创建呢?
所以,rails就做到了,来看看rails如何一条命令完成上面所有的操作:
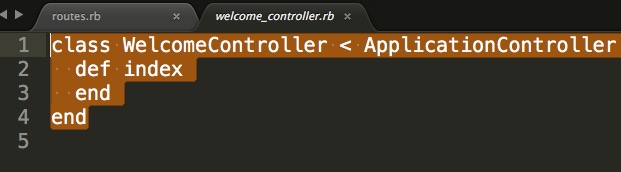
➜  blog rails generate controller welcome index
Running via Spring preloader in process 70093
      create  app/controllers/welcome_controller.rb
       route  get 'welcome/index'
      invoke  erb
      create    app/views/welcome
      create    app/views/welcome/index.html.erb
      invoke  test_unit
      create    test/controllers/welcome_controller_test.rb
      invoke  helper
      create    app/helpers/welcome_helper.rb
      invoke    test_unit
      invoke  assets
      invoke    coffee
      create      app/assets/javascripts/welcome.coffee
      invoke    scss
      create      app/assets/stylesheets/welcome.scss
看这一条命令创建了多少文件:
- controller文件:welcome_controller.rb
- 路由添加welcome/index,get请求
- 在view中添加welcome文件夹和html文件index.html.erb
- 单测文件welcome_controller_test.rb
- 帮助文件welcome_helper.rb
- js文件和css文件
这个功能很好的诠释了约定优于配置。
下面我们继续
主页设置
在config/routes.rb中添加如下语句:
root 'welcome#index'root这个关键字就是定义了网页的根页面,上面这个用法是告诉服务器,去找welcome这个controller的index的方法,看下面的welcome_controller.rb文件,index方法啥也没有啊,
这又是一个约定,约定说默认跳转到welcome/index.html.erb页面
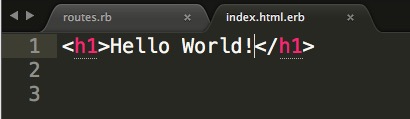
现在我们来访问一下localhost:3000:
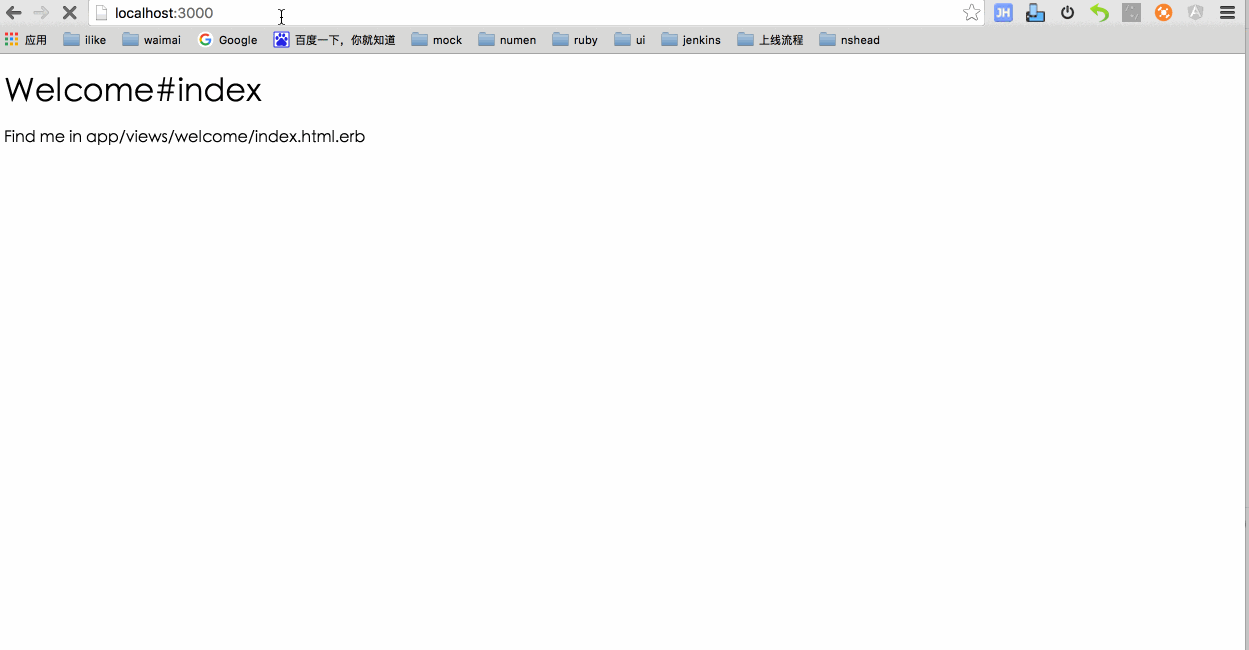
就是这么简单。
路由查看
要想知道我们有多少路由信息,可以通过rake routes命令查看
➜  blog rake routes
       Prefix Verb URI Pattern              Controller#Action
         root GET  /                        welcome#index
welcome_index GET /welcome/index(.:format) welcome#index然后我们再来一个约定由于配置的体现,在config/routes.rb中添加一行
resources :articles这个时候我们再看看有多少路由:
➜  blog rake routes
       Prefix Verb   URI Pattern                  Controller#Action
     articles GET    /articles(.:format)          articles#index
              POST   /articles(.:format)          articles#create
  new_article GET    /articles/new(.:format)      articles#new
 edit_article GET    /articles/:id/edit(.:format) articles#edit
      article GET    /articles/:id(.:format)      articles#show
              PATCH  /articles/:id(.:format)      articles#update
              PUT    /articles/:id(.:format)      articles#update
              DELETE /articles/:id(.:format)      articles#destroy
         root GET    /                            welcome#index
welcome_index GET    /welcome/index(.:format)     welcome#index
那些多出来的都是默认创建出来的。
创建模型
➜  blog rails generate model Article
Running via Spring preloader in process 79757
      invoke  active_record
      create    db/migrate/20160809092044_create_articles.rb
      create    app/models/article.rb
      invoke    test_unit
      create      test/models/article_test.rb
      create      test/fixtures/articles.yml
生成了一个迁移文件,以时间戳标识
还有model文件article.rb
测试文件:test/models/article_test.rb
测试模拟数据文件:test/fixtures/articles.yml
执行迁移
➜  blog rake db:migrate
== 20160809092501 CreateArticles: migrating ===================================
-- create_table(:articles)
   -> 0.0012s
== 20160809092501 CreateArticles: migrated (0.0013s) ==========================
默认用的sqlite数据库,我们去查看一下数据库表。
conf/database.yml中定义了数据库相关信息
default: &default
  adapter: sqlite3
  pool: 5
  timeout: 5000

development:
  <<: *default
  database: db/development.sqlite3

# Warning: The database defined as "test" will be erased and
# re-generated from your development database when you run "rake".
# Do not set this db to the same as development or production.
test:
  <<: *default
  database: db/test.sqlite3

production:
  <<: *default
database: db/production.sqlite3可以看出我们开发环境的数据库为db/development.sqlite3,我们进去看看:
➜  blog sqlite3 db/development.sqlite3
SQLite version 3.8.10.2 2015-05-20 18:17:19
Enter ".help" for usage hints.
sqlite> .tables
ar_internal_metadata  articles              schema_migrations
sqlite> .schema articles
CREATE TABLE "articles" ("id" INTEGER PRIMARY KEY AUTOINCREMENT NOT NULL, "created_at" datetime NOT NULL, "updated_at" datetime NOT NULL);


 309
309

 被折叠的 条评论
为什么被折叠?
被折叠的 条评论
为什么被折叠?
 到【灌水乐园】发言


