


Solana 智能合约可以用 Rust 编写,是可以在 Solana 区块链上执行的代码片段。与以太坊的 Solidity 不同,Solana 智能合约使用 Rust 语言编写,这使得它具有更高的性能和更好的安全性。智能合约通常用于执行复杂的逻辑,例如数字资产管理、投票、众筹等。
对于Rust,同学们可以看一下我之前的Rust从入门到暴走系列,相信对于Rust很容易会有一个清晰的认识并且上手,Rust系列还在持续更新中。
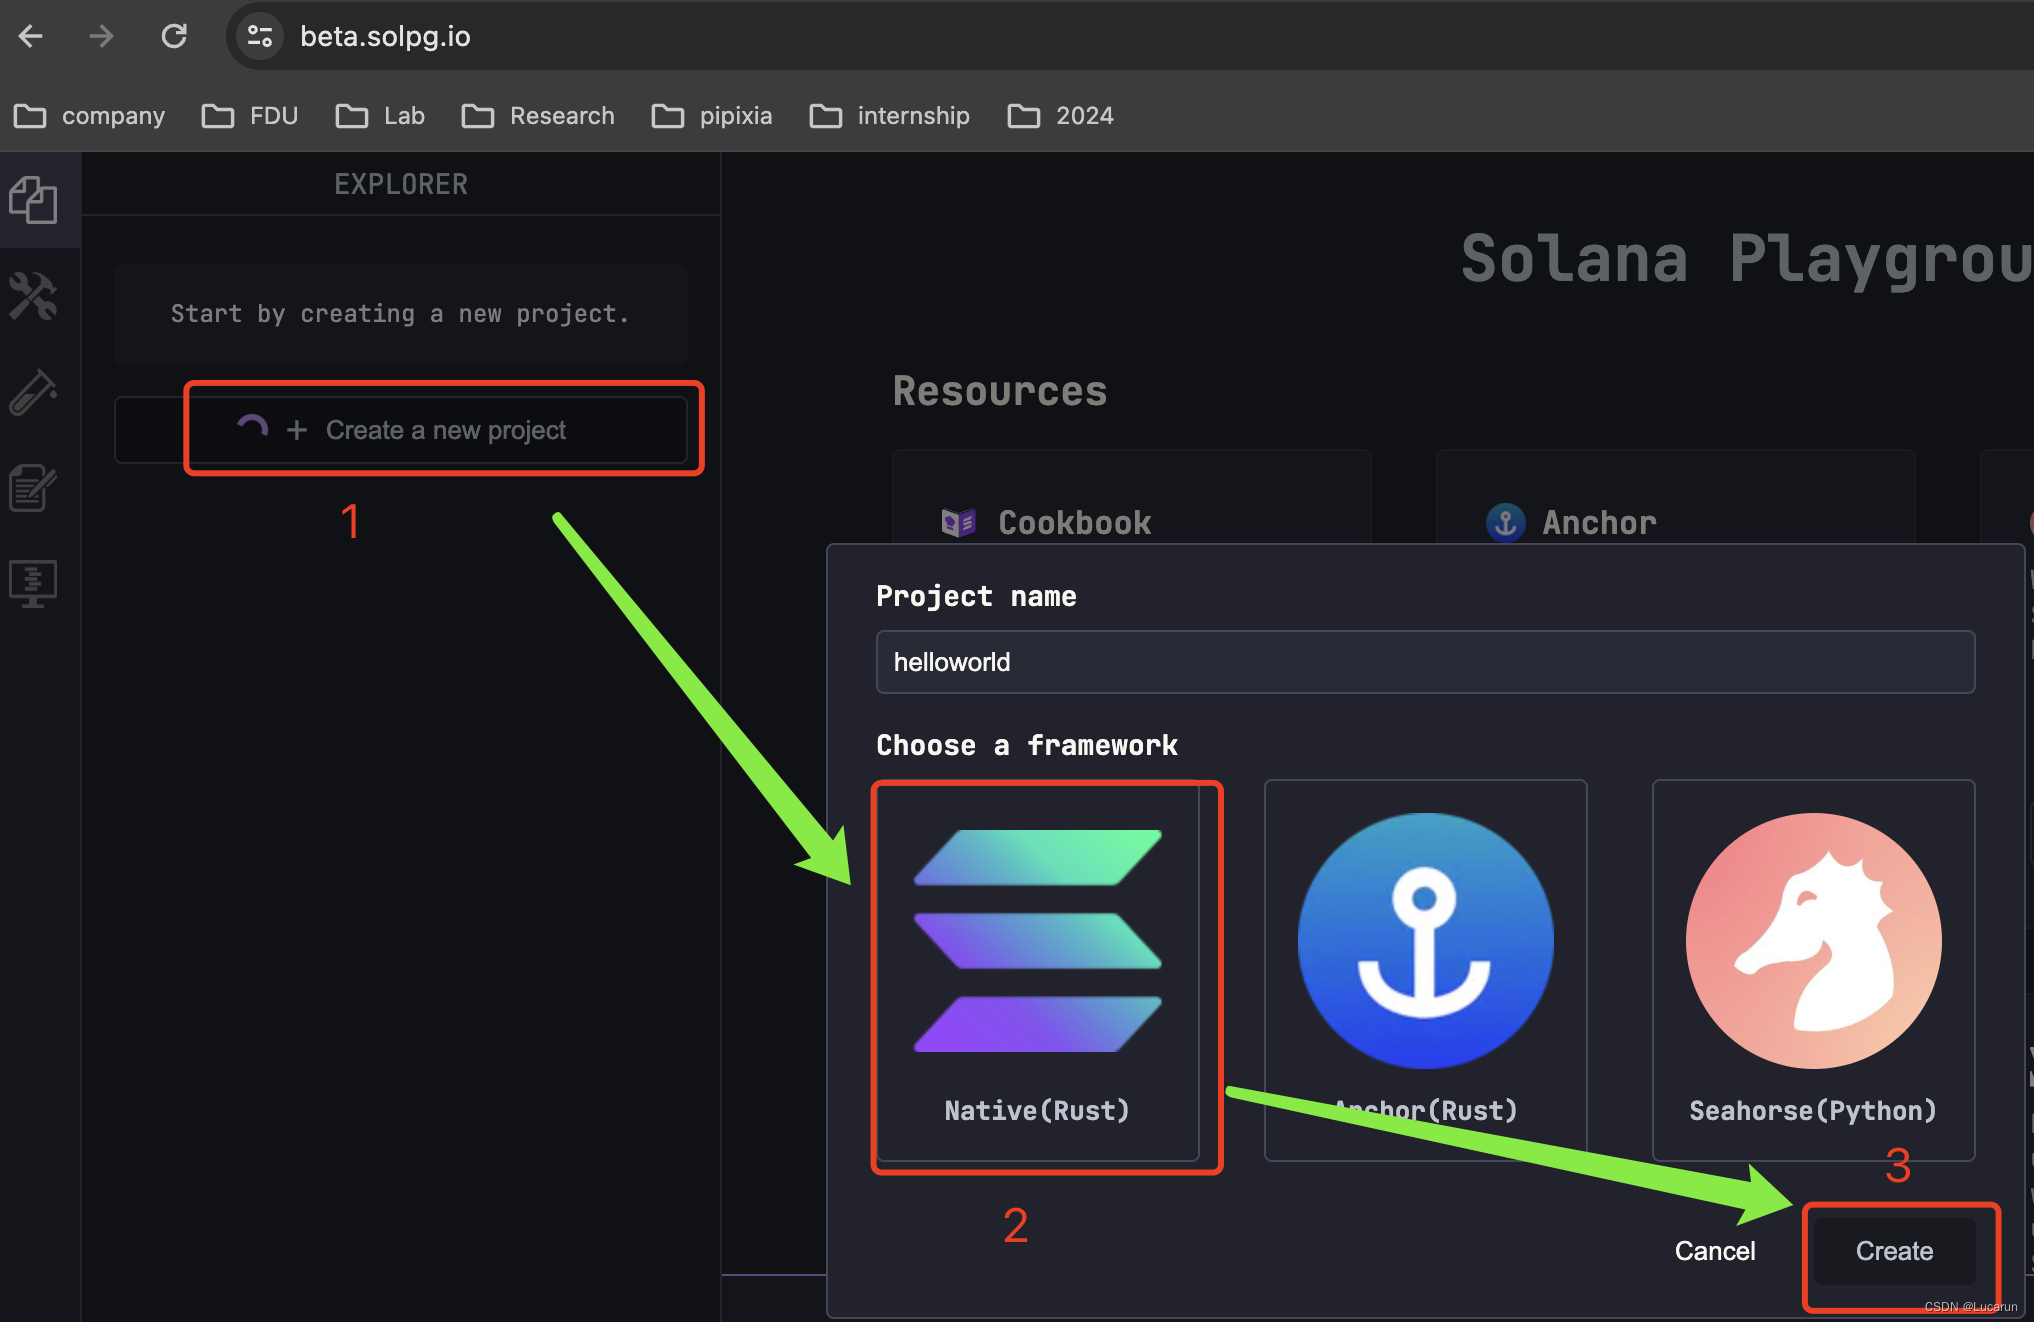
Solana为了初学者可以快速入门,提供了一个Playground服务。 可以在不需要本地环境的情况下,进行DApp的开发。下面我们将编写一个简单的 Solana 智能合约,它将接收一条消息并返回相同的消息。
创建项目
可以看到项目目录结构

“Build”:构建合约
“Run” : 运行客户端端,调试合约。
“Test”: 执行测试代码
连接钱包
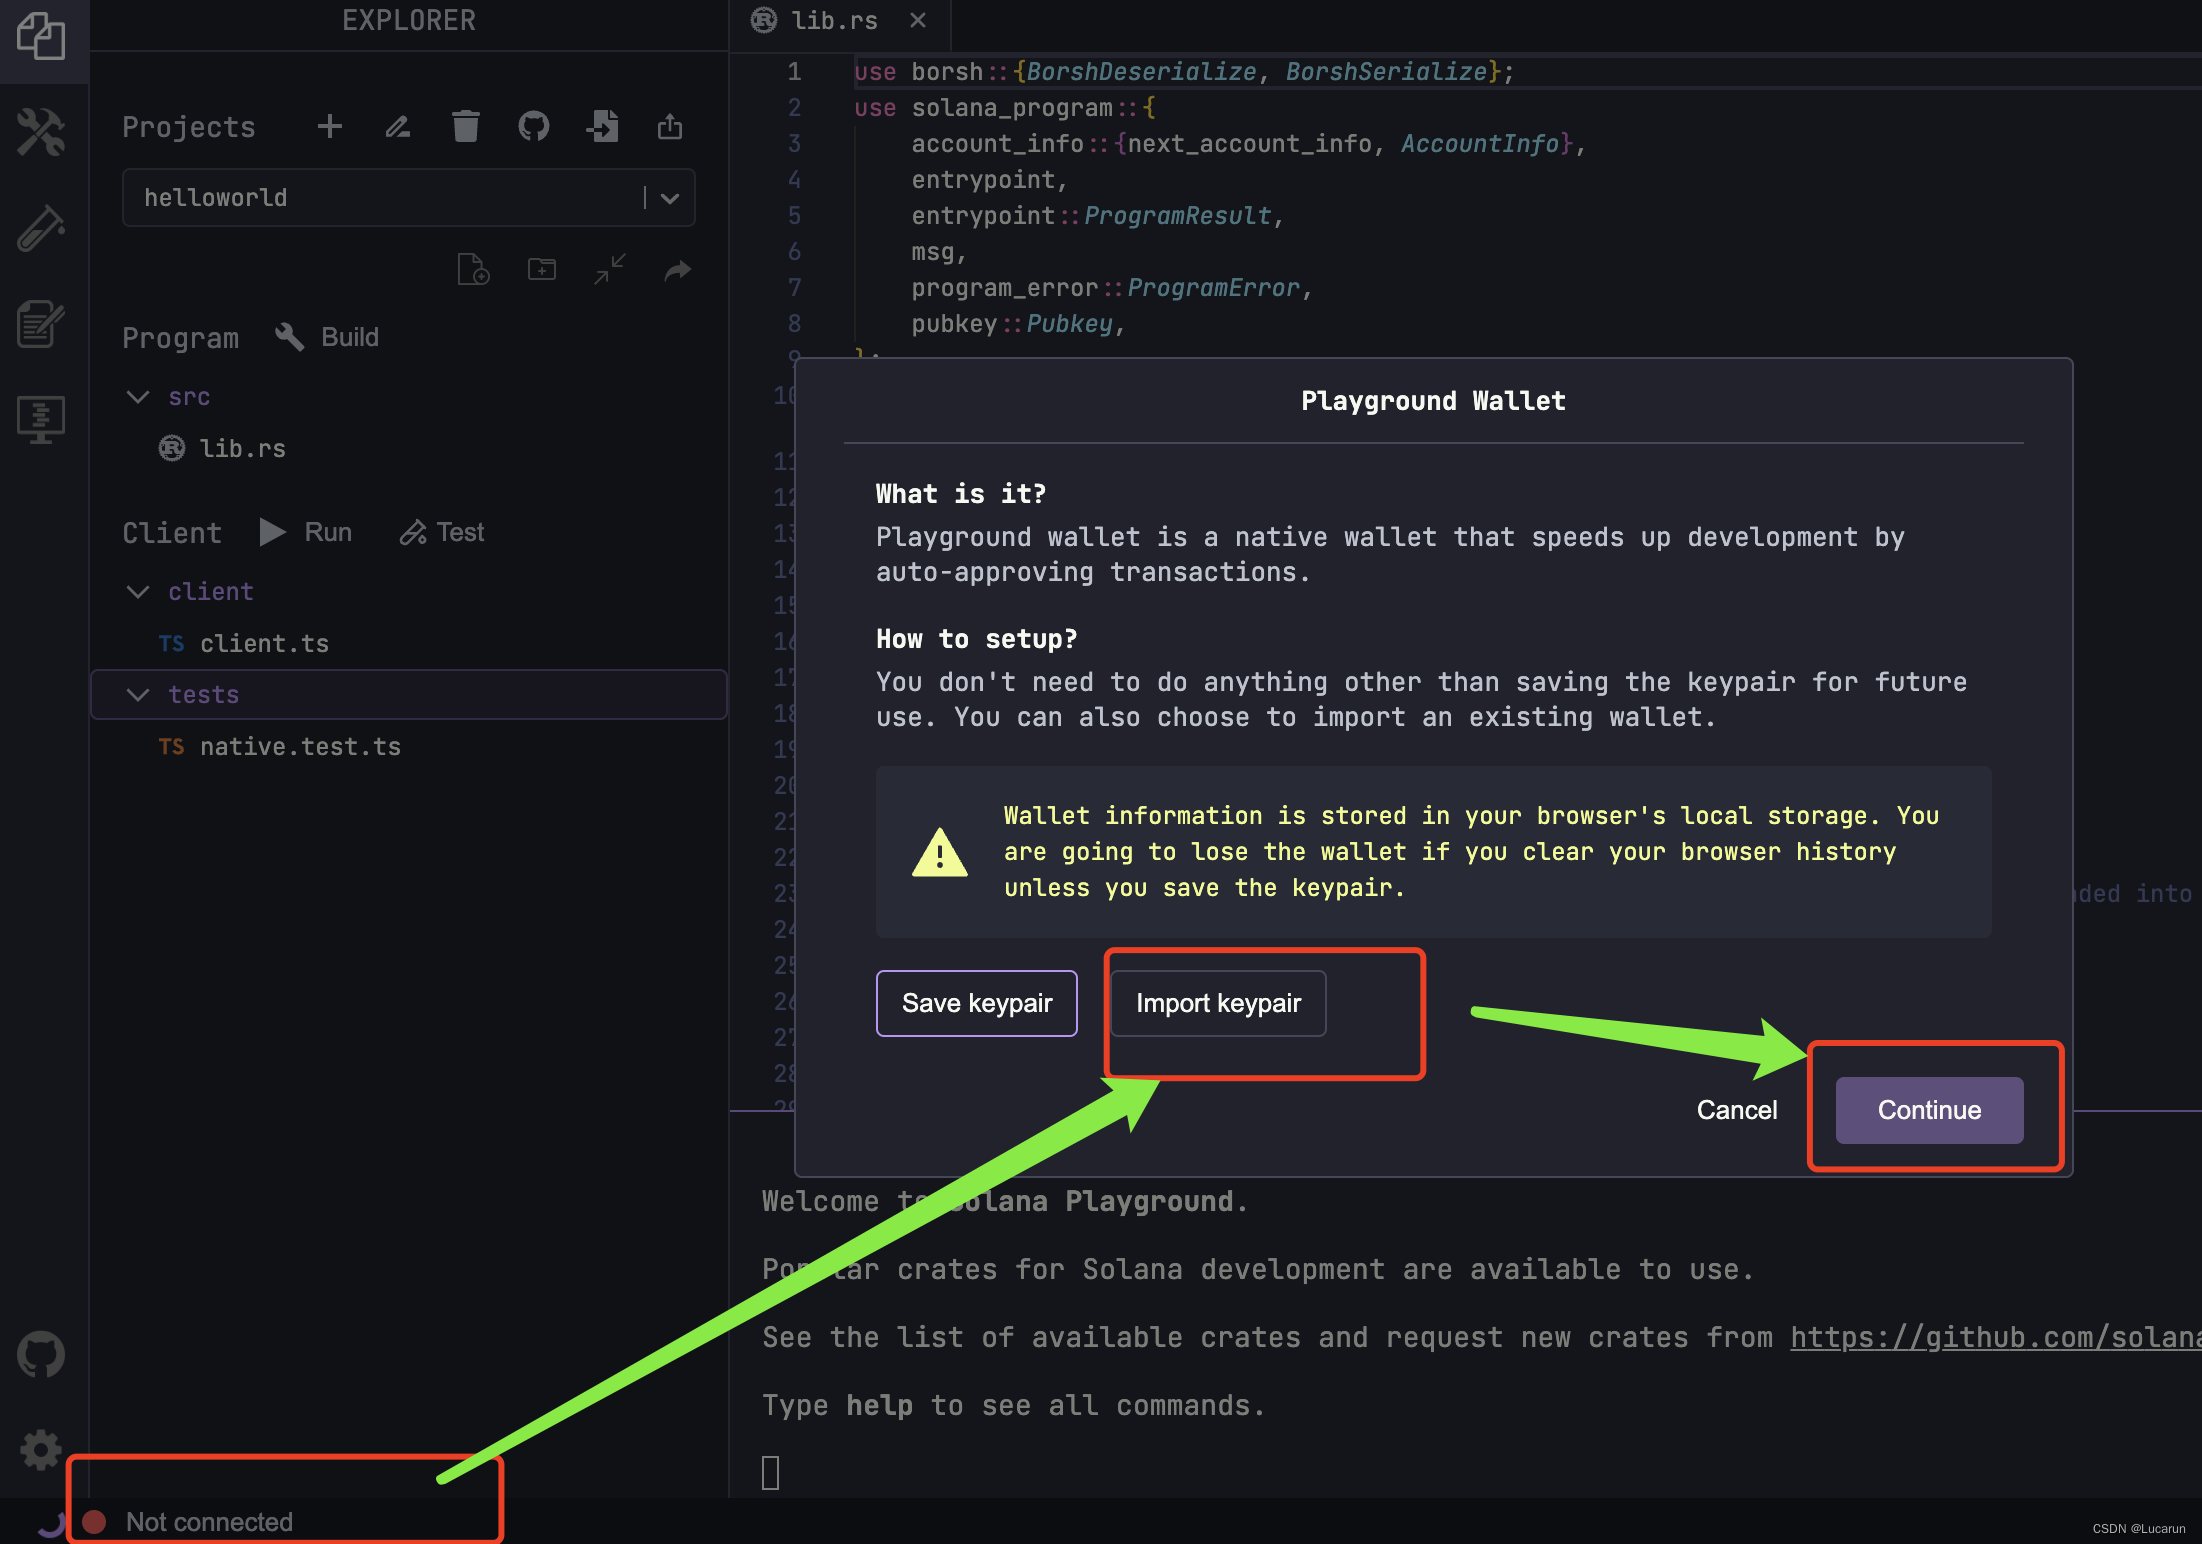
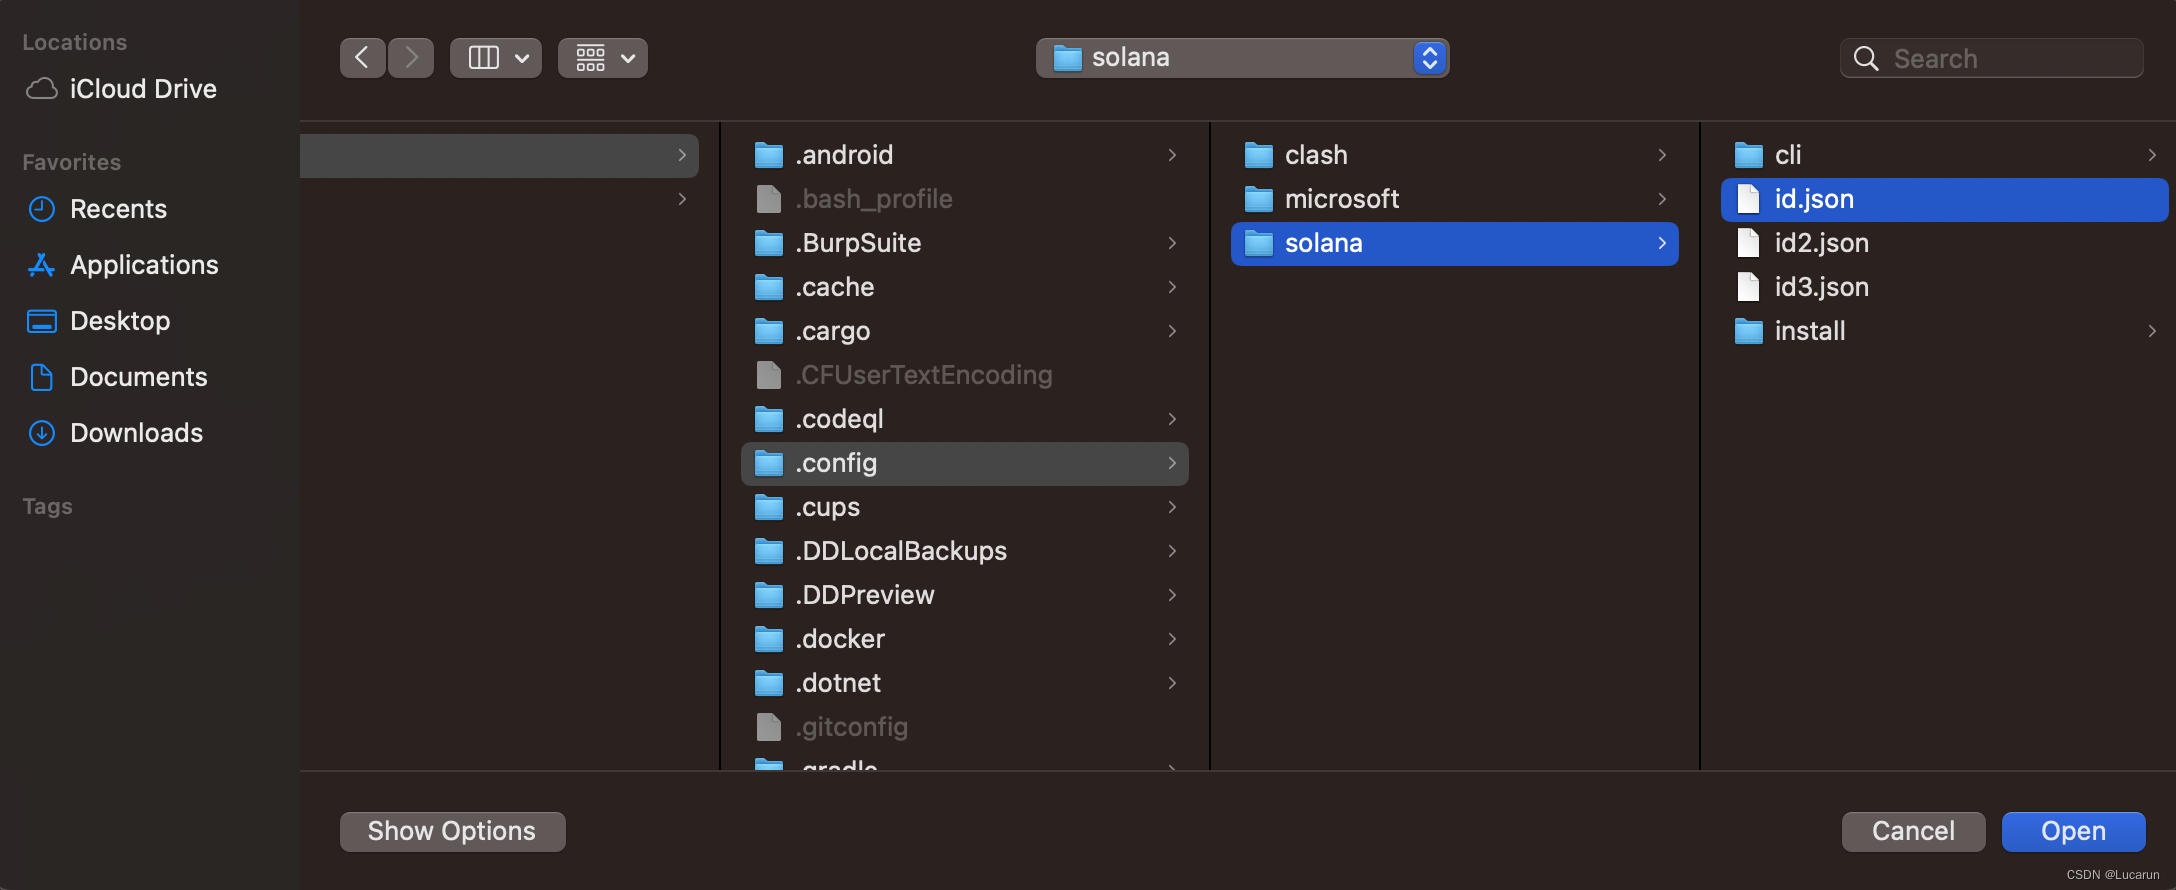
在这里选择我们之前生成的"~/.config/solana/id.json"秘钥文件
(如果.config文件被隐藏了,mac可以按快捷键command+shift+.显示)
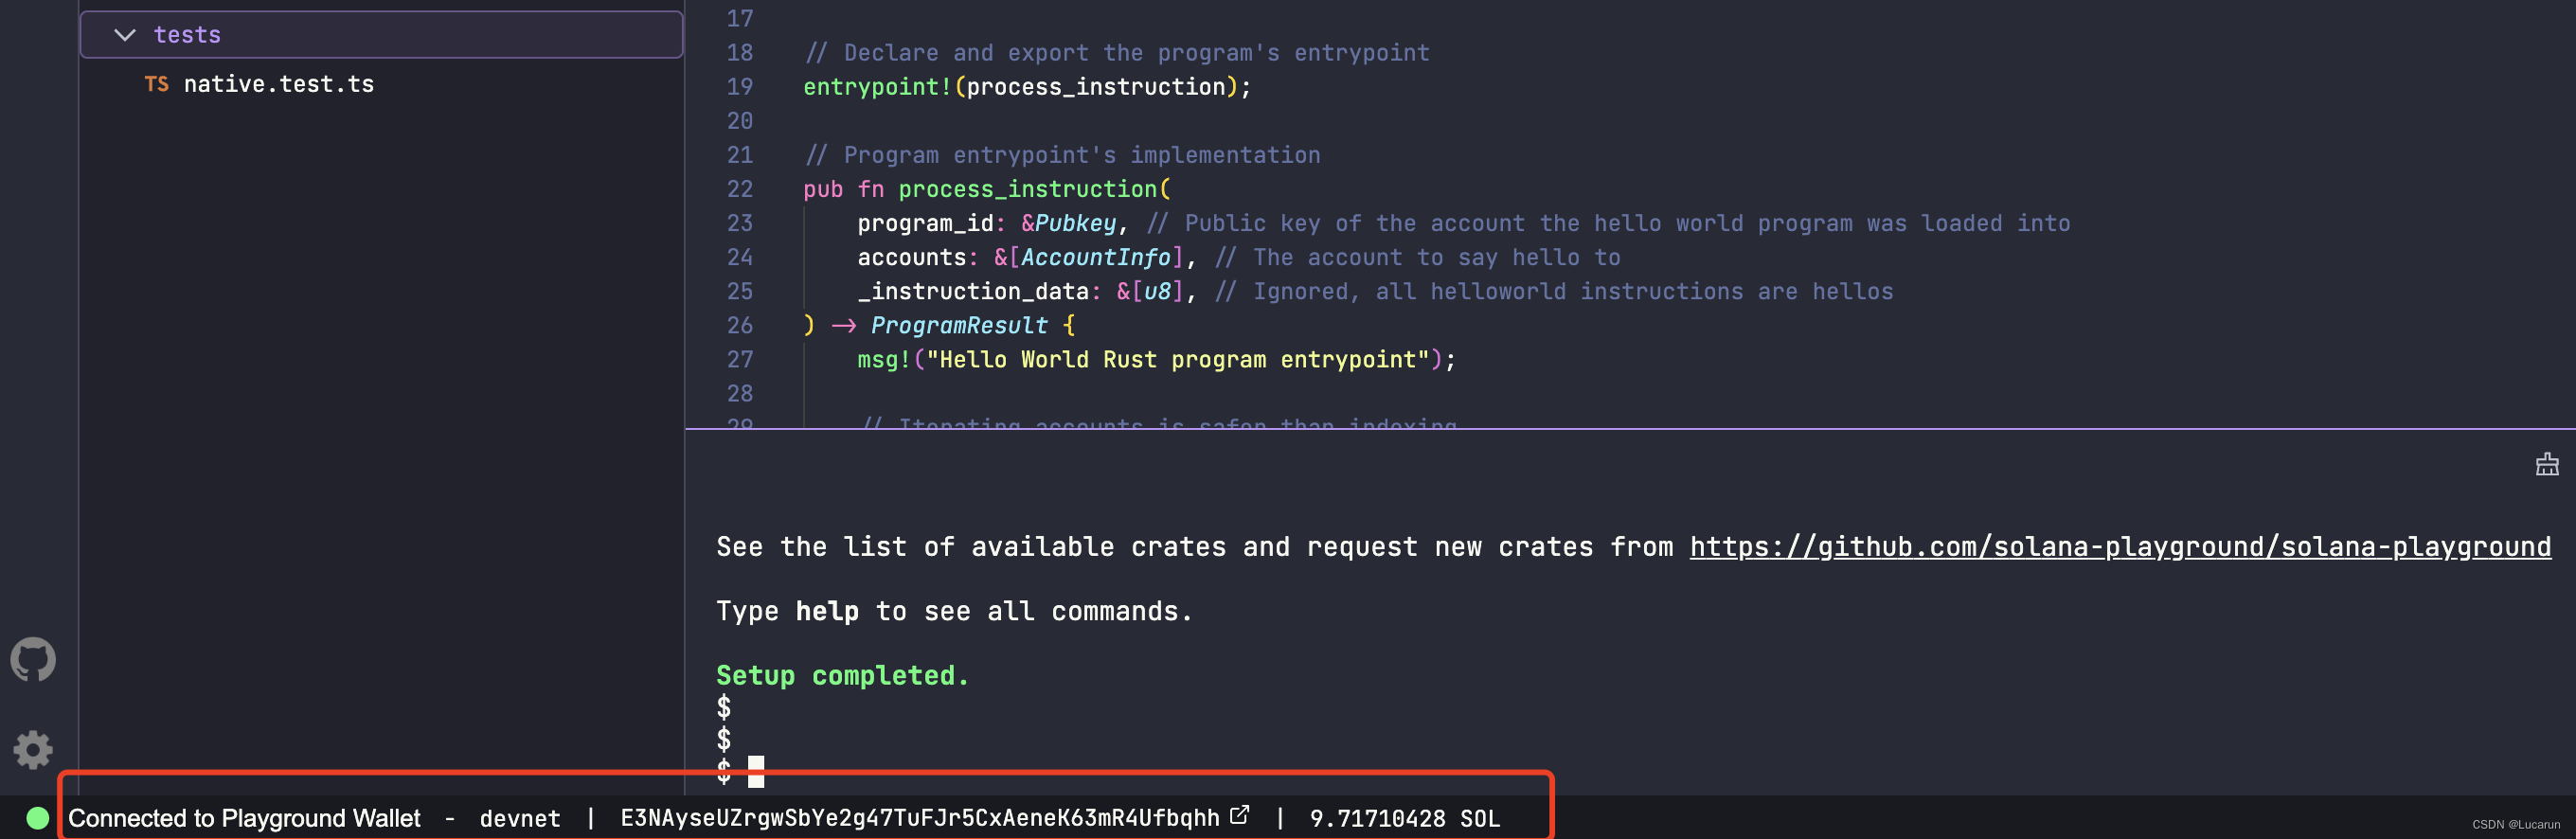
可以看到钱包连接成功,默认会mint 5 sol到这个钱包地址,此时是在开发网devnet环境下
开发简单的智能合约
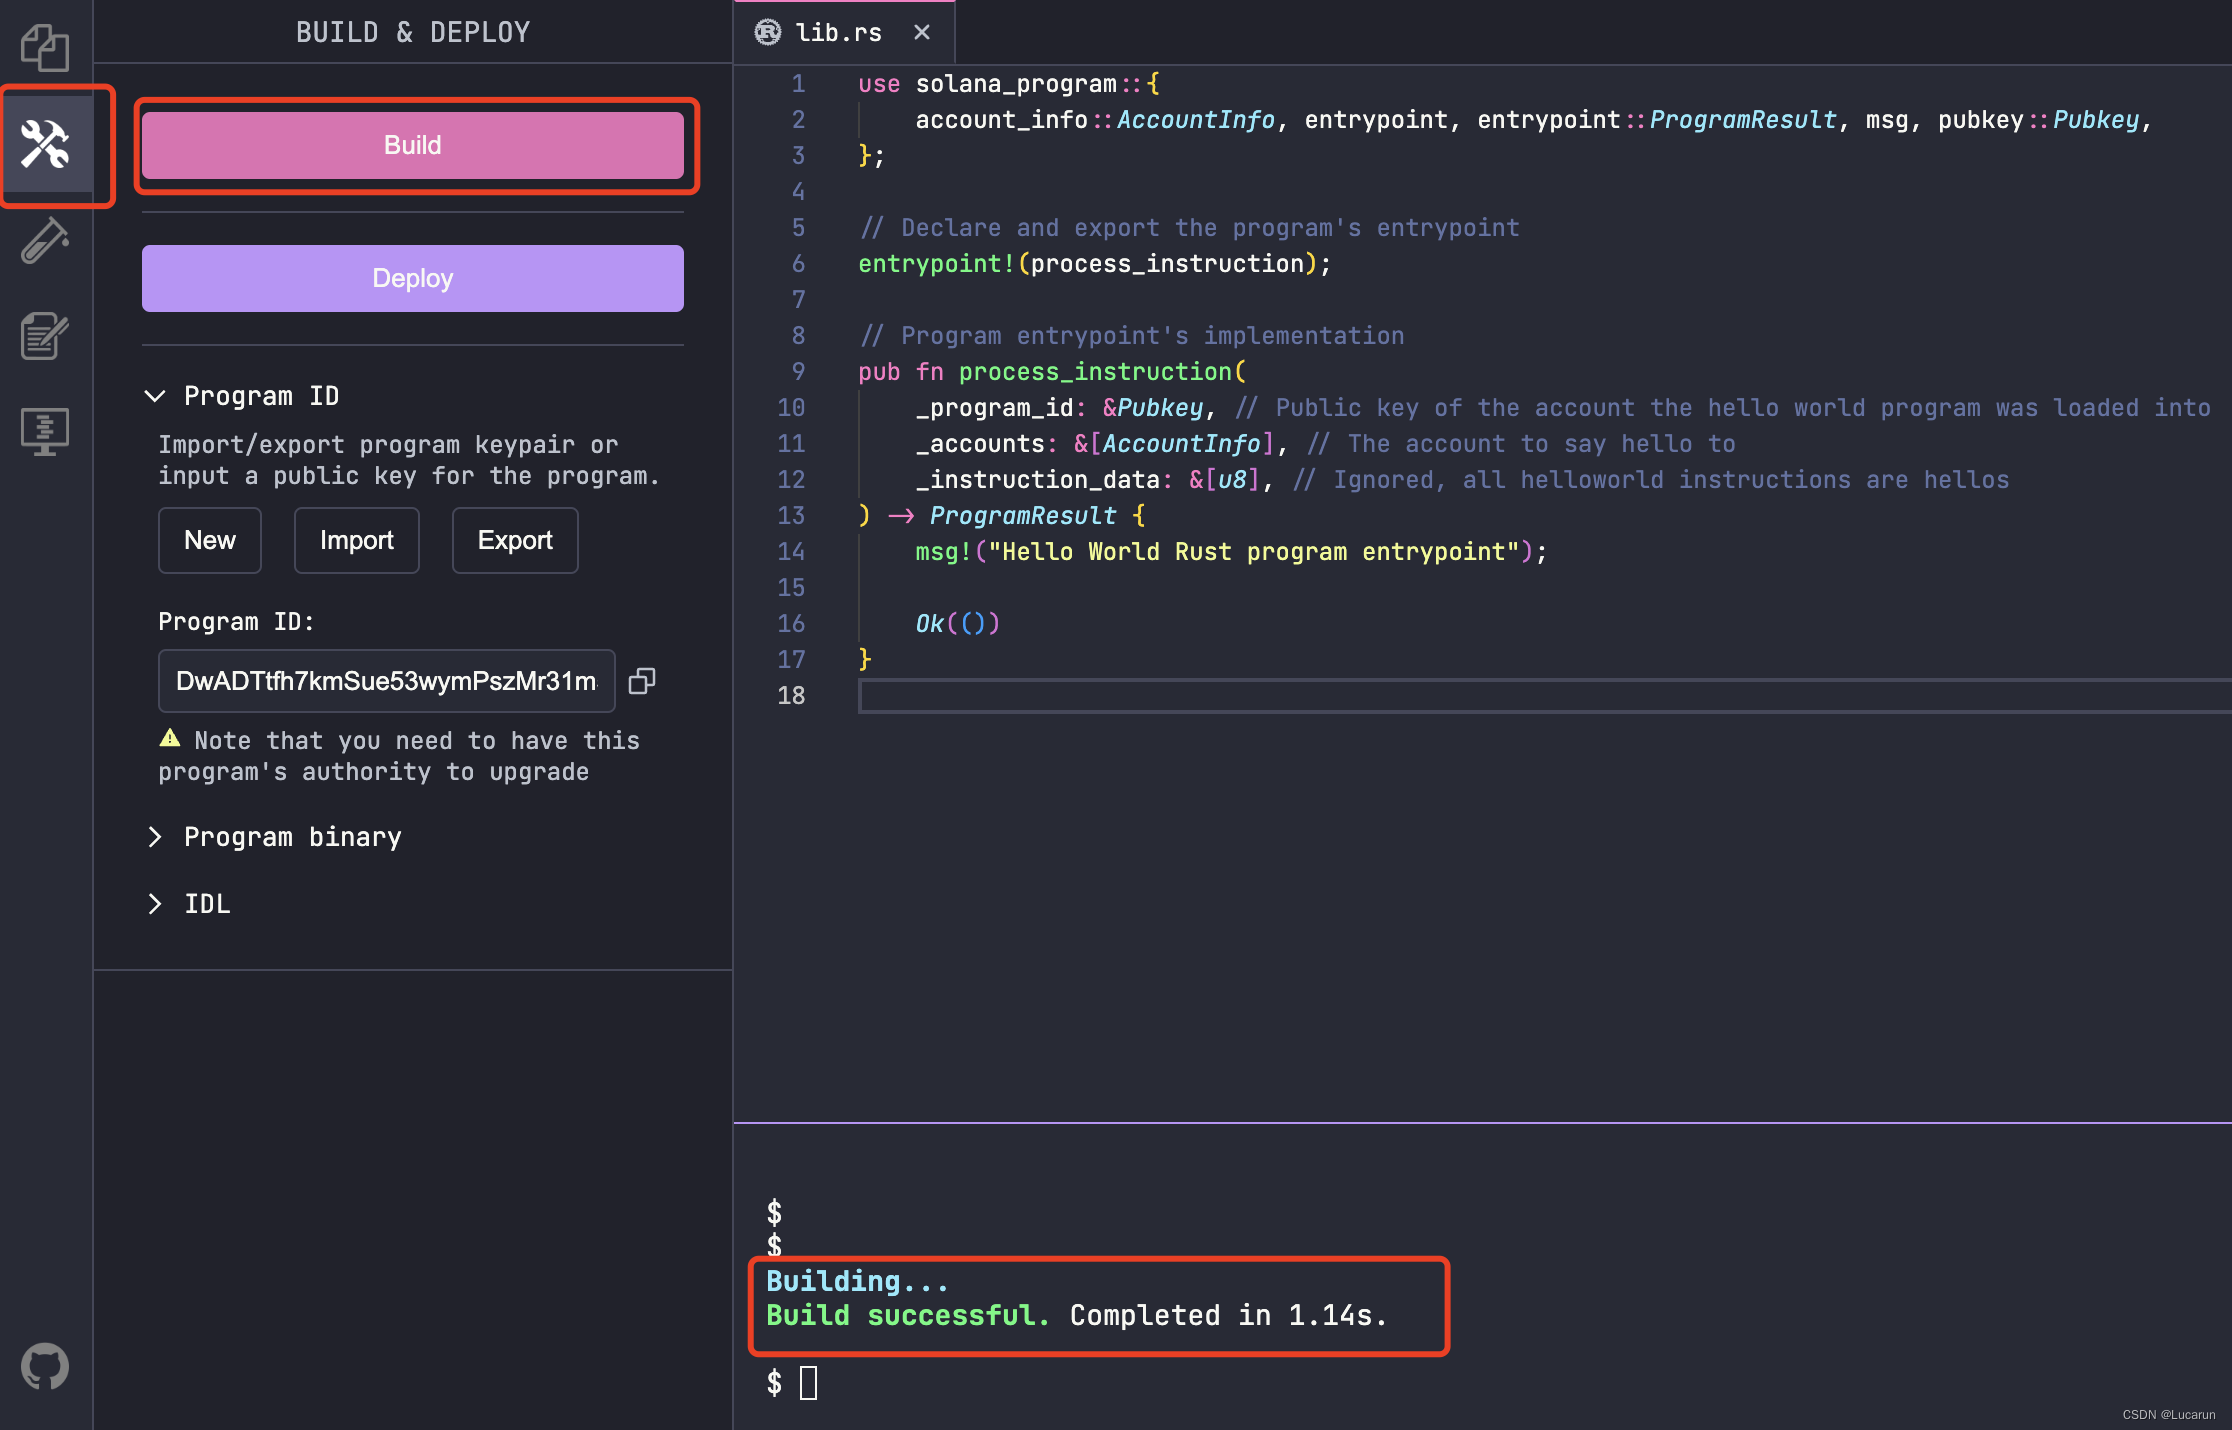
清空lib.rs原有内容,在里面贴上如下代码
use solana_program::{
    account_info::AccountInfo,
    entrypoint,
    entrypoint::ProgramResult,
    pubkey::Pubkey,
    msg,
};


// Declare and export the program's entrypoint
entrypoint!(process_instruction);

// Program entrypoint's implementation
pub fn process_instruction(
    _program_id: &Pubkey, // Public key of the account the hello world program was loaded into
    _accounts: &[AccountInfo], // The account to say hello to
    _instruction_data: &[u8], // Ignored, all helloworld instructions are hellos
) -> ProgramResult {
    msg!("Hello World Rust program entrypoint");

    Ok(())
}
这里我结合Rust语法解释一下当前智能合约的含义
-
use solana_program::{…}
这是一个 Rust 的 use 声明,用于导入 Solana Program 库中所需的模块和类型。在这个例子中,导入了 AccountInfo、entrypoint、ProgramResult、Pubkey 和 msg 等模块和类型。 -
entrypoint!(process_instruction)
这是一个 Rust 的宏调用,用于声明程序的入口点。entrypoint 宏会自动生成一个函数,作为程序的入口点,并将其中的逻辑与 Solana 区块链的交互进行协调。 -
pub fn process_instruction(…)
这是程序入口点的实际实现。这个函数的参数包括程序的公钥 _program_id,账户信息数组 _accounts 和指令数据 _instruction_data。在这个例子中,函数并没有使用这些参数,而是简单地打印了一条 “Hello World Rust program entrypoint” 消息,并返回一个成功的结果。 -
msg!(“Hello World Rust program entrypoint”)
这是一个 Solana Program 库提供的宏,用于在程序执行过程中向控制台打印消息。 -
Ok(())
这是一个 ProgramResult 类型的返回值,表示程序执行成功。
然后点击“Build”
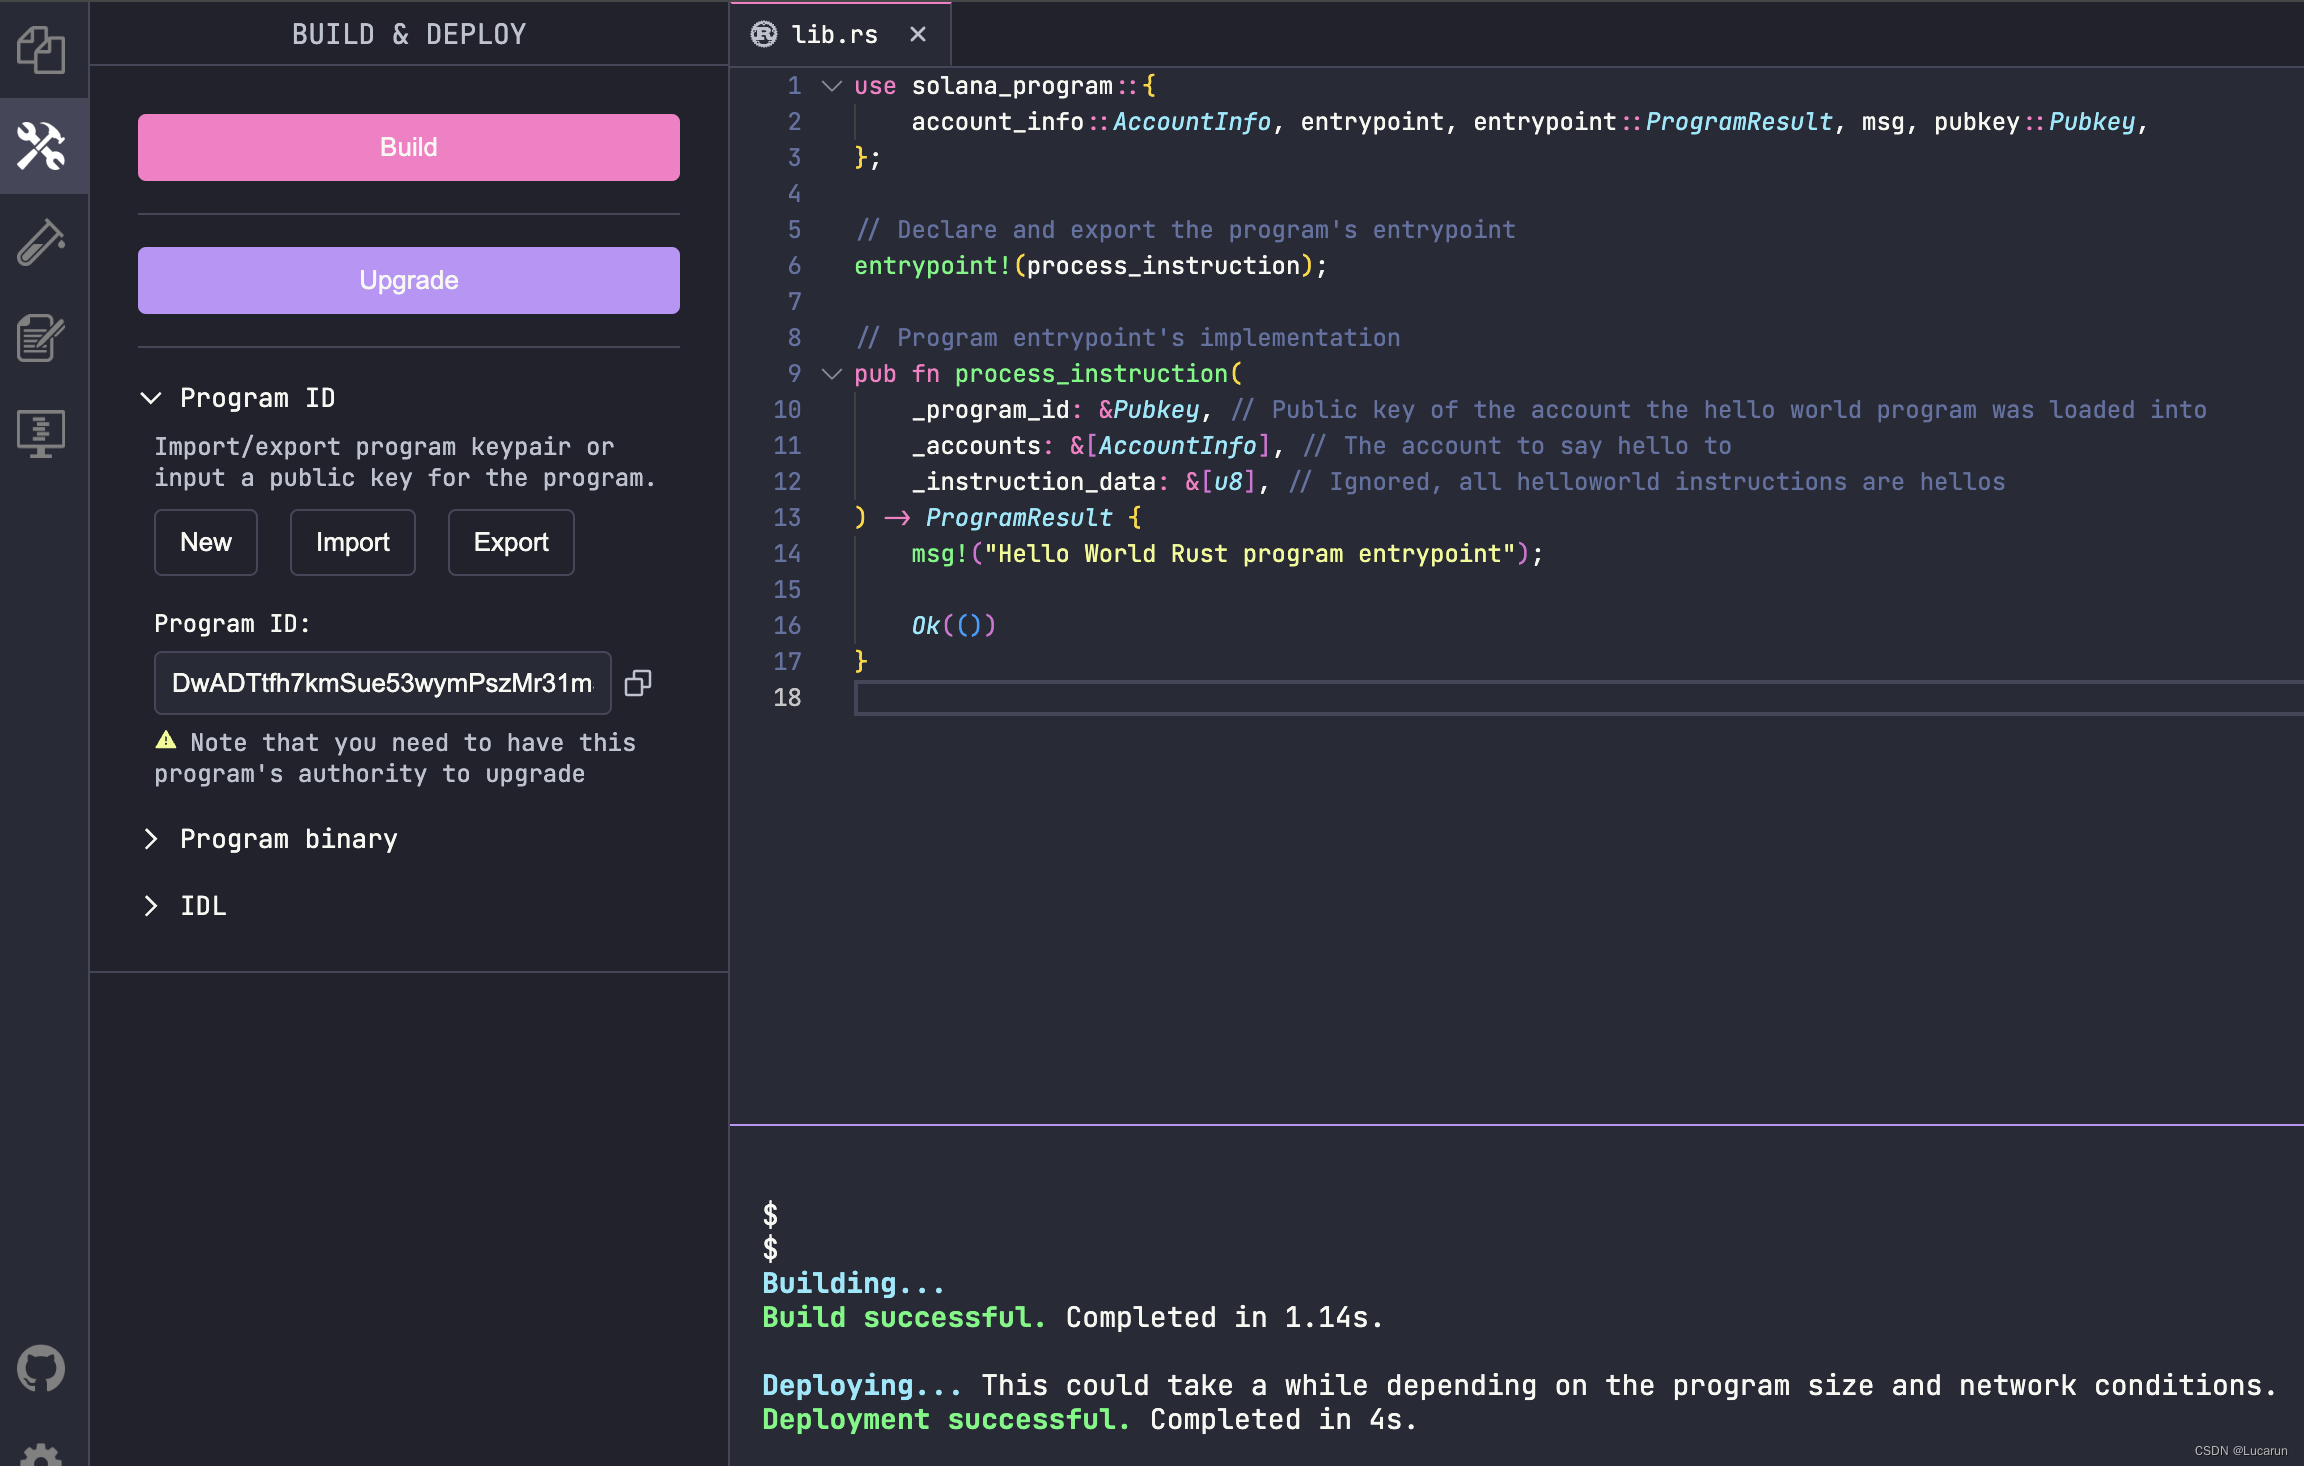
点击“Deploy”,发布合约。在发布过一次后,这里的"Deploy"就会变成"Update"
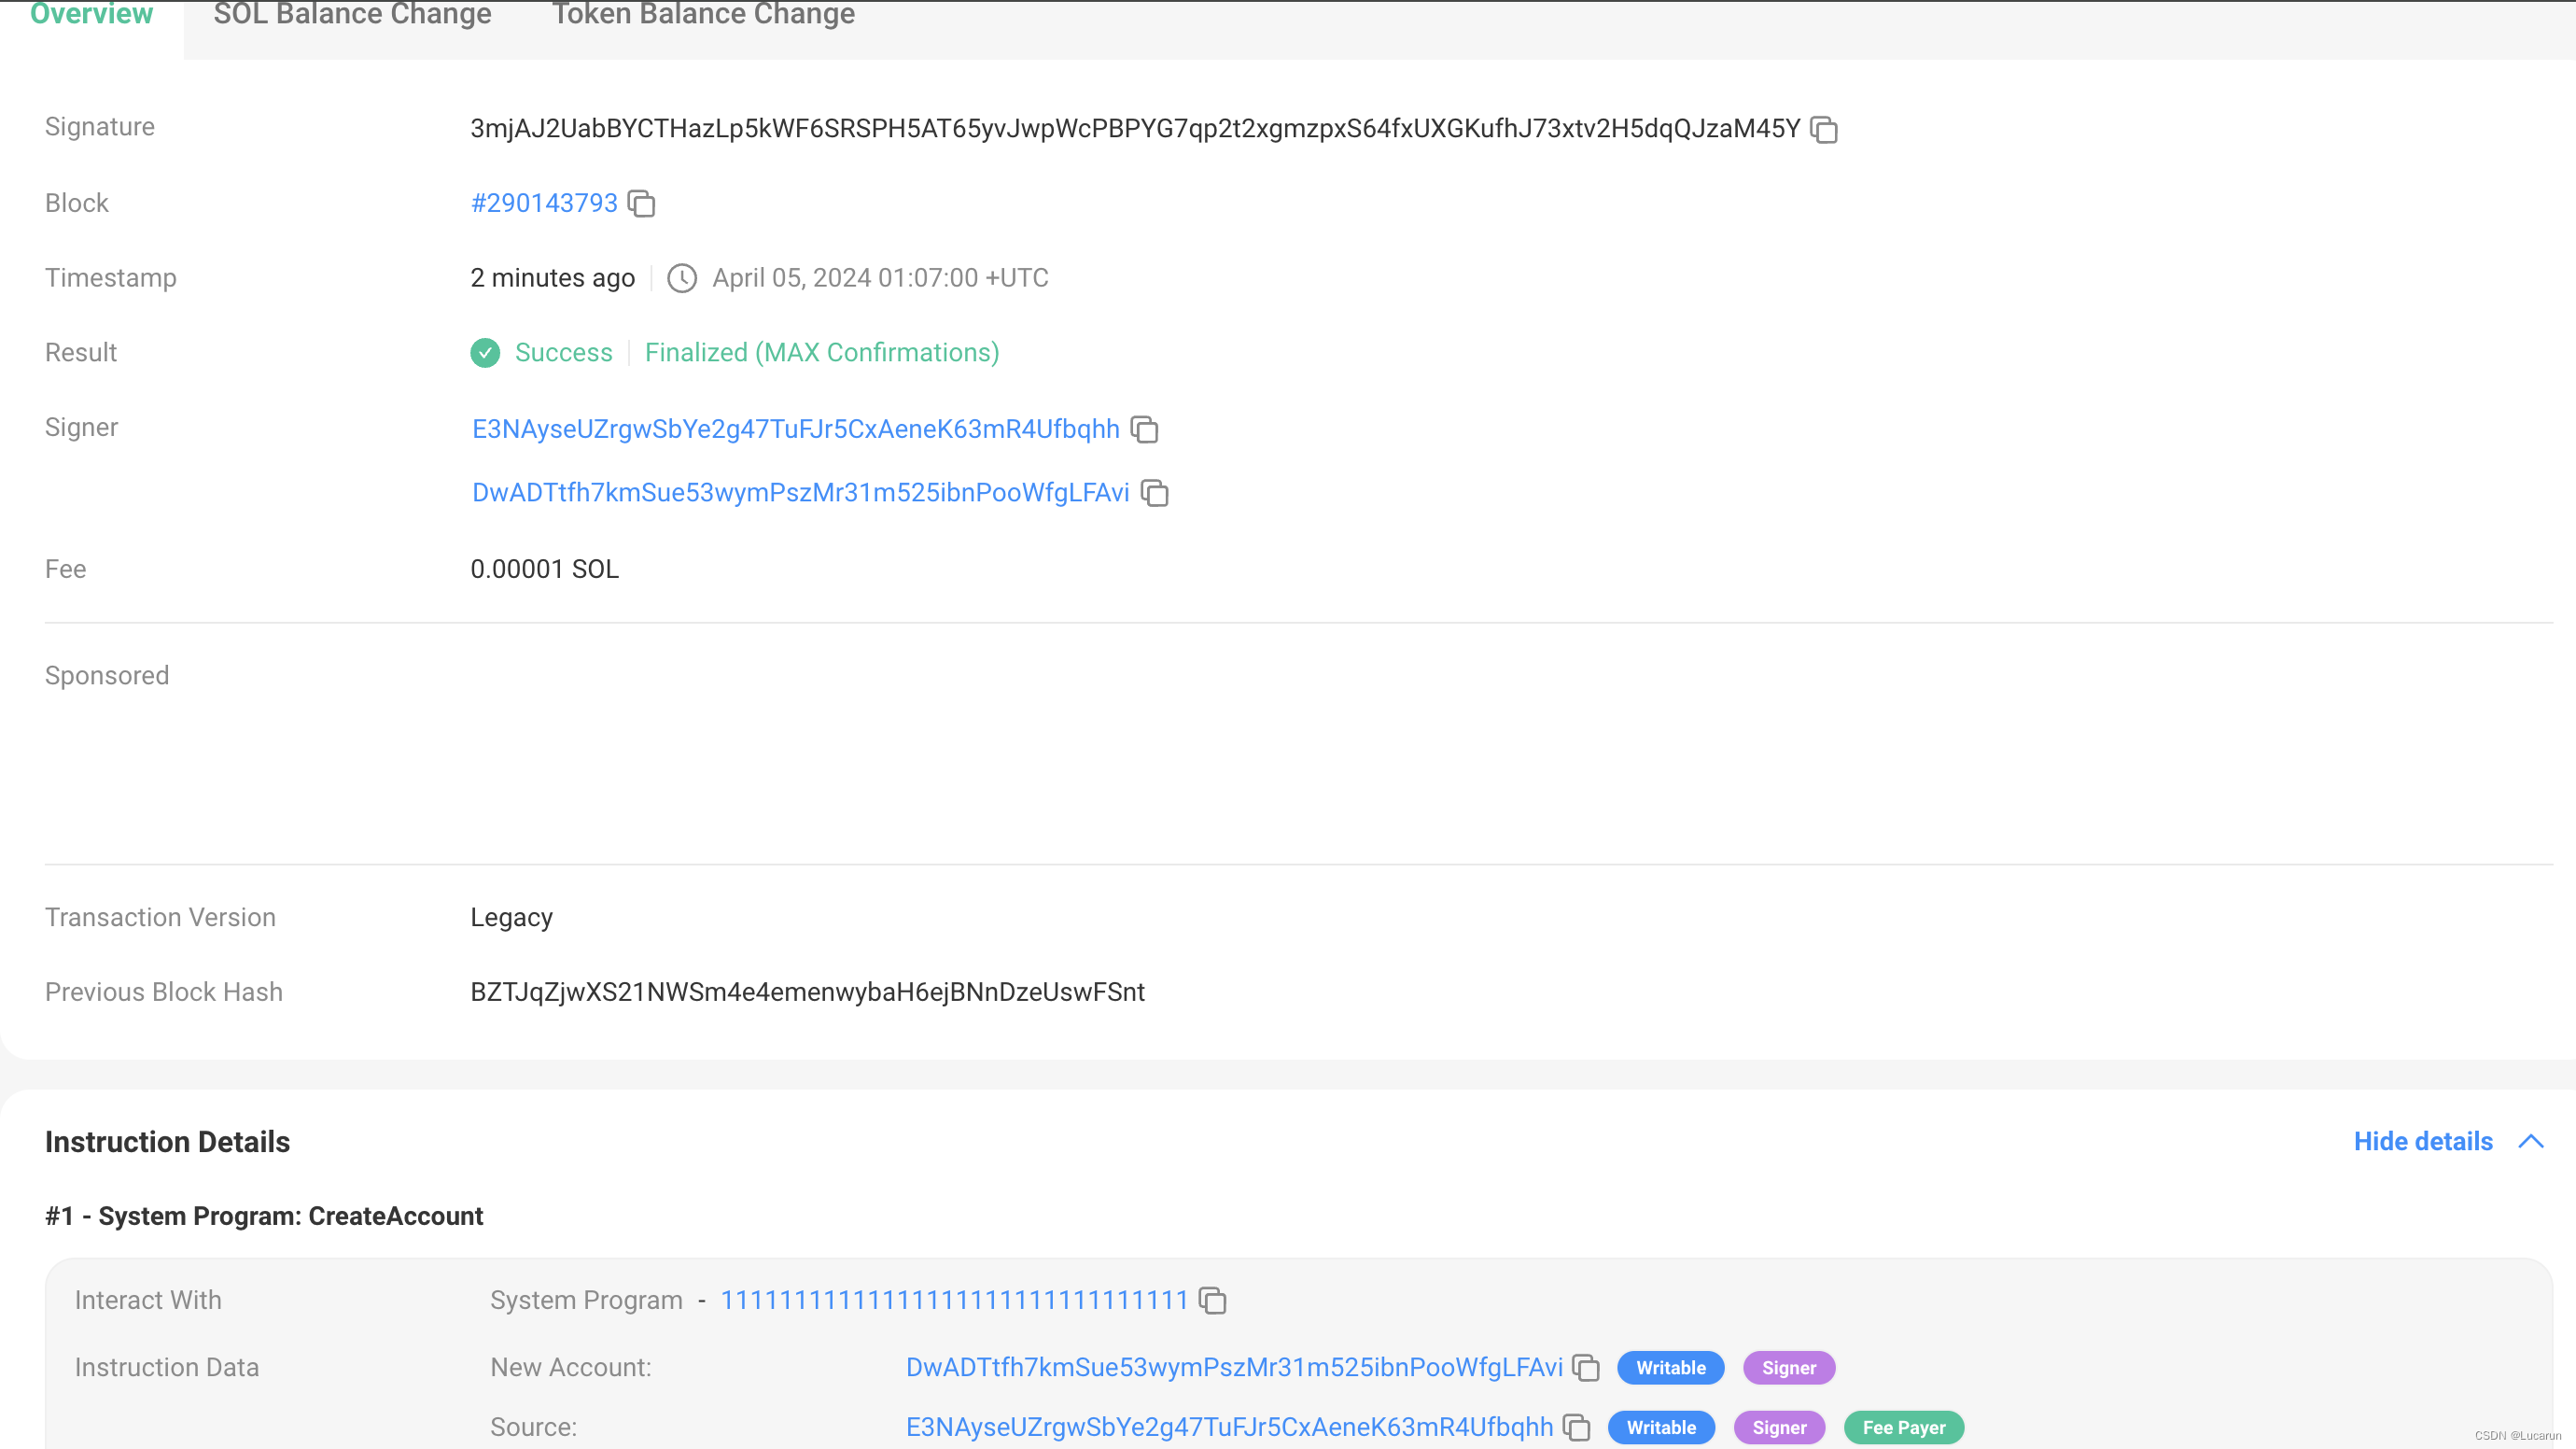
浏览器查看记录
https://solscan.io/tx/3mjAJ2UabBYCTHazLp5kWF6SRSPH5AT65yvJwpWcPBPYG7qp2t2xgmzpxS64fxUXGKufhJ73xtv2H5dqQJzaM45Y?cluster=devnet
客户端开发
在client.rs 里面贴上如下代码
// Client
console.log("My address:", pg.wallet.publicKey.toString());
const balance = await pg.connection.getBalance(pg.wallet.publicKey);
console.log(`My balance: ${balance / web3.LAMPORTS_PER_SOL} SOL`);

// create an empty transaction
const transaction = new web3.Transaction();

// add a hello world program instruction to the transaction
transaction.add(
  new web3.TransactionInstruction({
    keys: [],
    programId: new web3.PublicKey(pg.PROGRAM_ID),
  })
);

console.log("Sending transaction...");
const txHash = await web3.sendAndConfirmTransaction(
  pg.connection,
  transaction,
  [pg.wallet.keypair]
);
console.log("Transaction sent with hash:", txHash);
在这段代码中,“pg.wallet” 表示我们的钱包,其publicKey属性代表了钱包的地址。而 “pg.connection” 类似于我们使用 web3 创建的连接对象,这里使用了 playground 设置中的 RPC 地址。而 “pg.PROGRAM_ID” 则是刚刚构建并发布的合约的地址。
点击“Run”
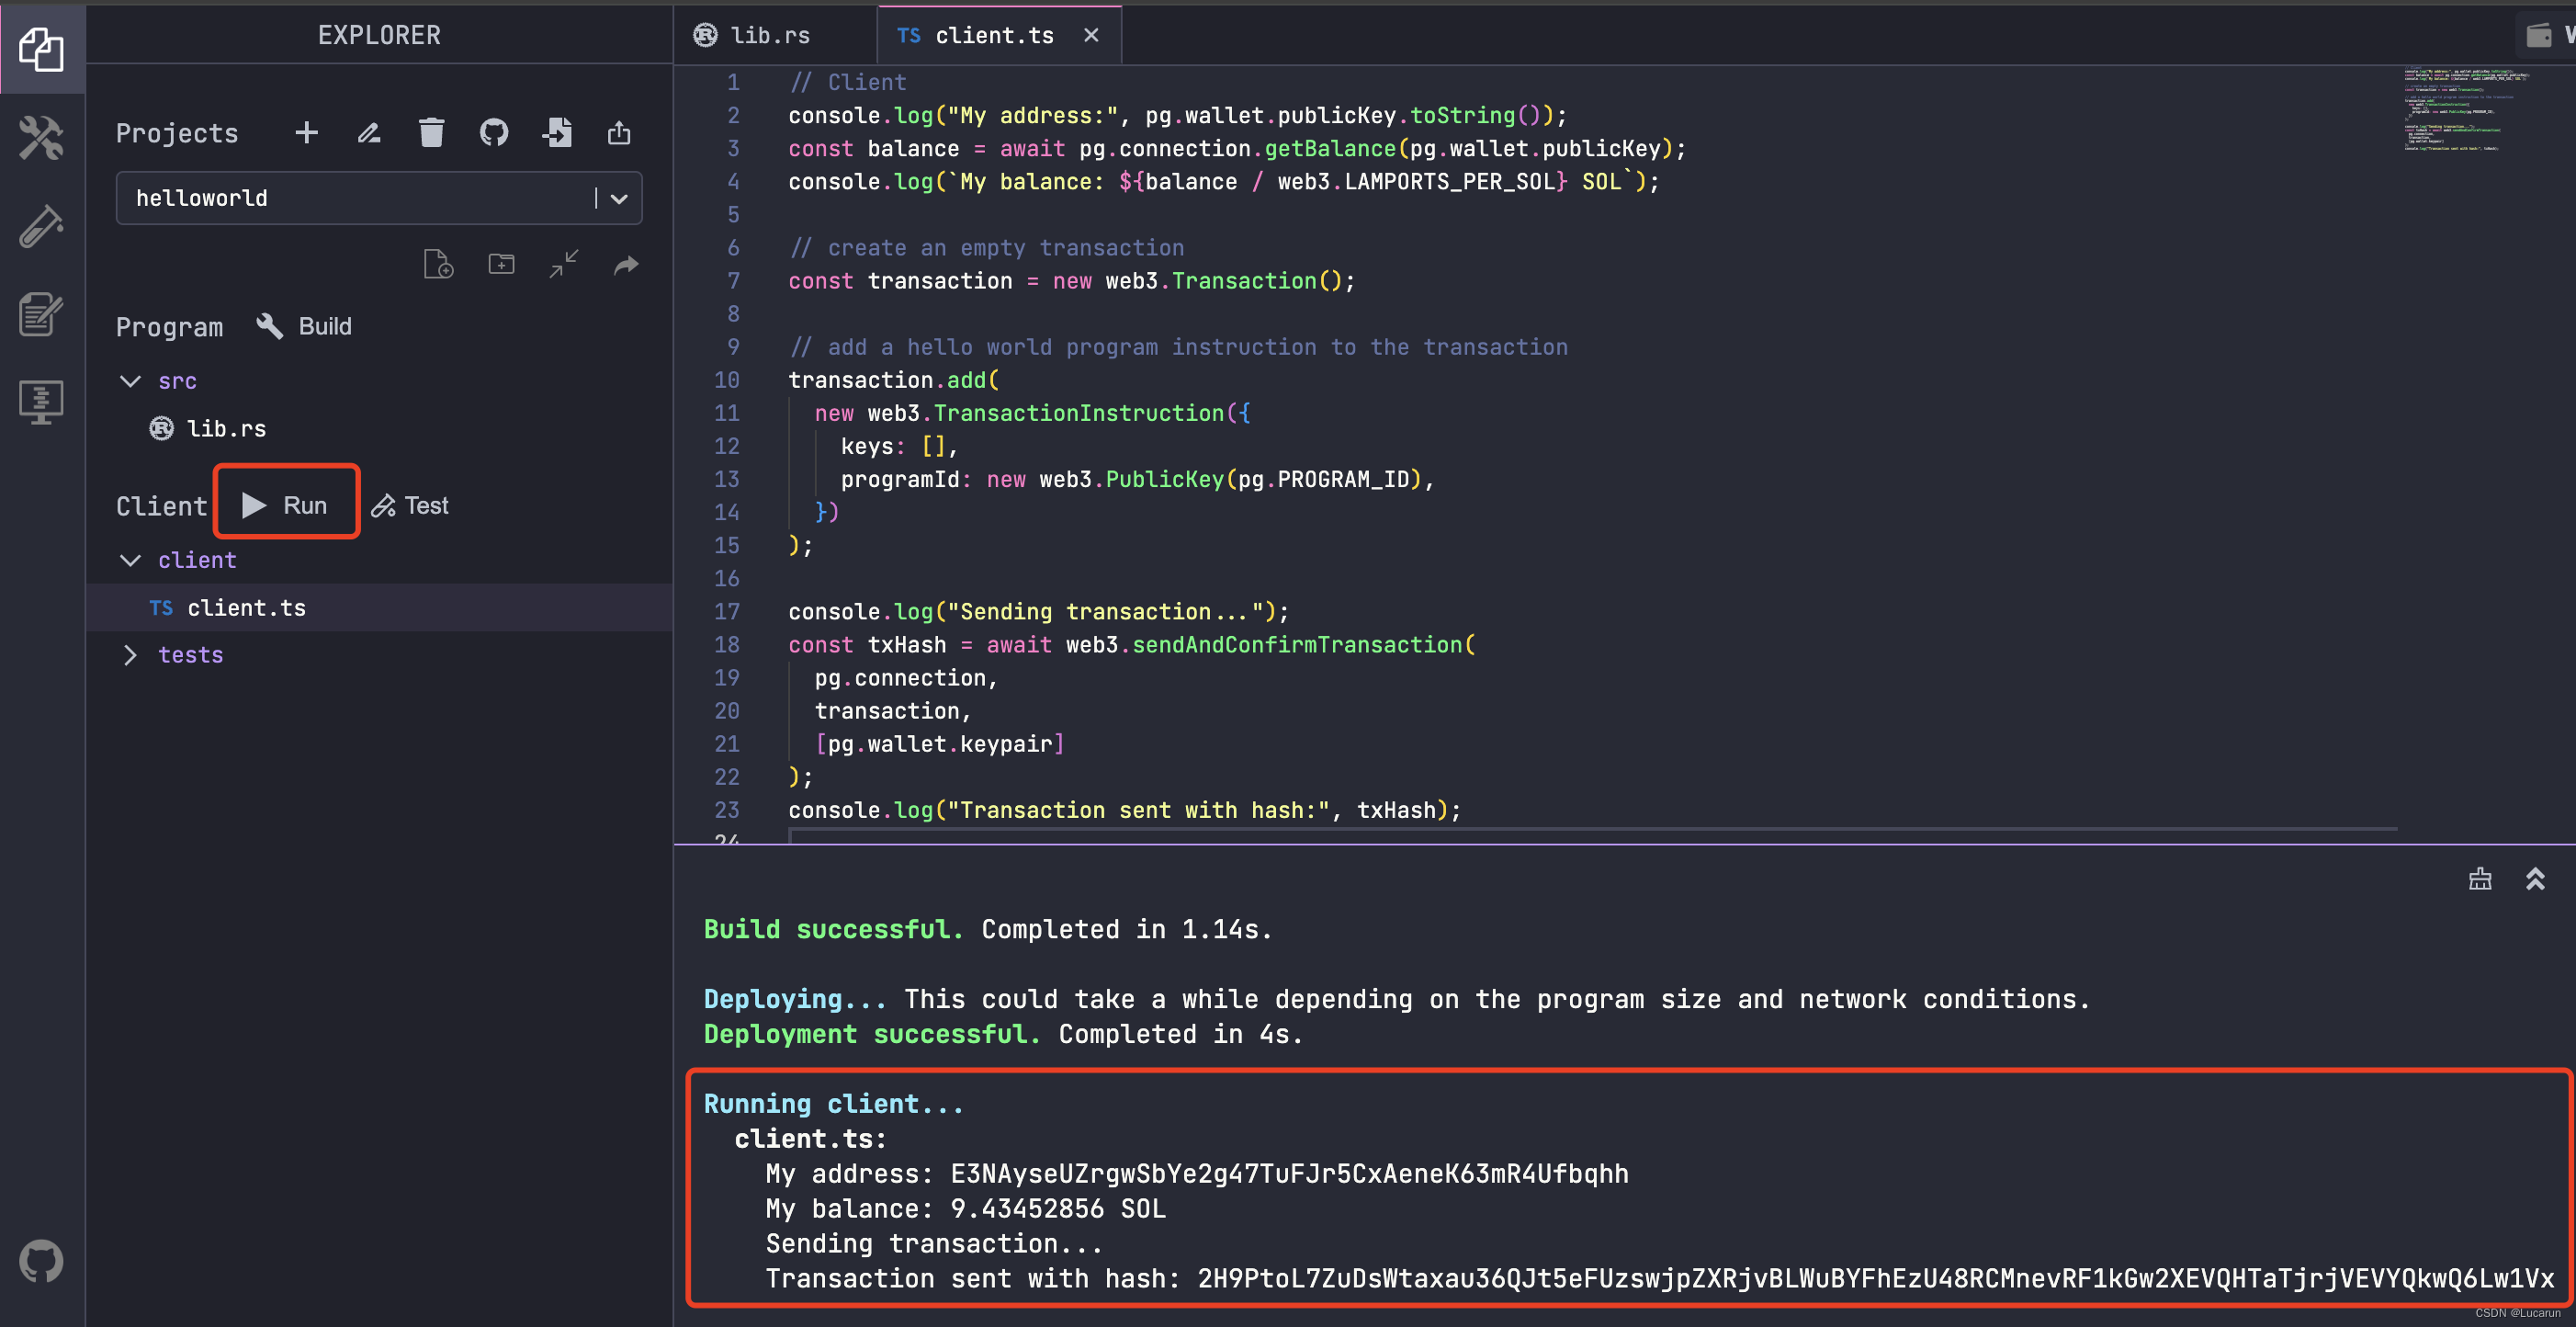
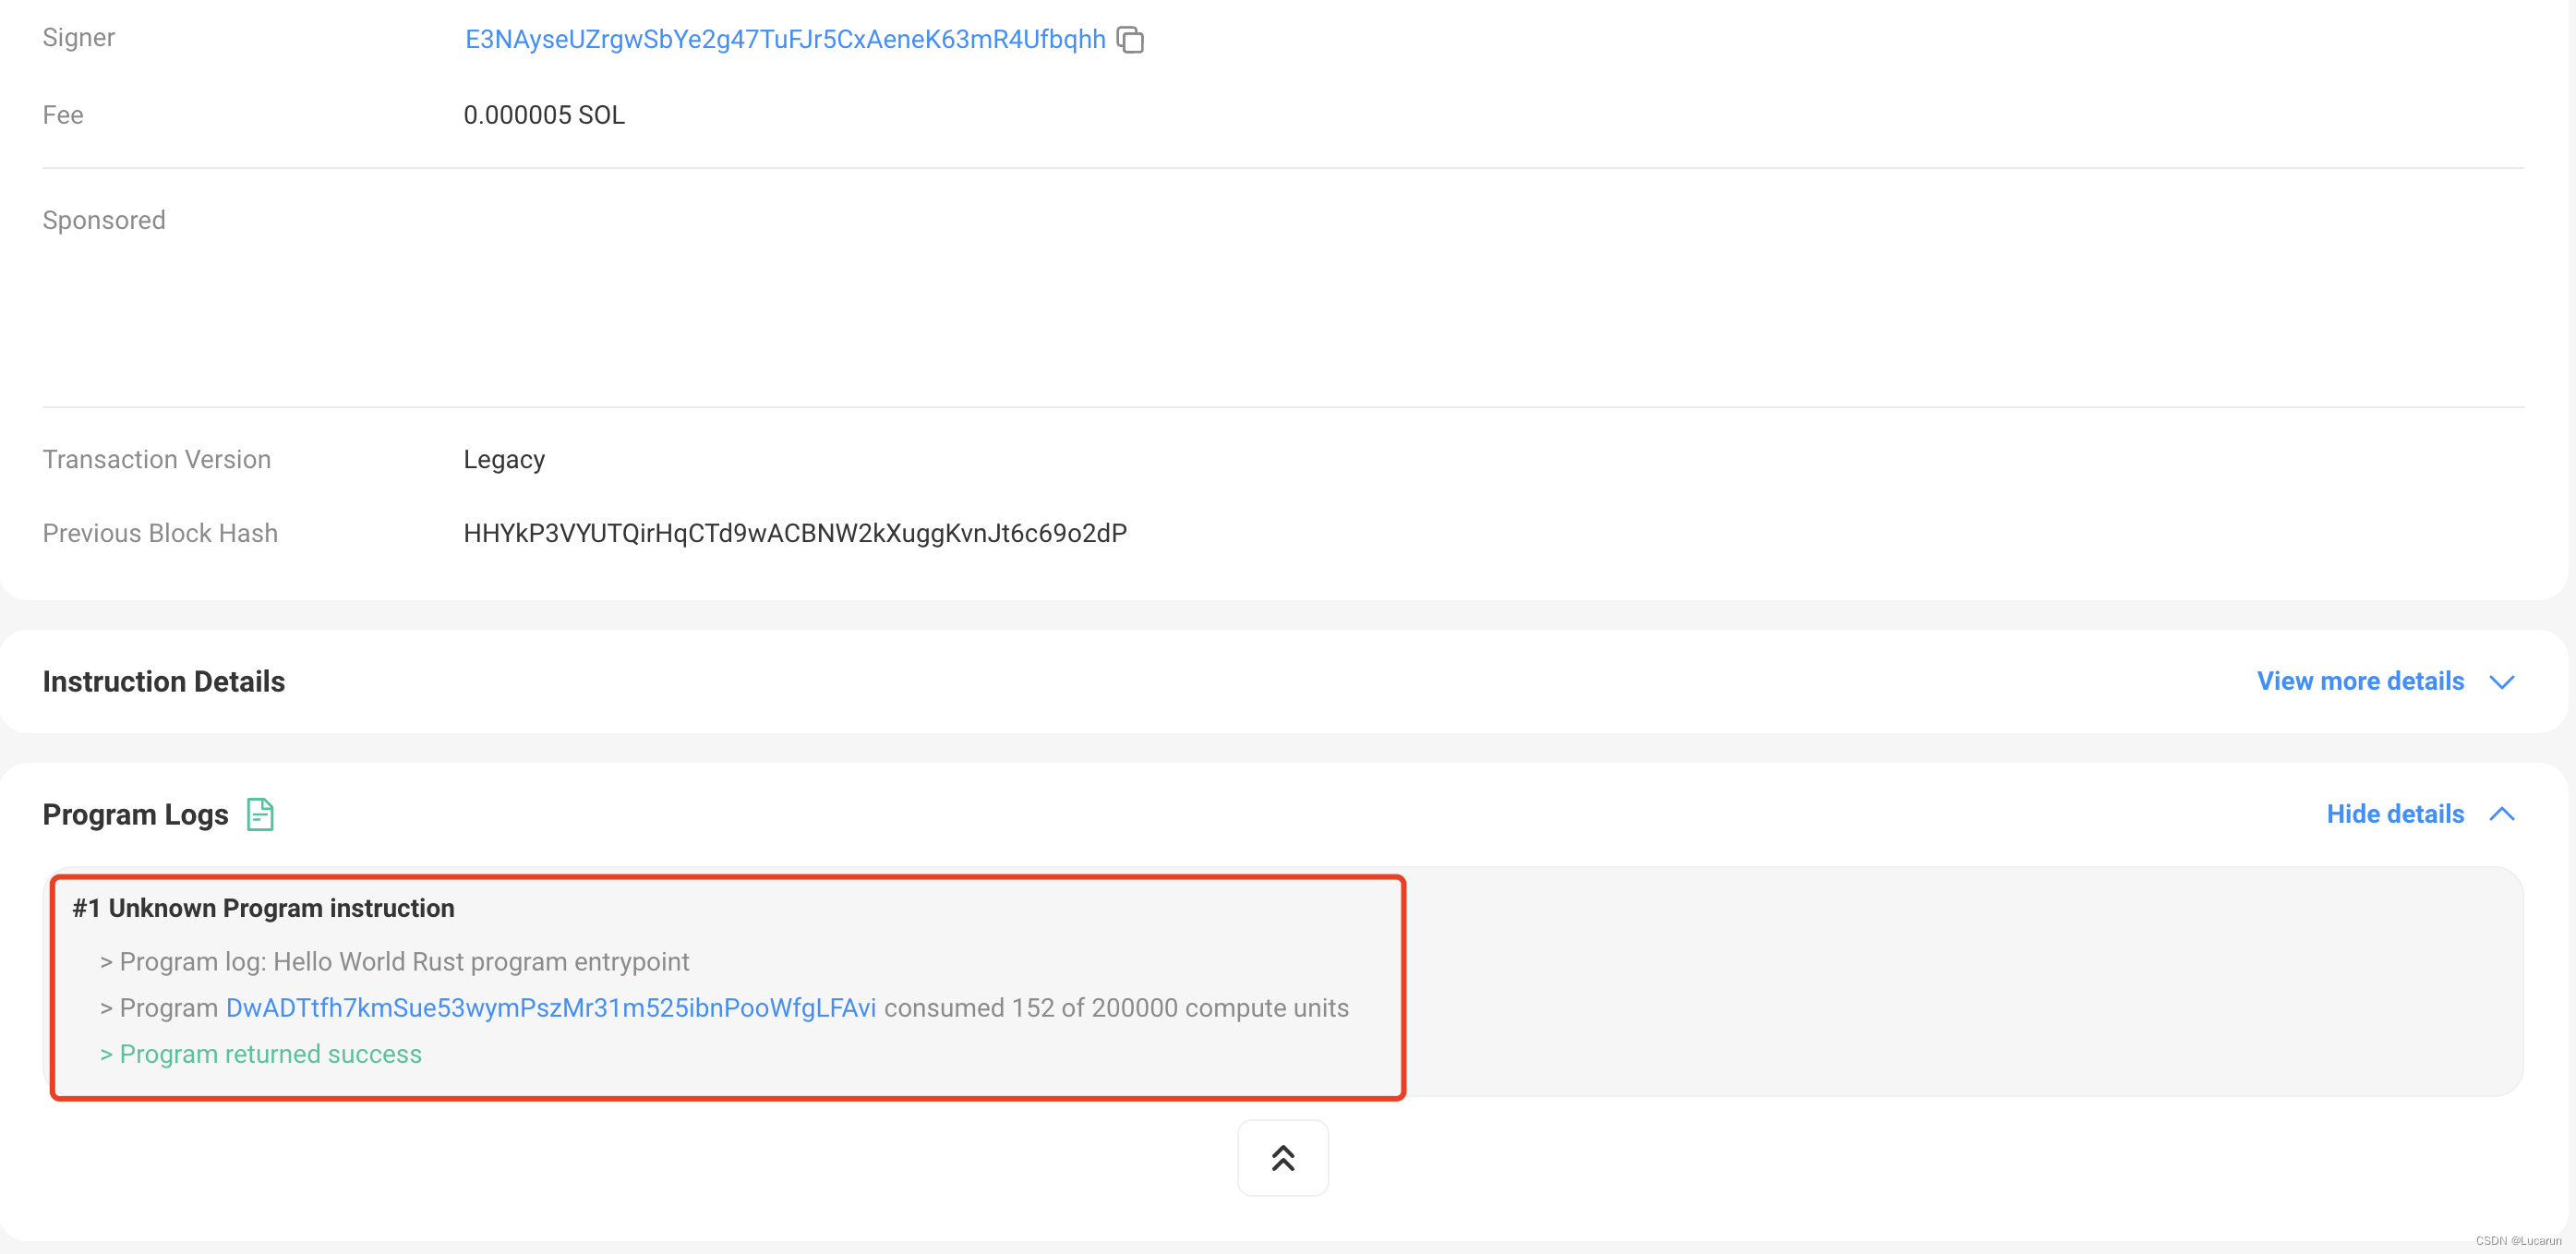
打开浏览器,查询hash,可以看到执行了之前创建好的智能合约。
https://solscan.io/tx/2H9PtoL7ZuDsWtaxau36QJt5eFUzswjpZXRjvBLWuBYFhEzU48RCMnevRF1kGw2XEVQHTaTjrjVEVYQkwQ6Lw1Vx?cluster=devnet


 被折叠的 条评论
为什么被折叠?
被折叠的 条评论
为什么被折叠?
 到【灌水乐园】发言


