


今天就讲讲Ant Design Vue下的控件----table表格(分页、编辑和删除功能)
结合项目中的需求,看看如何配置,让table即可以展示列表,又可以直接编辑数据。需求:
(1)展示即将检查的数据列表,数据量较大,要分页;
(2)当数据有错误时,点击编辑;
(3)数据改完后刷新,保存,恢复列表展示功能;
(4)出现多余的数据时,可删除;
模板中代码如下:
<template>
        <a-table
          class="ant-table-striped"
          style="width: 100%; height: 100%"
          bordered="true"
          size="small"
          :columns="cols"
          :dataSource="dataTable"
          :pagination="pagination"
          :scroll="{ x: srcollWidth, y: tableScrollY }"
          :loading="loading"
          :row-class-name="(_record, index) => (index % 2 === 1 ? 'table-striped' : null)"
          @change="pageIndexChange">
          <template #bodyCell="{ column, text, record }">
            <template v-if="!['operation', 'well_id', 'table_id', 'order_no'].includes(column.dataIndex)">
              <div>
                <a-input v-if="editableData[record.key]" v-model:value="editableData[record.key][column.dataIndex]" style="margin: -5px 0" />
                <template v-else>
                  {{ text }}
                </template>
              </div>
            </template>
            <template v-else-if="column.dataIndex === 'operation'">
              <div class="editable-row-operations">
                <span v-if="editableData[record.key]">
                  <a-typography-link @click="saveRecord(record)">保存</a-typography-link>
                  <a-popconfirm title="是否取消修改?" @confirm="cancelRecord(record.key)">
                    <a>取消</a>
                  </a-popconfirm>
                </span>
                <span v-else>
                  <a @click="editRecord(record)">修改</a> |
                  <a-popconfirm title="是否确定删除该记录?删除后无法恢复,请谨慎操作。" @confirm="deleteRecord(record)">
                    <a>删除</a>
                  </a-popconfirm>
                </span>
              </div>
            </template>
          </template>
        </a-table>
      </template>
先声明与table有关的变量
//表格设置
  const tableScrollY = 'calc(100vh - 280px)';
  const srcollWidth = '100%';
  const loading = ref(false);
  const cols: Ref<Array<any>> = ref([
    {
      title: 'XXXX列',
      dataIndex: 'XX',
      key: 'XXX',
      width: 100,
      checked: true,
    },
    {
        title: '操作',
        fixed: true,
        dataIndex: 'operation',
        width: '110px',
      }
  ]);
const dataTable: Ref<Array<any>> = ref(new Array<any>());
1.分页展示
(1)声明与分页有关的变量
//总页数
  const totalRows = ref(1);
//当前页码
  const p_curPage = ref(1);
//默认每页显示条数
  const defaultPageSize = ref(100);
(2)通过计算属性控制分页
const pagination = computed(() => ({
    total: totalRows.value,
    current: p_curPage.value,
    pageSize: defaultPageSize.value,
    showTotal: (total, range) => {
      if (range && total && range != null) {
        return `共${total}条数据,当前显示${range[0]}~${range[1]}条`;
      }
    },
  }));
(3)分页事件change(change:用于分页、排序、筛选变化时触发)
//分页
async function pageIndexChange(e) {
loading = true;
p_curPage.value = e.current;
defaultPageSize.value = e.pageSize;
await queryTableData(activeItem.value, '');
}
//根据表名查询表格数据
//tableName:表名
async function queryTableData(tableName: string, dtoName: string) {
dataTable.value = [];
let wellName = '',
wellid = '';
let strWhere = {
p_well_name: wellName,
p_well_id: wellid,
p_table_name: tableName,
p_curPage: p_curPage.value,//往api传入当前页码
p_pageSize: defaultPageSize.value,//每页条数
p_totalRecords: 1,//总记录数
p_totalPages: 1,//总页数
};
let queryProc = {
whereStr: JSON.stringify(strWhere),
packageCode: 'getdatacheck',
};
let res = await getCommonTableData(queryProc);//调用api
dataTable.value = res;
if (res.length > 0) {
totalRows.value = res[0].total;//总记录数
}
loading = false;
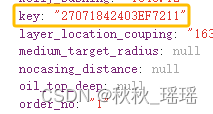
}注意:dataTable中的列必须含有key这个列。如图:
分页功能实现效果如下图:

2. 实现编辑功能
(1)声明与编辑功能有关的变量
const editableData = reactive({});(2)与编辑功能有关的事件
//编辑事件
function editRecord(record) {
    let keyId = record.key;
    editableData[keyId] = cloneDeep(record);//深拷贝
  }
3.实现保存功能
//保存事件
function saveRecord(record) {
    let keyId = record.key;
    Object.assign(dataTable.value.filter((item) => keyId === item.key)[0], editableData[keyId]);
    let updateParam = {
      tableName: activeItem.value,
      whereStr: JSON.stringify(editableData[keyId]),
    };
    updateCommonData(updateParam).then((res) => {//api
      if (res && res.length > 0) {
        message.warning(res);
      } else {
        message.info('保存成功');
      }
    });

    delete editableData[keyId];
  }
//取消事件
function cancelRecord(keyId) {
    delete editableData[keyId];//对象移除
  }
Object.assign()方法
//assign静态方法:将一个或者多个源对象中所有可枚举的自有属性复制到目标对象,并返回修改后的目标对象
const target = { a: 1, b: 2 };
const source = { b: 4, c: 5 };
const returnedTarget = Object.assign(target, source);

console.log(target);
// Expected output: Object { a: 1, b: 4, c: 5 }

console.log(returnedTarget === target);
// Expected output: true
4. 实现删除功能
function deleteRecord(record) {
    let keyId = record.key;

    let param = {
      tableName: activeItem.value,
      whereStr: JSON.stringify(record),
    };
    if (record.table_id && record.order_no) {
      deleteCommonData(param).then((res) => {//api
        if (res && res.length > 0) {
          message.warning(res);
        } else {
          message.info('删除成功');
          queryTableData(activeItem.value, '');
        }
      });
    } else {
      message.info('删除条件table_id,order_no不能为空');
    }
  }


 1655
1655


 被折叠的 条评论
为什么被折叠?
被折叠的 条评论
为什么被折叠?
 到【灌水乐园】发言


