


本文适用于wangEditor5用在Vue3中自定义扩展音频、视频、图片菜单;并扩展音频元素节点,保证音频节点的插入、读取、回写功能正常;支持动态修改尺寸。适用于初学者。
1、官网关键文档。
- ButtonMenu:自定义扩展新功能 | wangEditor
- ModalMenu:自定义扩展新功能 | wangEditor
- 注册菜单到wangEditor:定义新元素:自定义扩展新功能 | wangEditor
- insertKeys:工具栏配置 | wangEditor
- hoverbarKeys:编辑器配置 | wangEditor
- 定义新元素:自定义扩展新功能 | wangEditor
- 各种节点数据结构:节点数据结构 | wangEditor
2、安装
关键包:
npm install @wangeditor/editor
npm install @wangeditor/editor-for-vue
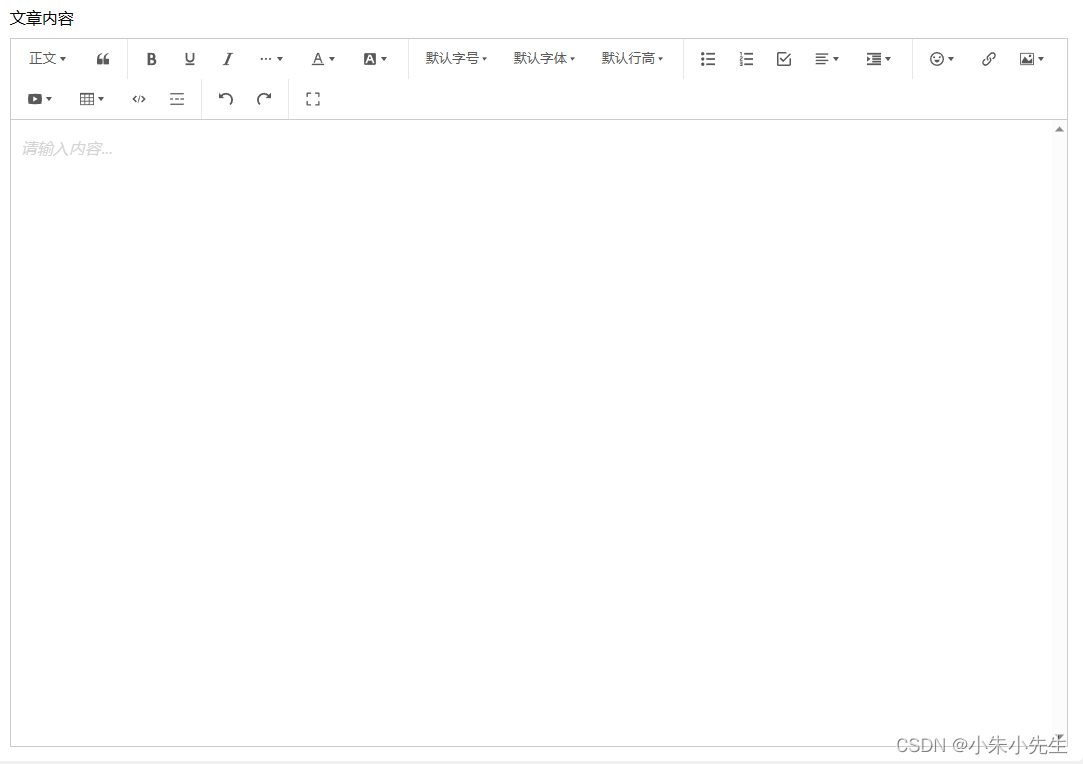
npm install snabbdom3、初始化编辑器(Editor.vue)
<template>
  <div style="border:1px solid #ccc;height: calc(100% - 30px)">
    <toolbar
        style="border-bottom: 1px solid #ccc"
        :editor="editorRef"
        :defaultConfig="toolbarConfig"
        :mode="mode"
    ></toolbar>
    <editor
        style="height: calc(100% - 81px);overflow-y: hidden"
        v-model="editorValue"
        :defaultConfig="editorConfig"
        :mode="mode"
        @onCreated="handleCreated"></editor>
  </div>
</template>
<script lang="ts" setup>
import '@wangeditor/editor/dist/css/style.css'
import {Toolbar, Editor} from "@wangeditor/editor-for-vue";
import {onBeforeUnmount, onMounted, reactive, ref, shallowRef} from "vue";
import {IToolbarConfig} from "@wangeditor/editor";
const mode = ref('default');
const editorRef = shallowRef();
const editorValue = ref();

onMounted(() => {
   editorValue.value = ''  // 这里可以设置编辑器内容。但是无法设置富文本信息。需要用setHtml
})

onBeforeUnmount(() => { // 当离开后,销毁编辑器实例
  const editor = editorRef.value;
  if (editor == null) {
    return;
  }
  editor.destroy();
})

const toolbarConfig: Partial<IToolbarConfig> = { // 工具栏配置

}
const editorConfig = { // 编辑器配置
  placeholder: '请输入内容...'
}
// 当编辑器创建的时候
const handleCreated = (editor: any) => {
  editorRef.value = editor;// 记录编辑器实例
}
</script>
<style scoped lang="scss">
</style>
4、在Editor.vue中隐藏自带的图片、视频上传。
在toolbarConfig中添加excludeKeys字段。将图片和视频的key填入。
const toolbarConfig: Partial<IToolbarConfig> = {
  excludeKeys: [
    "group-image", // 图片上传:本地上传+网络图片
    "group-video", // 视频上传:本地上传+网络视频
    "fullScreen"
  ]
}
5、创建自定义图片、视频、音频菜单
这里使用到了ButtonMenu。可以到官网查看具体文档。
5.1、图片菜单配置文件。
创建ImageMenu.ts文件。然后在文件中添加以下代码。
import {IButtonMenu, IDomEditor} from "@wangeditor/editor";

class ImageMenu implements IButtonMenu {
    tag: string;
    title: string;
    iconSvg: string;
    constructor() {
        this.title = '插入图片'; // 鼠标悬浮显示
        this.tag = 'button'
        this.iconSvg = '<svg viewBox="0 0 1024 1024"><path d="M959.877 128l0.123 0.123v767.775l-0.123 0.122H64.102l-0.122-0.122V128.123l0.122-0.123h895.775zM960 64H64C28.795 64 0 92.795 0 128v768c0 35.205 28.795 64 64 64h896c35.205 0 64-28.795 64-64V128c0-35.205-28.795-64-64-64zM832 288.01c0 53.023-42.988 96.01-96.01 96.01s-96.01-42.987-96.01-96.01S682.967 192 735.99 192 832 234.988 832 288.01zM896 832H128V704l224.01-384 256 320h64l224.01-192z"></path></svg>'; // 菜单图标
    }

    isActive(editor: IDomEditor):boolean{ // 保持默认
        return false
    }
    getValue(editor: IDomEditor): string|boolean{ // 保持默认
        return ''
    }
    isDisabled(editor: IDomEditor): boolean{ // 保持默认
        return false;
    }
    exec(editor: IDomEditor, value: string | boolean){ // 菜单点击事件,这里将点击事件暴露出去
        if(this.isDisabled(editor)){
            return;
        }
        editor.emit('ImageMenuClick');
    }

}

export default ImageMenu
5.2、视频菜单配置文件。
创建VideoMenu.ts文件。然后在文件中添加以下代码。
import {IButtonMenu, IDomEditor} from "@wangeditor/editor";

class VideoMenu implements IButtonMenu {
    tag: string;
    title: string;
    iconSvg: string;

    constructor() {
        this.title = '插入视频';
        this.tag = 'button'
        this.iconSvg = '<svg viewBox="0 0 1024 1024"><path d="M981.184 160.096C837.568 139.456 678.848 128 512 128S186.432 139.456 42.816 160.096C15.296 267.808 0 386.848 0 512s15.264 244.16 42.816 351.904C186.464 884.544 345.152 896 512 896s325.568-11.456 469.184-32.096C1008.704 756.192 1024 637.152 1024 512s-15.264-244.16-42.816-351.904zM384 704V320l320 192-320 192z"></path></svg>';
    }

    isActive(editor: IDomEditor): boolean {
        return false
    }

    getValue(editor: IDomEditor): string | boolean {
        return ''
    }

    isDisabled(editor: IDomEditor): boolean {
        return false;
    }

    exec(editor: IDomEditor, value: string | boolean) {
        if (this.isDisabled(editor)) {
            return;
        }
        editor.emit('VideoMenuClick');
    }

}

export default VideoMenu
5.3、音频菜单配置文件。
创建AudioMenu.ts文件。然后在文件中添加以下代码。
import {IButtonMenu, IDomEditor} from "@wangeditor/editor";

class AudioMenu implements IButtonMenu {
    tag: string;
    title: string;
    iconSvg: string;
    constructor() {
        this.title = '插入音频';
        this.tag = 'button'
        this.iconSvg = '<svg t="1637634971457" class="icon" viewBox="0 0 1024 1024" version="1.1" xmlns="http://www.w3.org/2000/svg" p-id="7981" width="16" height="16"><path d="M983.792981 0H40.211115A40.5504 40.5504 0 0 0 0.002048 40.96v942.08c0 22.664533 17.954133 40.96 40.209067 40.96h943.581866a40.5504 40.5504 0 0 0 40.209067-40.96V40.96c0-22.664533-17.954133-40.96-40.209067-40.96z m-235.383466 207.530667v118.784H581.702315v326.8608c0 81.92-62.190933 148.548267-138.8544 148.548266-76.663467 0-138.8544-63.351467-138.8544-141.448533 0-78.097067 62.122667-141.448533 138.8544-141.448533 31.607467 0 60.074667-2.730667 83.3536 16.110933v-327.68l222.208 0.273067z" fill="#999999" p-id="7982"></path></svg>';
    }

    isActive(editor: IDomEditor):boolean{
        return false
    }
    getValue(editor: IDomEditor): string|boolean{
        return ''
    }
    isDisabled(editor: IDomEditor): boolean{
        return false;
    }
    exec(editor: IDomEditor, value: string | boolean){
        if(this.isDisabled(editor)){
            return;
        }
        editor.emit('AudioMenuClick');
    }

}

export default AudioMenu
5.4、创建初始化文件。index.ts
import ImageMenu from "@/share/Editor/menus/ImageMenu";
import VideoMenu from "@/share/Editor/menus/VideoMenu";
import AudioMenu from "@/share/Editor/menus/AudioMenu";
import {IDomEditor, IToolbarConfig, Boot, IModuleConf} from "@wangeditor/editor";

const MenusList = [
    {
        key: 'ImageMenu',
        class: ImageMenu,
        index: 22 // 菜单要在工具栏显示的位置
    },
    {
        key: 'VideoMenu',
        class: VideoMenu,
        index: 23 // 菜单要在工具栏显示的位置
    },
    {
        key: 'AudioMenu',
        class: AudioMenu,
        index: 24 // 菜单要在工具栏显示的位置
    }
]
const registerMenu = function (editor: IDomEditor, toolbarConfig: Partial<IToolbarConfig>){
    const allRegisterMenu = editor.getAllMenuKeys(); // 获取所有已注册的菜单
    let keys = [];
    for(let item of MenusList){
        if(allRegisterMenu.indexOf(item.key) < 0){ // 如果未注册,则注册
            const menuObj = {
                key: item.key,
                factory() {
                    return new item.class()
                }
            }
            Boot.registerMenu(menuObj);
        }
        keys.push(item.key)
    }
    toolbarConfig.insertKeys = {
        index: MenusList[0].index,
        keys: keys
    }
}

export default registerMenu
5.5、在Editor.vue中初始化自定义菜单并注册自定义菜单点击事件。
// 在handleCreated中,获取编辑器实例后注册相关菜单功能。
const handleCreated = (editor: any) => {
  editorRef.value = editor;// 记录编辑器实例
  registerMenu(editorRef.value, toolbarConfig); // 注册自定义菜单。这个是5.4那边声明的
  initMediaMenuEvent(); // 注册自定义菜单点击事件
}

// 事件监听
const initMediaMenuEvent = () => {
  const editor = editorRef.value;
    // 在点击事件中,根据具体菜单,可以触发响应的功能,这里可以为每个事件创建一个el-dialog弹窗。我们就可以完全按照自己的需求开发后续功能
  editor.on('AudioMenuClick', () => {
    // 你点击了音频菜单
  });
  editor.on('ImageMenuClick', () => {
    // 你点击了图片菜单
  });
  editor.on('VideoMenuClick', () => {
   // 你点击了视频菜单
  });
}
6、插入图片到富文本中(具体数据结构可查看1段落中的数据结构文档地址)
editorRef.value.insertNode({
      type: 'image',
      src: url,
      children: [{ // 该字段必须要
        text: ''
      }]
})
7、插入视频到富文本中
editorRef.value.insertNode({
      type: 'video',
      src: url,
      poster:"", // 如果有则填入
      children: [{
        text: ''
      }]
})
8、插入音频到富文本中
由于wangEditor富文本并不兼容音频插入,所以这里有两种插入方式。按需选择
8.1、懒人开发。
其实在HTML中,音频文件也可以直接使用video标签播放,所以对于不想折腾的读者,可以直接使用video插入视频的方式来实现播放音频。
8.2、费脑子开发。
这里要注意,这边会涉及到wangEditor中ModalMenu、插件、新元素等方面的内容,具体可以参考官方文档。这边所涉及的源代码是在wangeditor的video源码的上做更改的。涉及多个文件。记得安装snabbdom.js这个包。下面的代码里会用到
8.2.1、创建custom-types.ts文件定义Audio节点数据结构。
type EmptyText = {
    text: ''
};
export type AudioElement = {
    type: 'audio'
    src: string
    width?: string
    height?:string
    children: EmptyText[]
}
8.2.2、创建render-elem.ts文件,并编写 renderElem函数
该函数是为了将insertNode传入的信息在富文本容器中渲染成html代码。
import {DomEditor, IDomEditor, SlateElement} from "@wangeditor/editor";
import {h, VNode} from "snabbdom";
import {AudioElement} from "@/share/Editor/Node/custom-types";

function renderAudioElement(elemNode: SlateElement,children:VNode[] | null, editor: IDomEditor):VNode{
    const {src='',width='300',height='54'} = elemNode as AudioElement;
    const selected = DomEditor.isNodeSelected(editor, elemNode);


    const audioVnode = h(
        'audio', // html标签
        {
            props: {
                src: src,
                contentEditable: false,
                controls: true,
            },
            style:{
                width: width + 'px',
                height: height + 'px',
                'max-width':'100%' // 这里之所以要写死,是为了实现宽度自适应的。如果直接设置width:100%,会触发报错。所以想要实现width:100%效果,需要先设置max-width,然后在给width设置一个离谱的值,比如说100000.
            }
        }
    )
    const vnode = h(
        'div',
        {
            props: {
                "className": 'w-e-textarea-video-container', // 这里直接复用video的效果
                "data-selected": (selected?'true':'')
            },
        },
        audioVnode
    )
    const containerVnode = h(
        'div',
        {
            props: {
                contentEditable: false,
            },
            on: {
                mousedown: e => e.preventDefault(),
            },
        },
        vnode
    )

    return containerVnode
}
const renderAudioConf = {
    type: 'audio', // 新元素 type ,重要!!!即custom-type中定义的type
    renderElem: renderAudioElement,
}

export {renderAudioConf}
8.2.3、创建elem-html.ts文件并编写elemToHtml函数。
8.2.2中所提到的代码已经能够通过editor.insertNode() 将Audio插入到富文本中,但是如果真行editor.getHtml会发现,获取到的代码中并没有audio这类信息,所以还需要编写以下代码。
import {SlateElement} from "@wangeditor/editor";
import {AudioElement} from "@/share/Editor/Node/custom-types";


function audioElemtToHtml(elem: SlateElement, childrenHtml: string): string{
    const {src,width=300,height=54} = elem as AudioElement
// 通过data-w-e开头的data数据,存放一些必要的信息,到时候通过setHtml将富文本信息还原回编辑器的时候,才能使编辑器正常识别
    const html = `<div
                    data-w-e-type="audio"
                    data-w-e-is-void
                    data-w-e-type="audio"
                    data-w-e-width="${width}"
                    data-w-e-height="${height}"
                    data-src="${src}"
                    data-width="${width}"
                    data-height="${height}"
                    >
                        <audio controls src="${src}" style="width: ${width};height:${height};max-width: 100%"/>
                     </div>`
    return html
}

const audioToHtmlConf = {
    type: 'audio',
    elemToHtml: audioElemtToHtml
}

export {audioToHtmlConf}
8.2.4、创建parse-elem-html.ts文件并编写parseElemHtml 函数。
到8.2.3为止,已经可以将audio元素添加到编辑器中,并从编辑器中获取到富文本内容。但如果现在通过setHtml将富文本内容还原回编辑器,你会发现audio信息丢失或异常。所以还需要编写以下的代码。
import {IDomEditor, SlateDescendant, SlateElement} from "@wangeditor/editor";

function parseAudioElementHtml(domElem:Element, children:SlateDescendant[], editor: IDomEditor): SlateElement {
    const src= domElem.getAttribute('data-src'); // 这些就是elem-html.ts自定义扩展存放的地方,可以根据需要自行扩展
    const height = domElem.getAttribute('data-height');
    const width = domElem.getAttribute('data-width');
    const myAudio = { // 这里的信息要和custom-types.ts一致
        type: 'audio',
        src,
        width,
        height,
        children: [{text: ''}]
    }
    return myAudio
}
const parseAudioHtmlConf = {
    selector: 'div[data-w-e-type="audio"]', // 这个就是elem-html.ts中第一个div里包含的信息
    parseElemHtml: parseAudioElementHtml,
}

export {parseAudioHtmlConf}
8.2.5、创建plugin.ts并编写相关内容
到8.2.4为止,已经能够实现audio自定义元素的插入,获取,读取的功能,但是当你插入之后会发现,插入audio元素后,audio元素之后的富文本区域变成不可编辑,哪怕你通过insertBreak()往后面添加换行也没用,所以还需要通过编写plugin.ts来避免这个问题。这里的代码基本复用了video模块的代码,只是将里面的video信息改成了audio信息。
import {DomEditor, IDomEditor} from "@wangeditor/editor";
import {AudioElement} from "@/share/Editor/Node/custom-types";
import { Transforms } from 'slate'

function withAudio<T extends IDomEditor>(editor: T): T {
    const { isVoid, normalizeNode } = editor
    const newEditor = editor

    // 重写 isVoid

    // @ts-ignore
    newEditor.isVoid = (elem: AudioElement) => {
        const { type } = elem

        if (type === 'audio') {
            return true
        }

        return isVoid(elem)
    }

    // 重写 normalizeNode
    newEditor.normalizeNode = ([node, path]) => {
        const type = DomEditor.getNodeType(node)

        // ----------------- audio 后面必须跟一个 p header blockquote -----------------
        if (type === 'audio') {
            // -------------- audio 是 editor 最后一个节点,需要后面插入 p --------------
            const isLast = DomEditor.isLastNode(newEditor, node)
            if (isLast) {
                Transforms.insertNodes(newEditor, DomEditor.genEmptyParagraph(), { at: [path[0] + 1] })
            }
        }

        // 执行默认的 normalizeNode ,重要!!!
        return normalizeNode([node, path])
    }

    // 返回 editor ,重要!
    return newEditor
}
export default withAudio
8.2.6、注册这些功能。
到此,已经完成了audio新元素所有的基础功能,也能保证编辑器的正常使用。为了保证audio新元素的正常使用,上面所述的所有功能模块需要在编辑器初始化前进行初始化。所以为上面这些功能模块编写index.ts作为初始化入口。
import {Boot} from "@wangeditor/editor";
import {renderAudioConf} from "@/share/Editor/Node/render-elem";
import {audioToHtmlConf} from "@/share/Editor/Node/elem-html";
import {parseAudioHtmlConf} from "@/share/Editor/Node/parse-elem-html";
import withAudio from "@/share/Editor/Node/plugin";


function initAudioNode() {
    Boot.registerRenderElem(renderAudioConf);
    Boot.registerElemToHtml(audioToHtmlConf)
    Boot.registerParseElemHtml(parseAudioHtmlConf)
    Boot.registerPlugin(withAudio);
}

export default initAudioNode
并在Editor.vue中,handleCreated函数之前引入该模块并调用。initAudioNode();
9、动态修改audio元素尺寸。
如果你插入过video元素,你点击该元素会发现,该元素支持动态修改尺寸的功能。

但是你去点击audio元素,却无法触发该功能,所以还需要一下的代码来实现。
9.1、从wangeditor中复制两份代码出来。
//创建dom.ts文件,将以下代码复制进去
/**
 * @description DOM 操作
 * @author wangfupeng
 */

import $, { append, on, focus, attr, val, html, parent, hasClass, Dom7Array, empty } from 'dom7'
export { Dom7Array } from 'dom7'

if (append) $.fn.append = append
if (on) $.fn.on = on
if (focus) $.fn.focus = focus
if (attr) $.fn.attr = attr
if (val) $.fn.val = val
if (html) $.fn.html = html
if (parent) $.fn.parent = parent
if (hasClass) $.fn.hasClass = hasClass
if (empty) $.fn.empty = empty

export default $

/**
 * 获取 tagName lower-case
 * @param $elem $elem
 */
export function getTagName($elem: Dom7Array): string {
    if ($elem.length) return $elem[0].tagName.toLowerCase()
    return ''
}

/**
 * 生成带 size 样式的 iframe html
 * @param iframeHtml iframe html string
 * @param width width
 * @param height height
 * @returns iframe html string with size style
 */
export function genSizeStyledIframeHtml(
    iframeHtml: string,
    width: string = 'auto',
    height: string = 'auto'
): string {
    const $iframe = $(iframeHtml)
    $iframe.attr('width', width)
    $iframe.attr('height', height)
    return $iframe[0].outerHTML
}

// COMPAT: This is required to prevent TypeScript aliases from doing some very
// weird things for Slate's types with the same name as globals. (2019/11/27)
// https://github.com/microsoft/TypeScript/issues/35002
import DOMNode = globalThis.Node
import DOMComment = globalThis.Comment
import DOMElement = globalThis.Element
import DOMText = globalThis.Text
import DOMRange = globalThis.Range
import DOMSelection = globalThis.Selection
import DOMStaticRange = globalThis.StaticRange
export { DOMNode, DOMComment, DOMElement, DOMText, DOMRange, DOMSelection, DOMStaticRange }
//创建util.ts文件,并将以下代码复制进去
/**
* @description 工具函数
* @author wangfupeng
*/
import { nanoid } from 'nanoid'
/**
* 获取随机数字符串
* @param prefix 前缀
* @returns 随机数字符串
*/
export function genRandomStr(prefix: string = 'r'): string {
return `${prefix}-${nanoid()}`
}
export function replaceSymbols(str: string) {
return str.replace(/</g, '<').replace(/>/g, '>')
}
9.2、根据ModalMenu编写EditAudioSizeMenu.ts文件
该文件是根据video模块的EditAudioSizeMenu.ts修改的,具体逻辑自行分析。
import { Node as SlateNode, Transforms } from 'slate'
import {
    IModalMenu,
    IDomEditor,
    DomEditor,
    genModalInputElems,
    genModalButtonElems,
    t,
} from '@wangeditor/core'
import $, { Dom7Array, DOMElement } from '../dom'
import { genRandomStr } from '../util'
import {AudioElement} from "@/share/Editor/Node/custom-types";

/**
 * 生成唯一的 DOM ID
 */
function genDomID(): string {
    return genRandomStr('w-e-insert-audio')
}

class EditorAudioSizeMenu implements IModalMenu {
    readonly title = t('修改尺寸')
    readonly tag = 'button'
    readonly showModal = true // 点击 button 时显示 modal
    readonly modalWidth = 320
    private $content: Dom7Array | null = null
    private readonly widthInputId = genDomID()
    private readonly heightInputId = genDomID()
    private readonly buttonId = genDomID()

    private getSelectedAudioNode(editor: IDomEditor): SlateNode | null {
        return DomEditor.getSelectedNodeByType(editor, 'audio')
    }

    getValue(editor: IDomEditor): string | boolean {
        // 插入菜单,不需要 value
        return ''
    }

    isActive(editor: IDomEditor): boolean {
        // 任何时候,都不用激活 menu
        return false
    }

    exec(editor: IDomEditor, value: string | boolean) {
        // 点击菜单时,弹出 modal 之前,不需要执行其他代码
        // 此处空着即可
    }

    isDisabled(editor: IDomEditor): boolean {
        if (editor.selection == null) return true

        const audioNode = this.getSelectedAudioNode(editor)
        if (audioNode == null) {
            return true
        }
        return false
    }

    getModalPositionNode(editor: IDomEditor): SlateNode | null {
        return this.getSelectedAudioNode(editor)
    }

    getModalContentElem(editor: IDomEditor): DOMElement {

        const { widthInputId, heightInputId, buttonId } = this


        const [widthContainerElem, inputWidthElem] = genModalInputElems(
            t('宽度'),
            widthInputId,
            '300'
        )
        const $inputWidth = $(inputWidthElem)
        const [heightContainerElem, inputHeightElem] = genModalInputElems(
            t('高度'),
            heightInputId,
            '54'
        )
        const $inputHeight = $(inputHeightElem)
        const [buttonContainerElem] = genModalButtonElems(buttonId, t('确定'))

        if (this.$content == null) {
            // 第一次渲染
            const $content = $('<div></div>')

            // 绑定事件(第一次渲染时绑定,不要重复绑定)
            $content.on('click', `#${buttonId}`, e => {
                e.preventDefault()
                const rawWidth = $content.find(`#${widthInputId}`).val().trim()
                const rawHeight = $content.find(`#${heightInputId}`).val().trim()
                const numberWidth = parseInt(rawWidth)
                const numberHeight = parseInt(rawHeight)
                const width = numberWidth ? numberWidth.toString() : '300'
                const height = numberHeight ? numberHeight.toString() : '54'

                editor.restoreSelection()
                // 修改尺寸
                Transforms.setNodes(
                    editor,
                    // @ts-ignore
                    { width, height },
                    {
                        match: n => DomEditor.checkNodeType(n, 'audio'),
                    }
                )

                editor.hidePanelOrModal() // 隐藏 modal
            })

            this.$content = $content
        }

        const $content = this.$content

        // 先清空,再重新添加 DOM 内容
        $content.empty()
        $content.append(widthContainerElem)
        $content.append(heightContainerElem)
        $content.append(buttonContainerElem)

        const audioNode = this.getSelectedAudioNode(editor) as AudioElement
        if (audioNode == null) return $content[0]

        // 初始化 input 值
        const { width = '300', height = '54' } = audioNode
        $inputWidth.val(width)
        $inputHeight.val(height)
        setTimeout(() => {
            $inputWidth.focus()
        })

        return $content[0]
    }
}

export default EditorAudioSizeMenu
9.3、修改5.4中提到的index.ts文件部分逻辑
这里其实并没有修改多少代码,只是对audio元素做针对性处理。
import ImageMenu from "@/share/Editor/menus/ImageMenu";
import VideoMenu from "@/share/Editor/menus/VideoMenu";
import AudioMenu from "@/share/Editor/menus/AudioMenu";
import {IDomEditor, IToolbarConfig, Boot, IModuleConf} from "@wangeditor/editor";
import EditAudioSizeMenu from "@/share/Editor/menus/EditAudioSizeMenu";

const MenusList = [
    {
        key: 'ImageMenu',
        class: ImageMenu,
        index: 22
    },
    {
        key: 'VideoMenu',
        class: VideoMenu,
        index: 23
    },
    {
        key: 'AudioMenu',
        class: AudioMenu,
        index: 24
    }
]
const registerMenu = function (editor: IDomEditor, toolbarConfig: Partial<IToolbarConfig>){
    const allRegisterMenu = editor.getAllMenuKeys(); // 获取所有已注册的菜单
    let keys = [];
    for(let item of MenusList){
        if(allRegisterMenu.indexOf(item.key) < 0){ // 如果未注册,则注册
            const menuObj = {
                key: item.key,
                factory() {
                    return new item.class()
                }
            }
            if(item.key === 'AudioMenu'){ // 如果是音频菜单
                const editorAudioSizeMenuConf = { // 先注册修改尺寸的modalMenu菜单
                    key: 'editAudioSize', // 任意命名,但需要跟9.4中用到的保存一致
                    factory() {
                        return new EditAudioSizeMenu() // 这个就是9.2中提到的方法
                    },
                }
                const module: Partial<IModuleConf> = {
                    menus: [menuObj, editorAudioSizeMenuConf],
                }
                 Boot.registerModule(module);// 这里的注册方法跟普通的不太一样,注意
            } else {
                Boot.registerMenu(menuObj);
            }
        }
        keys.push(item.key)
    }
    toolbarConfig.insertKeys = {
        index: MenusList[0].index,
        keys: keys
    }
}

export default registerMenu
9.4、将modalmenu注册到编辑器的hoverbarKeys里。
// 在editorConfig中注册hoverbarKeys
const editorConfig = {
  placeholder: '请输入内容...',
  hoverbarKeys: {
    audio: {
      menuKeys: ['editAudioSize'] // 这个key就是9.3里声明的
    }
  }
}
到此,自定义媒体资源菜单就结束了。下面为最终效果的演示视频。
wangEditor模拟操作


 4246
4246

 被折叠的 条评论
为什么被折叠?
被折叠的 条评论
为什么被折叠?
 到【灌水乐园】发言


