


websocket的用处及vue和SpringBoot的引入-入门
为什么要有websocket
微信
想一个场景,扫码登录,服务器并不知道用户有没有扫码,怎么办,一种办法是HTTP定时轮询,1-2秒就请求一次服务端,看看用户有没有扫码,典型的例子就是微信

还有一种就是长轮询,比如一般的http请求是2-3秒就应该给你回复,但是登录是例外,我可以将这个时长扩充到30秒,只要在30秒内你扫码并登录了,服务端就给返回了,如果30秒没有登录,那就再发起一次。比较特殊的就是百度网盘
百度网盘

上面这两种本质上都是客户端主动向服务器申请数据,在登录这种简单场景还可以用,但是复杂场景的话,就不可以了。
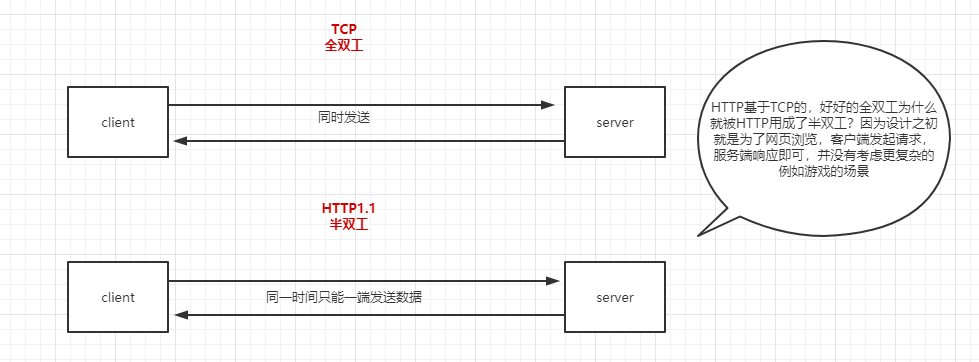
全双工和半双工
socket和websocket毫无关系
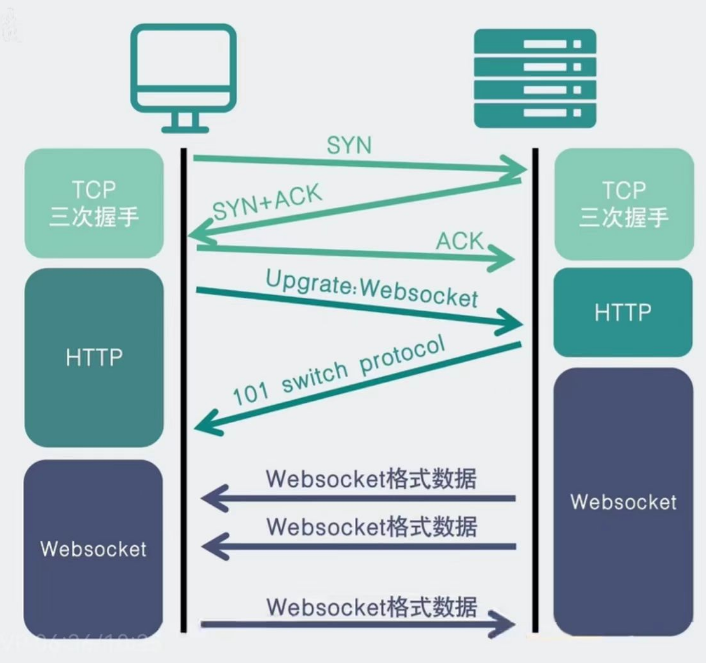
websocket如何建立连接
大体流程是
1、TCP三次握手,通过Http发起请求
2、http请求中带有特殊的信息头,Upgrate:Websocket
3、服务端发现,哎,我支持这个协议,那就返回一个101状态码,这个状态码就是协议转换
4、然后就可以愉快的发送websocket格式数据了
在springboot和vue中的使用
springboot
首先我们需要先配写一个配置类
package com.meterspheretest.config;


import lombok.extern.slf4j.Slf4j;
import org.springframework.context.annotation.Bean;
import org.springframework.context.annotation.Configuration;
import org.springframework.web.socket.server.standard.ServerEndpointExporter;

/**
 * 开启 WebSocket:使用 springboot 内嵌的tomcat容器启动 websocket
 **/
@Slf4j
@Configuration
public class WebSocketConfig {
    /**
     * 服务器节点
     *
     * 如果使用独立的servlet容器,而不是直接使用springboot 的内置容器,就不要注入ServerEndPoint
     *
     * @return
     */
    @Bean
    public ServerEndpointExporter serverEndpointExporter(){
        log.info("启动socket");
        return new ServerEndpointExporter();
    }
}
然后看一下我的配置文件
server:
  # 项目访问的端口
  port: 8765
  servlet:
    # 这个配置能够设置项目中的所有API的上下文路径(URL的一部分),与@RequestMapping有异曲同工之妙。
    # 我们知道,@RequestMapping能够在API方法层级声明,同时能够在Controller的类层级声明,为什么能够在多层级声明呢?大家很容易想到,
    # 为了使API url的语义性,遵从REST标准的API是非常棒的,同一个Controller下的URL前缀相同能够非常明确的表达语义与关联关系。
    # 那么,如果我们有多个项目/微服务呢?也应该做到这一点,只不过是以更大的层级方式在应用。server.servlet.context-path能够以一个project为单位配置默认的URL上下文路径,
    # 保持设计的一致性是非常合适的做法。
    context-path: /ssl-service
然后写专门的service
package com.meterspheretest.service;

import lombok.extern.slf4j.Slf4j;
import org.springframework.stereotype.Component;

import javax.websocket.*;
import javax.websocket.server.ServerEndpoint;
import java.io.IOException;

import java.util.Iterator;
import java.util.Map;
import java.util.concurrent.ConcurrentHashMap;

/**
 * websocket的处理类。
 * 作用相当于HTTP请求
 * 中的controller
 */
@Component
@Slf4j
//@ServerEndpoint() 前端通过此 URL 和后端交互,建立连接   // 接口路径 ws://localhost:8765/ssl-service/api/pushMessage/{userName};
@ServerEndpoint("/api/pushMessage")
public class WebSocketServer {
    /**静态变量,用来记录当前在线连接数。应该把它设计成线程安全的。*/
    private static int onlineCount=0;
    /**concurrent包的线程安全Set,用来存放每个客户端对应的Session对象。*/
    private static ConcurrentHashMap<String,WebSocketServer>  webSocketMap=new ConcurrentHashMap<>();
    /**与某个客户端的连接会话,需要通过它来给客户端发送数据*/
    private Session session;
    /**
     * 连接建立成
     * 功调用的方法
     */
    @OnOpen
    public void onOpen(Session session) throws IOException {
//        用户初始是0个,所以要先+1
        addOnlineCount();
        this.session=session;
        log.info("用户连接:,当前在线人数为:" + getOnlineCount());
        log.info(this.session.toString());
        log.info("session对应的id:"+this.session.getId());
//        这个id获取出来是string类型的,所以ConcurrentHashMap<String,WebSocketServer>
        webSocketMap.put(this.session.getId(),this);
        sendMessage("连接成功");
    }
    /**
     * 连接关闭
     * 调用的方法
     */
    @OnClose
    public void onClose(){
        log.info("用户退出:,当前在线人数为:" + getOnlineCount());
        subOnlineCount();
        webSocketMap.remove(this.session.getId());
    }
    /**
     * 收到客户端消
     * 息后调用的方法
     *
     **/
    @OnMessage
    public void onMessage(String message){
        log.info("【websocket消息】收到客户端消息:"+message);
    }
    @OnError
    public void onError(Throwable error){
        log.error("用户错误:,原因:"+error.getMessage());
        error.printStackTrace();
    }
    /**
     /**
     *服务器群发消息
     **/
    public void sendInfo(String message) throws IOException {
        log.info("尝试广播消息");
        Iterator iterator=webSocketMap.entrySet().iterator();
        while(iterator.hasNext()){
            Map.Entry entry=(Map.Entry)iterator.next();
            WebSocketServer webSocketServer=(WebSocketServer) entry.getValue();
            webSocketServer.sendMessage("群发消息:"+entry.getKey()+","+message);
        }
    }
    /**
     * 实现服务
     * 器主动推送
     */
    public void sendMessage(String message) throws IOException {
//            this.session.getBasicRemote().sendText(message);
        this.session.getBasicRemote().sendText(message);
        log.info("其他方法调用了sendMessage:"+message);

    }

    /**
     * 获得此时的
     * 在线人数
     * @return
     */
    public static synchronized int getOnlineCount() {
        return onlineCount;
    }

    /**
     * 在线人
     * 数加1
     */
    public static synchronized void addOnlineCount() {
        WebSocketServer.onlineCount++;
    }

    /**
     * 在线人
     * 数减1
     */
    public static synchronized void subOnlineCount() {
        WebSocketServer.onlineCount--;
    }
}
再写一个controller
package com.meterspheretest.controller;


import com.meterspheretest.service.WebSocketServer;
import lombok.extern.slf4j.Slf4j;
import org.springframework.web.bind.annotation.*;

import javax.annotation.Resource;
import java.io.IOException;

@Slf4j
@CrossOrigin
@RestController
@RequestMapping("/websocket")
public class WebSocketController {
    @Resource
    WebSocketServer webSocketServer;
    @GetMapping("/onMessage/{msg}")
    public String loGin(@PathVariable("msg") String msg){
        webSocketServer.onMessage(msg);
        return "onMessage";
    }
    @GetMapping("/sendMessage/{msg}")
    public String sendMessage(@PathVariable("msg")String msg) throws IOException {
        webSocketServer.sendMessage(msg);
        return "onsendMessage";
    }
    @GetMapping("/sendInfo/{msg}")
    public String sendInfo(@PathVariable("msg")String msg) throws IOException {
        webSocketServer.sendInfo(msg);
        return "onsendInfo";
    }
}
Vue
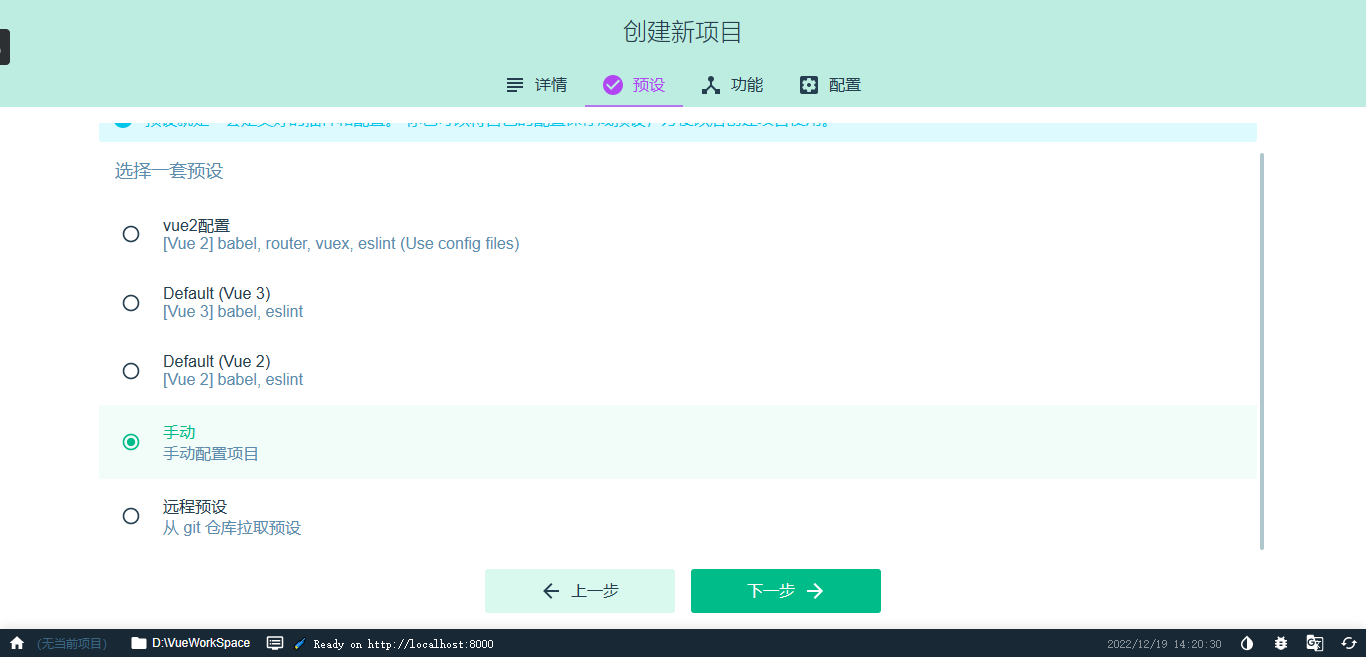
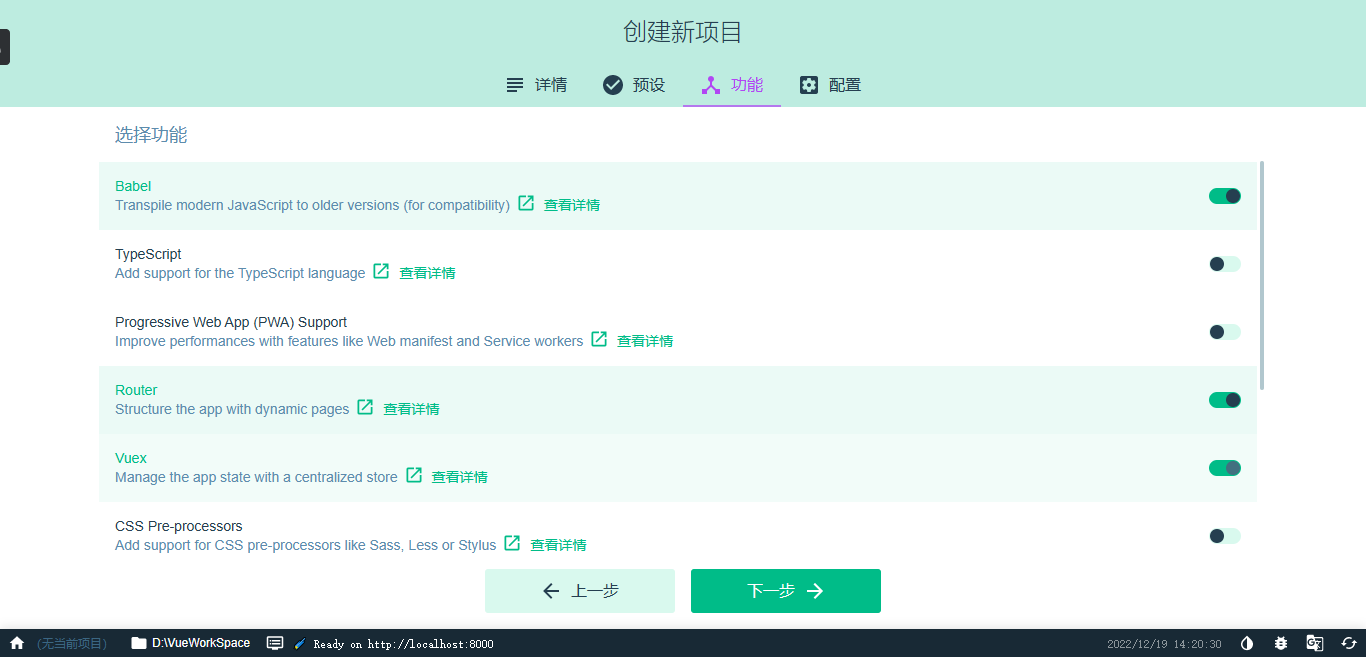
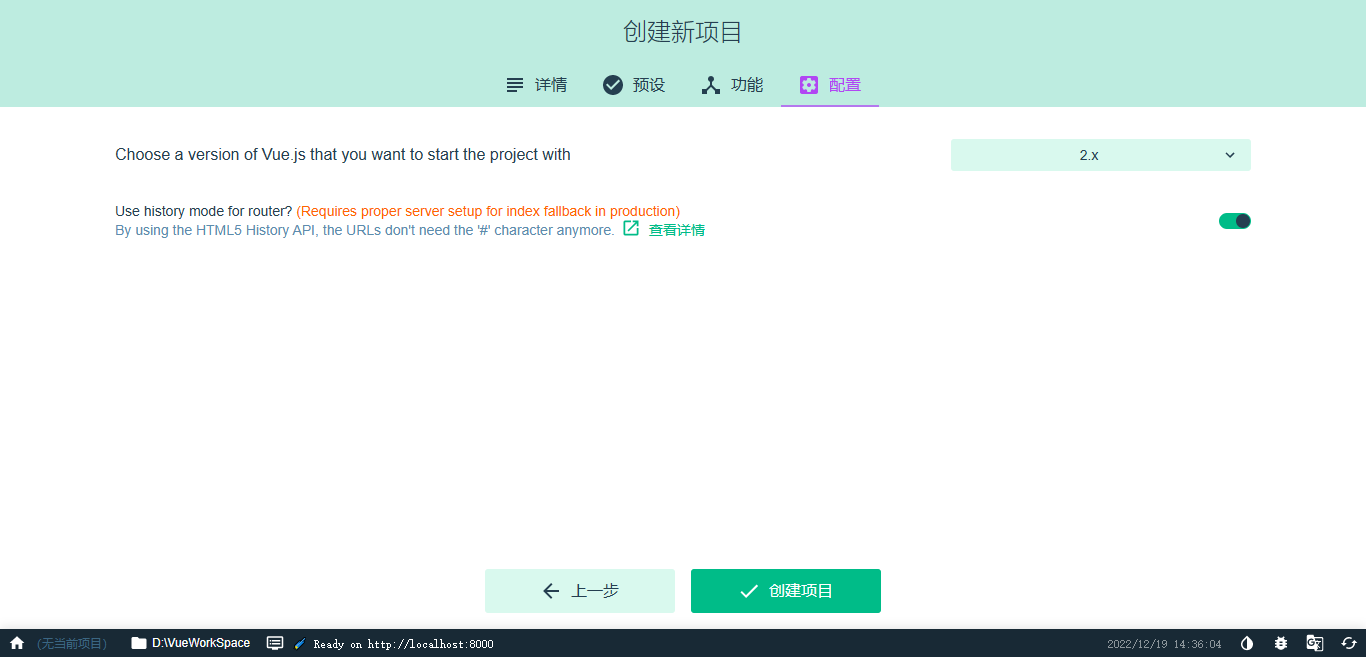
单独拿出来,是因为版本太操蛋了,就摸索了一番,从新建项目开始讲
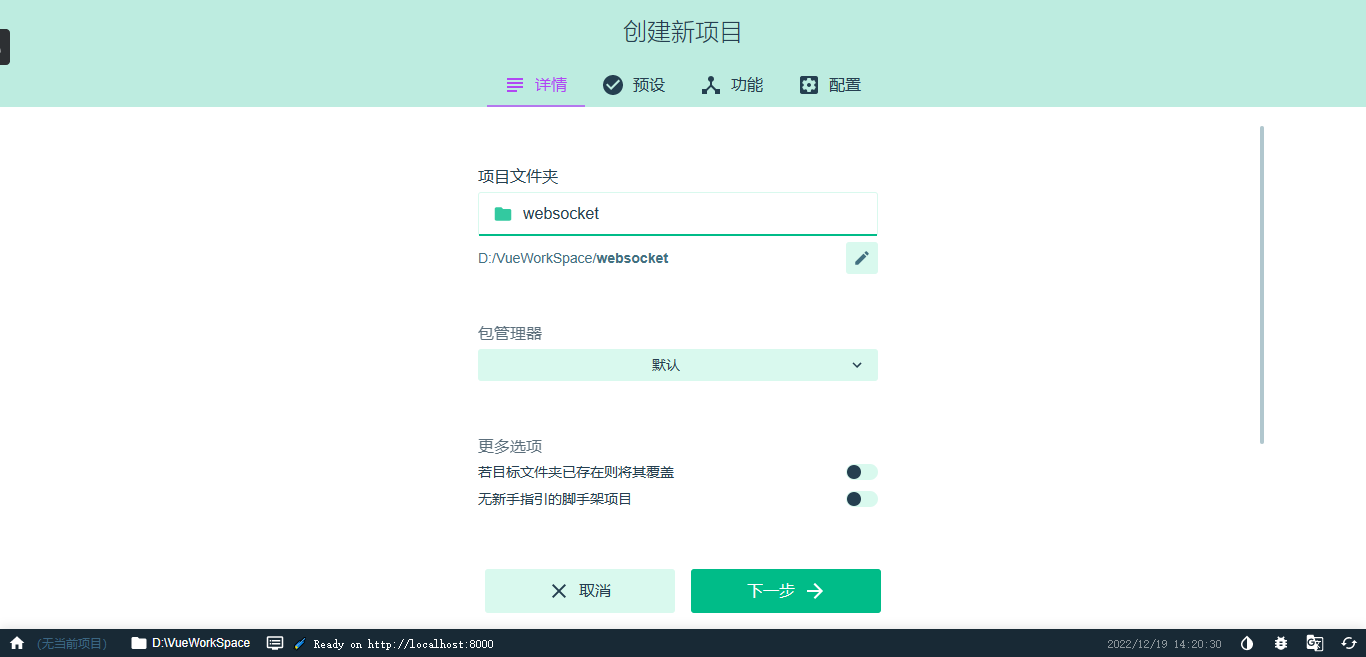
vue ui
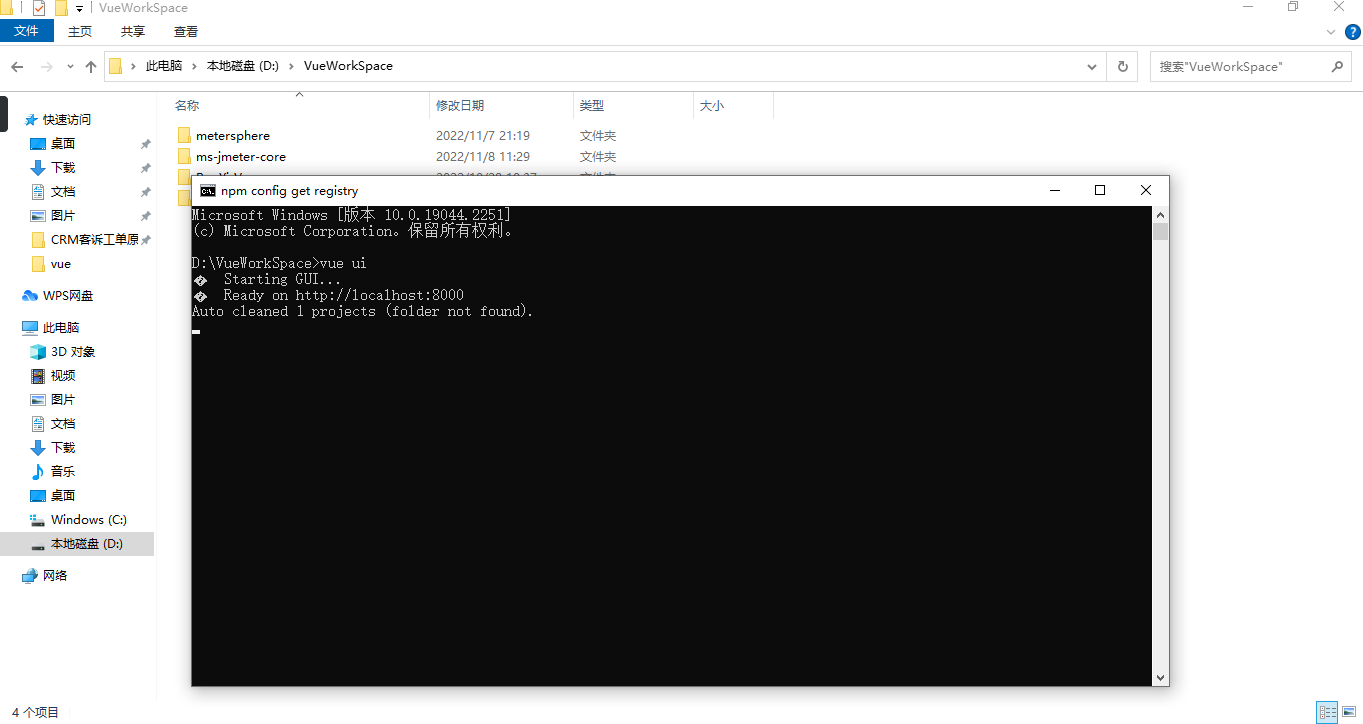
新建

elementUI的安装
如果你没有在创建项目的时候安装elementUI。也可以通过命令行的方式安装
项目目录下执行
cnpm install element-ui --save
ZHR:learn zc$ cnpm install element-ui --save
✔ Installed 1 packages
✔ Linked 10 latest versions
[1/1] scripts.postinstall element-ui@2.15.3 › async-validator@1.8.5 › babel-runtime@6.26.0 › core-js@^2.4.0 run "node -e \"try{require('./postinstall')}catch(e){}\"", root: "/Users/zc/VueProjects/learn/node_modules/_core-js@2.6.12@core-js"
Thank you for using core-js ( https://github.com/zloirock/core-js ) for polyfilling JavaScript standard library!

The project needs your help! Please consider supporting of core-js on Open Collective or Patreon:
> https://opencollective.com/core-js
> https://www.patreon.com/zloirock

Also, the author of core-js ( https://github.com/zloirock ) is looking for a good job -)

[1/1] scripts.postinstall element-ui@2.15.3 › async-validator@1.8.5 › babel-runtime@6.26.0 › core-js@^2.4.0 finished in 80ms
✔ Run 1 scripts
deprecate element-ui@2.15.3 › async-validator@1.8.5 › babel-runtime@6.26.0 › core-js@^2.4.0 core-js@<3.3 is no longer maintained and not recommended for usage due to the number of issues. Because of the V8 engine whims, feature detection in old core-js versions could cause a slowdown up to 100x even if nothing is polyfilled. Please, upgrade your dependencies to the actual version of core-js.
✔ All packages installed (11 packages installed from npm registry, used 2s(network 2s), speed 987.36kB/s, json 11(100.82kB), tarball 1.46MB)
elementUI的引入
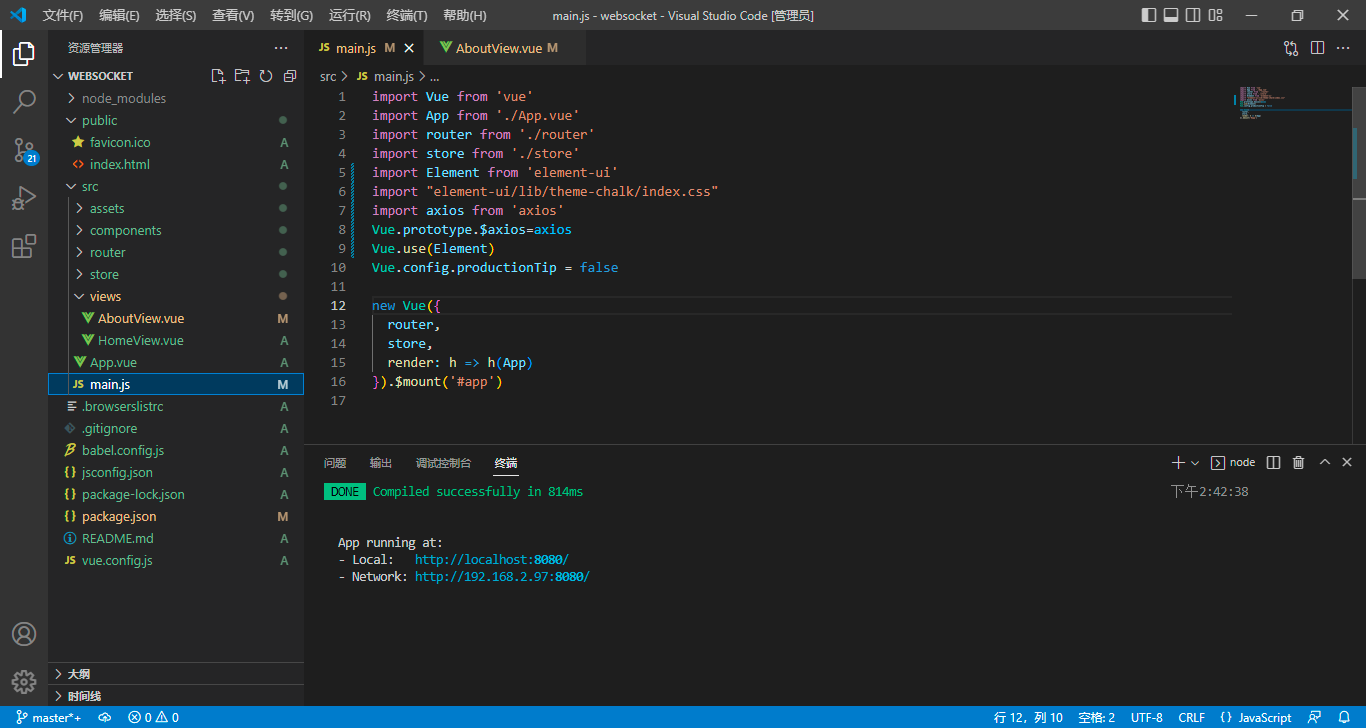
在src下面的main.js下新增如下内容
import Element from 'element-ui'
import "element-ui/lib/theme-chalk/index.css"
Vue.use(Element)
这样我们就可以愉快得在官网上选择组件复制代码到我们项目中直接使用啦。
axios的安装
如果你在创建项目的时候没有安装axios,那也可以使用命令行安装
cnpm install axios --save
ZHR:learn zc$ cnpm install axios --save
✔ Installed 1 packages
✔ Linked 1 latest versions
✔ Run 0 scripts
✔ All packages installed (2 packages installed from npm registry, used 291ms(network 290ms), speed 33kB/s, json 2(9.57kB), tarball 0B)
axios的引入
在src下面的main.js下新增如下内容
import axios from 'axios'
Vue.prototype.$axios=axios
组件中,我们就可以通过this.$axios.get()来发起我们的请求了哈。
整体展示
vue.config.js
const { defineConfig } = require('@vue/cli-service')
module.exports = defineConfig({
  transpileDependencies: true,
  // 基本路径 baseURL已经过时,这里需要注意,很多教程都是指定成了baseURL
  publicPath: './',
  // 输出文件目录
  outputDir: 'dist',
  // eslint-loader 是否在保存的时候检查
  lintOnSave: true,
  // use the full build with in-browser compiler?
  // https://vuejs.org/v2/guide/installation.html#Runtime-Compiler-vs-Runtime-only
  // compiler: false,
  // webpack配置
  // see https://github.com/vuejs/vue-cli/blob/dev/docs/webpack.md
  chainWebpack: () => {},
  configureWebpack: () => {},
  // vue-loader 配置项
  // https://vue-loader.vuejs.org/en/options.html
  // vueLoader: {},
  // 生产环境是否生成 sourceMap 文件
  productionSourceMap: true,
  // css相关配置
  css: {
   // 是否使用css分离插件 ExtractTextPlugin
   extract: true,
   // 开启 CSS source maps?
   sourceMap: false,
   // css预设器配置项
   loaderOptions: {},
   // 启用 CSS modules for all css / pre-processor files.
  //  requireModuleExtension: true
  },
  // use thread-loader for babel & TS in production build
  // enabled by default if the machine has more than 1 cores
  parallel: require('os').cpus().length > 1,
  // 是否启用dll
  // See https://github.com/vuejs/vue-cli/blob/dev/docs/cli-service.md#dll-mode
  // dll: false,
  // PWA 插件相关配置
  // see https://github.com/vuejs/vue-cli/tree/dev/packages/%40vue/cli-plugin-pwa
  pwa: {},
  // webpack-dev-server 相关配置
  devServer: {//这里需要注意,很多旧的教程都是devServerTable
    open: process.platform === 'darwin',
    // disableHostCheck: true,
    host: 'localhost',//这里就是在我们npn run serve启动后打开的网页的host
    port: 8090,//这里就是在我们npn run serve启动后打开的网页的端口
    https: false,
    // hotOnly: false,
    proxy: {
      '/api': {
          target: 'http://127.0.0.1:8765/ssl-service/',     // 目标url
          changeOrigin: true,                     // 是否跨域
          pathRewrite: {
              '^/api': ''                         // 可以使用 /api 等价于 http://api.douban.com/v2
          }
      }
  },
  //  before: app => {}
  },
  // 第三方插件配置
  pluginOptions: {
   // ...
  }
})
修改一下项目的AboutView.vue
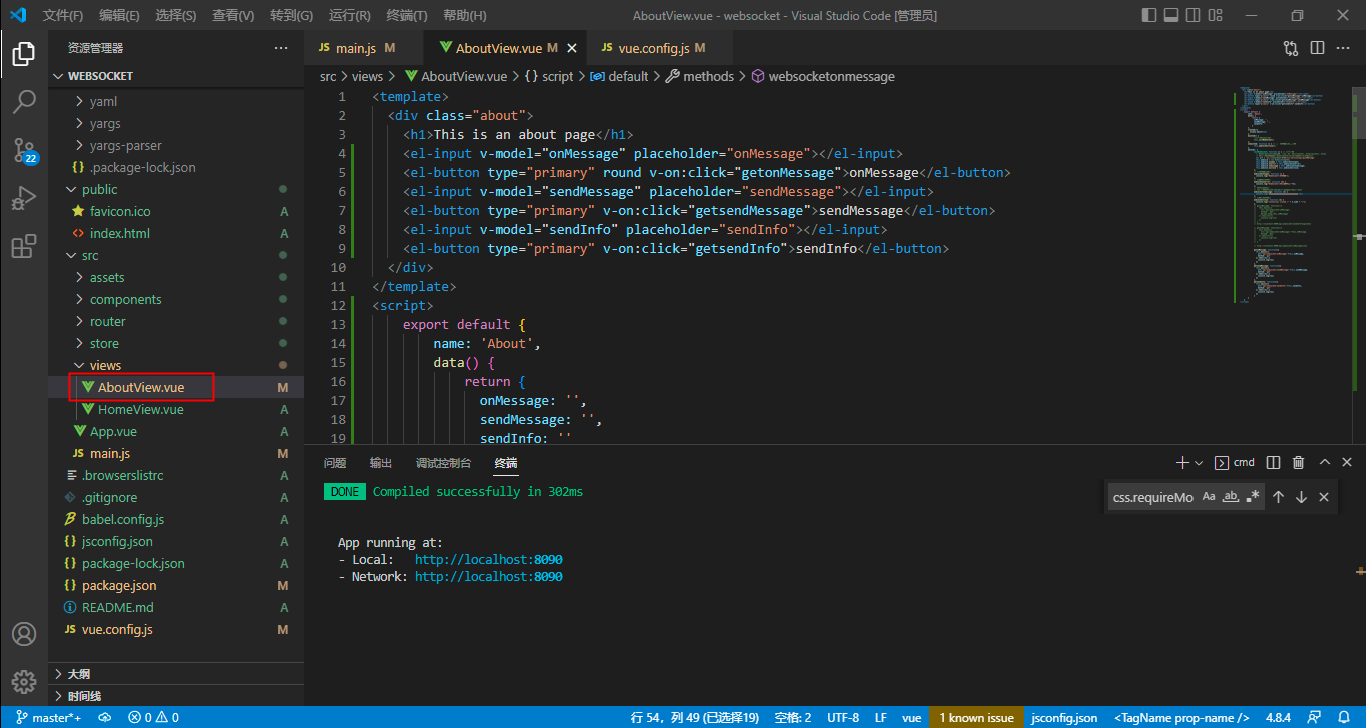
<template>
  <div class="about">
    <h1>This is an about page</h1>
    <el-input v-model="onMessage" placeholder="onMessage"></el-input>
    <el-button type="primary" round v-on:click="getonMessage">onMessage</el-button>
    <el-input v-model="sendMessage" placeholder="sendMessage"></el-input>
    <el-button type="primary" v-on:click="getsendMessage">sendMessage</el-button>
    <el-input v-model="sendInfo" placeholder="sendInfo"></el-input>
    <el-button type="primary" v-on:click="getsendInfo">sendInfo</el-button>
  </div>
</template>
<script>
    export default {
        name: 'About',
        data() {
            return {
              onMessage: '',
              sendMessage: '',
              sendInfo: ''
            }
        },
        created(){
          window.About=this
        },
        mounted() {
              //初始化websocket
              this.initWebSocket()
        },
        unmounted: function () { // 离开页面生命周期函数
              this.websocketclose();
        },
        methods: {
              initWebSocket: function () { // 建立连接
                // WebSocket与普通的请求所用协议有所不同,ws等同于http,wss等同于https
                // 这里配置的地址就是WebSocketServer对应的@ServerEndpoint
                var url = 'ws://localhost:8765/ssl-service/api/pushMessage'
                this.websock = new WebSocket(url);
                this.websock.onopen = this.websocketonopen;
                this.websock.onerror = this.websocketonerror;
                this.websock.onmessage = this.websocketonmessage;
                this.websock.onclose = this.websocketclose;
              },
              // 连接成功后调用
              websocketonopen: function () {
                console.log("WebSocket连接成功");
              },
              // 发生错误时调用
              websocketonerror: function (e) {
                console.log("WebSocket连接发生错误:"+e);
              },
							// 接收后端消息
              // vue 客户端根据返回的cmd类型处理不同的业务响应
              websocketonmessage: function (e) {
                console.log("websocket收到用户发送的消息:"+e);
              },
              // 关闭连接时调用
              websocketclose: function (e) {
                console.log("connection closed (" + e.code + ")");
              },
              // getonMessage: function(){
              //   this.$axios({
              //     url:'api/websocket/onMessage',
              //     method: 'get',
              //     params:{msg:this.onMessage}
              //   }).then(res=>{
              //     console.log(res)
              //   })
              // }
              // http://localhost:8090/api/websocket/sendInfo?msg=12121

              // getonMessage: function(){
              //   this.$axios({
              //     url:'api/websocket/onMessage/'+this.onMessage,
              //     method: 'get'
              //   }).then(res=>{
              //     console.log(res)
              //   })
              // }

              // http://localhost:8090/api/websocket/onMessage/1212

              getonMessage: function(){
                this.$axios({
                  url:'api/websocket/onMessage/'+this.onMessage,
                  method: 'get'
                }).then(res=>{
                  console.log(res)
                })
              },
              getsendMessage: function(){
                this.$axios({
                  url:'api/websocket/sendMessage/'+this.sendMessage,
                  method: 'get'
                }).then(res=>{
                  console.log(res)
                })
              },
              getsendInfo: function(){
                this.$axios({
                  url:'api/websocket/sendInfo/'+this.sendInfo,
                  method: 'get'
                }).then(res=>{
                  console.log(res)
                })
              }
        }
    }
</script>
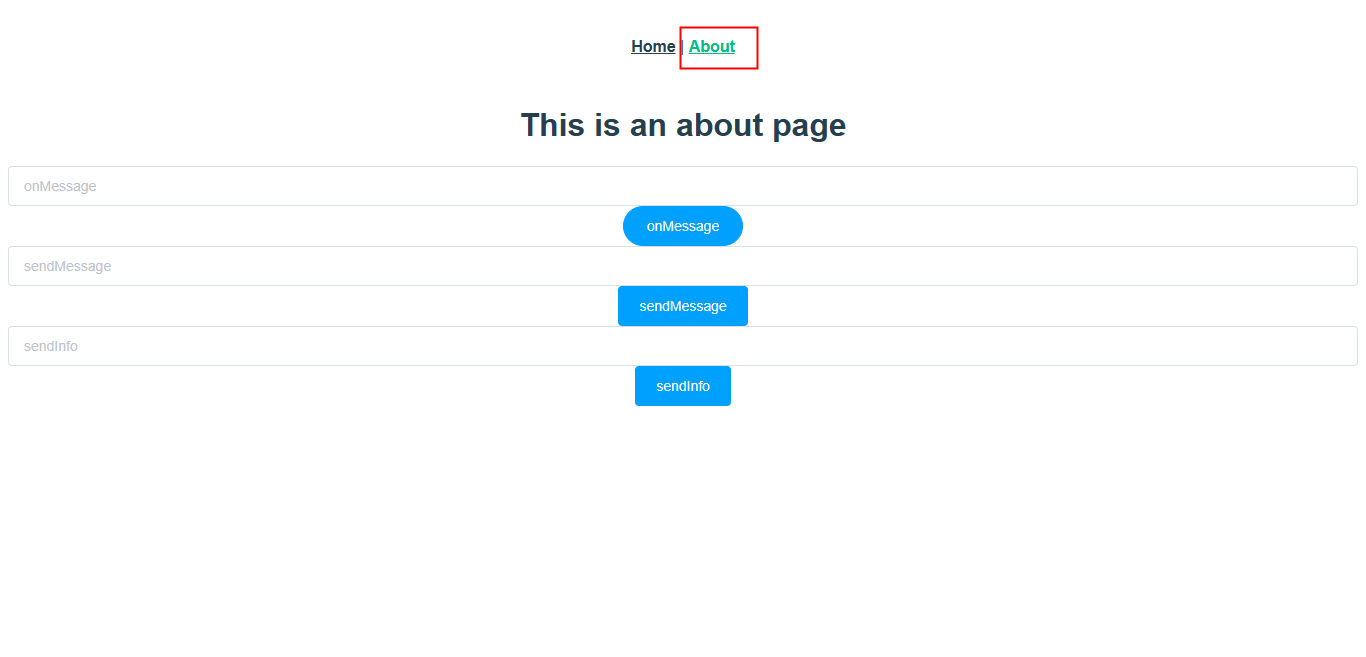
调试
启动项目后,打开页面就是这样的
我们再来看一下springboot的启动信息

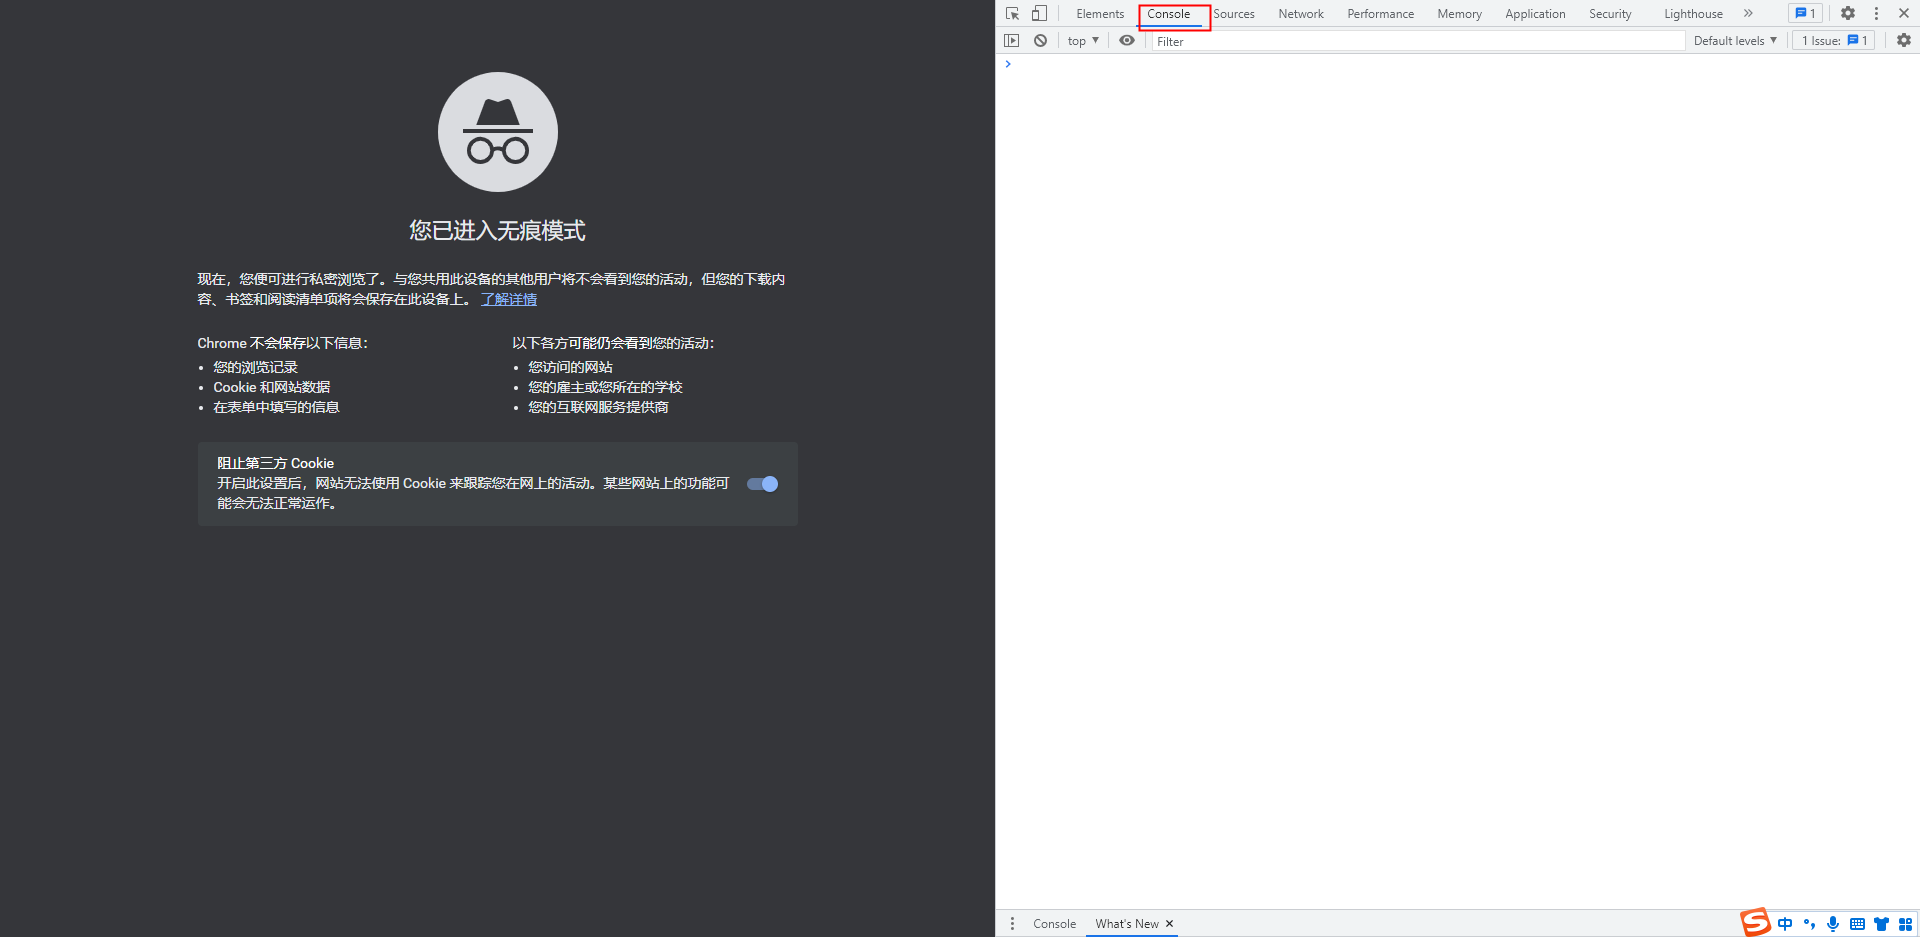
然后打开一个google浏览器页面,再打开一个google浏览器无痕模式的页面,分别打开调试
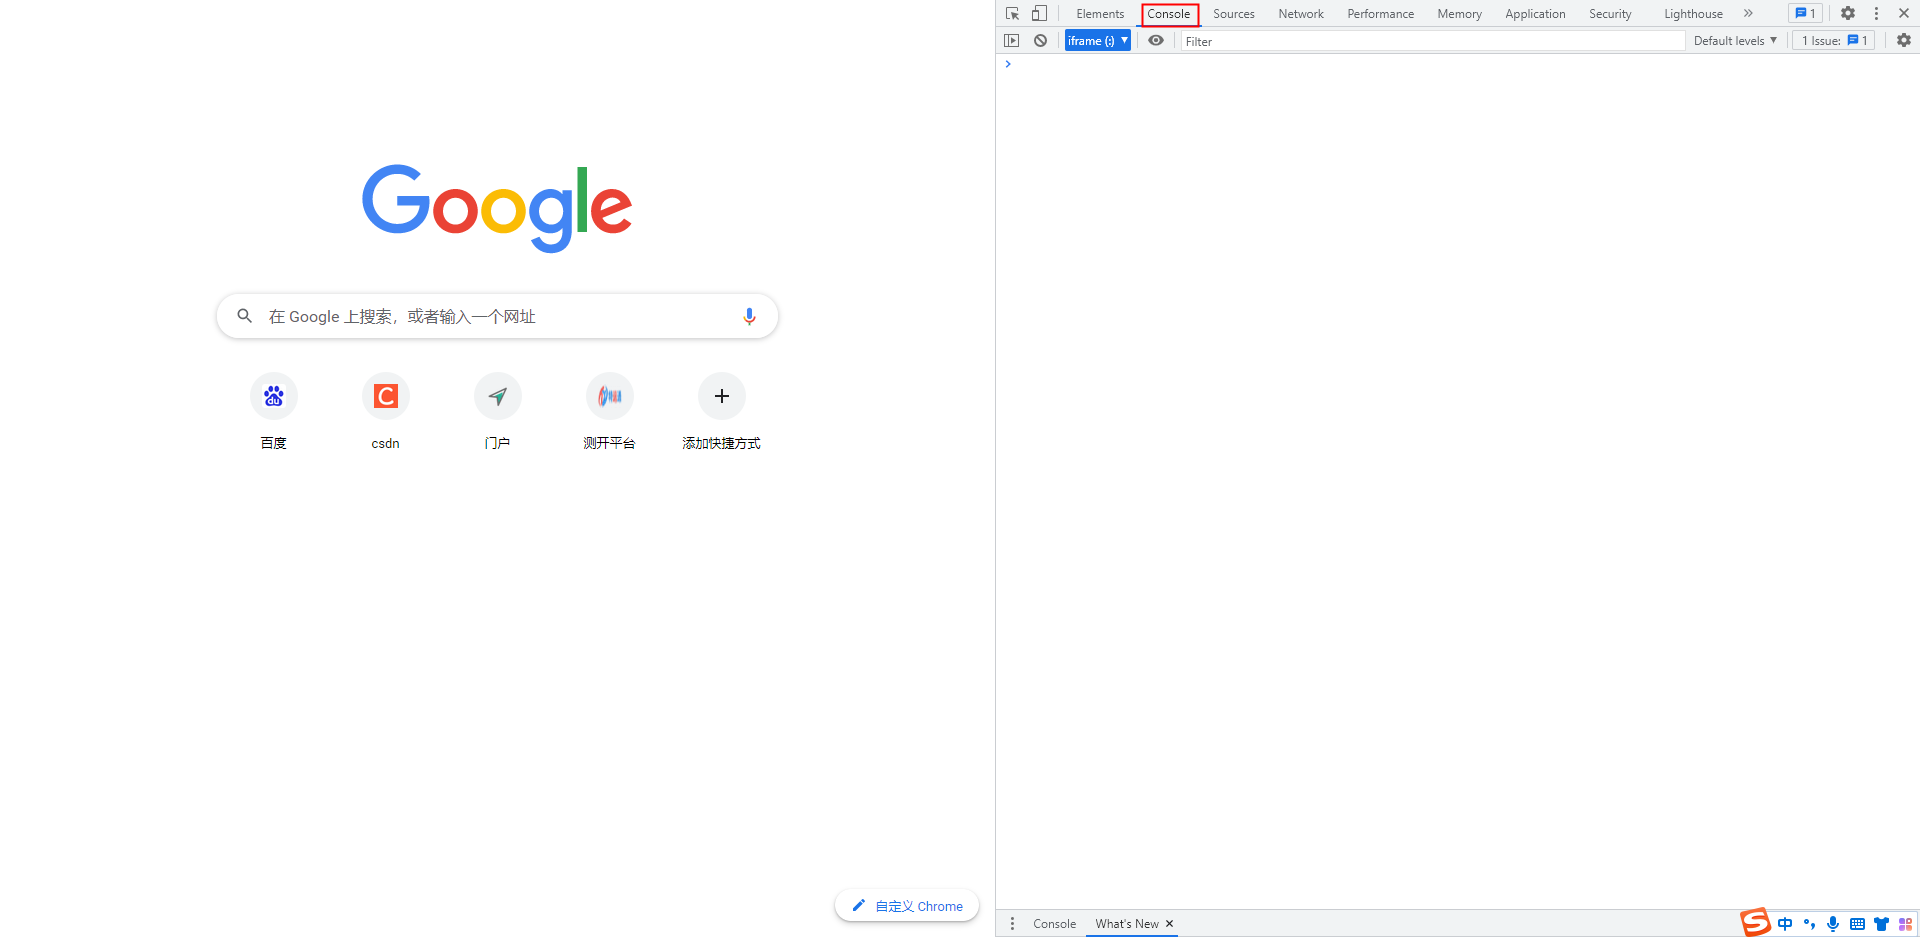
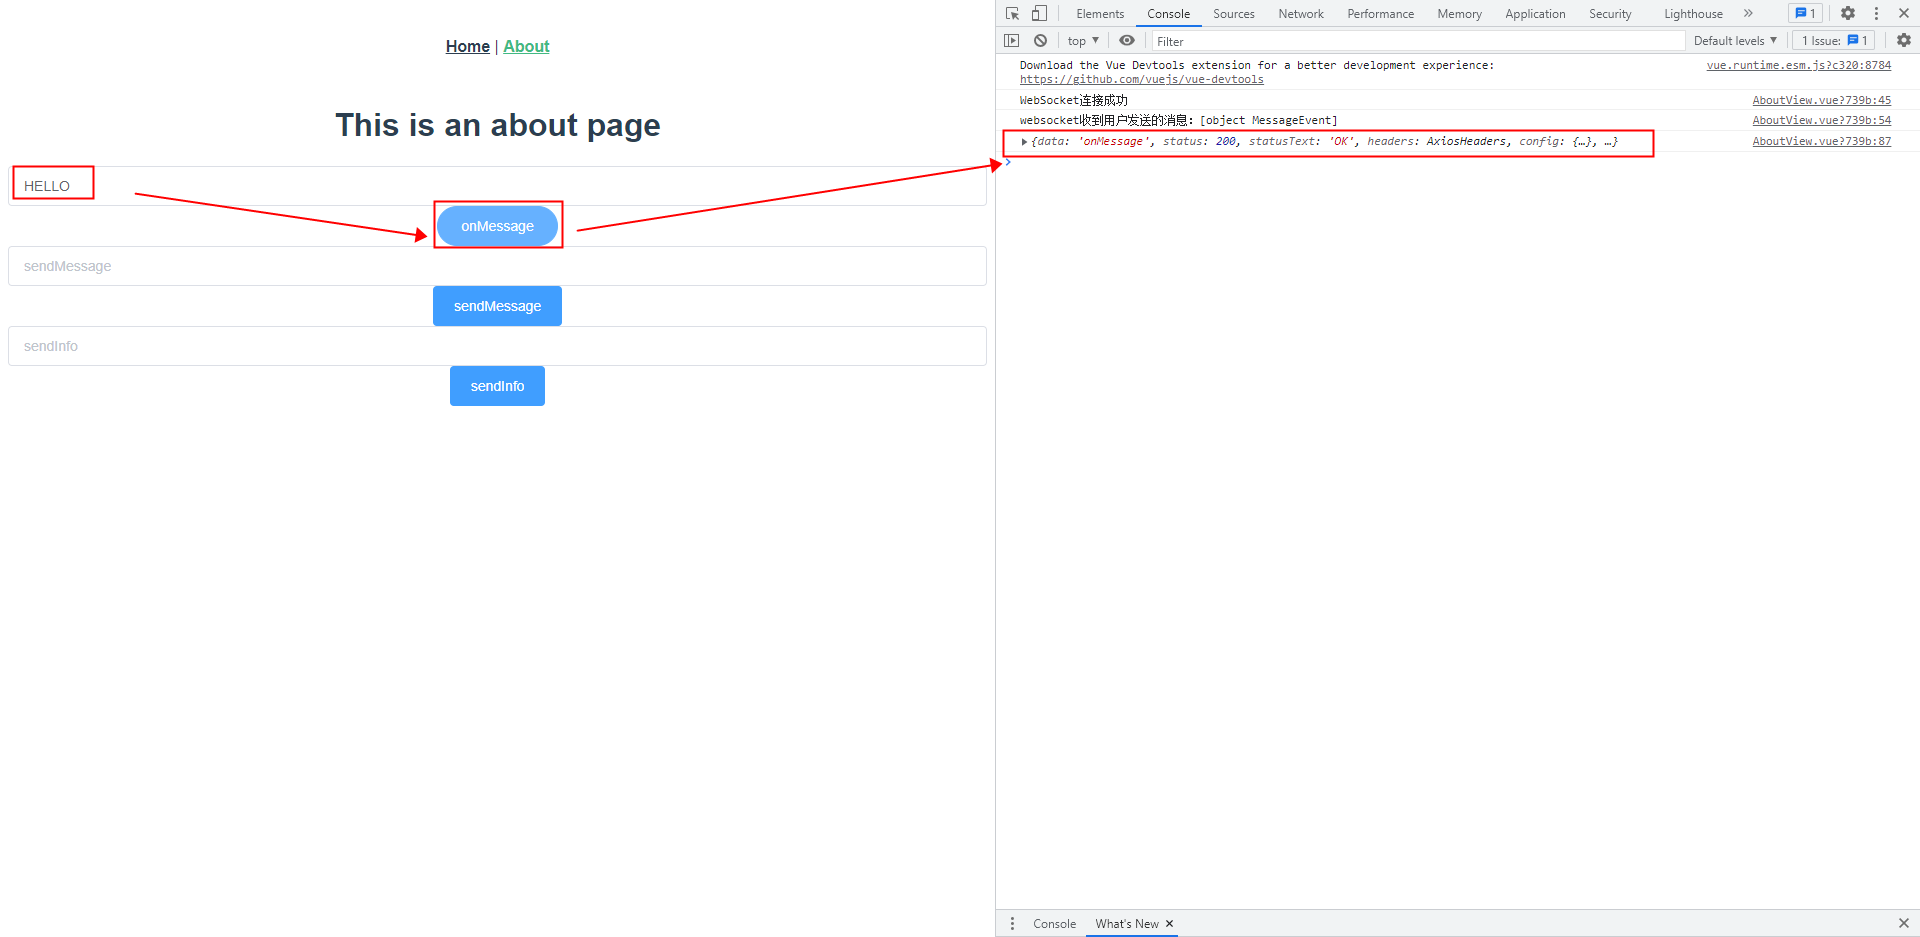
首先,第一个非无痕模式的浏览器,输入我们vue的前端部署的连接,点击About连接,分别看一下springboot和前端发生了什么
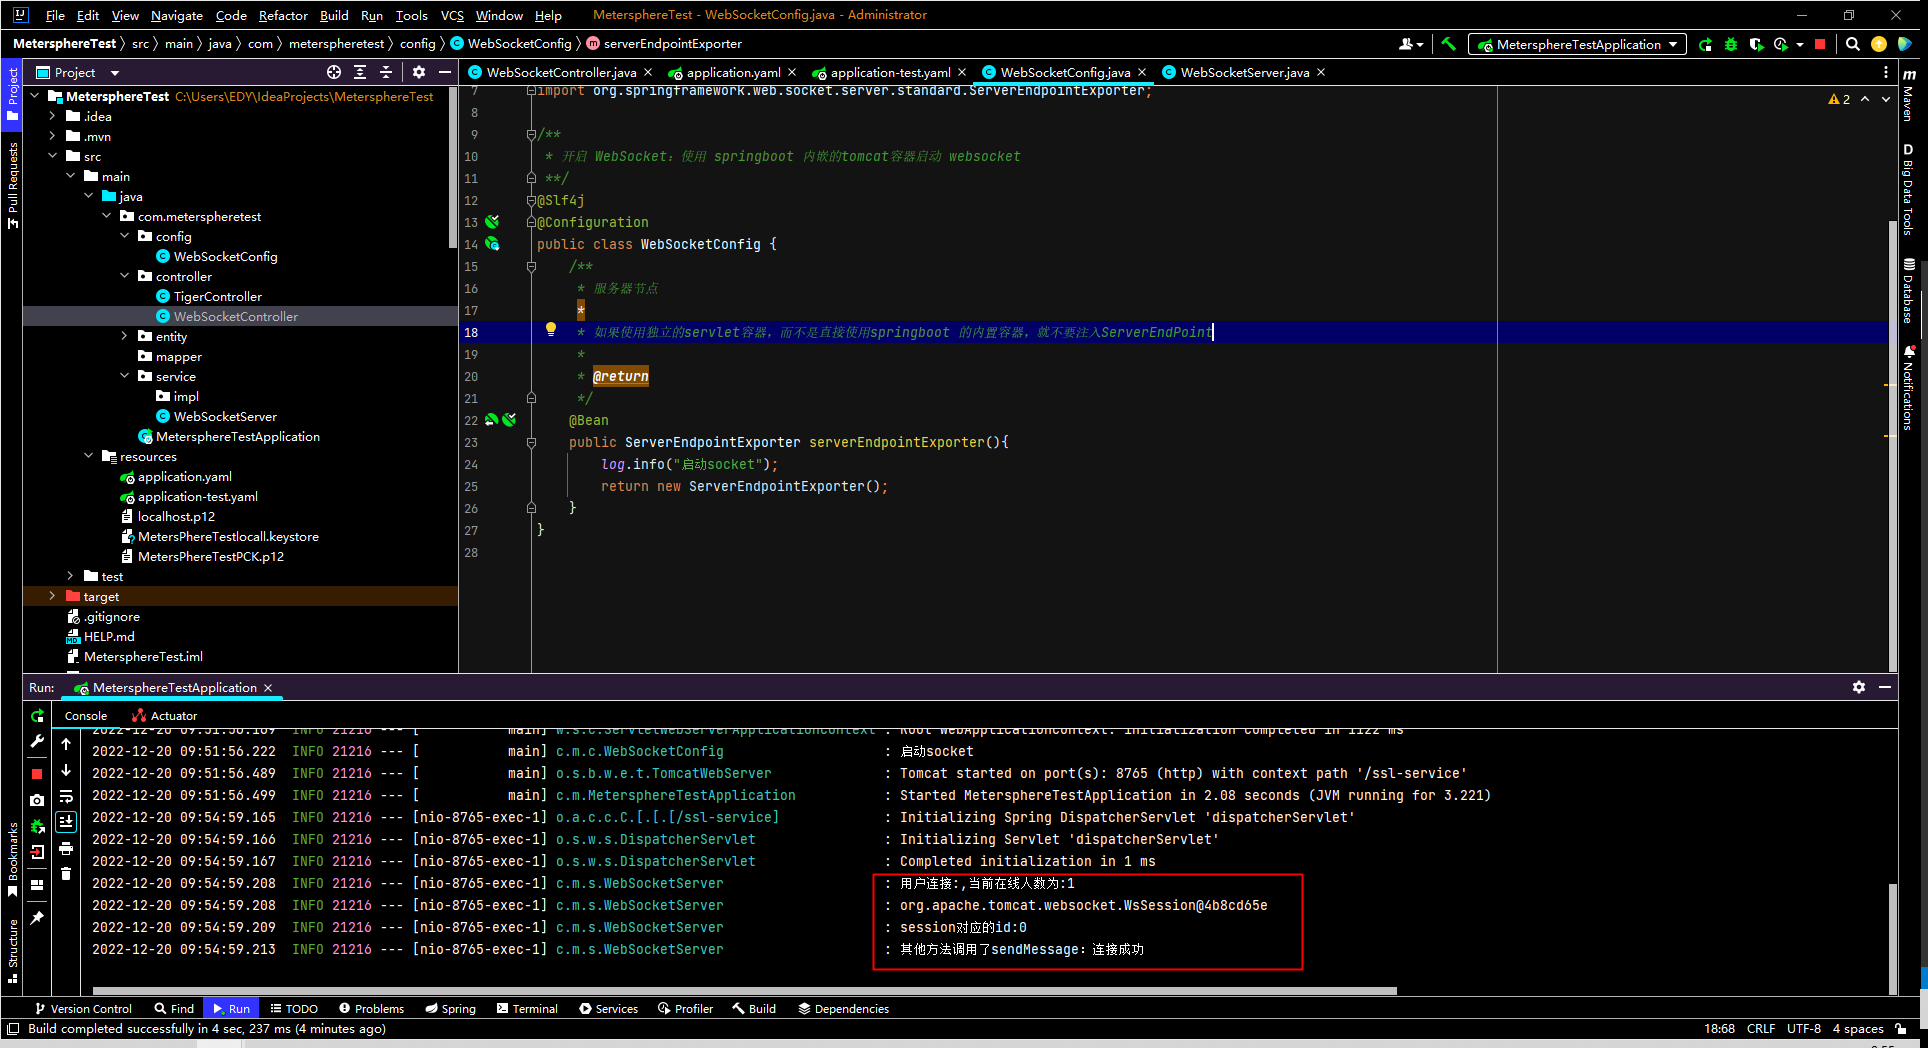
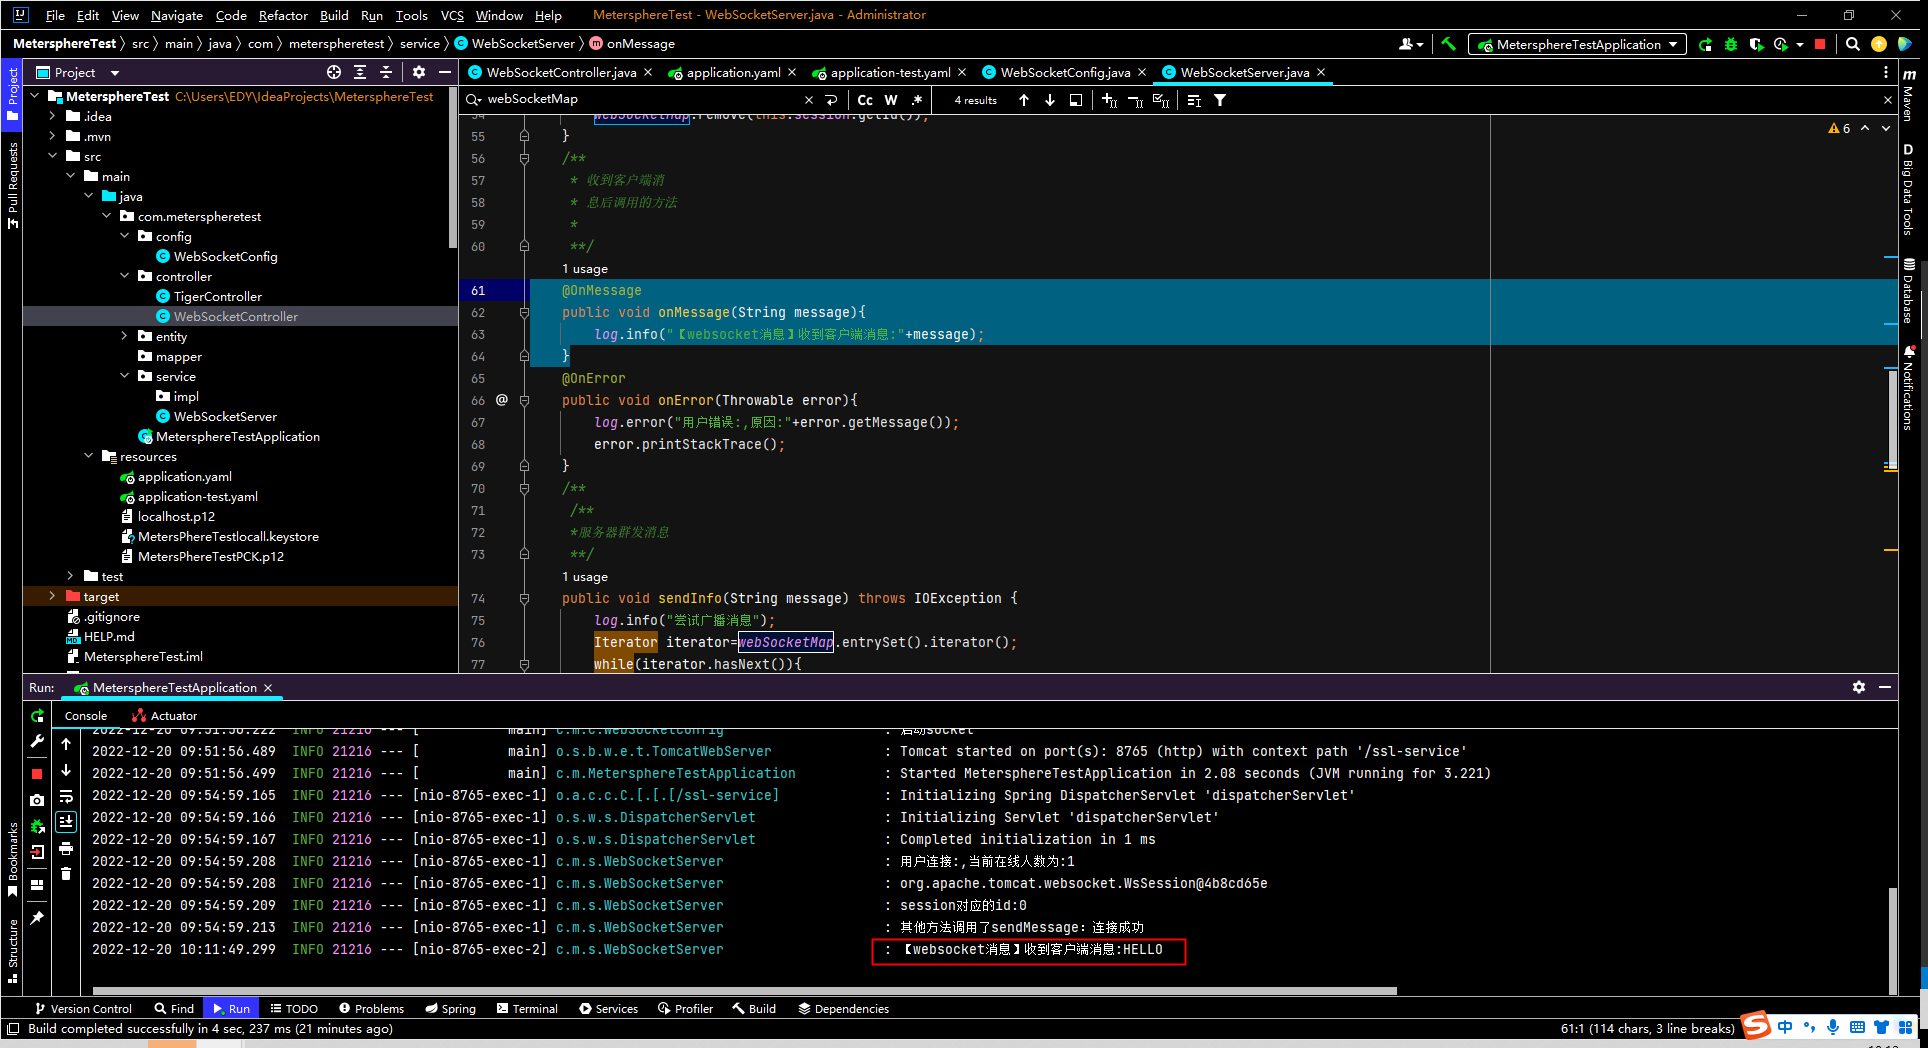
发现分别调用了,原因是onOpen方法内调用了sendMessage
    @OnOpen
    public void onOpen(Session session) throws IOException {
//        用户初始是0个,所以要先+1
        addOnlineCount();
        this.session=session;
        log.info("用户连接:,当前在线人数为:" + getOnlineCount());
        log.info(this.session.toString());
        log.info("session对应的id:"+this.session.getId());
//        这个id获取出来是string类型的,所以ConcurrentHashMap<String,WebSocketServer>
        webSocketMap.put(this.session.getId(),this);
        sendMessage("连接成功");
    }
和
    public void sendMessage(String message) throws IOException {
//            this.session.getBasicRemote().sendText(message);
        this.session.getBasicRemote().sendText(message);
        log.info("其他方法调用了sendMessage:"+message);

    }
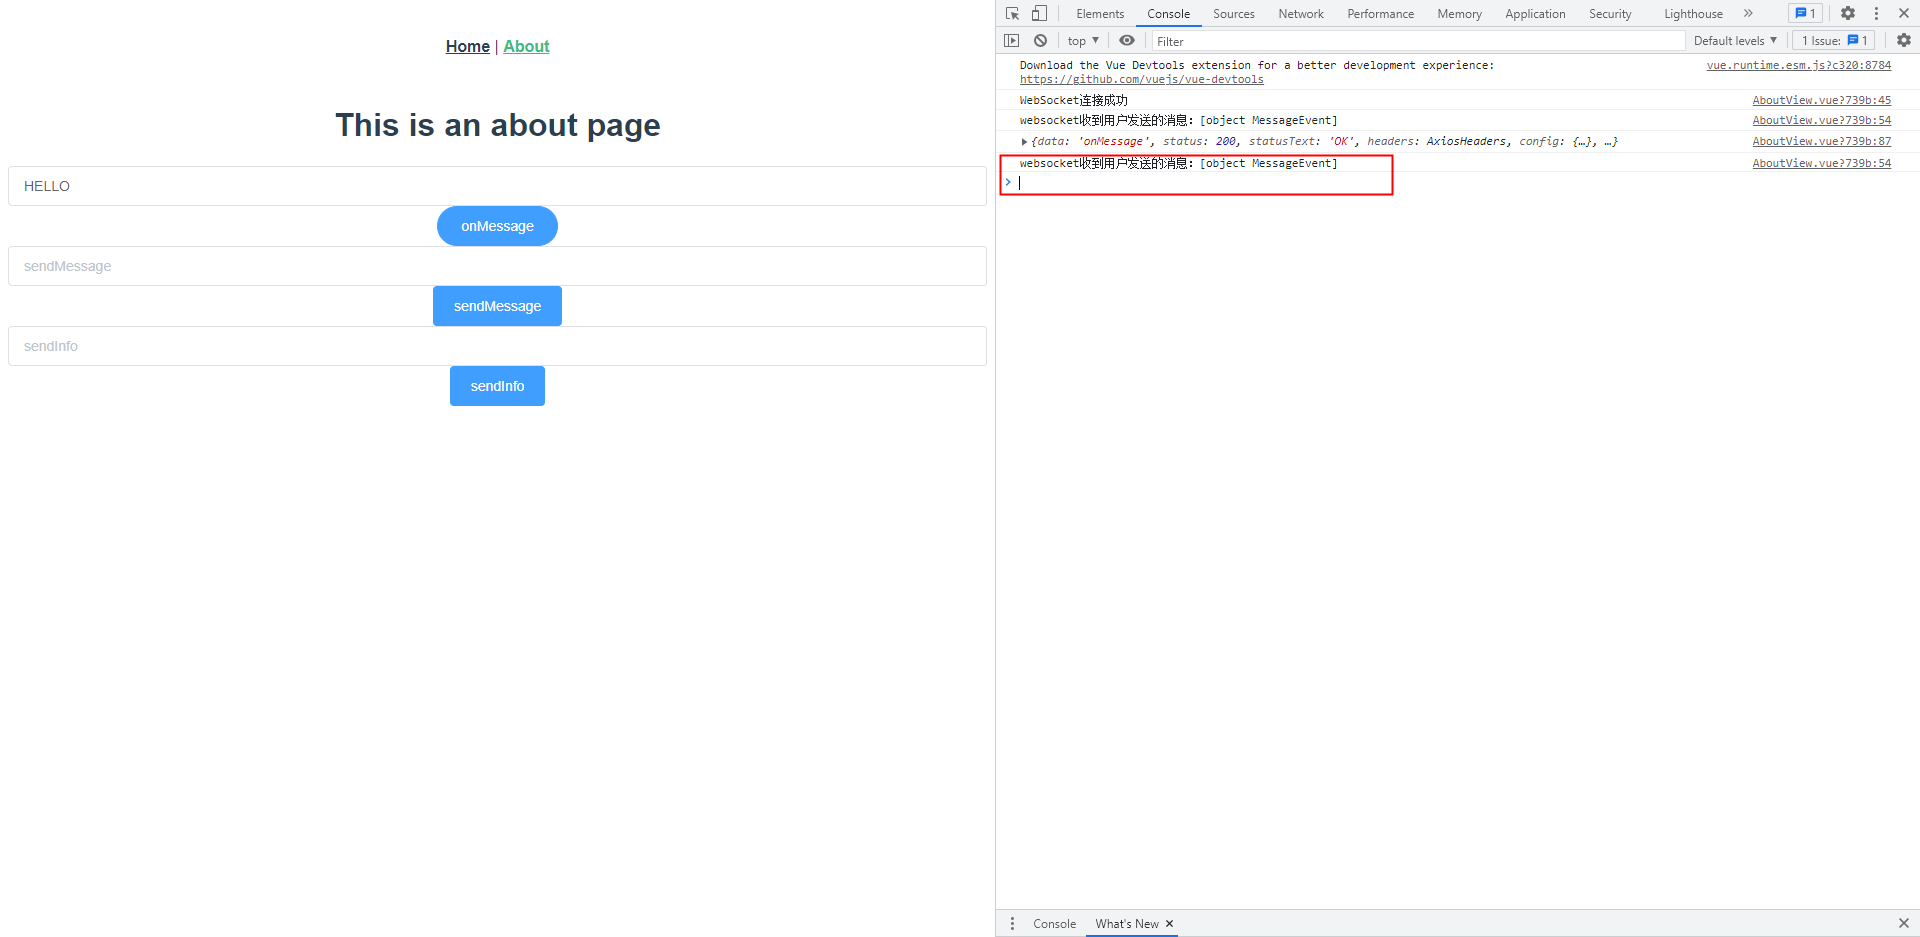
我们再来看一下前端发生了什么,发现调用了onopen和onmessage,调用onmessage是因为在springboot的onOpen中调用了sendMessage,服务器主动发送了数据向客户端
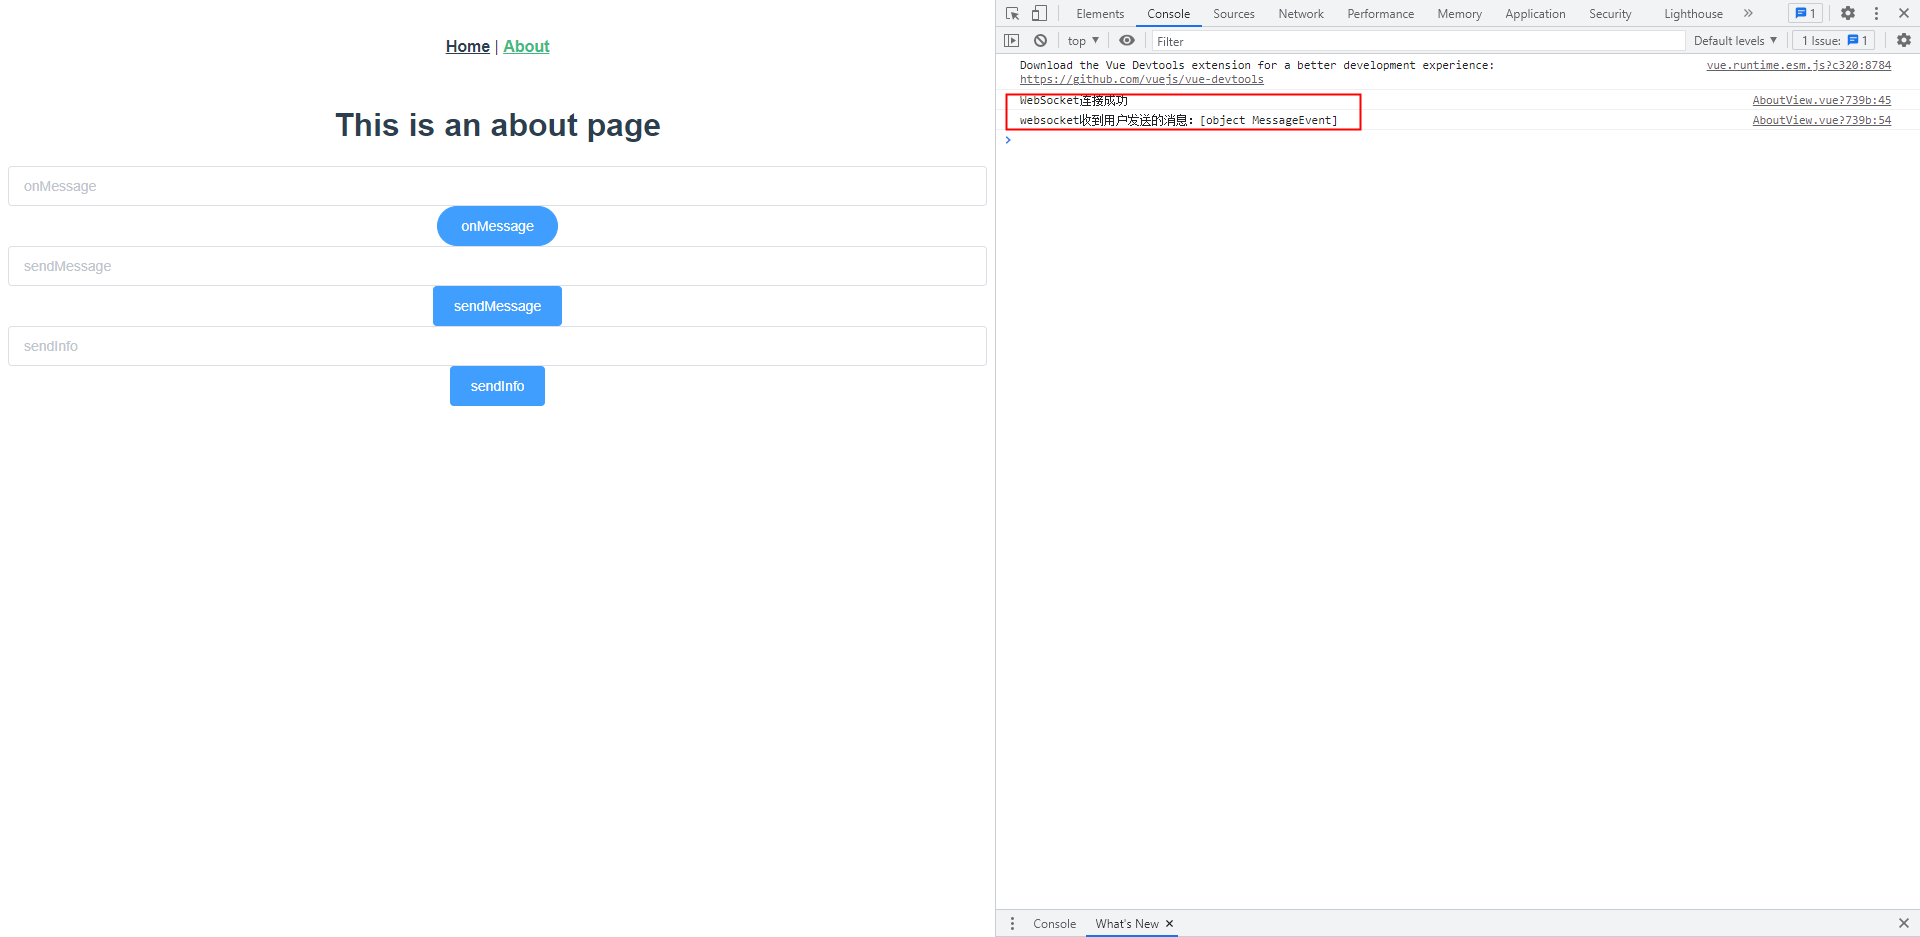
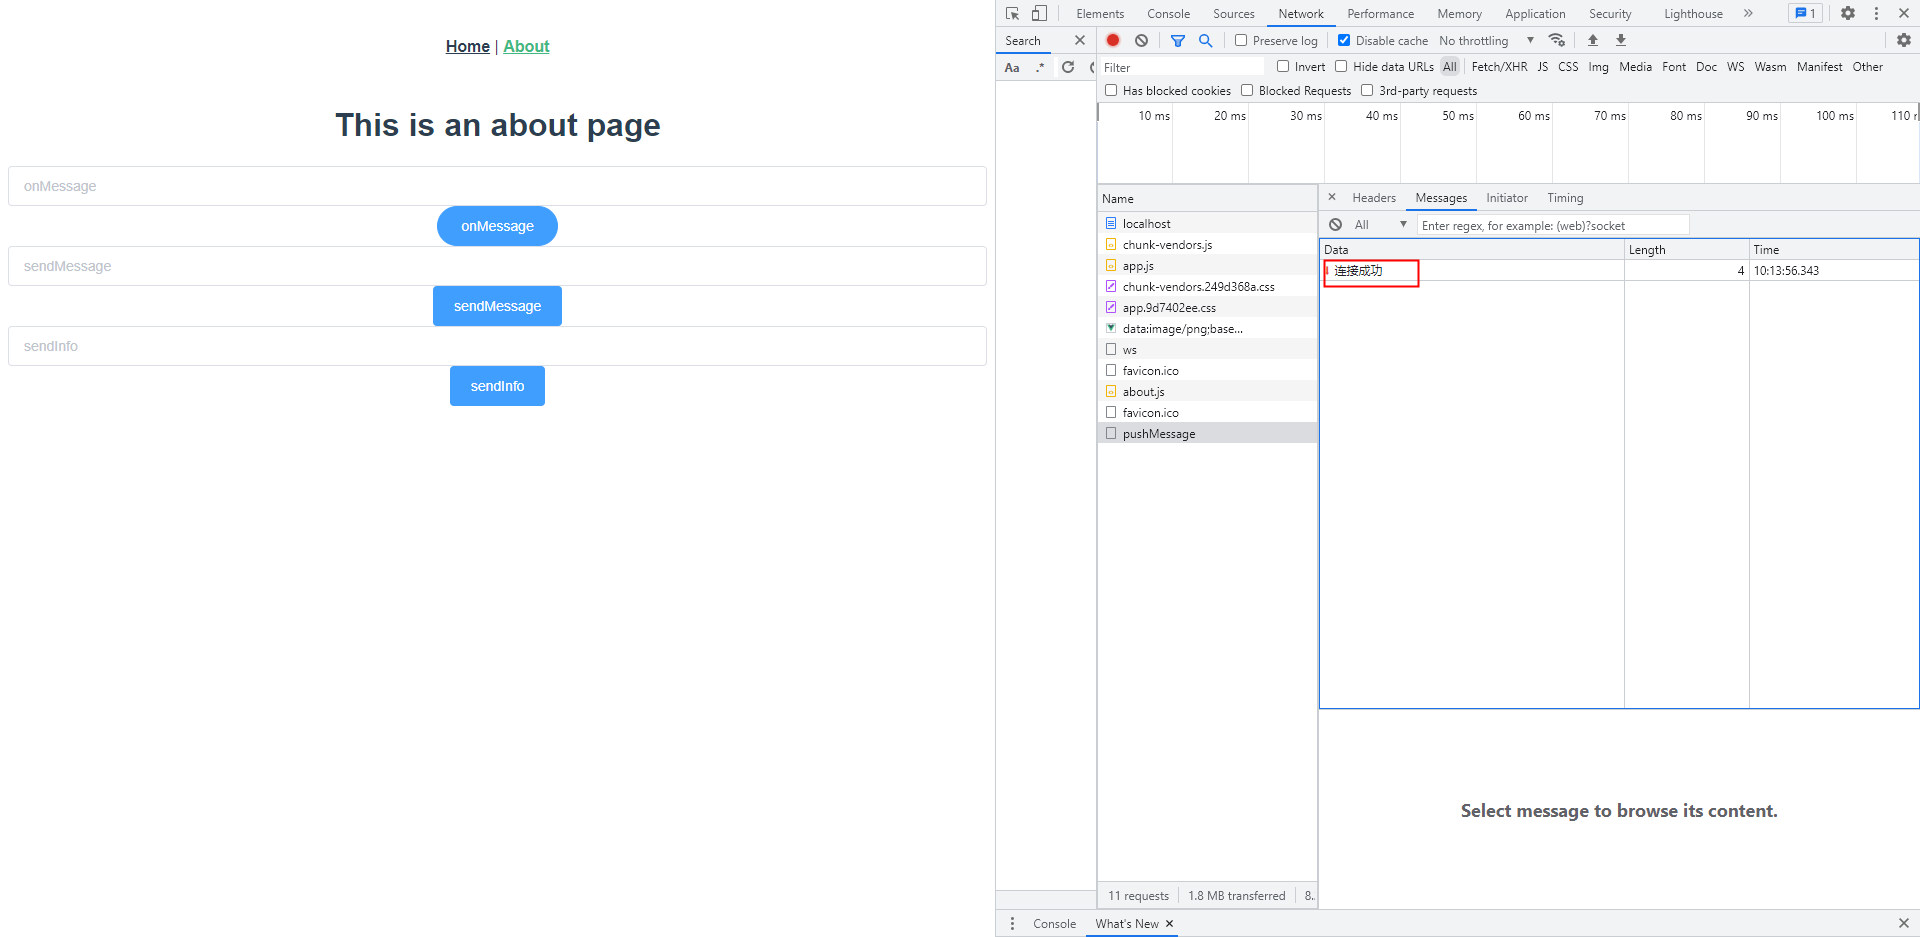
为了验证,我们来看一下网络请求
首先映入眼帘的是协议切换
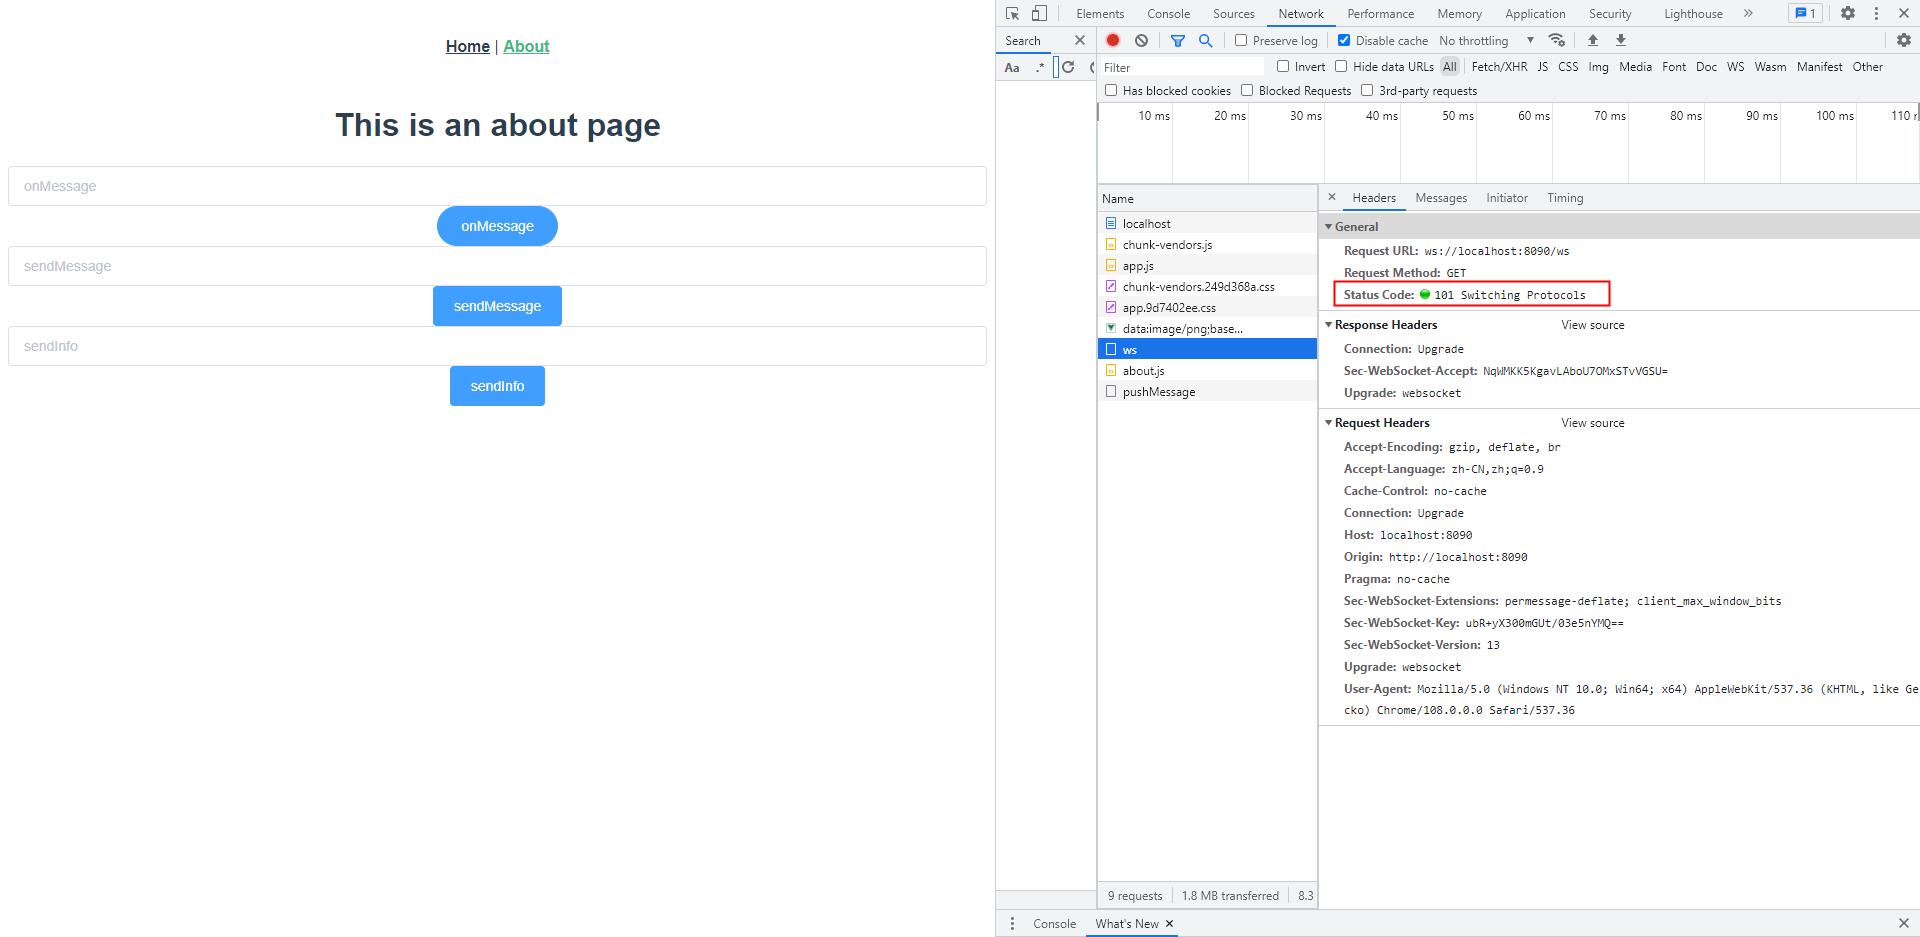
然后就是我们的网络请求了
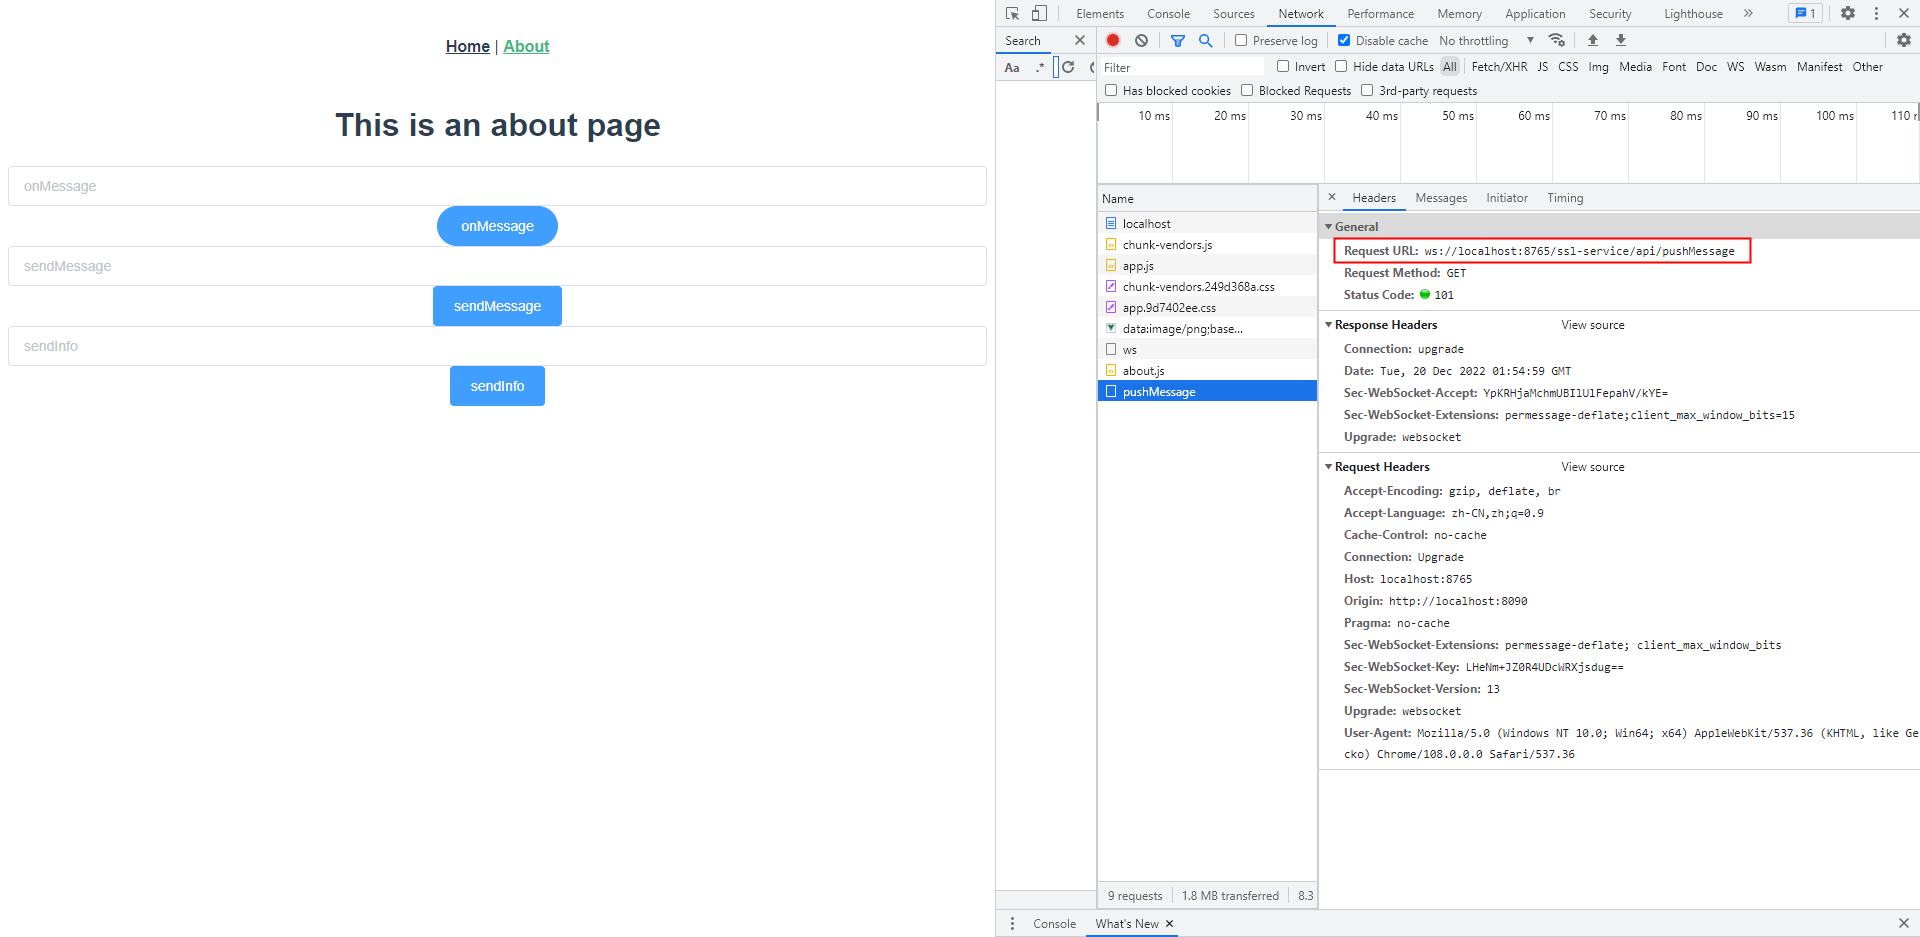
发送的内容是

对应的后端是
    @OnOpen
    public void onOpen(Session session) throws IOException {
//        用户初始是0个,所以要先+1
        addOnlineCount();
        this.session=session;
        log.info("用户连接:,当前在线人数为:" + getOnlineCount());
        log.info(this.session.toString());
        log.info("session对应的id:"+this.session.getId());
//        这个id获取出来是string类型的,所以ConcurrentHashMap<String,WebSocketServer>
        webSocketMap.put(this.session.getId(),this);
        sendMessage("连接成功");
    }
接下来我们看一下请求onMessage接口,后面真正调用的就是这个方法,这个没什么意义
    @OnMessage
    public void onMessage(String message){
        log.info("【websocket消息】收到客户端消息:"+message);
    }
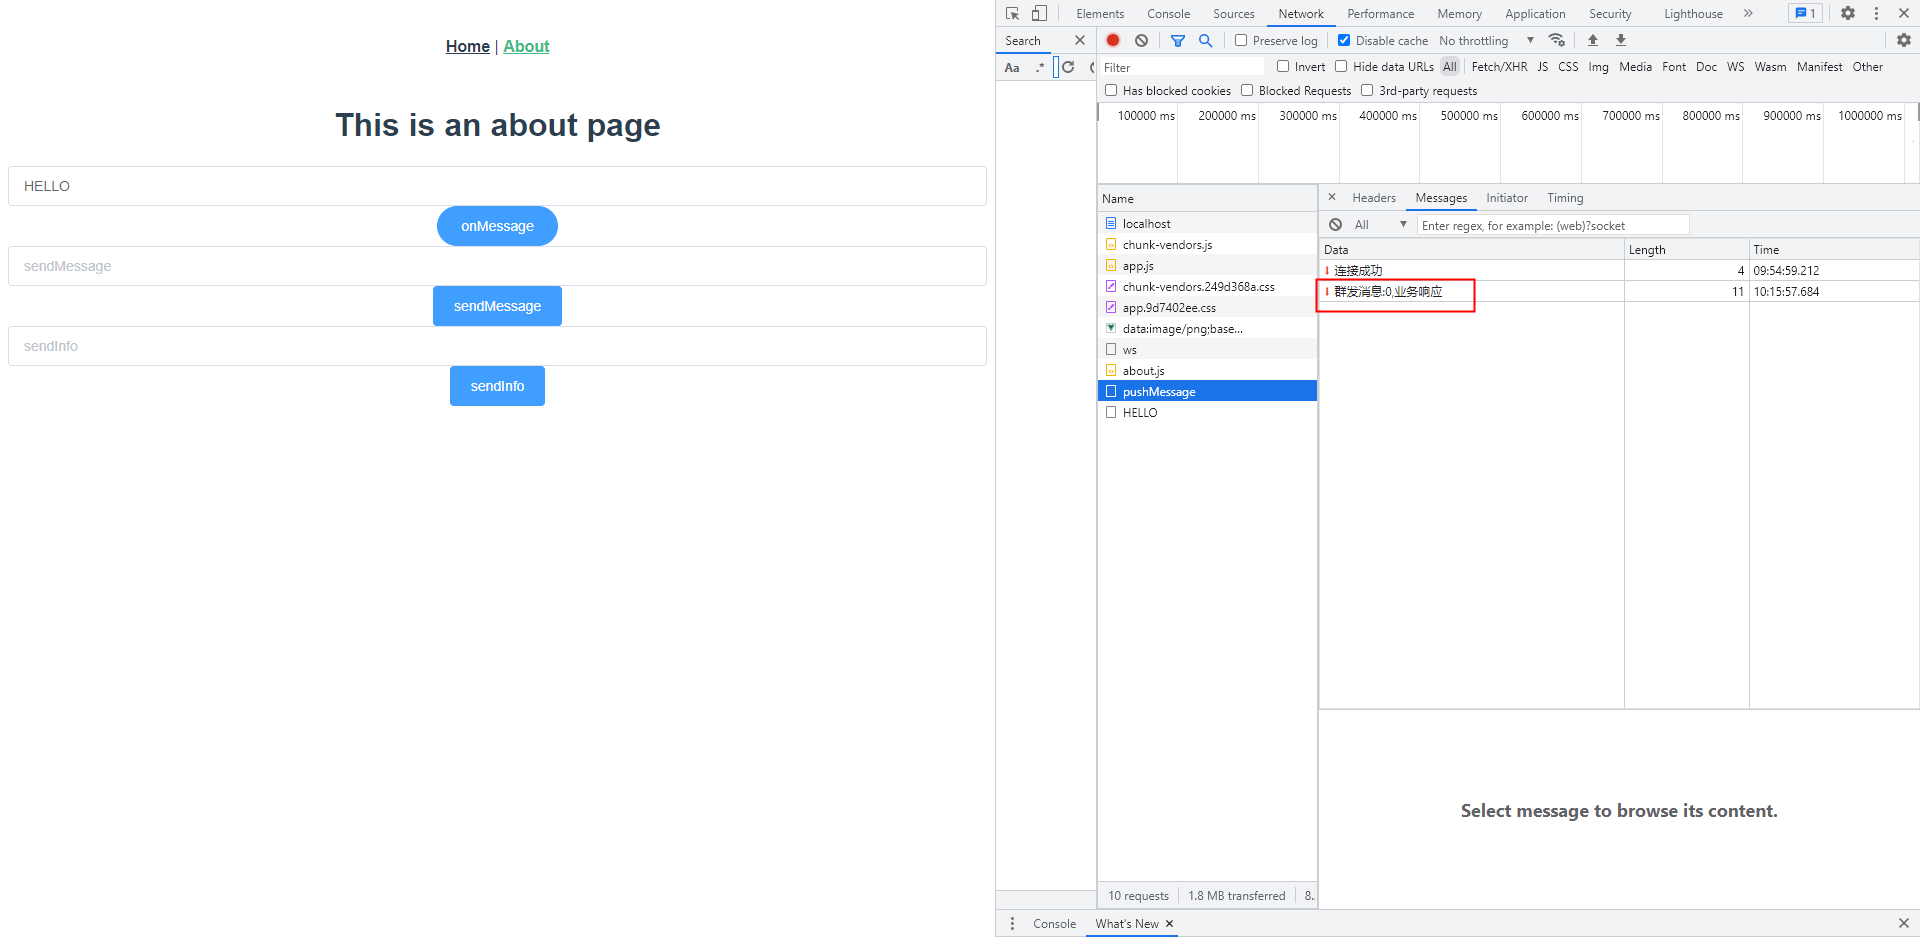
真正有意义的是,在无痕模式再打开一个页面,和上面那个页面一样

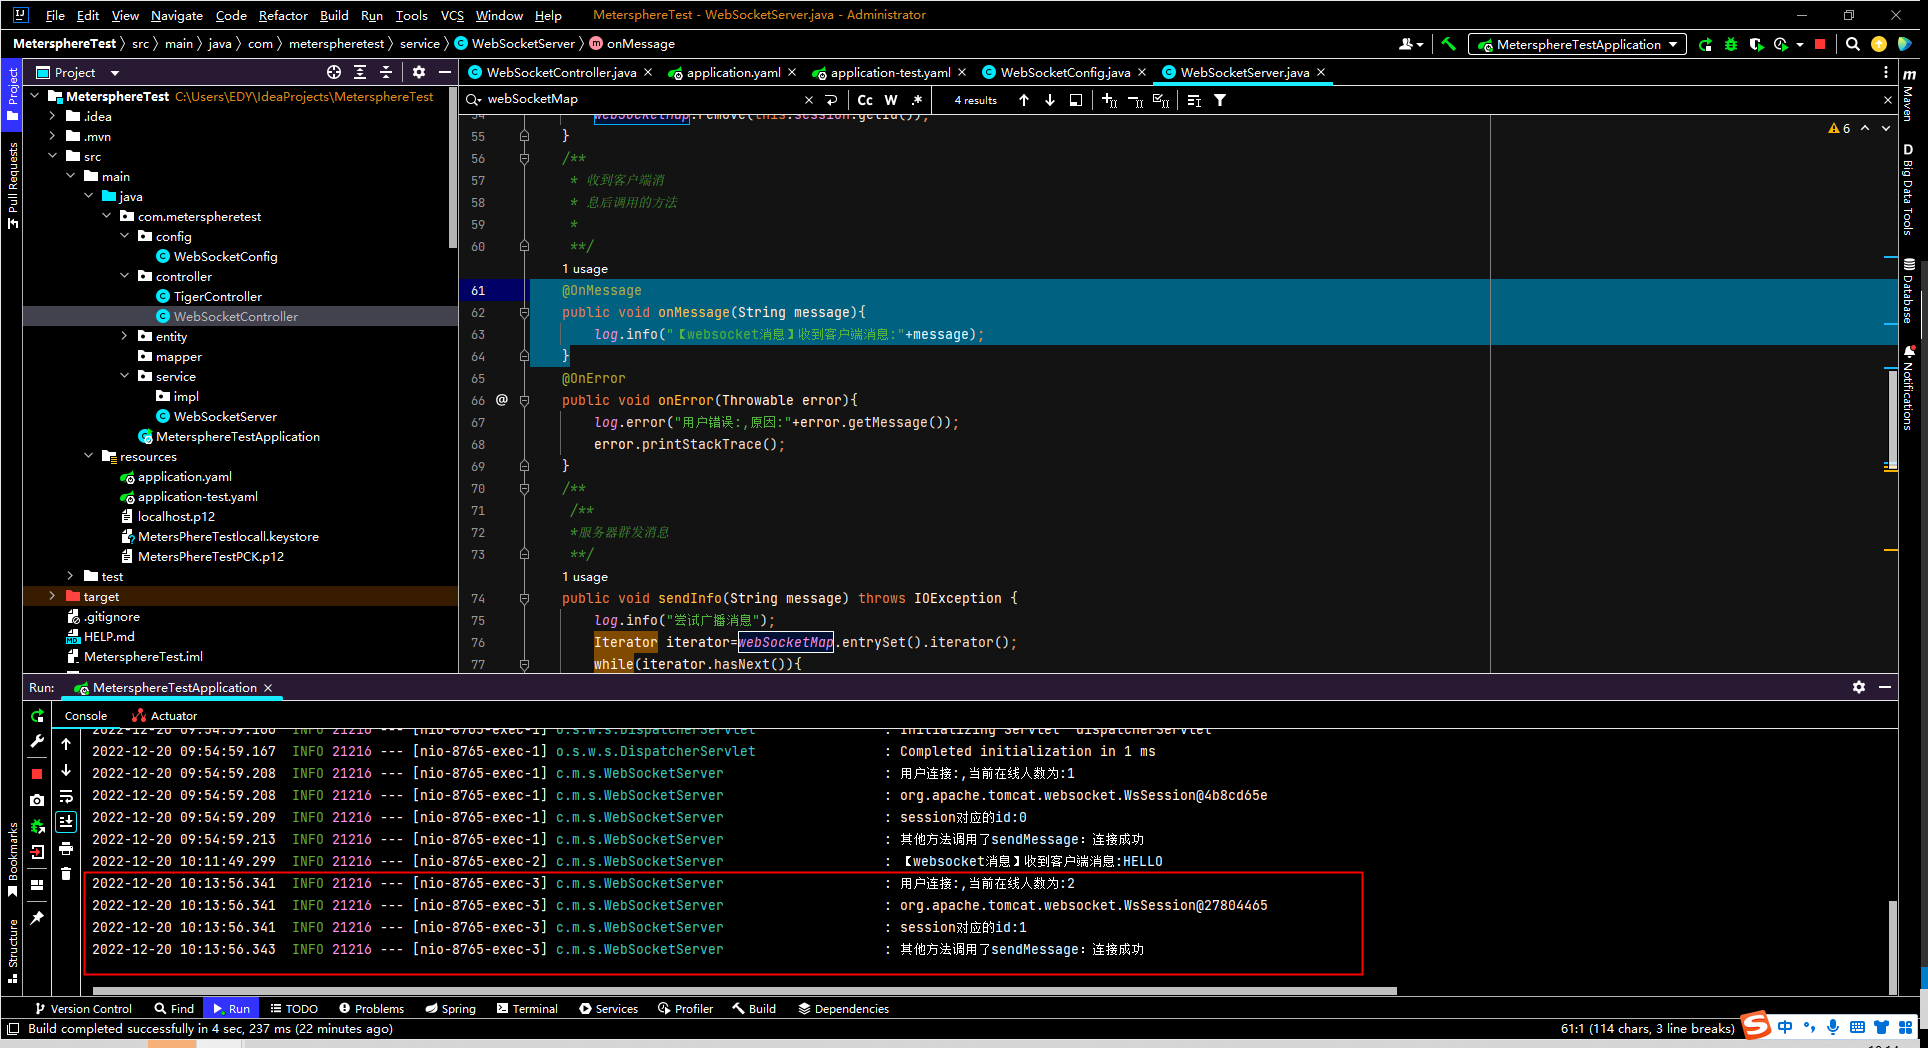
然后我们调用sendinfo,随便两个页面任何一个都可以,我这里选择无痕模式的页面

还是原来的连接,新增了一条数据
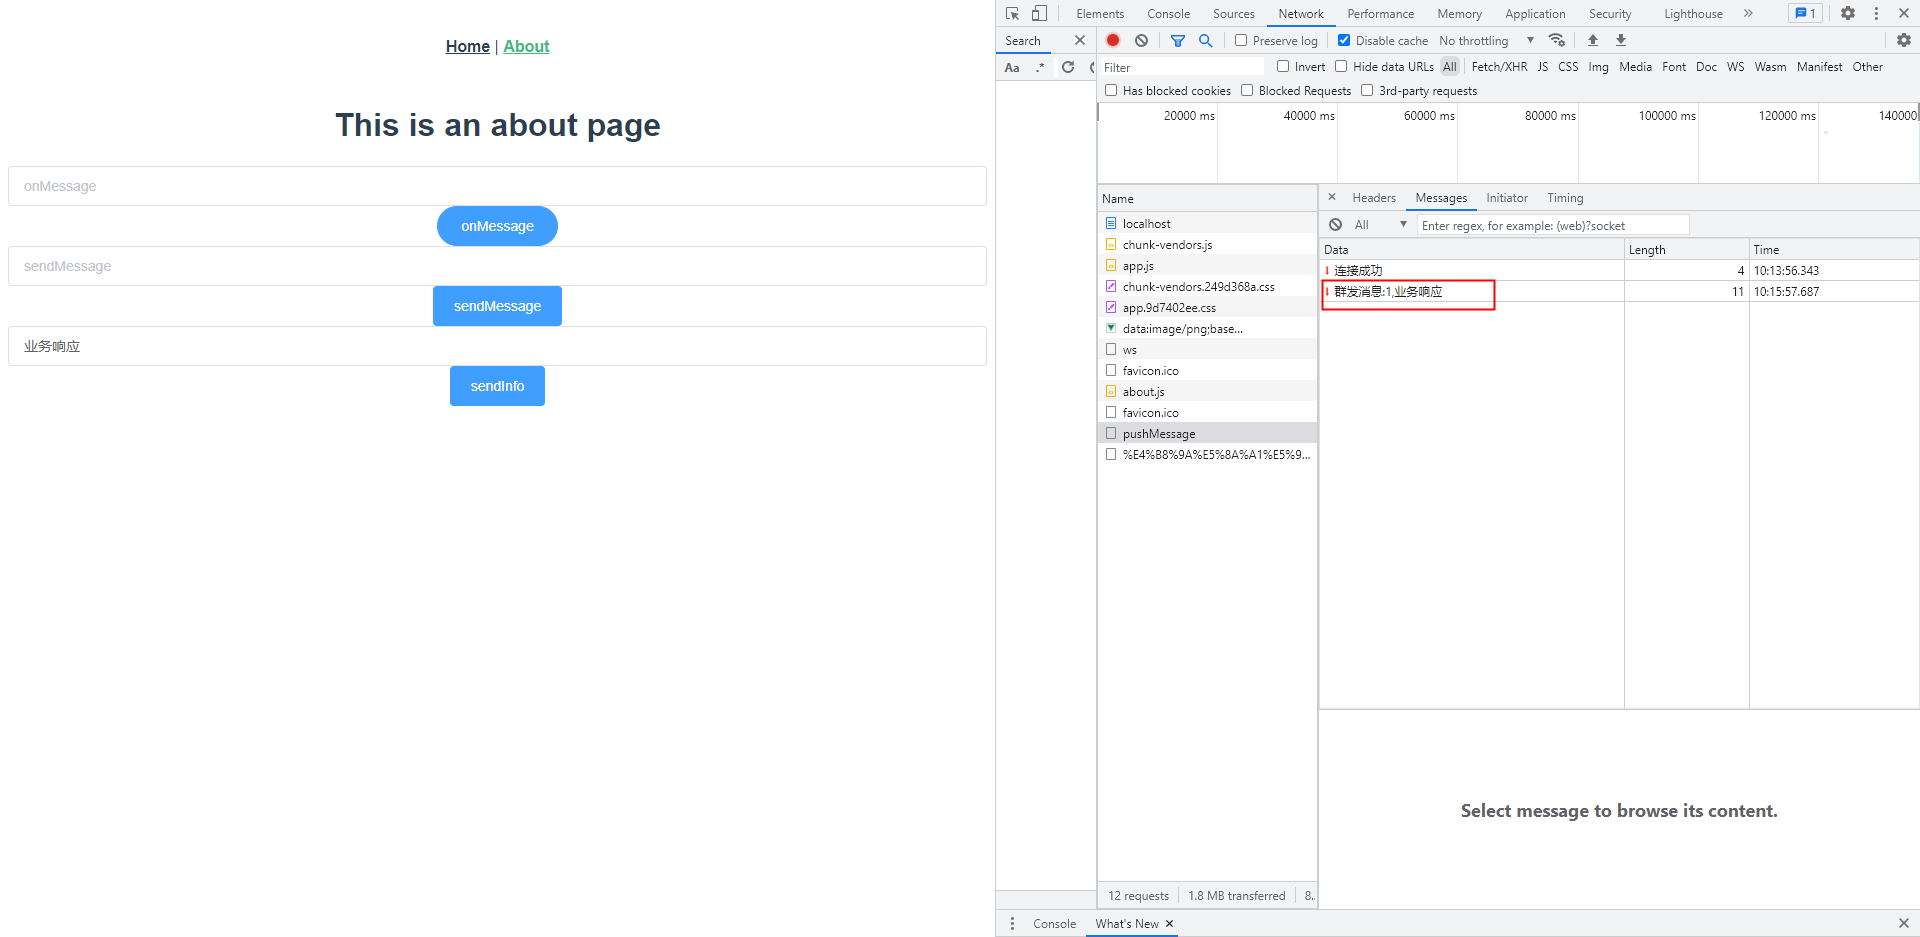
数据的内容是
    public void sendInfo(String message) throws IOException {
        log.info("尝试广播消息");
        Iterator iterator=webSocketMap.entrySet().iterator();
        while(iterator.hasNext()){
            Map.Entry entry=(Map.Entry)iterator.next();
            WebSocketServer webSocketServer=(WebSocketServer) entry.getValue();
            webSocketServer.sendMessage("群发消息:"+entry.getKey()+","+message);
        }
    }
我们再来看一下非无痕模式的页面
在原来的连接上,也新增了一条数据,说明群发成功了。实现了服务器主动向客户端发送请求的功能。
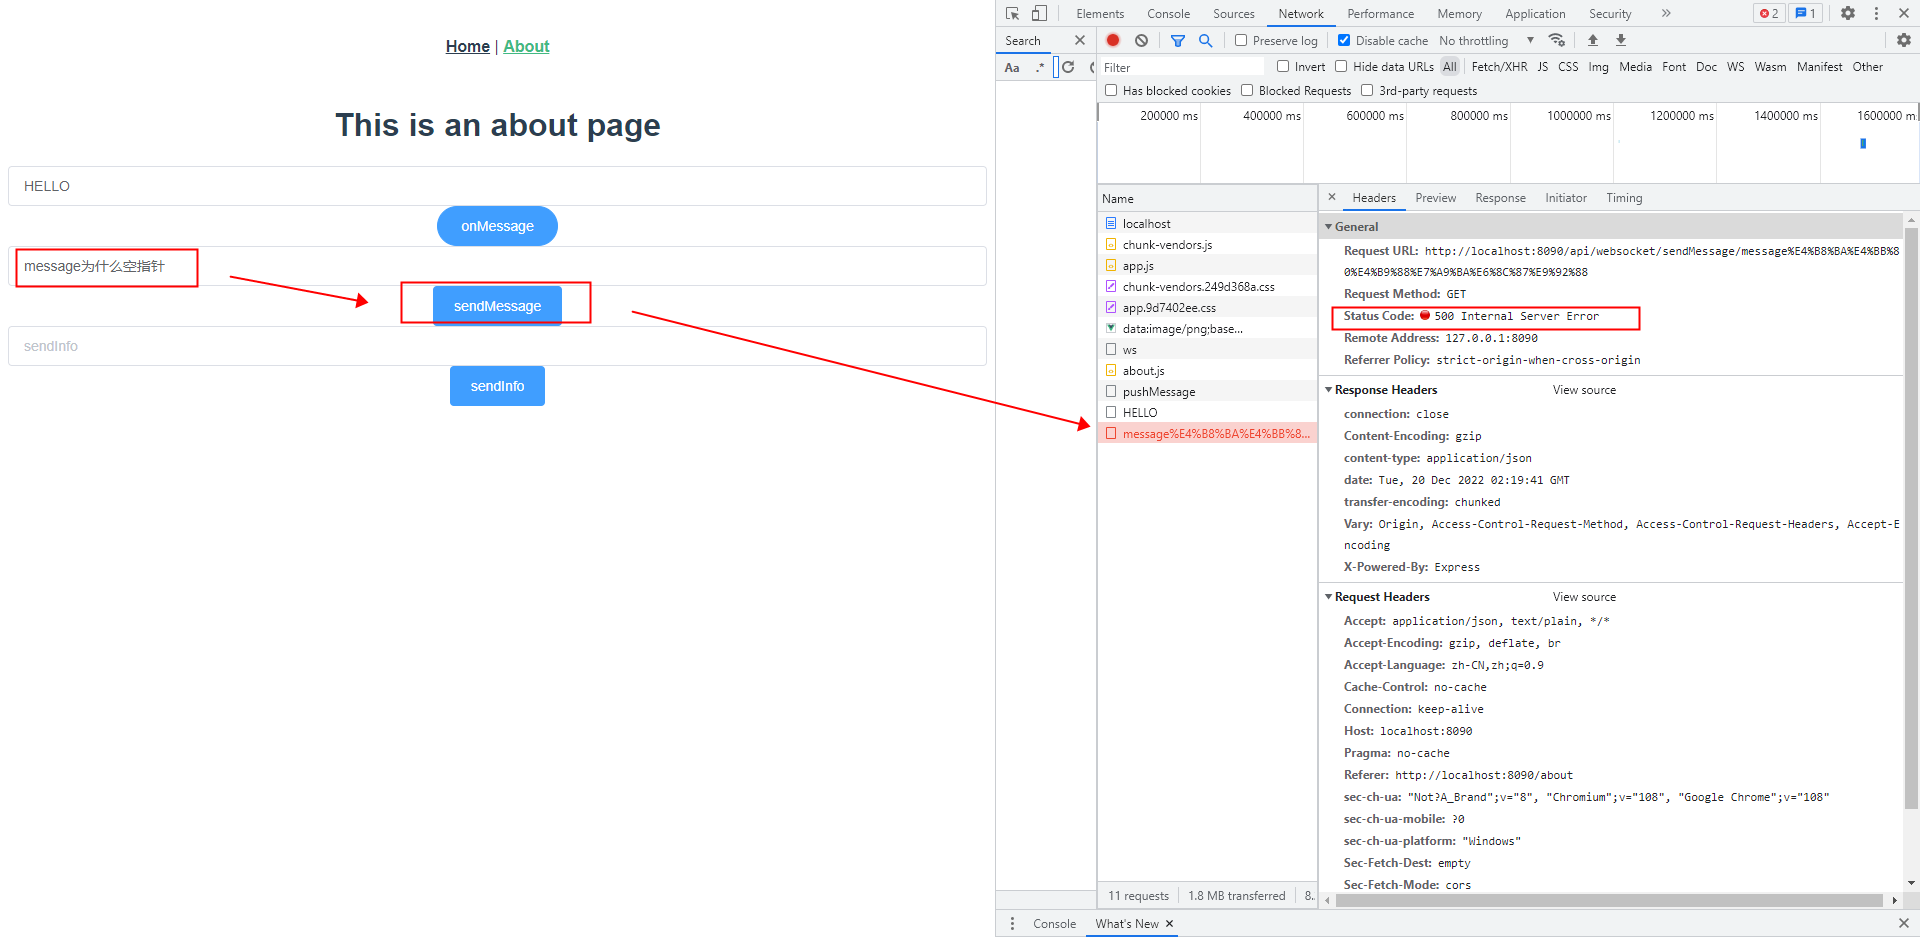
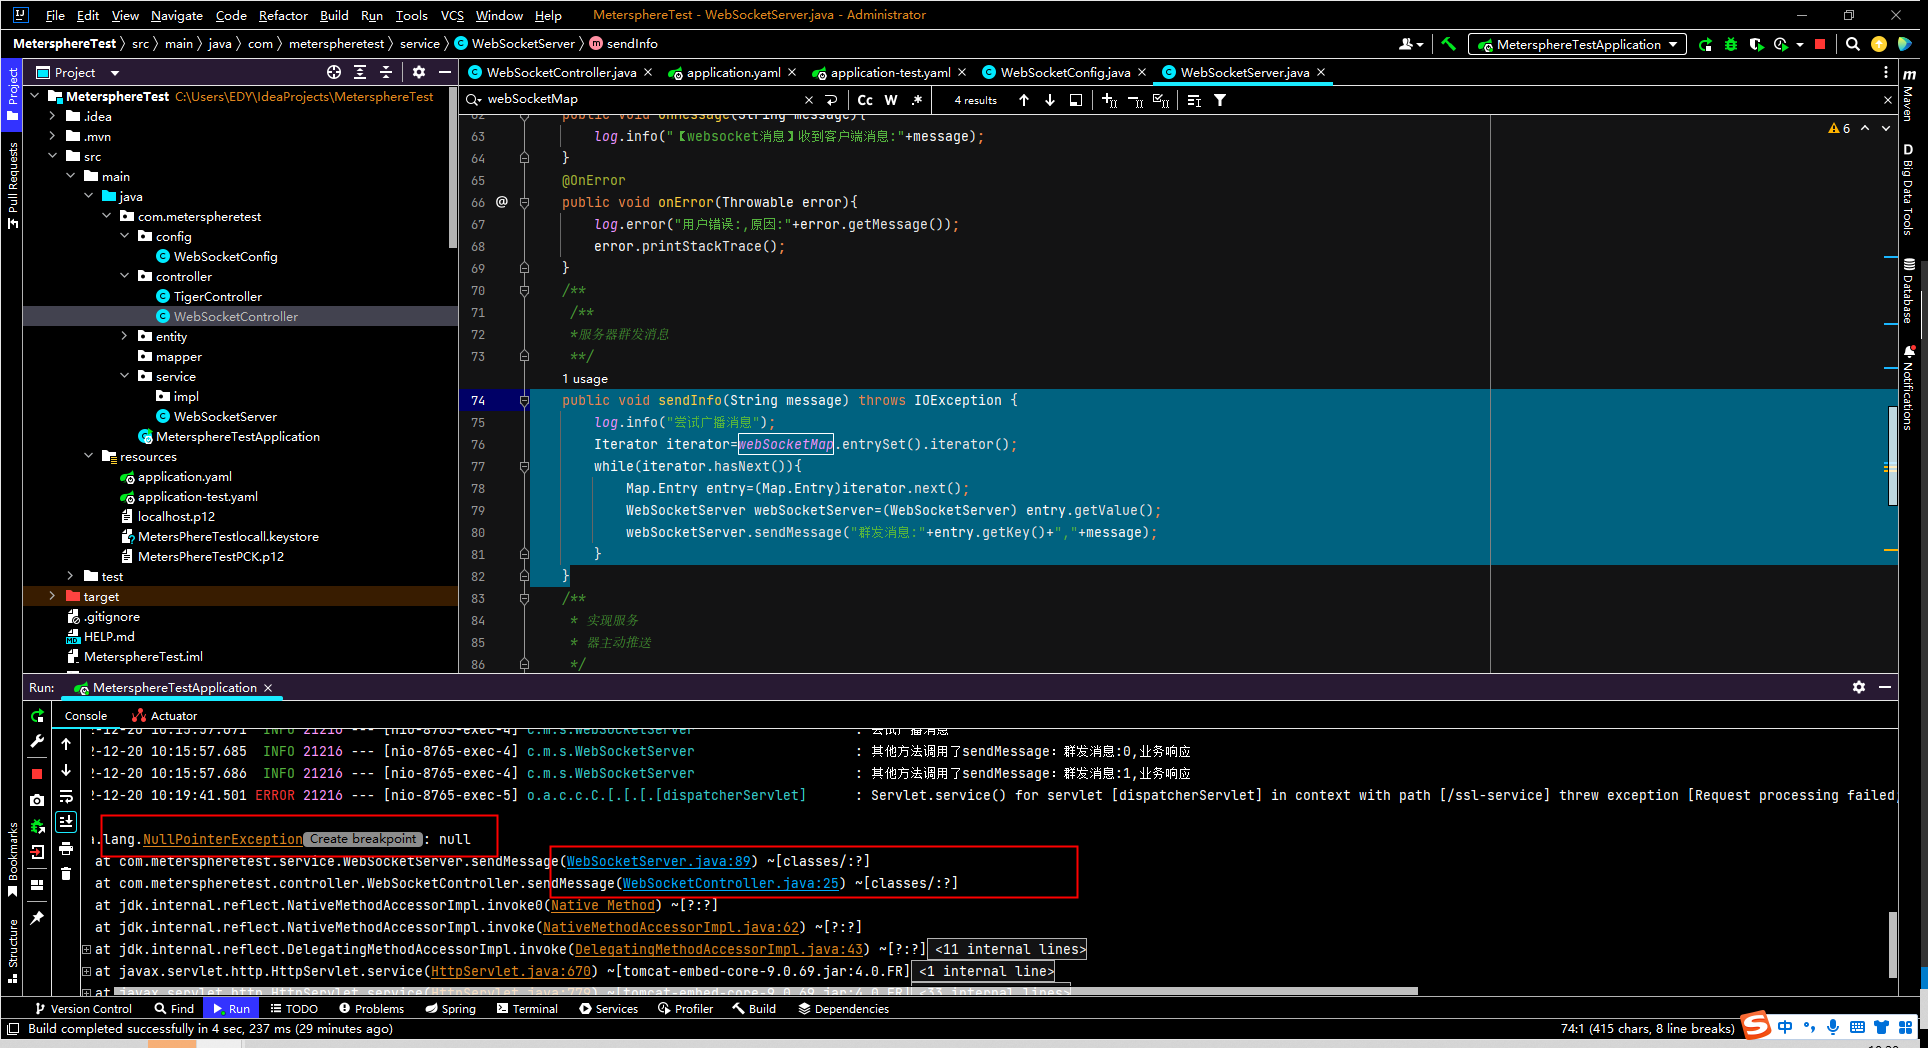
至于sendmessage为什么报空指针,不太清楚
在nginx下的使用
我的项目用的是http,是这么配置的(是另一个项目,所以忽略端口)
#user  nobody;
worker_processes  1;

#error_log  logs/error.log;
#error_log  logs/error.log  notice;
#error_log  logs/error.log  info;

#pid        logs/nginx.pid;


events {
    worker_connections  1024;
}


http {
    include       mime.types;
    default_type  application/octet-stream;

    #log_format  main  '$remote_addr - $remote_user [$time_local] "$request" '
    #                  '$status $body_bytes_sent "$http_referer" '
    #                  '"$http_user_agent" "$http_x_forwarded_for"';

    #access_log  logs/access.log  main;

    sendfile        on;
    #tcp_nopush     on;

    #keepalive_timeout  0;
    keepalive_timeout  65;

    #gzip  on;

    server {
        listen       80;
        server_name  localhost;

        #charset koi8-r;

        #access_log  logs/host.access.log  main;

        location / {
            root   html;
            index  index.html index.htm;
            proxy_pass http://localhost:8443/;
            # 配置 websocket 支持
            proxy_http_version 1.1;
            proxy_set_header Upgrade $http_upgrade;
            proxy_set_header Connection "upgrade";
        }

        #error_page  404              /404.html;

        # redirect server error pages to the static page /50x.html
        #
        error_page   500 502 503 504  /50x.html;
        location = /50x.html {
            root   html;
        }

        # proxy the PHP scripts to Apache listening on 127.0.0.1:80
        #
        #location ~ \.php$ {
        #    proxy_pass   http://127.0.0.1;
        #}

        # pass the PHP scripts to FastCGI server listening on 127.0.0.1:9000
        #
        #location ~ \.php$ {
        #    root           html;
        #    fastcgi_pass   127.0.0.1:9000;
        #    fastcgi_index  index.php;
        #    fastcgi_param  SCRIPT_FILENAME  /scripts$fastcgi_script_name;
        #    include        fastcgi_params;
        #}

        # deny access to .htaccess files, if Apache's document root
        # concurs with nginx's one
        #
        #location ~ /\.ht {
        #    deny  all;
        #}
    }


    # another virtual host using mix of IP-, name-, and port-based configuration
    #
    #server {
    #    listen       8000;
    #    listen       somename:8080;
    #    server_name  somename  alias  another.alias;

    #    location / {
    #        root   html;
    #        index  index.html index.htm;
    #    }
    #}


    # HTTPS server
    #
    #server {
    #    listen       443 ssl;
    #    server_name  localhost;

    #    ssl_certificate      cert.pem;
    #    ssl_certificate_key  cert.key;

    #    ssl_session_cache    shared:SSL:1m;
    #    ssl_session_timeout  5m;

    #    ssl_ciphers  HIGH:!aNULL:!MD5;
    #    ssl_prefer_server_ciphers  on;

    #    location / {
    #        root   html;
    #        index  index.html index.htm;
    #    }
    #}

}


 727
727


 被折叠的 条评论
为什么被折叠?
被折叠的 条评论
为什么被折叠?
 到【灌水乐园】发言


