


前端的小玩意(9.1)——做一个仿360工具箱的web页面(Tab按钮切换)
http://blog.csdn.net/qq20004604/article/details/52216203
前端的小玩意(9.2)——做一个仿360工具箱的web页面(全部工具里面的模板)
http://blog.csdn.net/qq20004604/article/details/52226223
(三)我的工具页面布局
如图:
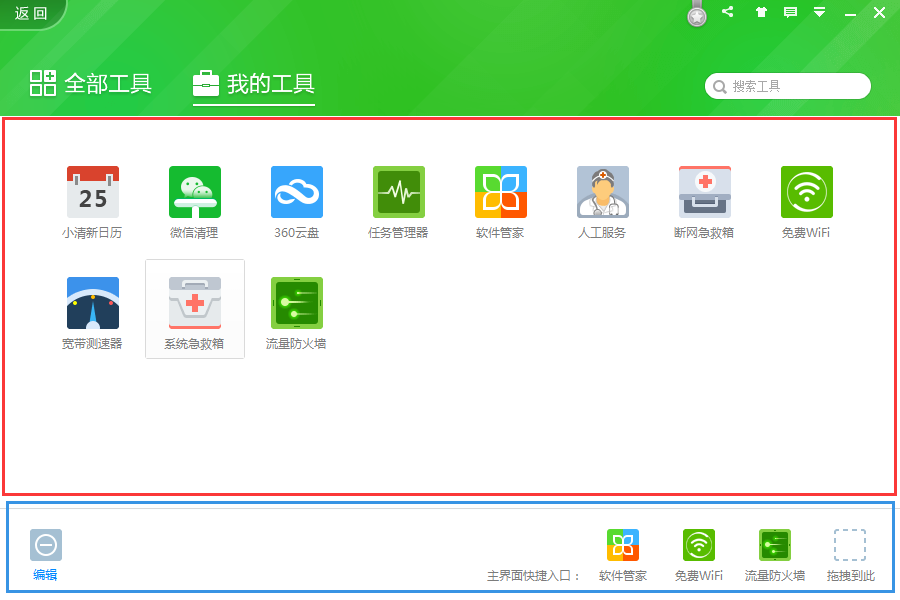
首先将其分为二部分;
第一部分是上方整体红色方框区域;
- 包含若干个独立按钮,按钮分为图片和下方文字两部分;
第二部分是下方蓝色方框区域;
- 包含左方的编辑按钮和右方的四个快捷按钮区域;
- 左方是图标和文字,图标分为按下和非按下状态;
- 右方是左边的文字和右侧的按钮,按钮又分为图标和文字。按钮在无图标时有占位图标。
先上模板:
//我的工具,和之前的div.toolbox-all平级
div.toolbox-my.displayNONE
    //上方区域
    div.toolbox-content
        //独立按钮
        div.tool-my
            div.img
            div.text    小清新日历
    //下方区域
    div.toolbox-foot
        //编辑按钮
        div.edit
            div.img
            div.text    编辑
        //右方区域
        div.shortcut
            //左边的描述文字
            div.description
                div.text    主界面快捷入口:
            //右边四个按钮
            div.tool-foot
                div.img
                div.text    系统急救箱
            div.tool-foot.placeholder
                div.placeholder-img
                div.text    拖拽到此
            div.tool-foot.placeholder
                div.placeholder-img
                div.text    拖拽到此
            div.tool-foot.placeholder
                div.placeholder-img
                div.text    拖拽到此
然后是CSS的样式:(会涉及图片,后补,图标图片除外)
.back .contentbox .toolbox-my {
    background-color: white;
    padding: 30px 40px 90px 40px;
    position: relative;
}

.back .contentbox .toolbox-my .toolbox-content {
    width: 100%;
    height: 100%;
    overflow-x: hidden;
    overflow-y: auto;
    display: flex;
    flex-wrap: wrap;
}

.back .contentbox .toolbox-my .toolbox-content .tool-my {
    width: 100px;
    height: 100px;
    display: inline-block;
    position: relative;
    border: 1px solid transparent;
    -webkit-box-sizing: border-box;
    -moz-box-sizing: border-box;
    box-sizing: border-box;
}

.back .contentbox .toolbox-my .toolbox-content .tool-my:hover {
    -webkit-border-radius: 2px;
    -moz-border-radius: 2px;
    border-radius: 2px;
    border: 1px solid #DADADA;
}

.back .contentbox .toolbox-my .toolbox-content .tool-my .img {
    position: absolute;
    top: 18px;
    left: 23px;
    right: 23px;
    bottom: 28px;
    background-image: url("../img/toolsImg.png");
    background-position: 0 0;
}

.back .contentbox .toolbox-my .toolbox-content .tool-my .text {
    position: absolute;
    bottom: 9px;
    width: 100%;
    text-align: center;
    line-height: 12px;
    height: 12px;
    font-size: 12px;
    color: #7c7c7c;
}

.back .contentbox .toolbox-my .toolbox-foot {
    position: absolute;
    left: 0;
    right: 0;
    bottom: 0;
    height: 95px;
    -webkit-box-sizing: border-box;
    -moz-box-sizing: border-box;
    box-sizing: border-box;
    border-top: 1px solid rgb(218, 218, 218);
}

.back .contentbox .toolbox-my .toolbox-foot .edit {
    width: 32px;
    height: 52px;
    position: absolute;
    top: 22px;
    left: 30px;
}

.back .contentbox .toolbox-my .toolbox-foot .edit .img {
    width: 32px;
    height: 32px;
    background-image: url(../img/toolbox.png);
    background-position: -120px 0;
}

.back .contentbox .toolbox-my .toolbox-foot .edit .img:hover {
    background-position: -120px -50px;
}

.back .contentbox .toolbox-my .toolbox-foot .edit .text {
    width: 32px;
    height: 20px;
    line-height: 20px;
    vertical-align: bottom;
    color: rgb(0, 138, 225);
    font-size: 12px;
    text-align: center;
    cursor: default;
}

.back .contentbox .toolbox-my .toolbox-foot .shortcut {
    position: absolute;
    right: 13px;
    top: 9px;
    bottom: 15px;
    width: 450px;
    display: flex;
    justify-content: flex-end;
    align-items: flex-end;
}

.back .contentbox .toolbox-my .toolbox-foot .shortcut .description {
    width: 98px;
    height: 22px;
}

.back .contentbox .toolbox-my .toolbox-foot .shortcut .description .text {
    height: 22px;
    line-height: 22px;
    font-size: 11px;
    color: #7c7c7c;
    vertical-align: top;
}

.back .contentbox .toolbox-my .toolbox-foot .shortcut .tool-foot {
    width: 76px;
    height: 70px;
    border: 1px solid transparent;
    -webkit-border-radius: 2px;
    -moz-border-radius: 2px;
    border-radius: 2px;
    -webkit-box-sizing: border-box;
    -moz-box-sizing: border-box;
    box-sizing: border-box;
    position: relative;
}

.back .contentbox .toolbox-my .toolbox-foot .shortcut .tool-foot:hover {
    border: 1px solid #dadada;
}

.back .contentbox .toolbox-my .toolbox-foot .shortcut .tool-foot .img {
    position: absolute;
    top: 13px;
    left: 21px;
    right: 21px;
    height: 34px;
    -webkit-border-radius: 2px;
    -moz-border-radius: 2px;
    border-radius: 2px;
    -webkit-box-sizing: border-box;
    -moz-box-sizing: border-box;
    box-sizing: border-box;
    border: 1px solid transparent;
    background-image: url("../img/toolsImg.png");
    background-size: 615px 615px;
    /*
        这个用于计算位置,和实际位置需要乘以61.5%
        background-position: 0 0;
    */
}

.back .contentbox .toolbox-my .toolbox-foot .shortcut .tool-foot .text {
    position: absolute;
    bottom: 3px;
    width: 100%;
    text-align: center;
    line-height: 12px;
    height: 12px;
    font-size: 12px;
    color: #7c7c7c;
}

.back .contentbox .toolbox-my .toolbox-foot .shortcut .tool-foot.placeholder:hover {
    border: 1px solid transparent;
}

.back .contentbox .toolbox-my .toolbox-foot .shortcut .tool-foot.placeholder .placeholder-img {
    position: absolute;
    top: 13px;
    left: 21px;
    right: 21px;
    height: 34px;
    -webkit-border-radius: 2px;
    -moz-border-radius: 2px;
    border-radius: 2px;
    -webkit-box-sizing: border-box;
    -moz-box-sizing: border-box;
    box-sizing: border-box;
    border: 1px dotted #7c7c7c;
}
然后对之前的一些css和html修改:
首先,删除掉
div.BigTool
    span.img(style='background-image: url(../img/bigImg03.png)')
注意,以上共三个,最后的图片链接不同,修改为:
div.BigTool
span.img修改以下同名样式为:
.back .contentbox .toolbox-all .firstRow .BigTool .img {
    display: inline-block;
    position: absolute;
    width: 100%;
    height: 100%;
    background-image: url("../img/bigImg.png");
    background-position: 0 0;;
}
然后修改该样式:
.back .contentbox .commanRow .normalTool .img {
    position: relative;
    display: inline-block;
    width: 60px;
    height: 60px;
    background-image: url("../img/toolsImg.png");
    background-position: 0 0;;
}
于是,我们需要三个图片:
toolbox.png 放零碎的图标,
bigImg.png 放大图标,图标尺寸为300x160
toolsImg.png 放普通图标,尺寸为52x52
我自己已经切好了(话说切图好无聊),下载链接为:
http://jianwangsan.cn/img/toolbox.png
http://jianwangsan.cn/img/bigImg.png
http://jianwangsan.cn/img/toolsImg.png
放在img文件夹之内食用
目前效果应该如下:

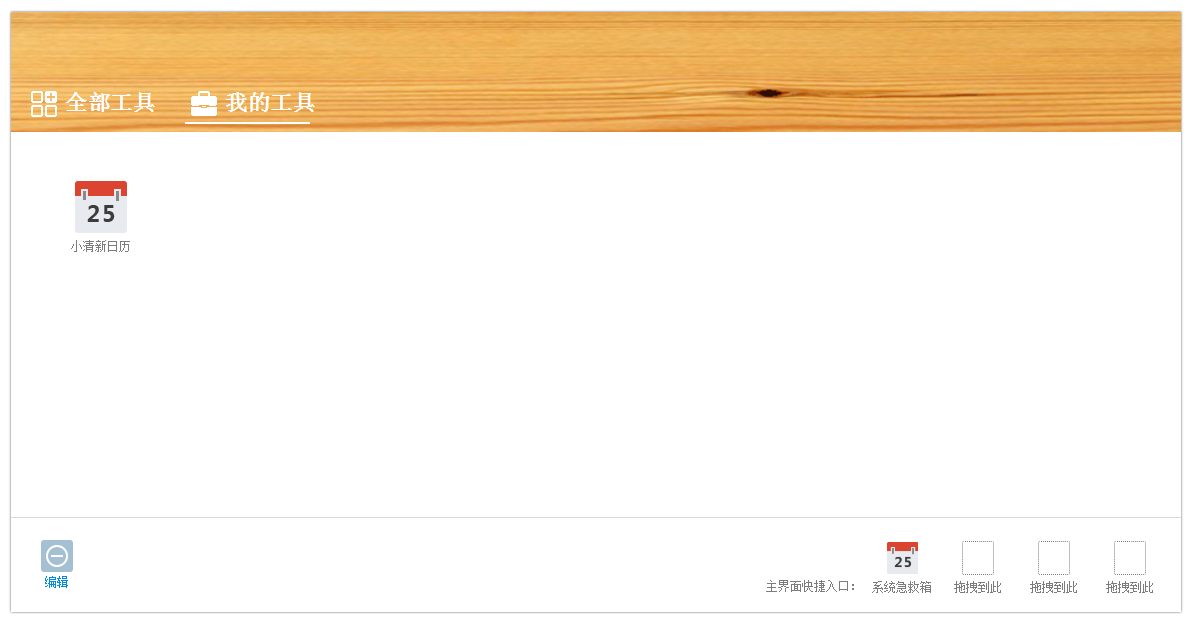
图片之所以重复,是因为使用的是默认第一个位置的图片,在实际生成的时候,会进行修改。
demo链接:
这个页面做完,主要部分的页面就做完啦~~当然,这只是模板,具体生成内容,会在第四部分通过js来读取json而生成,读取JSON生成的好处,在于日后无论添加、删除或者修改图标,甚至逻辑,都很容易。


 4248
4248


 被折叠的 条评论
为什么被折叠?
被折叠的 条评论
为什么被折叠?
 到【灌水乐园】发言


