


代码信息
本篇文章涉及代码版本
| 组件 | 版本 |
|---|---|
| Spring Boot | 2.0.8.RELEASE |
| Spring Cloud | Finchley.SR1 |
本篇文章涉及应用
| 应用 | 说明 |
|---|---|
| base-eureka | 服务发现 |
| base-config-service-bus | 配置中心服务端-bus依赖 |
| base-config-client-bus | 配置中心客户端使用-bus依赖 |
配置中心的自动刷新
假如了Spring Config组件后我们已经实现了将微服务配置的集中管理,而Spring Config除了提供配置集中管理之外,还提供了配置的动态刷新功能。在Git上进行配置进行更新后,可以实时更新应用的配置。
自动更新的原理
要实现配置的实时刷新需要引入一个新的组件Spring Cloud Bus。Spring Cloud Bus的作用是实现事件、消息总线,用于在集群(例如,配置变化事件)中传播状态变化,可与Spring Cloud Config联合实现热部署。
实现Spring Config 自动刷新的流程是这样的
首先,向config-server端发送刷新配置的接口
然后、服务端收到请求后发送给Spring Cloud Bus
后续、bus接到消息并通知给其它连接到总线的客户端
后续、其他客户端接收到通知,请求服务端获取最新配置
最后、客户端获取到最新配置
实现自动刷新
首先Bus支持kafka和rabbitmq两种方式,本篇使用rabbitmq作为消息队列。所以实现自动刷新的前提是需要现行安装rabbitmq。这一块目前网上已经有很多教程了,可以百度搜索下。
配置中心-服务端
添加依赖
此时使用的是rabbitmq所以使用的spring-cloud-starter-bus-amqp
    <dependencies>
        <dependency>
            <groupId>org.springframework.cloud</groupId>
            <artifactId>spring-cloud-config-client</artifactId>
        </dependency>
        <dependency>
            <groupId>org.springframework.cloud</groupId>
            <artifactId>spring-cloud-starter-bus-amqp</artifactId>
        </dependency>
    </dependencies>
配置
有一点需要注意的springboot 2.0之后的版本很多之后很多之前的功能端点都被整合进actuator相关内容,所以需要在management的配置中打开相应端点
spring:
  application:
    name: base-config-service-bus
  cloud:
    config:
      server:
        git:
          uri: https://gitee.com/daifylearn/cloud-config
          search-paths: /config,/base-config-producer,/base-config-client-bus
  # 此处使用自己的mq的配置
  rabbitmq:
     host: 127.0.0.1
     port: 5672
     username: admin
     password: admin
server:
  port: 8701


eureka:
  client:
    service-url:
      defaultZone: http://localhost:8000/eureka/
logging:
  file: ${spring.application.name}.log
  # 暴露相关管理端点
management:
  endpoints:
    web:
      exposure:
        include: "*"
代码
启动类中和之前的配置中心服务端内容一致
@SpringBootApplication
@EnableEurekaClient
@EnableConfigServer
public class ConfigServiceApplication {

    public static void main(String[] args) {
        SpringApplication.run(ConfigServiceApplication.class, args);
    }
}
配置中心-客户端
此时服务端配置完成之后开始进行客户端的配置
添加依赖
客户端同样需要引入spring-cloud-starter-bus-amqp依赖
    <dependencies>
        <dependency>
            <groupId>org.springframework.cloud</groupId>
            <artifactId>spring-cloud-config-client</artifactId>
        </dependency>
        <dependency>
            <groupId>org.springframework.cloud</groupId>
            <artifactId>spring-cloud-starter-bus-amqp</artifactId>
        </dependency>
    </dependencies>
配置
一样需要暴露管理端点,当然这个配置使用*打开了所有端点,实际中可以根据需要配置
spring:
  application:
    name: base-config-client-bus
  cloud:
    config:
      profile: test
      label: master
      uri: http://localhost:8701
management:
  endpoints:
    web:
      exposure:
        include: "*"
代码
系统的主类配置并无区别但是需要注意的是,属性配置只能刷新被@RefreshScope 注解下的配置
启动类
@SpringBootApplication
@EnableEurekaClient
@EnableConfigServer
public class ConfigServiceApplication {

    public static void main(String[] args) {
        SpringApplication.run(ConfigServiceApplication.class, args);
    }
}
需要自动刷新的类
@RestController
@RequestMapping("config")
@RefreshScope
public class ConfigController {

    @Value("${config.name}")
    private String profile;

    @GetMapping("/name")
    public String getProfile() {
        return this.profile;
    }
}
测试
到目前服务端和客户端的配置已经全部完成了,现在需要测试配置刷新效果
配置内容
首先我们创建一个配置文件base-config-client-bus-test.yml,上传至Git。配置内容
server:
  port: 8716

eureka:
  client:
    service-url:
      defaultZone: http://localhost:8000/eureka/
logging:
  file: ${spring.application.name}.log
config:
  name: test-bus
现在我们请求base-config-client-bus项目中config/name的地址

可以看到,客户端已经拿到了Git中的配置。
修改配置
然后我们将配置中的config.name从test-bus修改为test-bus-test
刷新服务端配置
在Spring Boot 2.0版本后刷新配置的服务端点迁移至了actuator/bus-refresh,所以我们使用postmen对此端点请求数据

现在我们请求base-config-client-bus项目中config/name的地址
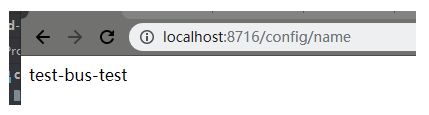
截止到目前发现配置已经完成刷新了。
本篇文章并未贴出所有代码,涉及的源码下载地址:https://gitee.com/daifylearn/cloud-learn
ps.上述的所有项目都是可以成功运行的。但是在后期为了实现每个应用端口尽量不冲突会有些许调整,而后续某次作死调整结构和名称可能会导致部分项目无法运行o(╯□╰)o,如果发现请留言我进行修改。


 2086
2086


 被折叠的 条评论
为什么被折叠?
被折叠的 条评论
为什么被折叠?
 到【灌水乐园】发言


