


代码信息
本篇文章涉及代码版本
| 组件 | 版本 |
|---|---|
| Spring Boot | 2.0.8.RELEASE |
| Spring Cloud | Finchley.SR1 |
本篇文章涉及应用
| 应用 | 说明 |
|---|---|
| base-eureka | 服务发现 |
| base-stream-client | 服务消费端 |
| base-stream-producer | 服务生产端 |
消息驱动的分布式服务
Spring Cloud中的Spring Cloud Stream提供了一套针对消息中间件的自动化配置实现,并且引入了发布-订阅、消费组以及消息分区的概念。通过使用Spring Cloud Stream,可以有效地简化消息中间件的使用复杂度。目前Spring Cloud Stream 支持RabbitMQ和Kafka的工具
实现消息驱动
注意和配置中心一样此时需要保证你已经在本地或者云服务器上安装RabbitMQ
创建消息的发送者
引入依赖
    <dependencies>
        <dependency>
            <groupId>org.springframework.cloud</groupId>
            <artifactId>spring-cloud-starter-stream-rabbit</artifactId>
        </dependency>
        <dependency>
            <groupId>org.springframework.cloud</groupId>
            <artifactId>spring-cloud-stream-test-support</artifactId>
            <scope>test</scope>
        </dependency>
    </dependencies>
参数配置
spring:
  application:
    name: base-stream-producer
  # mq的配置
  rabbitmq:
     host: 127.0.0.1
     port: 5672
     username: admin
     password: admin
  cloud:
    stream:
      rabbit:
        # 可以配置多个,作为入门案例,可以不进行配置
        bindings:
          # 监听的消息队列的名称。
          testMessage:
            # 服务的名称
            group: learn
            # 将发送的对象消息转化为json,方便调试
            content-type: application/json
server:
  port: 8704

eureka:
  client:
    service-url:
      defaultZone: http://localhost:8000/eureka/
logging:
  file: ${spring.application.name}.log
上面有一点需要注意的就是bindings的配置对应的源码可以看到是支持配置多个的
    public void setBindings(Map<String, RabbitBindingProperties> bindings) {
        this.bindings = bindings;
    }
代码
启动类
@SpringBootApplication
@EnableEurekaClient
public class StreamProducerApplication {

    public static void main(String[] args) {
        SpringApplication.run(StreamProducerApplication.class, args);
    }

}
配置消息发送代码
public interface MessageSource {


    String OUT_PUT = "testMessage";

    /**
     * 设置输出信息绑定的目标
     * @return
     */
    @Output(OUT_PUT)
    MessageChannel sendMessage();
}
@EnableBinding(MessageSource.class)
public class SendMessageService {

    @Autowired
    @Output(MessageSource.OUT_PUT)
    private MessageChannel channel;

    /**
     * 消息发送
     * @param msg
     */
    public void sendMsg(String msg) {
        channel.send(MessageBuilder.withPayload(msg).build());
        System.err.println("消息发送成功:"+msg);
    }

}
测试用代码
@RestController
public class SendMessageController {

    @Autowired
    private SendMessageService sendMessage;

    @RequestMapping(value = "send",method = RequestMethod.GET)
    public String sendMessag() {
        sendMessage.sendMsg("user name");
        return "send message: user name";
    }

}
创建消息的接收者
依赖和参数配置
消息接收者的依赖和参数配置和消息发送者相同
配置
spring:
  application:
    name: base-stream-client
  # mq的配置
  rabbitmq:
     host: 127.0.0.1
     port: 5672
     username: admin
     password: admin
  cloud:
    stream:
      rabbit:
        # 可以配置多个,作为入门案例,甚至可以不进行配置
        bindings:
          # 监听的消息队列的名称。
          testMessage:
            # 服务的名称
            group: learn
            # 将发送的对象消息转化为json,方便调试
            content-type: application/json

server:
  port: 8703

eureka:
  client:
    service-url:
      defaultZone: http://localhost:8000/eureka/
logging:
  file: ${spring.application.name}.log
代码
代码不同之处,消息的发送被修改为消息的监听
启动类
@SpringBootApplication
@EnableEurekaClient
public class StreamClientApplication {

    public static void main(String[] args) {
        SpringApplication.run(StreamClientApplication.class, args);
    }

}
消息接收配置
public interface GetMessage {

    String NAME = "testMessage";

    /**
     * 设置输入信息绑定的目标
     * @return
     */
    @Input(NAME)
    SubscribableChannel testInPut();

}
@EnableBinding(GetMessage.class)
public class GetMessageService {


    @StreamListener(GetMessage.NAME)
    public void messageInPut(Message<String> message) {
        System.err.println(" 消息接收成功:" + message.getPayload());
    }

}
测试
现在我们测试一下通过一方进行消息发送另外一方是否能够获得消息。
现在我们请求:http://localhost:8704/send
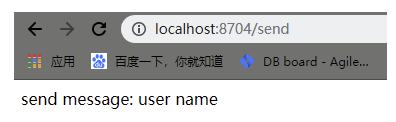
可以看到消息以及发出,那么现在看看消息接收者的控制台
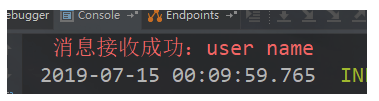
此时可以看到消息已经经过消息队列完成数据的通讯。这样Spring Cloud Stream的基础使用就完成了。
本篇文章并未贴出所有代码,涉及的源码下载地址:https://gitee.com/daifylearn/cloud-learn
ps.上述的所有项目都是可以成功运行的。但是在后期为了实现每个应用端口尽量不冲突会有些许调整,而后续某次作死调整结构和名称可能会导致部分项目无法运行o(╯□╰)o,如果发现请留言我进行修改。


 253
253


 被折叠的 条评论
为什么被折叠?
被折叠的 条评论
为什么被折叠?
 到【灌水乐园】发言


