


前面我们讲过几个UITableView的使用小技巧, 现在让我们来看看怎么使用UITableView把我们输入的信息存储到CoreData中.
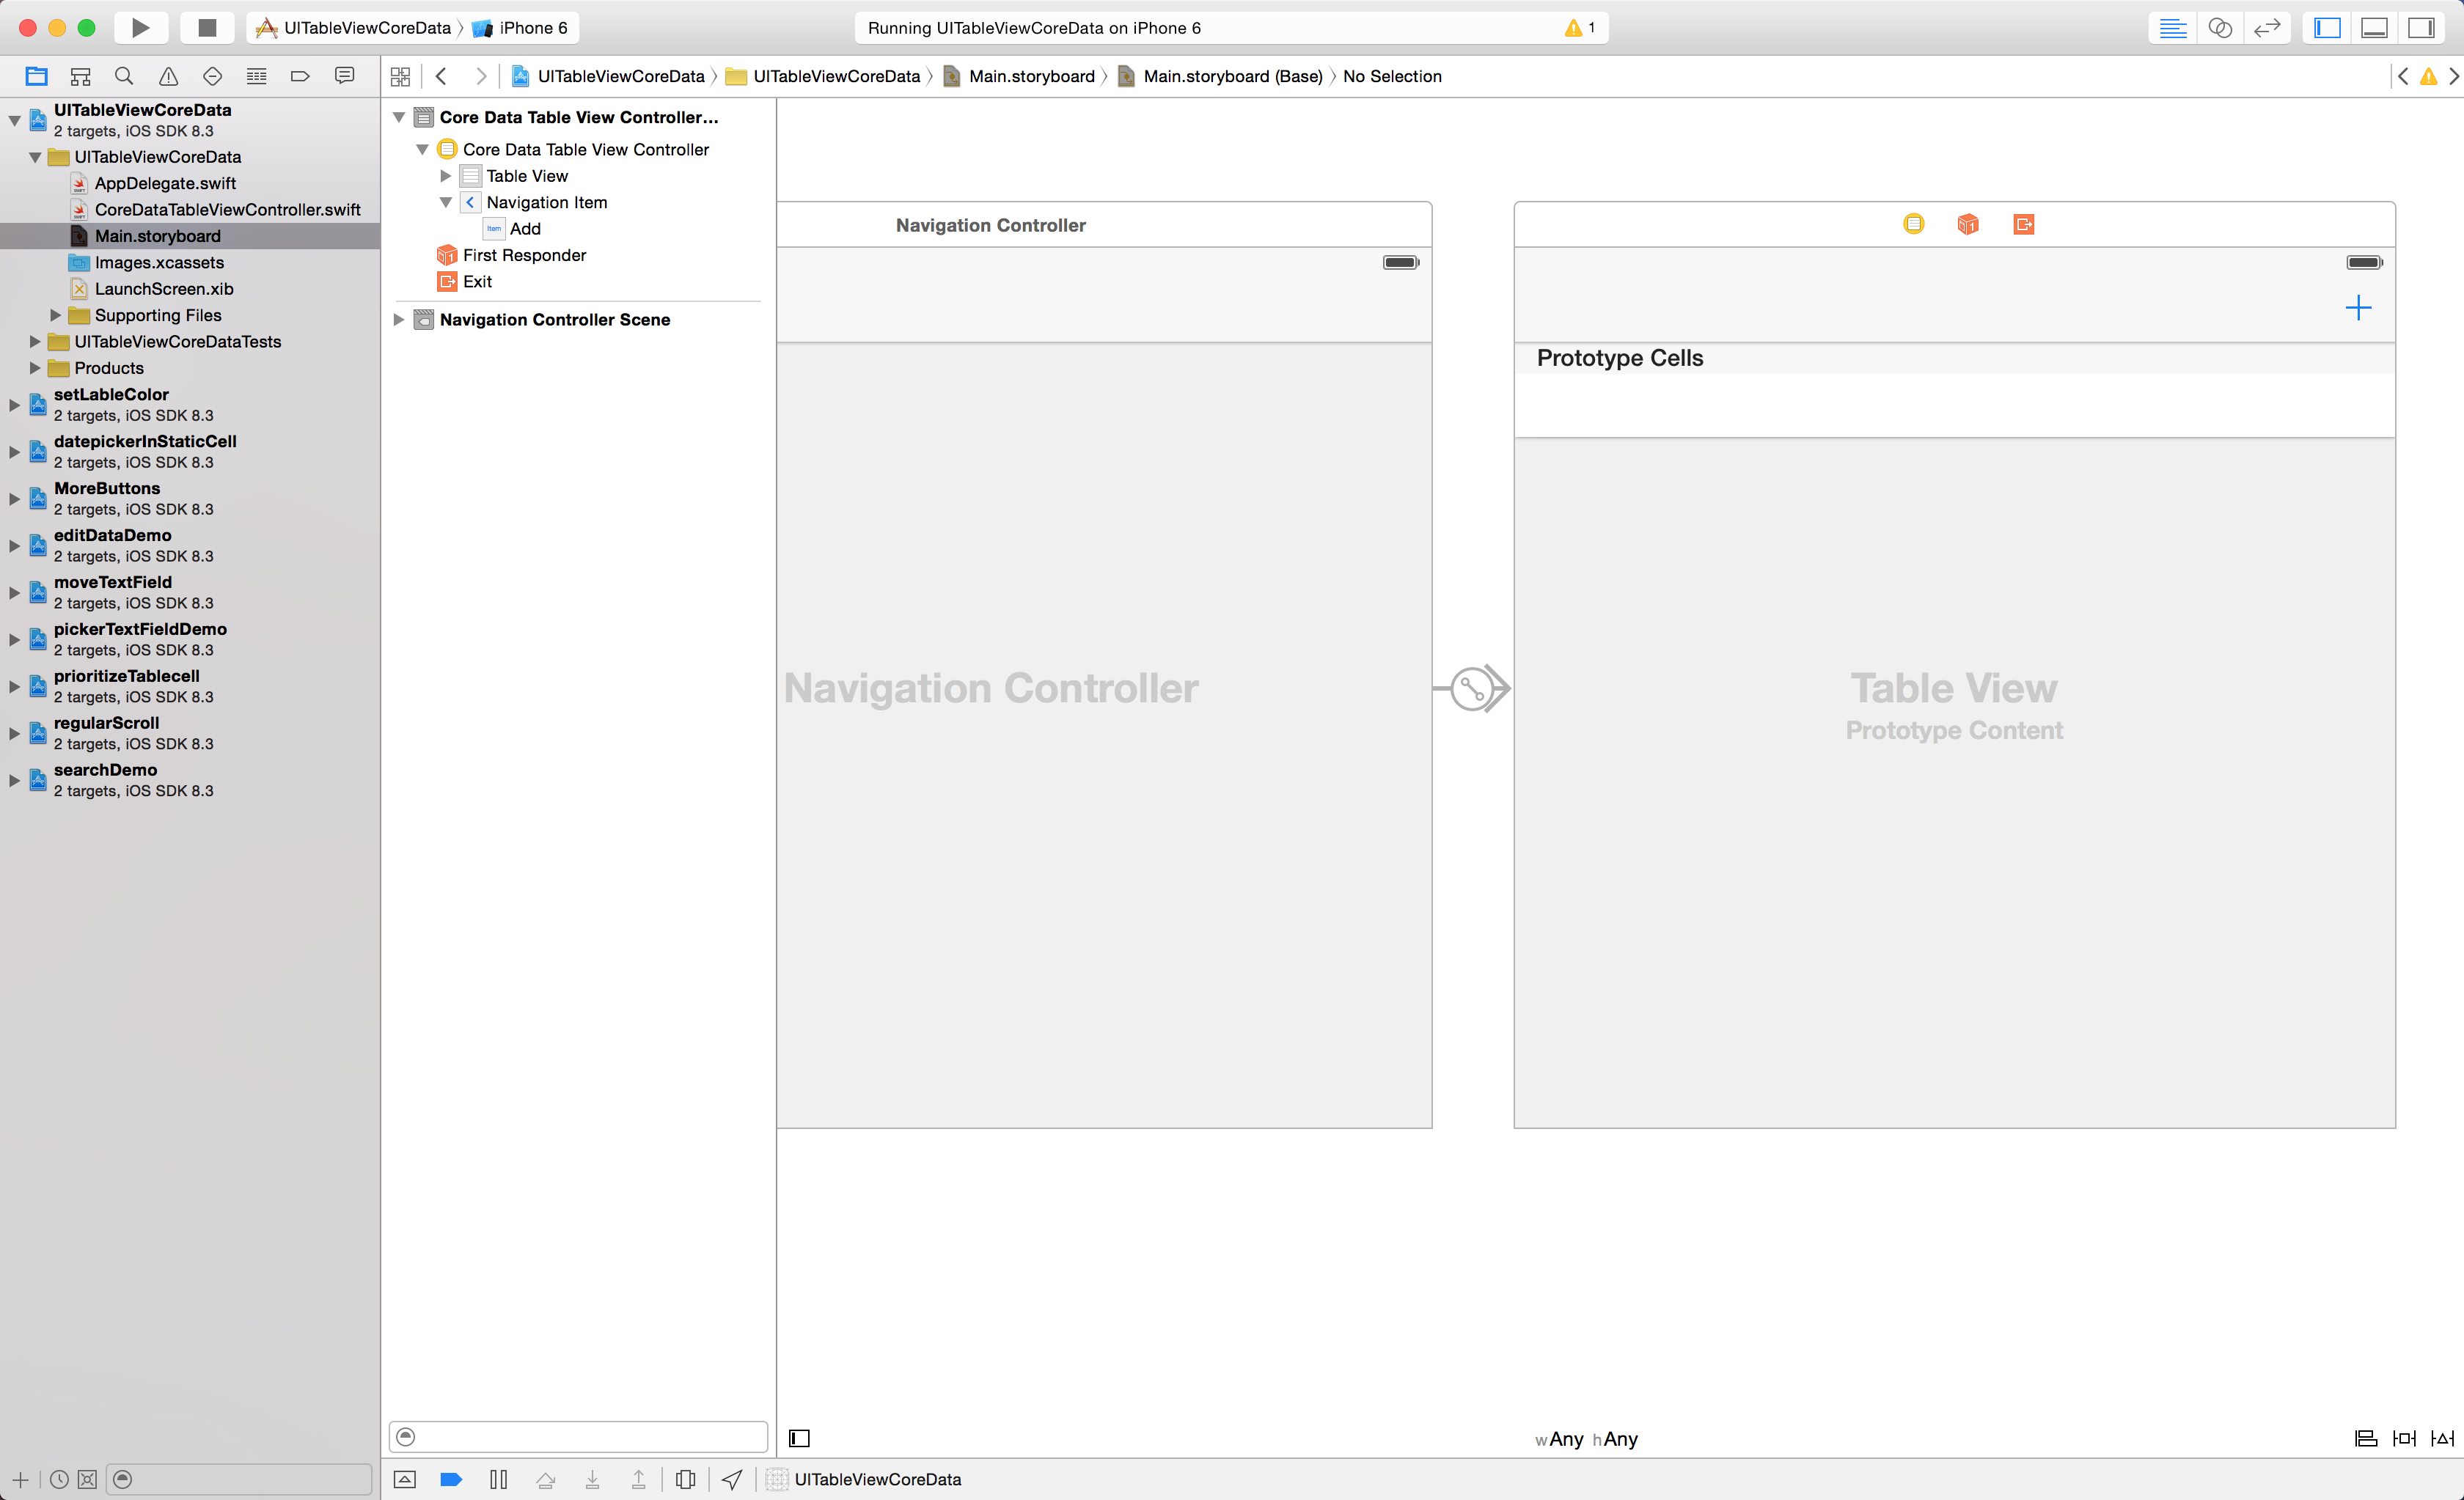
1.界面布局
2.实现代码
1.声明变量
class CoreDataTableViewController: UITableViewController {
    // 1.设置一个用来存储数据的字符串数组
    var names = [String]()
    override func viewDidLoad() {
        super.viewDidLoad()
        // 2.设置
        title = "Name"

        // 3.给UITextViewCell添加identifier为"Cell"
        tableView.registerClass(UITableViewCell.self, forCellReuseIdentifier: "Cell")
    }
}
2.设置TableView
// 4.设置UITableView有多少组Cell
override func numberOfSectionsInTableView(tableView: UITableView) -> Int {
return 1
}
// 5.设置UITableViewCell有多少行
override func tableView(tableView: UITableView, numberOfRowsInSection section: Int) -> Int {
return names.count
}
// 6.设置UITableViewCell显示的内容
override func tableView(tableView: UITableView, cellForRowAtIndexPath indexPath: NSIndexPath) -> UITableViewCell {
// 6.1获取indentfier为Cell的UITableViewCell
let cell = tableView.dequeueReusableCellWithIdentifier("Cell", forIndexPath: indexPath) as! UITableViewCell
// 6.2设置UITableViewCell每行显示的内容
cell.textLabel!.text = names[indexPath.row]
// 6.3返回UITableViewCell
return cell
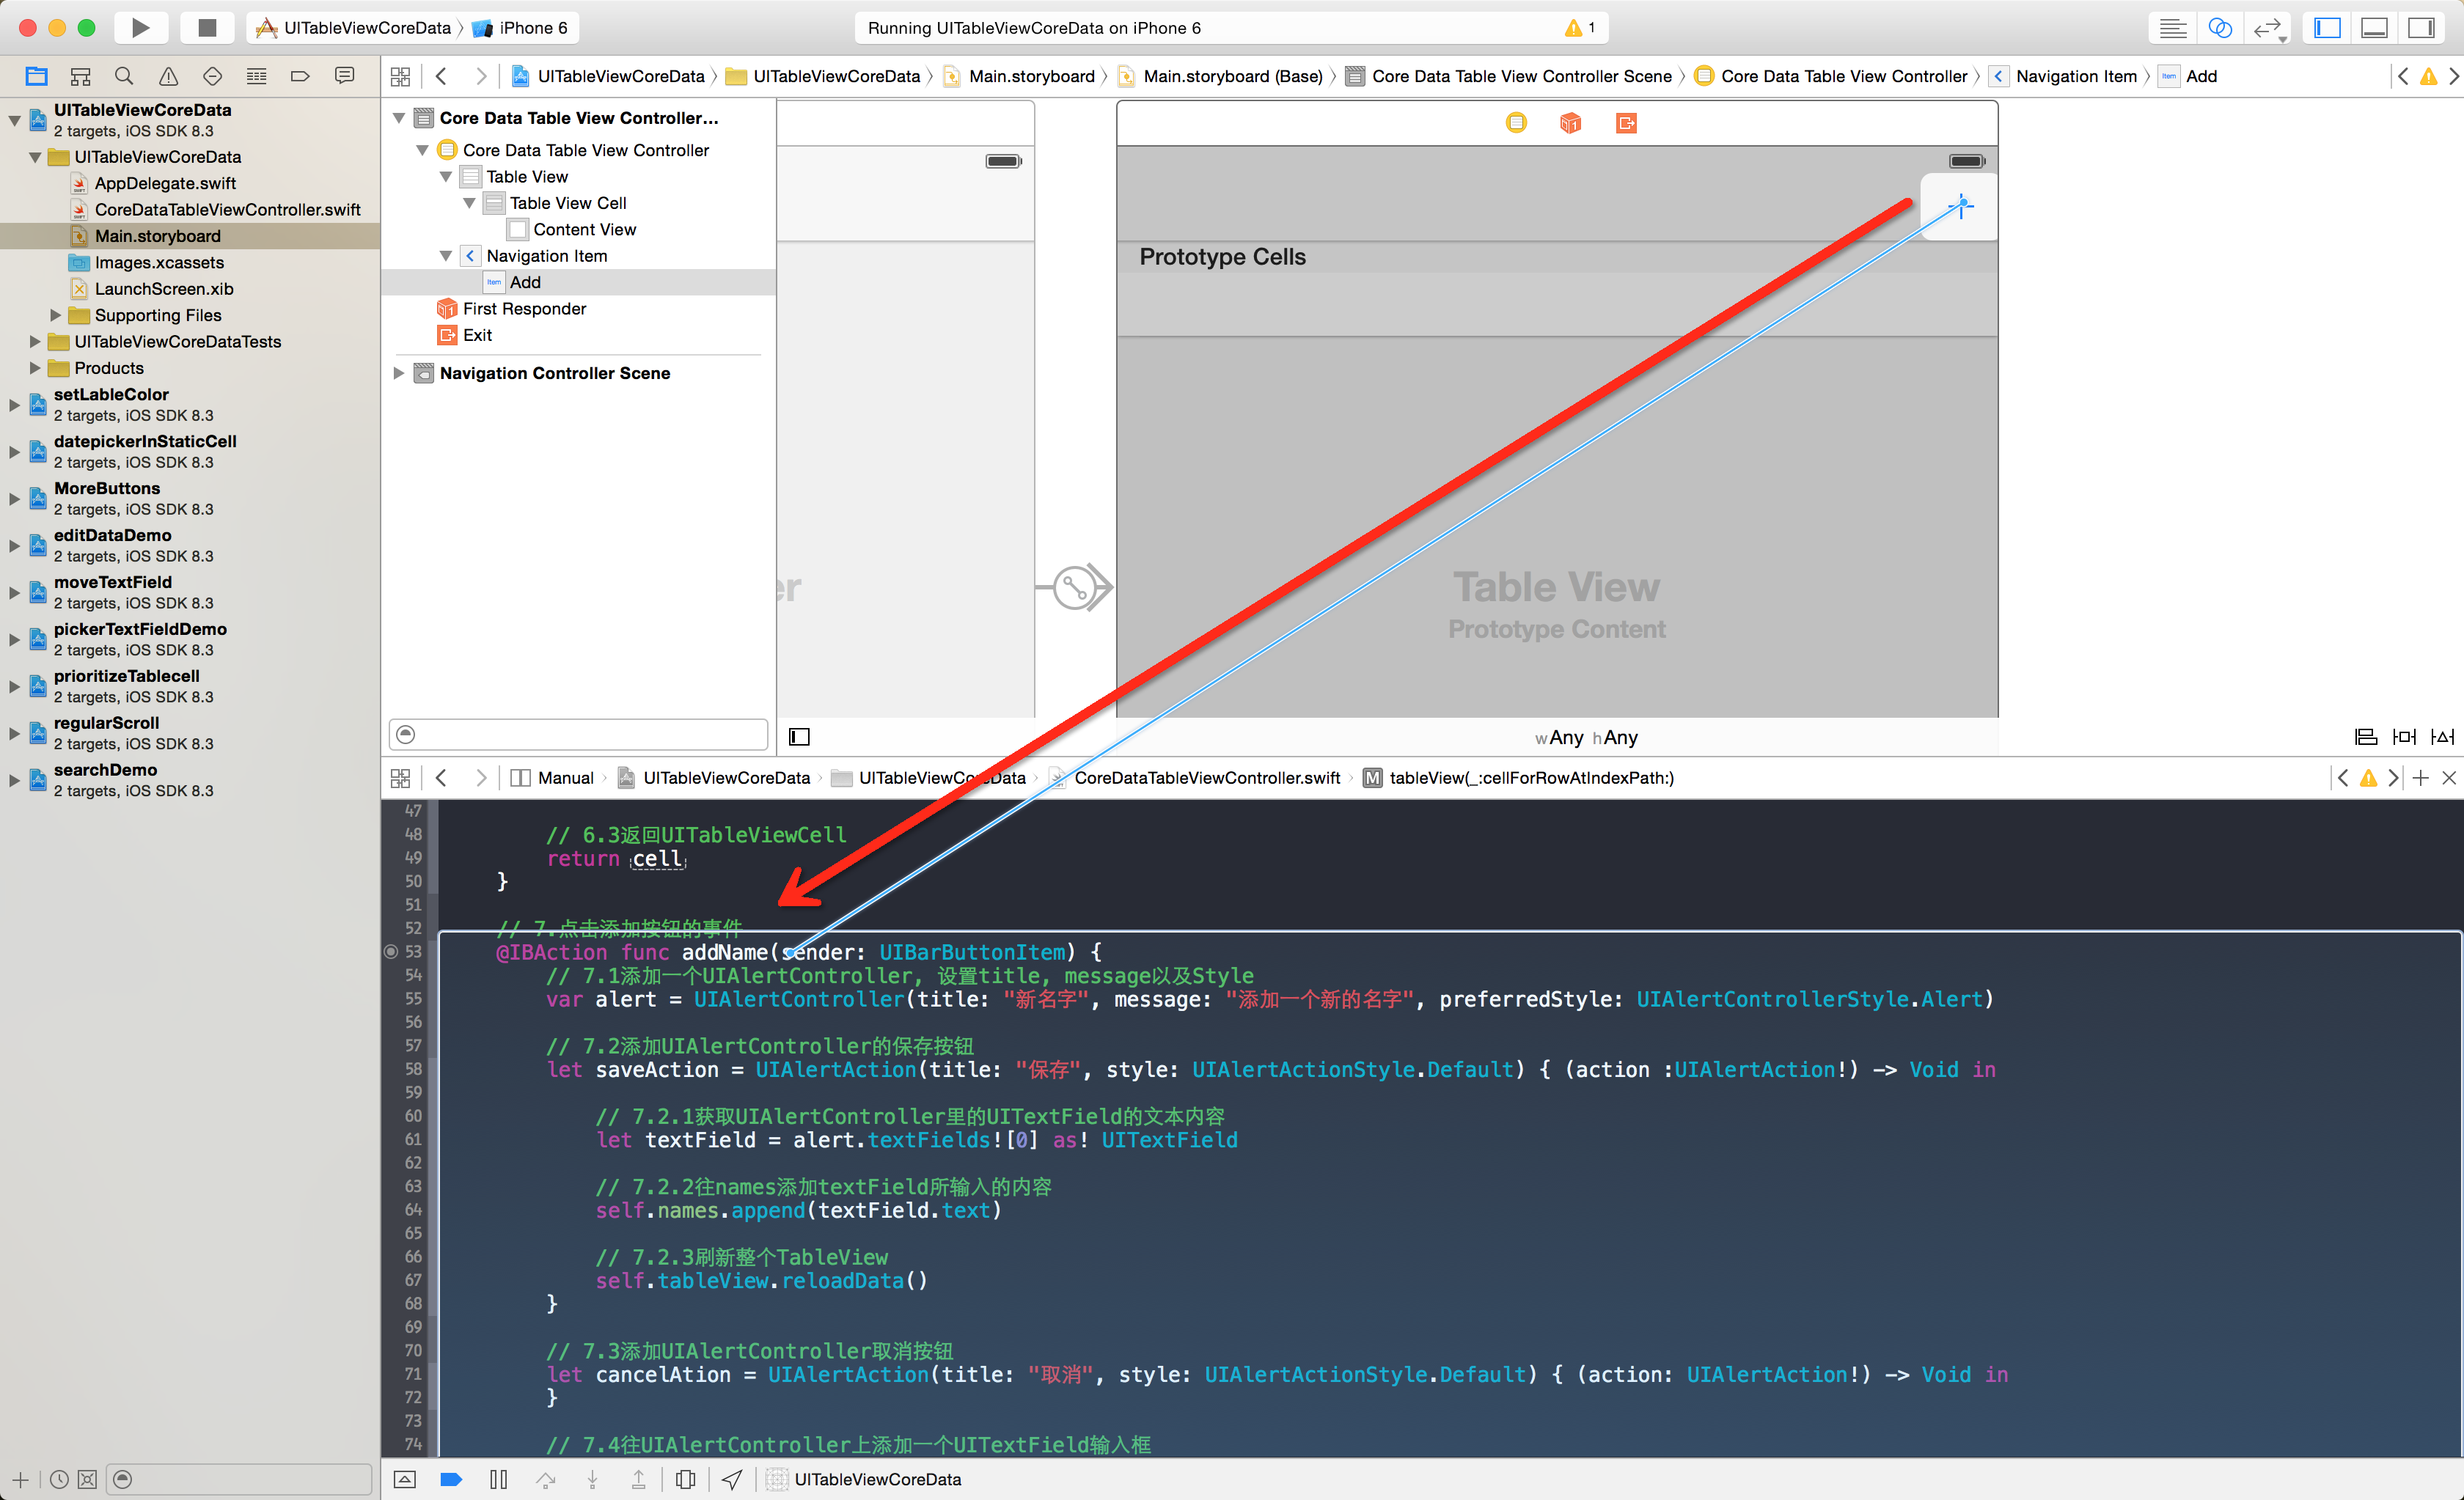
}3.添加UIBarButtonItem点击事件
// 7.点击添加按钮的事件
@IBAction func addName(sender: UIBarButtonItem) {

    // 7.1添加一个UIAlertController, 设置title, message以及Style
    var alert = UIAlertController(title: "新名字", message: "添加一个新的名字", preferredStyle: UIAlertControllerStyle.Alert)

    // 7.2添加UIAlertController的保存按钮
    let saveAction = UIAlertAction(title: "保存", style: UIAlertActionStyle.Default) { (action :UIAlertAction!) -> Void in
        // 7.2.1获取UIAlertController里的UITextField的文本内容
        let textField = alert.textFields![0] as! UITextField
        // 7.2.2往names添加textField所输入的内容
        self.names.append(textField.text)
        // 7.2.3刷新整个TableView
        self.tableView.reloadData()
    }

    // 7.3添加UIAlertController取消按钮
    let cancelAtion = UIAlertAction(title: "取消", style: UIAlertActionStyle.Default) { (action: UIAlertAction!) -> Void in
    }

    // 7.4往UIAlertController上添加一个UITextField输入框 alert.addTextFieldWithConfigurationHandler { (textField: UITextField!) -> Void in
    }

    // 往UIAlertController上添加按钮, 注意, 这是有顺序的
    // 7.5往UIAlertController添加取消按钮
    alert.addAction(cancelAtion)

    // 7.6往UIAlertController添加保存按钮
    alert.addAction(saveAction)

    // 7.8显示当前的一个ViewController, 设置动画效果
    presentViewController(alert, animated: true, completion: nil)
}
3.最终效果
好了, 这次我们就讲到这里, 下次我们继续


 1097
1097


 被折叠的 条评论
为什么被折叠?
被折叠的 条评论
为什么被折叠?
 到【灌水乐园】发言


