


认识canal
译意为水道/管道/沟渠,主要用途是基于 MySQL 数据库增量日志解析,提供增量数据订阅和消费
早期阿里巴巴因为杭州和美国双机房部署,存在跨机房同步的业务需求,实现方式主要是基于业务 trigger 获取增量变更。从 2010 年开始,业务逐步尝试数据库日志解析获取增量变更进行同步,由此衍生出了大量的数据库增量订阅和消费业务。
canal应用场景
- 缓存/数据同步
- 任务下发
- 数据异构
- 数据采集
缓存/数据同步
在高并发环境下,程序需要应用大量的缓存来适应,当需数据需要更新时,就会出现缓存与数据库不一致的的情况,也就衍生出来很多问题
1.就redis而论,当数据库和redis同时存在该数据,恰巧一个查询到了,直接命中缓存,就不用经过数据库直接返回该数据,正常情况下是没有问题。如果这个数据刚好在更新,直接通过redis的key命中了缓存返回了未更新的数据是不是就出现错误,
1.2.当然你也可以通过删除缓存,有意进行缓存击穿,直接在数据库查询,假设这个更新还未成功,查询就已经到了,是不是把旧数据重新拿了出来丢进了redis缓存,依旧会出现缓存不一致的情况,
1.3.当然你还可以先写库,再删缓存,假设你写完库了,还未删除缓存,线程就宕机了,重启之后,缓存是不是还是与数据不一致
先删缓存再写数据
延时双删策略:
为有效应对1.2出现的缓存不一致性问题,采用延时双删策略
1.先删缓存,致使查询击穿,直接查询数据库
2.再写数据库,把数据库数据写为最新需要更新的数据
3.休眠一段时间,致使查询线程读取到最新的数据回填到缓存(redis),注意这里会出现早于步骤2更新的查询,致使回填到缓存的数据依旧是旧数据
4.再次删除缓存,不管缓存是否是最新的数据,再次删除,致使步骤3中出现的情况完全杜绝
来达到最终一致性
先写数据再删缓存
由上可以知道,这种情况是可以保证数据最终一致性的,但是会出现线程宕机等意外
意外重试策略
为避免删除缓存失败的意外,我们要容忍一定次数的失败重试,以及最终失败的人工处理,哈哈哈
这里也可以做为canal的一种应用场景
把canal伪装成mysql的一个从机,采集binlog日志,监听到mysql存在增删改的动作,讲情报发送给我们的处理程序,处理程序接收到情报执行删除缓存任务并且标识为成功,一旦标识不成功的话,也进行一定次数的重试,最终失败的话还是转人工手动处理
任务下发与数据采集
上面已经讲述的canal采集binlog日志,将情报传递给处理程序,就不做过多描述了哈
数据异构
在大型互联网架构中,为保证数据库的高可用性,经常会采用分库分表来解决性能问题,但是分库分表之后又会出现新的问题,我一个查询可能需要关联多张表,而这些表分布于不同的数据库中怎么办?
维度异构
某个用户的订单数据,散落在n个表中,某一天用户需要查看自己的订单数据怎么办?
我之前有个案列讲的是将用户id进行分库分表,按照雪花算法生成一串id,再由id去除以库的数量,取余,取余数等于要存入的分库序号里面,同样的再按照某种算法把数据存入分表,当查询这个用户的订单时,根据该用户id所在的维度,去对应的地方取数据
聚合异构
当要获取一个用户的详细信息时,该信息包含基本信息,银行卡号,身份证号,等等详细信息,而这些信息散落在不同分库中,根据这个用户的id需要查询关联到很多个库才能收集齐具体的数据,这就是聚合数据异构现象
canal也是实现数据异构的手段之一,它将你需要查询的数据按照某一个维度又重新聚合在一个数据库中,让你去查询
实战
mysql开启binlog
这里是我的mysql的配置,你们也可以根据自己的实际情况来修改,当然你得非常熟悉这些配置文件所包含的意义,盲目修改容易丢库丢数据,甚至搞崩服务
[client]
#password	= your_password
port		= 3306
socket		= /tmp/mysql.sock

[mysqld]
port		= 3306
socket		= /tmp/mysql.sock
datadir = /home/java/msql
default_storage_engine = InnoDB
performance_schema_max_table_instances = 400
table_definition_cache = 400
skip-external-locking
key_buffer_size = 256M
max_allowed_packet = 100G
table_open_cache = 1024
sort_buffer_size = 4M
net_buffer_length = 4K
read_buffer_size = 4M
read_rnd_buffer_size = 256K
myisam_sort_buffer_size = 64M
thread_cache_size = 128
query_cache_size = 128M
tmp_table_size = 128M
sql-mode=NO_ENGINE_SUBSTITUTION,STRICT_TRANS_TABLES
wait_timeout=31536000
interactive_timeout=31536000
lower_case_table_names=1


explicit_defaults_for_timestamp = true
#skip-name-resolve
max_connections = 500
max_connect_errors = 100
open_files_limit = 65535

log-bin=mysql-bin
binlog_format=ROW
server-id = 1
expire_logs_days = 10
slow_query_log=1
slow-query-log-file=/home/java/msql/mysql-slow.log
long_query_time=3
#log_queries_not_using_indexes=on
early-plugin-load = ""


innodb_data_home_dir = /home/java/msql
innodb_data_file_path = ibdata1:10M:autoextend
innodb_log_group_home_dir = /home/java/msql
innodb_buffer_pool_size = 1024M
innodb_log_file_size = 512M
innodb_log_buffer_size = 128M
innodb_flush_log_at_trx_commit = 1
innodb_lock_wait_timeout = 50
innodb_max_dirty_pages_pct = 90
innodb_read_io_threads = 12
innodb_write_io_threads = 12

[mysqldump]
quick
max_allowed_packet = 500M

[mysql]
no-auto-rehash

[myisamchk]
key_buffer_size = 256M
sort_buffer_size = 4M
read_buffer = 2M
write_buffer = 2M

[mysqlhotcopy]
interactive-timeout
重载配置,重启服务后,查看是否成功开启binlog日志
show variables like 'log_bin';
show variables like 'binlog_format';
show master logs; 
bin_log开启成功了
binlog的模式 STATEMENT,ROW,MIXED
STATEMENT模式
每一条会修改数据的sql语句会记录到binlog中。优点是并不需要记录每一条sql语句和每一行的数据变化,减少了binlog日志量,节约IO,提高性能。缺点是在某些情况下会导致master-slave中的数据不一致(如sleep()函数, last_insert_id(),以及user-defined functions(udf)等会出现问题)
ROW模式
不记录每条sql语句的上下文信息,仅需记录哪条数据被修改了,修改成什么样了。而且不会出现某些特定情况下的存储过程、或function、或trigger的调用和触发无法被正确复制的问题。缺点是会产生大量的日志,尤其是alter table的时候会让日志暴涨。
MIXED模式
以上两种模式的混合使用,一般的复制使用STATEMENT模式保存binlog,对于STATEMENT模式无法复制的操作使用ROW模式保存binlog,MySQL会根据执行的SQL语句选择日志保存方式。
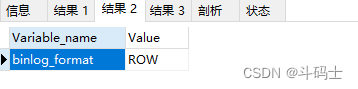
开启了ROW模式

这里是我的日志名称和大小
canal server搭建
下载https://github.com/alibaba/canal/releases
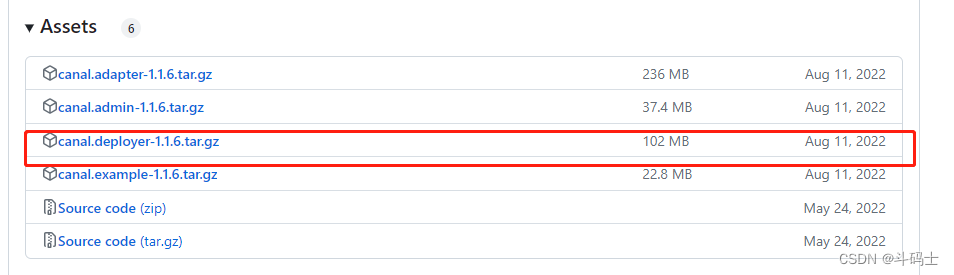
下载完成后解压,你也可以上传到linux服务器上然后解压,实际上都是一个道理
然后在解压路径中找到\canal\conf\example
修改
instance.properties
#################################################
## mysql serverId , v1.0.26+ will autoGen
# canal.instance.mysql.slaveId=0

# enable gtid use true/false
canal.instance.gtidon=false

# 数据库地址
canal.instance.master.address=127.0.0.1:3306
# binlog日志名称
canal.instance.master.journal.name=mysql-bin.000001
# mysql主库连接时起始的binlog偏移量
canal.instance.master.position=156
# mysql主库连接时起始的binlog时间戳
canal.instance.master.timestamp=
canal.instance.master.gtid=

# rds oss binlog
canal.instance.rds.accesskey=
canal.instance.rds.secretkey=
canal.instance.rds.instanceId=

# table meta tsdb info
canal.instance.tsdb.enable=true
#canal.instance.tsdb.url=jdbc:mysql://127.0.0.1:3306/canal_tsdb
#canal.instance.tsdb.dbUsername=canal
#canal.instance.tsdb.dbPassword=canal

#canal.instance.standby.address =
#canal.instance.standby.journal.name =
#canal.instance.standby.position =
#canal.instance.standby.timestamp =
#canal.instance.standby.gtid=

# username/password
# 在mysql服务器授权的账号密码
canal.instance.dbUsername=canal
canal.instance.dbPassword=canal
canal.instance.connectionCharset = UTF-8
# enable druid Decrypt database password
canal.instance.enableDruid=false
#canal.instance.pwdPublicKey=MFwwDQYJKoZIhvcNAQEBBQADSwAwSAJBALK4BUxdDltRRE5/zXpVEVPUgunvscYFtEip3pmLlhrWpacX7y7GCMo2/JM6LeHmiiNdH1FWgGCpUfircSwlWKUCAwEAAQ==

# table regex .*..*表示监听所有表 也可以写具体的表名,用,隔开
canal.instance.filter.regex=.*\\..*
# table black regex  mysql 数据解析表的黑名单,多个表用,隔开
canal.instance.filter.black.regex=
# table field filter(format: schema1.tableName1:field1/field2,schema2.tableName2:field1/field2)
#canal.instance.filter.field=test1.t_product:id/subject/keywords,test2.t_company:id/name/contact/ch
# table field black filter(format: schema1.tableName1:field1/field2,schema2.tableName2:field1/field2)
#canal.instance.filter.black.field=test1.t_product:subject/product_image,test2.t_company:id/name/contact/ch

# mq config
canal.mq.topic=example
# dynamic topic route by schema or table regex
#canal.mq.dynamicTopic=mytest1.user,mytest2\\..*,.*\\..*
canal.mq.partition=0
# hash partition config
#canal.mq.partitionsNum=3
#canal.mq.partitionHash=test.table:id^name,.*\\..*
#canal.mq.dynamicTopicPartitionNum=test.*:4,mycanal:6
#################################################
主要修改这几个地方
canal.instance.master.address=127.0.0.1:3306
canal.instance.master.journal.name=mysql-bin.000001
canal.instance.dbUsername=canal
canal.instance.dbPassword=canal
这里其实是mysql的binlog
\canal\bin
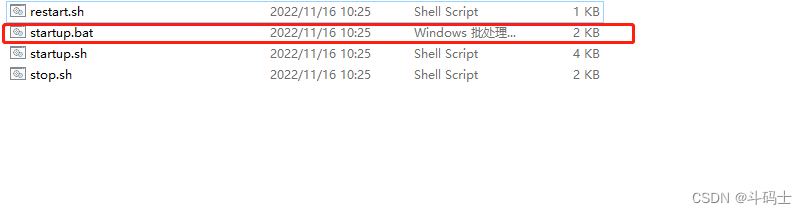
我这里就直接用window来启动了哈,linux也是这样,但是是执行./startup.sh这个文件
demo
好了我们实现一个mysql的数据监控
<?xml version="1.0" encoding="UTF-8"?>
<project xmlns="http://maven.apache.org/POM/4.0.0" xmlns:xsi="http://www.w3.org/2001/XMLSchema-instance"
         xsi:schemaLocation="http://maven.apache.org/POM/4.0.0 https://maven.apache.org/xsd/maven-4.0.0.xsd">
    <modelVersion>4.0.0</modelVersion>
    <parent>
        <groupId>org.springframework.boot</groupId>
        <artifactId>spring-boot-starter-parent</artifactId>
        <version>3.1.1</version>
        <relativePath/> <!-- lookup parent from repository -->
    </parent>
    <groupId>com.zkb</groupId>
    <artifactId>canal-demo</artifactId>
    <version>0.0.1-SNAPSHOT</version>
    <name>canal-demo</name>
    <description>canal-demo</description>
    <properties>
        <java.version>17</java.version>
    </properties>
    <dependencies>
        <dependency>
            <groupId>org.springframework.boot</groupId>
            <artifactId>spring-boot-starter</artifactId>
        </dependency>

        <dependency>
            <groupId>org.springframework.boot</groupId>
            <artifactId>spring-boot-devtools</artifactId>
            <scope>runtime</scope>
            <optional>true</optional>
        </dependency>

        <dependency>
            <groupId>org.springframework.boot</groupId>
            <artifactId>spring-boot-configuration-processor</artifactId>
            <optional>true</optional>
        </dependency>
        <dependency>
            <groupId>org.springframework.boot</groupId>
            <artifactId>spring-boot-starter-test</artifactId>
            <scope>test</scope>
        </dependency>


        <dependency>
            <groupId>com.alibaba.otter</groupId>
            <artifactId>canal.protocol</artifactId>
            <version>1.1.4</version>
        </dependency>

        <dependency>
            <groupId>org.projectlombok</groupId>
            <artifactId>lombok</artifactId>
            <version>1.18.22</version>
            <scope>compile</scope>
        </dependency>
        <dependency>
            <groupId>com.alibaba.otter</groupId>
            <artifactId>canal.client</artifactId>
            <version>1.1.4</version>
        </dependency>

    </dependencies>

    <build>
        <plugins>
            <plugin>
                <groupId>org.springframework.boot</groupId>
                <artifactId>spring-boot-maven-plugin</artifactId>
            </plugin>
        </plugins>
    </build>

</project>
canal:
  server:
    ip: 127.0.0.1
    port: 11111
    username: canal
    password: canal
  promotion:
    destination: example
    batchSize: 1000
    subscribe: xxx.test    #这里是具体的库名和表名,当然你也可以监控所有
package com.zkb;
import com.alibaba.otter.canal.client.CanalConnector;
import com.alibaba.otter.canal.client.CanalConnectors;
import com.alibaba.otter.canal.protocol.CanalEntry;
import com.alibaba.otter.canal.protocol.CanalEntry.Entry;
import com.alibaba.otter.canal.protocol.CanalEntry.EntryType;
import com.alibaba.otter.canal.protocol.CanalEntry.RowChange;
import com.alibaba.otter.canal.protocol.Message;
import com.google.protobuf.InvalidProtocolBufferException;
import lombok.extern.slf4j.Slf4j;
import org.springframework.beans.factory.annotation.Value;
import org.springframework.boot.CommandLineRunner;
import org.springframework.stereotype.Component;
import java.net.InetSocketAddress;
import java.util.List;
@Slf4j
@Component
public class CanalUtil implements CommandLineRunner {
@Value("${canal.server.ip}")
private String canalServerIp;
@Value("${canal.server.port}")
private int canalServerPort;
@Value("${canal.server.username}")
private String userName;
@Value("${canal.server.password}")
private String password;
@Value("${canal.promotion.destination}")
private String destination;
@Value("${canal.promotion.subscribe}")
private String subscribe;
@Override
public void run(String...args) {
CanalConnector connector =
CanalConnectors.newSingleConnector(new InetSocketAddress(canalServerIp, canalServerPort), destination, userName, password);
int batchSize = 1000;
try {
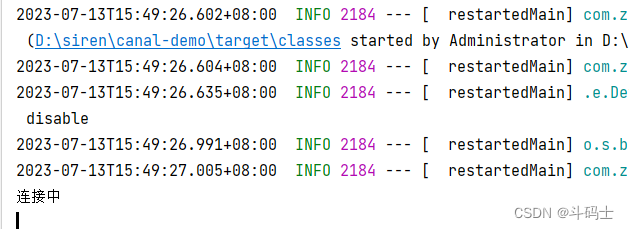
connector.connect();
System.out.println("连接中");
connector.subscribe(subscribe);
connector.rollback();
try {
while (true) {
Message message = connector.getWithoutAck(batchSize);
long batchId = message.getId();
int size = message.getEntries().size();
if (batchId == -1 || size == 0) {
Thread.sleep(1000);
} else {
log.info("msgId -> " + batchId);
dataHandle(message.getEntries());
}
connector.ack(batchId);
}
} catch (InterruptedException e) {
e.printStackTrace();
} catch (InvalidProtocolBufferException e) {
e.printStackTrace();
}
} finally {
connector.disconnect();
//防止频繁访问数据库链接: 线程睡眠 5秒
try {
Thread.sleep(5 * 1000);
} catch (InterruptedException e) {
e.printStackTrace();
}
}
}
private void dataHandle(List<Entry> entries) throws InvalidProtocolBufferException {
for (Entry entry : entries) {
if(entry.getEntryType() != CanalEntry.EntryType.ROWDATA){
continue;
}
if (EntryType.ROWDATA == entry.getEntryType()) {
RowChange rowChange = RowChange.parseFrom(entry.getStoreValue());
for (CanalEntry.RowData rowData : rowChange.getRowDatasList()) {
switch (rowChange.getEventType()){
case INSERT:
// 表名
String tableName = entry.getHeader().getTableName();
List<CanalEntry.Column> afterColumnsList = rowData.getAfterColumnsList();
StringBuffer sb = new StringBuffer();
afterColumnsList.stream().forEach(s->{
sb.append(s.getValue()).append(",");
});
System.out.println("插入字段为:["+sb.toString()+"]");
break;
case UPDATE:
List<CanalEntry.Column> beforeColumnsList1 = rowData.getBeforeColumnsList();
StringBuffer sb1 = new StringBuffer();
beforeColumnsList1.stream().forEach(s->{
sb1.append(s.getValue()).append(",");
});
System.out.println("更新前的数据是:["+sb1.toString()+"]");
List<CanalEntry.Column> afterColumnsList2 = rowData.getAfterColumnsList();
StringBuffer sb2 = new StringBuffer();
afterColumnsList2.stream().forEach(s->{
sb2.append(s.getValue()).append(",");
});
System.out.println("更新后的数据是:["+sb2.toString()+"]");
break;
case DELETE:
List<CanalEntry.Column> beforeColumnsList = rowData.getBeforeColumnsList();
StringBuffer sb3 = new StringBuffer();
beforeColumnsList.stream().forEach(s->{
sb3.append(s.getValue()).append(",");
});
System.out.println("被删除的数据是:["+sb3.toString()+"]");
break;
default:
}
}
}
}
}
}
package com.zkb;

import org.springframework.boot.SpringApplication;
import org.springframework.boot.autoconfigure.SpringBootApplication;

@SpringBootApplication
public class CanalDemoApplication {

    public static void main(String[] args) {
        SpringApplication.run(CanalDemoApplication.class, args);
    }

}
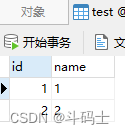
我这里用的是一个test表,里面有两条非常简单的测试数据
当我修改id为1的name时
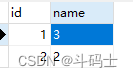

可以很清晰的监控到我的数据变化,其它的我就不试了哈,到这里我们的demo就已经很好的工作,如此如果我们结合mq或者kafka是不是就能很好的解决我们缓存最终一致性的问题


 5078
5078

 被折叠的 条评论
为什么被折叠?
被折叠的 条评论
为什么被折叠?
 到【灌水乐园】发言


