


对于android初学者而言,看到LayoutInflater只能说是“爱过“。在自定义控件的时候构造函数中会LayoutInflater.from(mContext).inflater(layout_id, this);还有重写
适配器布局会LayoutInflater.from(getContext()).inflater(layout_id, null);当时我也是只知道这样用,具体怎么回事不是太清楚,今天就事论事,聊一聊LayoutInflater那些事儿。
首先我们要知道获取LayoutInflater实例有三种方式,并且本质都是一样的:
- LayoutInflater inflater = getLayoutInflater(); //调用Activity的getLayoutInflater()
- LayoutInflater inflater =(LayoutInflater)context.getSystemService(Context.LAYOUT_INFLATER_SERVICE);
- LayoutInflater inflater = LayoutInflater.from(context);
读过源码的就会知道,三种最后都会执行到mContext.getSystemService()。
额,再来说说inflater方法,这个方法重载过一次,有两种形式:
- inflater(int resource, ViewGroup root);
- inflater(int resource, ViewGroup root, boolean attachToRoot);
然而第一种方法本质是inflater(int resource, ViewGroup root, root != null);所以这两个也是有联系的。
实践出真理,写个小demo,新建两个布局文件:
activity_main.xml:
<LinearLayout xmlns:android="http://schemas.android.com/apk/res/android"
    xmlns:tools="http://schemas.android.com/tools"
    android:layout_width="match_parent"
    android:layout_height="200dp"
    android:background="#555"
    android:orientation="vertical">

    <TextView
        android:layout_width="wrap_content"
        android:layout_height="wrap_content"
        android:layout_gravity="center"
        android:text="测试"
        android:textColor="#abc"
        android:textSize="40sp" />

</LinearLayout>
test.xml:
<?xml version="1.0" encoding="utf-8"?>
<LinearLayout xmlns:android="http://schemas.android.com/apk/res/android"
    android:layout_width="250dp"
    android:layout_height="match_parent"
    android:background="#478"
    android:orientation="vertical">

</LinearLayout>
非常简单的两个布局,然后我们在MainActivity中编写:
View test = getLayoutInflater().inflate(R.layout.test, null);
setContentView(test);
运行程序:
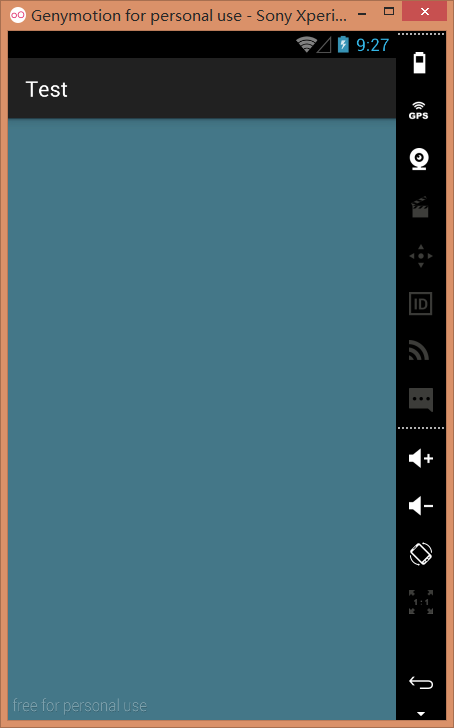
发现宽和高并不是我们自己定义的250dp,是不是巧合咧,改下代码:
View main = getLayoutInflater().inflate(R.layout.activity_main, null);
setContentView(main);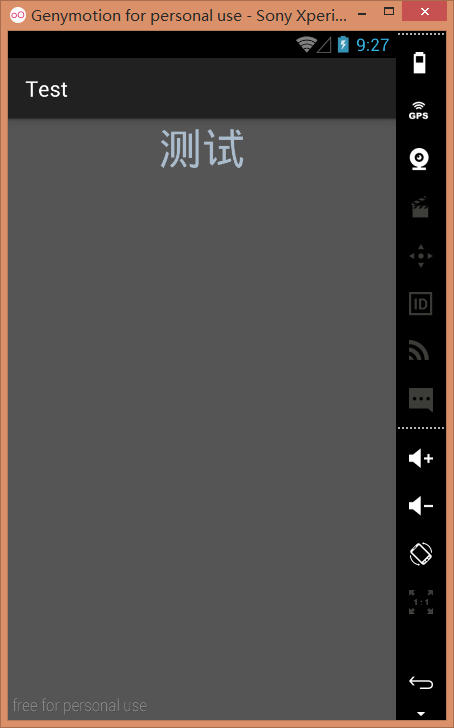
呀哈,这就奇了怪了,为什么有这种情况,不要急,细细道来。
网上看源码分析的demo一搜几个G,我就不扯了,inflater(int resource, ViewGroup root, boolean attachToRoot)三个参数的意义:
- resource:不说也知道,布局的id
- root:该视图的根布局
- attachToRoot:是否将该视图添加到根布局中并返回
inflater的视图宽高,只有匹配到root根布局才会正常计算,不信你去看源码,反正我是信了。
只看解释可能没有什么说服力,那我们再修改代码:
View main = getLayoutInflater().inflate(R.layout.activity_main, null);
View test = getLayoutInflater().inflate(R.layout.test, (ViewGroup) main);
setContentView(test);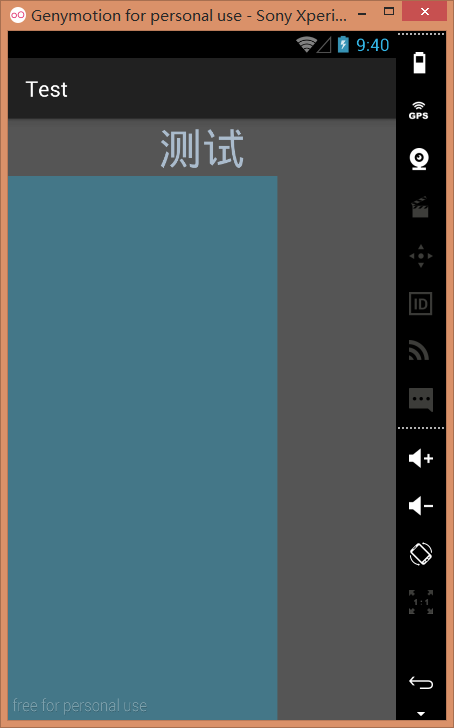
首先inflater一个main布局,因为root传的null所以宽高并不是我们自己定义的宽高,然后inflater一个test布局,这个布局传的root是main布局,后面的attachToRoot我没写出来,大家都应该知道是true吧,所以会正确的加载test布局,并把test布局添加到main布局中并返回。
有疑问,没关系,我们将
View test = getLayoutInflater().inflate(R.layout.test, (ViewGroup) main);改成
View test = getLayoutInflater().inflate(R.layout.test, (ViewGroup) main, false);按照上面的说法这里还是会正确加载test布局,但并不会将test添加到main布局中,我们再运行看看:
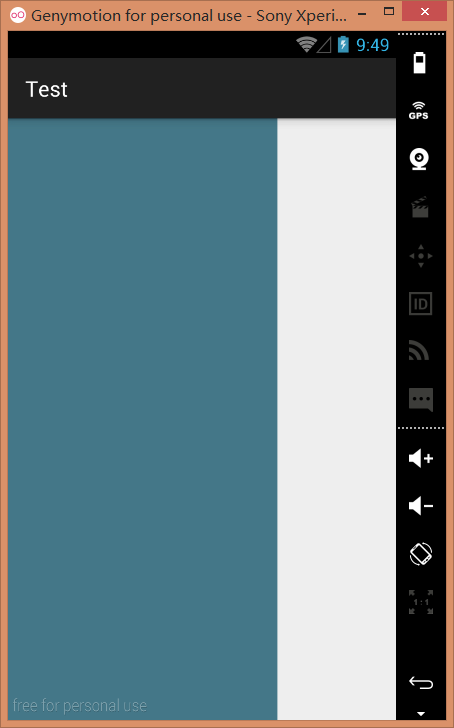
的确是这样,证明了我们上述的猜测是对的。
好了,如果你一行一行地看到了这里,相信你也明白了十之八九,好了,不知道大家有没有遇到一个问题,在自定义adapter中listview不能正常显示item的宽高,当初为了这个抓破头皮屑。。最简单的解决方法就是在不要穿root为空值,记得后面的参数传false哦。
可能见解看法有偏差,虚心接受大牛们的评教。


 611
611

 被折叠的 条评论
为什么被折叠?
被折叠的 条评论
为什么被折叠?
 到【灌水乐园】发言


