添加Swagger2依赖
        <dependency>
           <groupId>io.springfox</groupId>
           <artifactId>springfox-swagger2</artifactId>
           <version>2.9.2</version>
           <scope>compile</scope>
       </dependency>

        <dependency>
           <groupId>io.springfox</groupId>
           <artifactId>springfox-swagger-ui</artifactId>
           <version>2.9.2</version>
       </dependency>
添加注解
启用Swagger2
import org.slf4j.Logger;
import org.slf4j.LoggerFactory;
import org.springframework.boot.SpringApplication;
import org.springframework.boot.autoconfigure.SpringBootApplication;
import org.springframework.boot.autoconfigure.condition.ConditionalOnClass;
import springfox.documentation.swagger2.annotations.EnableSwagger2;

@EnableSwagger2 //启用swagger2
@ConditionalOnClass
@SpringBootApplication
public class DemoApplication {
    public static final Logger logger = LoggerFactory.getLogger(DemoApplication.class);

    public static void main(String[] args) {
        SpringApplication.run(DemoApplication.class, args);
    }
}
swagger分组配置(可选)
import org.springframework.context.annotation.Bean;
import org.springframework.context.annotation.Configuration;
import springfox.documentation.builders.ApiInfoBuilder;
import springfox.documentation.builders.PathSelectors;
import springfox.documentation.builders.RequestHandlerSelectors;
import springfox.documentation.service.ApiInfo;
import springfox.documentation.service.Contact;
import springfox.documentation.spi.DocumentationType;
import springfox.documentation.spring.web.plugins.Docket;

@Configuration
public class SwaggerConfig {

    @Bean
    public Docket createRestApi() {
        return new Docket(DocumentationType.SWAGGER_2)
                .groupName("第一组") // 定义组名
                .apiInfo(apiInfo())
                .select()
                // 指定该组扫描哪些包下面的接口
                .apis(RequestHandlerSelectors.basePackage("com.example"))
                .paths(PathSelectors.any())
                .build();
    }

    //构建 api文档的详细信息函数
    private ApiInfo apiInfo() {
        return new ApiInfoBuilder()
                //页面标题
                .title("XX平台API接口文档")
                //创建人
                .contact(new Contact("今天例外", "https://blog.csdn.net/qq_15022971/article/details/126606500?spm=1001.2014.3001.5501",
                        "xxxxxx@qq.com"))
                //版本号
                .version("1.0")
                //描述
                .description("系统API描述")
                .build();
    }
}
controller层
import io.swagger.annotations.Api;
import io.swagger.annotations.ApiOperation;
import org.springframework.web.bind.annotation.*;

@Api(tags = "测试接口管理")
@RestController
@RequestMapping("/test")
public class TestController {

    @ApiOperation("测试接口")
    @PostMapping("/getCarInfo")
    public CarInfoResponseDTO test (@RequestBody CarInfoRequestDTO carInfoRequestDTO) {
        return new CarInfoResponseDTO();
    }
}
入参添加注解
// 入参添加注解
@Data
@ApiModel(value = "CarInfoRequestDTO", description = "车辆信息DTO")
public class CarInfoRequestDTO implements Serializable {

    @ApiModelProperty(value = "车架码(vin码)", name = "vin", dataType = "String")
    private String vin;

    @ApiModelProperty(value = "车牌号", name = "plateNo", dataType = "String")
    private String plateNo;

    @ApiModelProperty(value = "号牌种类", name = "plateType", dataType = "String")
    private String plateType;

    @ApiModelProperty(value = "厂牌型号", name = "vehicleName", dataType = "String")
    private String vehicleName;

    @ApiModelProperty(value = "订单id", name = "orderId", dataType = "String")
    private String orderId;
}
返参添加注解
// 返参添加注解
@Data
@ApiModel(value = "CarInfoResponseDTO", description = "车辆信息响应DTO")
public class CarInfoResponseDTO {

    @ApiModelProperty(value = "车架码(vin码)", name = "vin", dataType = "String")
    private String vin;

    @ApiModelProperty(value = "车牌号", name = "plateNo", dataType = "String")
    private String plateNo;

    @ApiModelProperty(value = "发动机号", name = "engNO", dataType = "String")
    private String engNO;

    @JsonFormat(
            pattern = "yyyy-MM-dd",
            timezone = "GMT+8"
    )
    @JsonSerialize(
            using = LocalDateSerializer.class
    )
    @JsonDeserialize(
            using = LocalDateDeserializer.class
    )
    @ApiModelProperty(value = "初登日期", name = "firstRegisterDate", dataType = "LocalDate")
    private LocalDate firstRegisterDate;

    @ApiModelProperty(value = "新车购置价", name = "purchasePrice", dataType = "BigDecimal")
    private BigDecimal purchasePrice;

    @ApiModelProperty(value = "座位数", name = "seat", dataType = "Integer")
    private Integer seat;

    @ApiModelProperty(value = "核定载质量", name = "vehicleCapacity", dataType = "BigDecimal")
    private BigDecimal vehicleCapacity;

    @ApiModelProperty(value = "行业车型编码", name = "hyModelCode", dataType = "String")
    private String hyModelCode;

    @ApiModelProperty(value = "整车车型编码", name = "jyModelCode", dataType = "String")
    private String jyModelCode;

    @ApiModelProperty(value = "品牌型号", name = "brandModel", dataType = "String")
    private String brandModel;

    @ApiModelProperty(value = "行业车型名称", name = "carStyleName", dataType = "String")
    private String carStyleName;

    @ApiModelProperty(value = "整车车型名称", name = "jyModelName", dataType = "String")
    private String jyModelName;

    @ApiModelProperty(value = "排量", name = "displacement", dataType = "BigDecimal")
    private BigDecimal displacement;

    @ApiModelProperty(value = "年款,格式:YYYY", name = "yearKx", dataType = "String")
    private String yearKx;

    @ApiModelProperty(value = "车辆的实际价值", name = "actualValue", dataType = "BigDecimal")
    private BigDecimal actualValue;

    @ApiModelProperty(value = "车辆的实际价值上限", name = "actualValueMax", dataType = "BigDecimal")
    private BigDecimal actualValueMax;

    @ApiModelProperty(value = "车辆的实际价值下限", name = "actualValueMin", dataType = "BigDecimal")
    private BigDecimal actualValueMin;

    @ApiModelProperty(value = "整备质量", name = "curbWeight", dataType = "BigDecimal")
    private BigDecimal curbWeight;
}
运行项目
查看Swagger UI
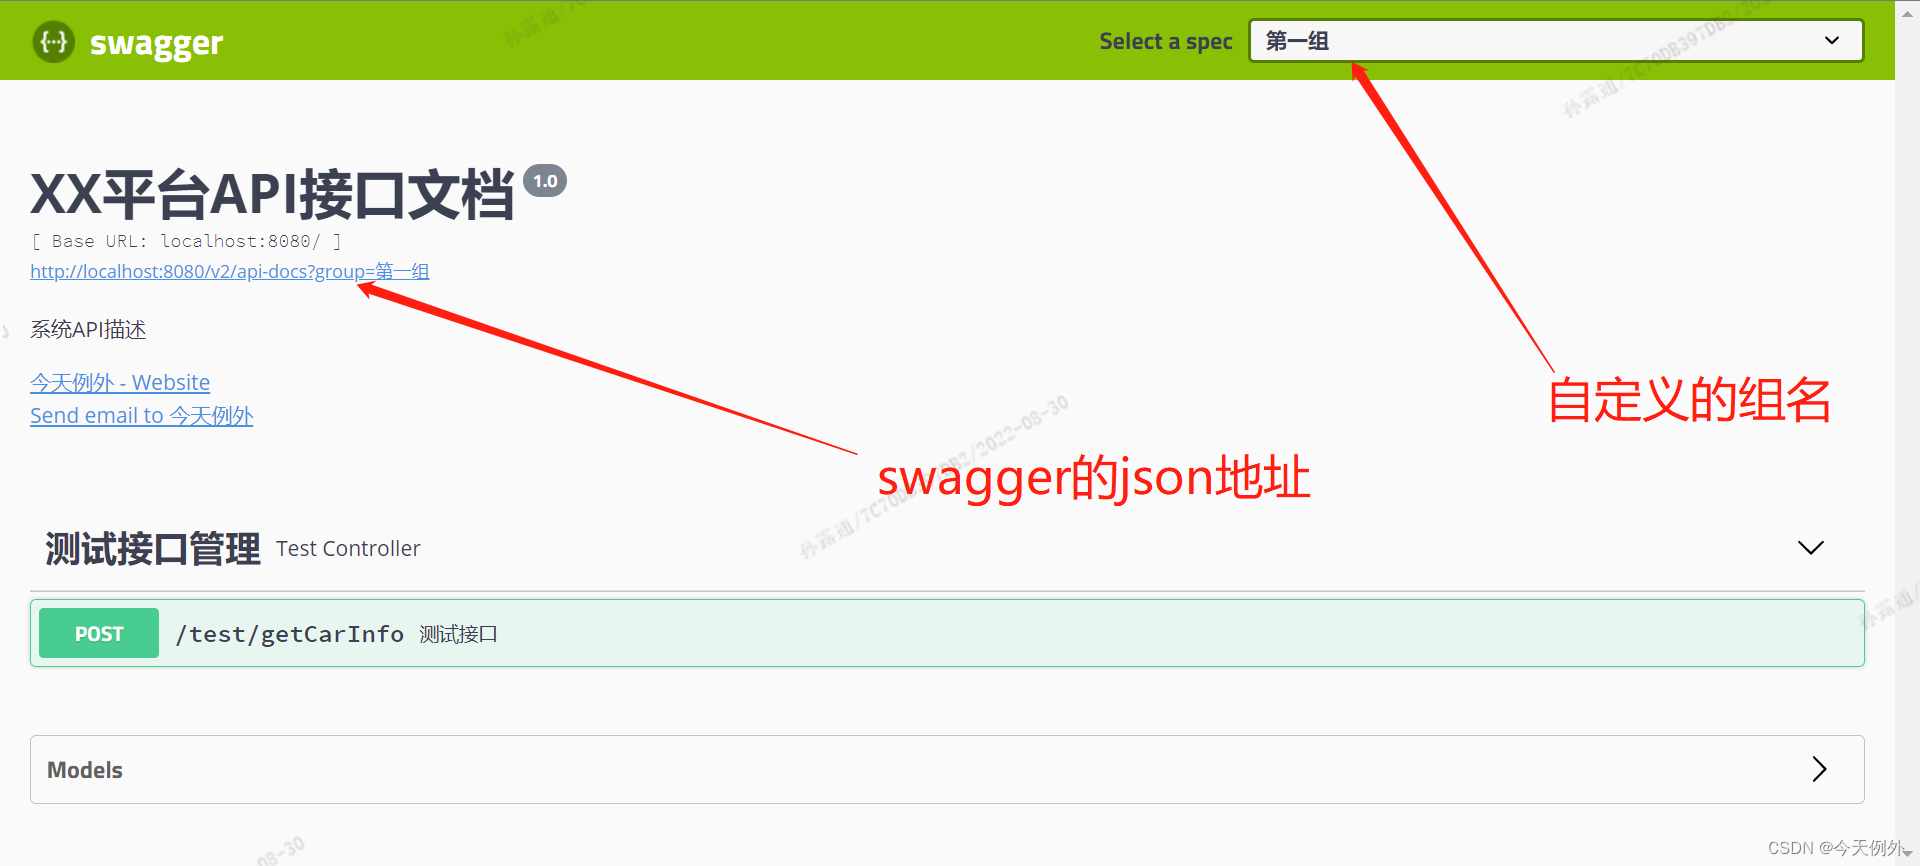
访问地址是http://localhost:8080//swagger-ui.html
注意图中的箭头所指的第一组的标记和上面配置类中的配置,你就明白了.
鉴于SwaggerUI真的不太方便,于是我们用Yapi来做接口的展示
yapiUI
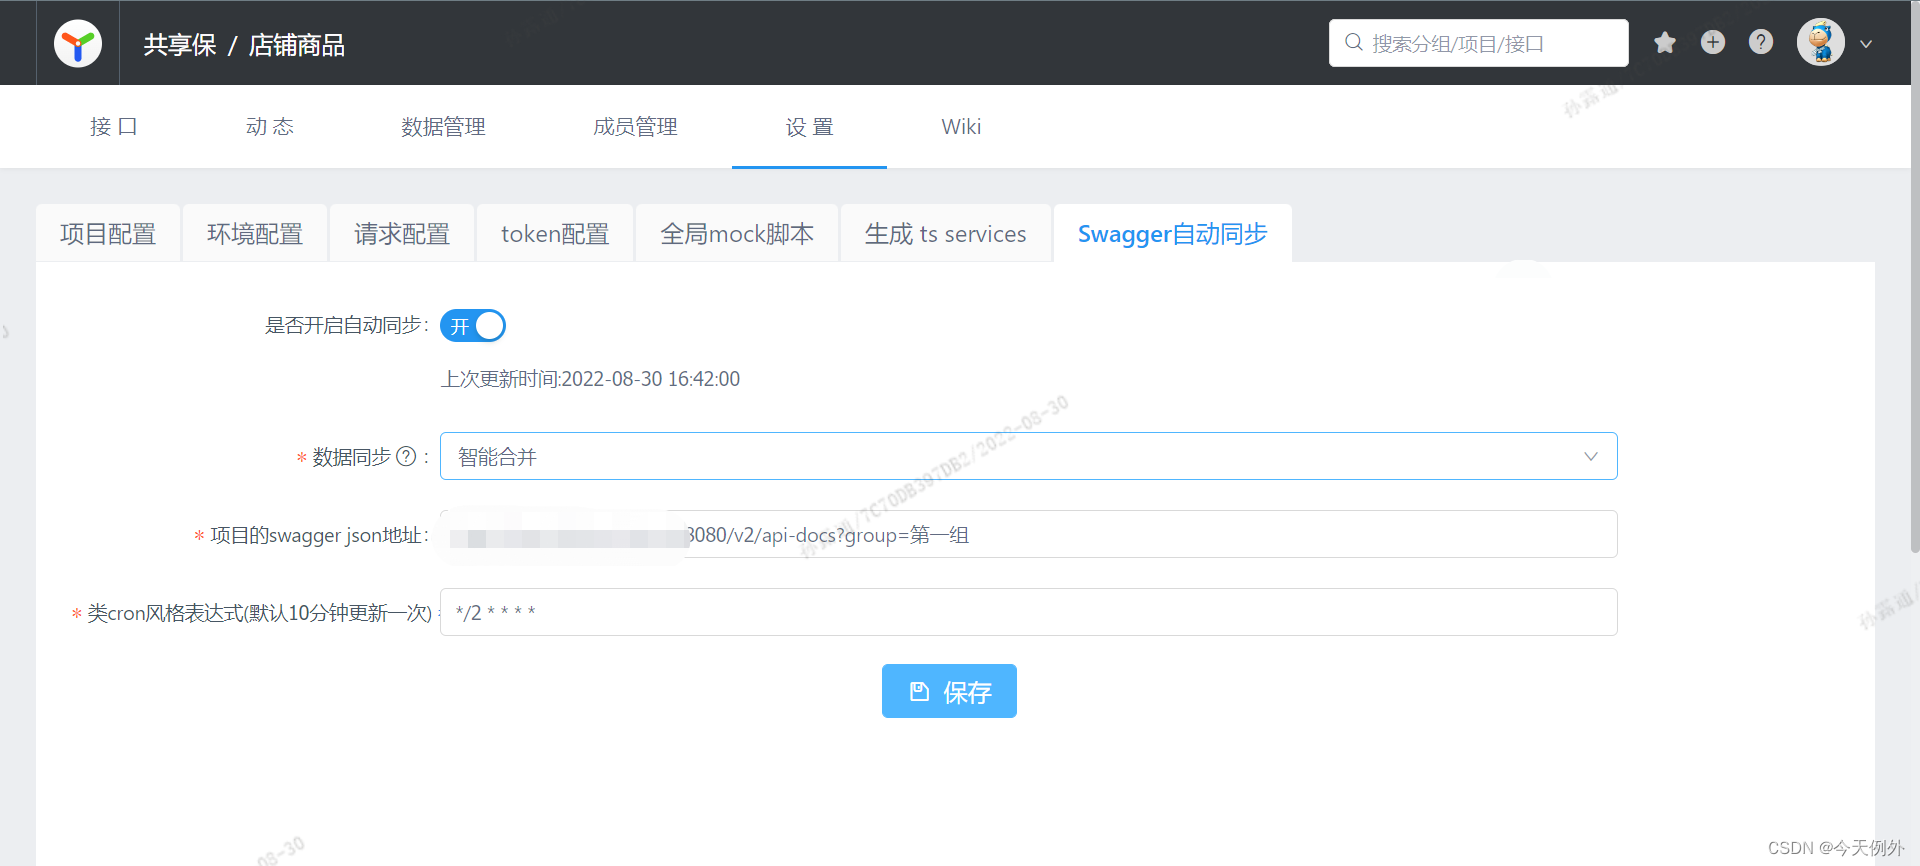
这里配置的是SwaggerUI中json地址
更新接口
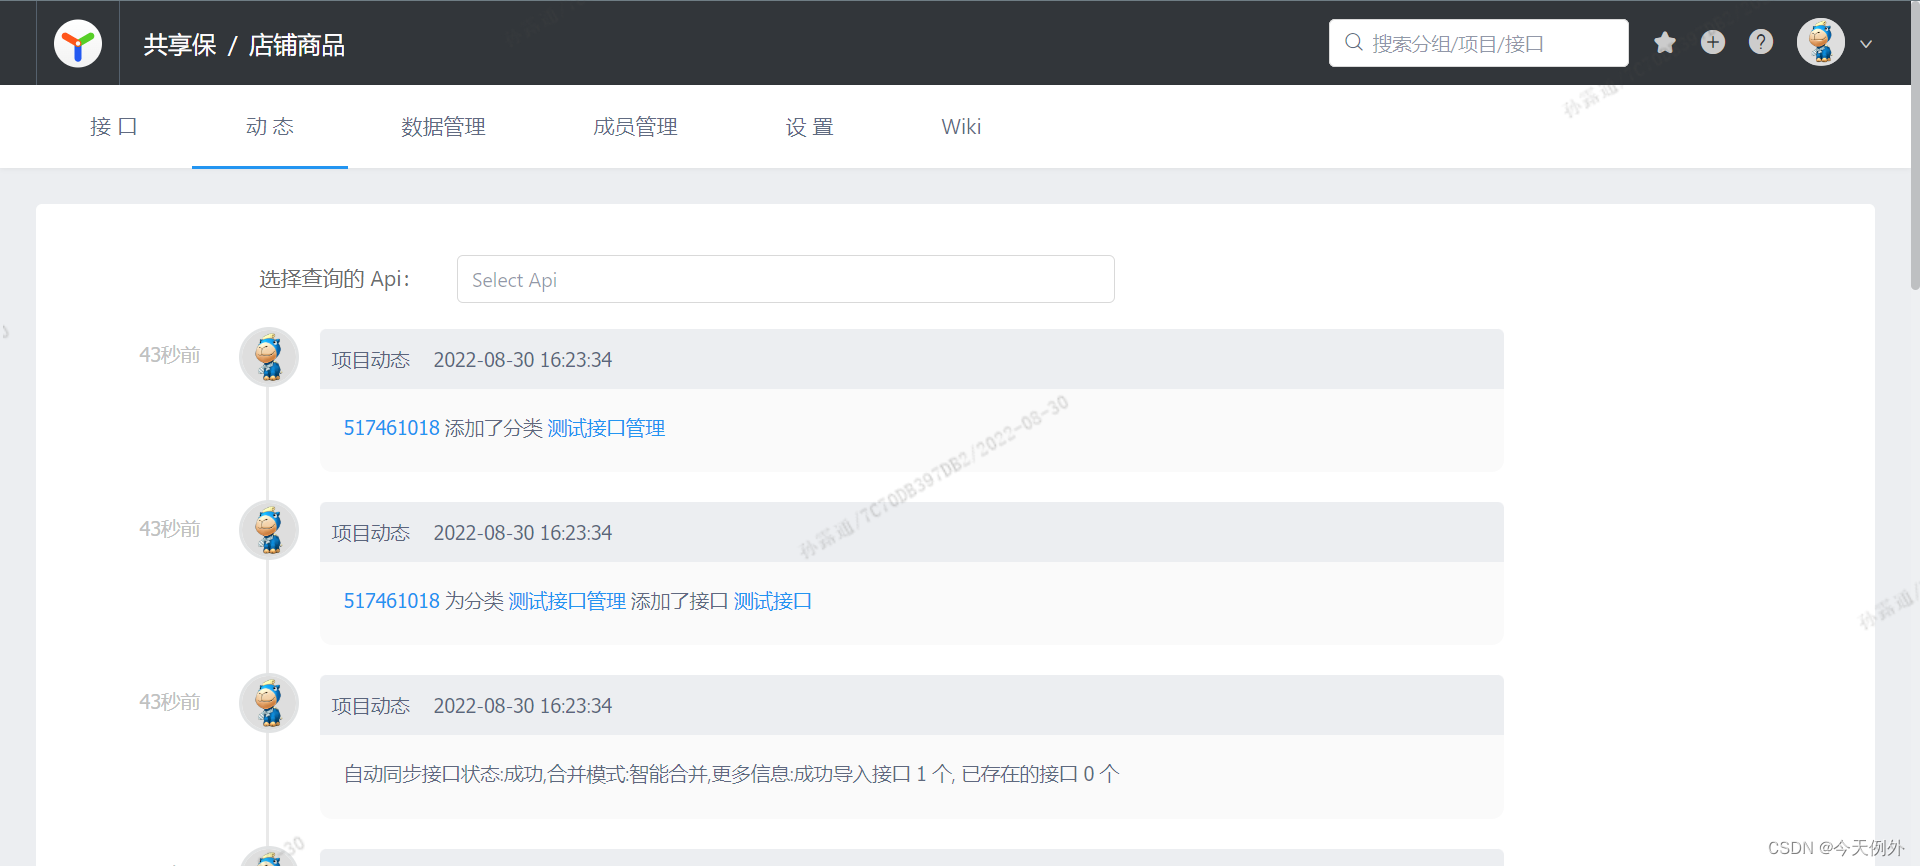
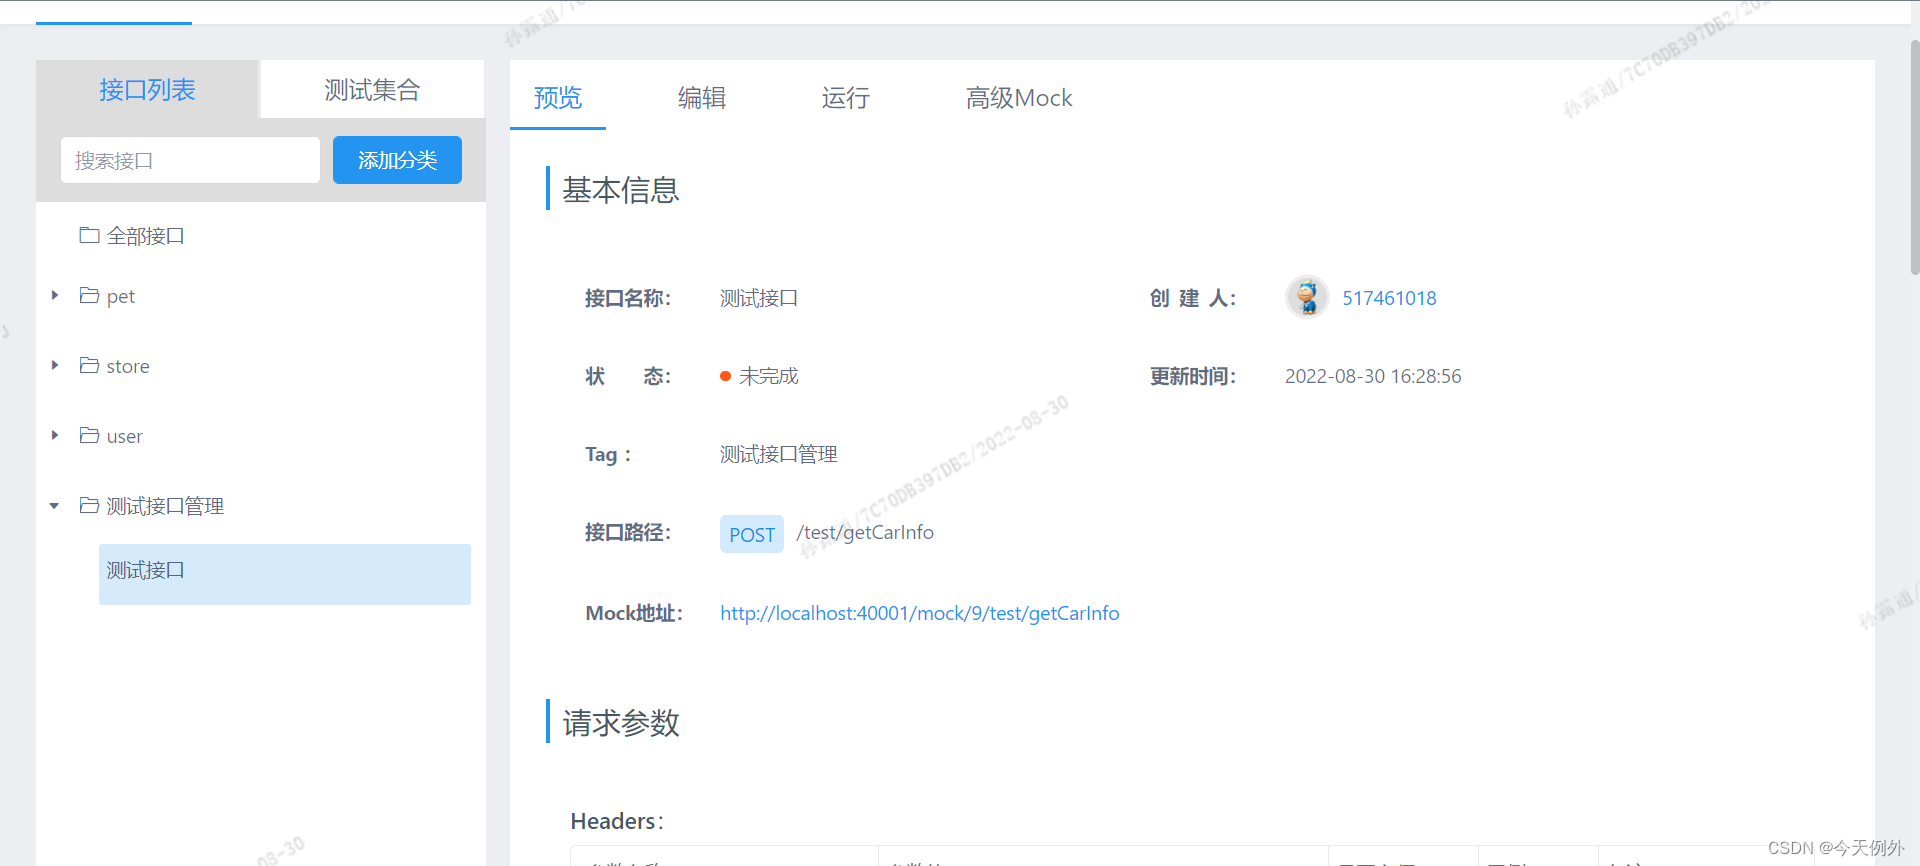
下面看一下YAPI上面接口的详情:
接口头部
接口请求体
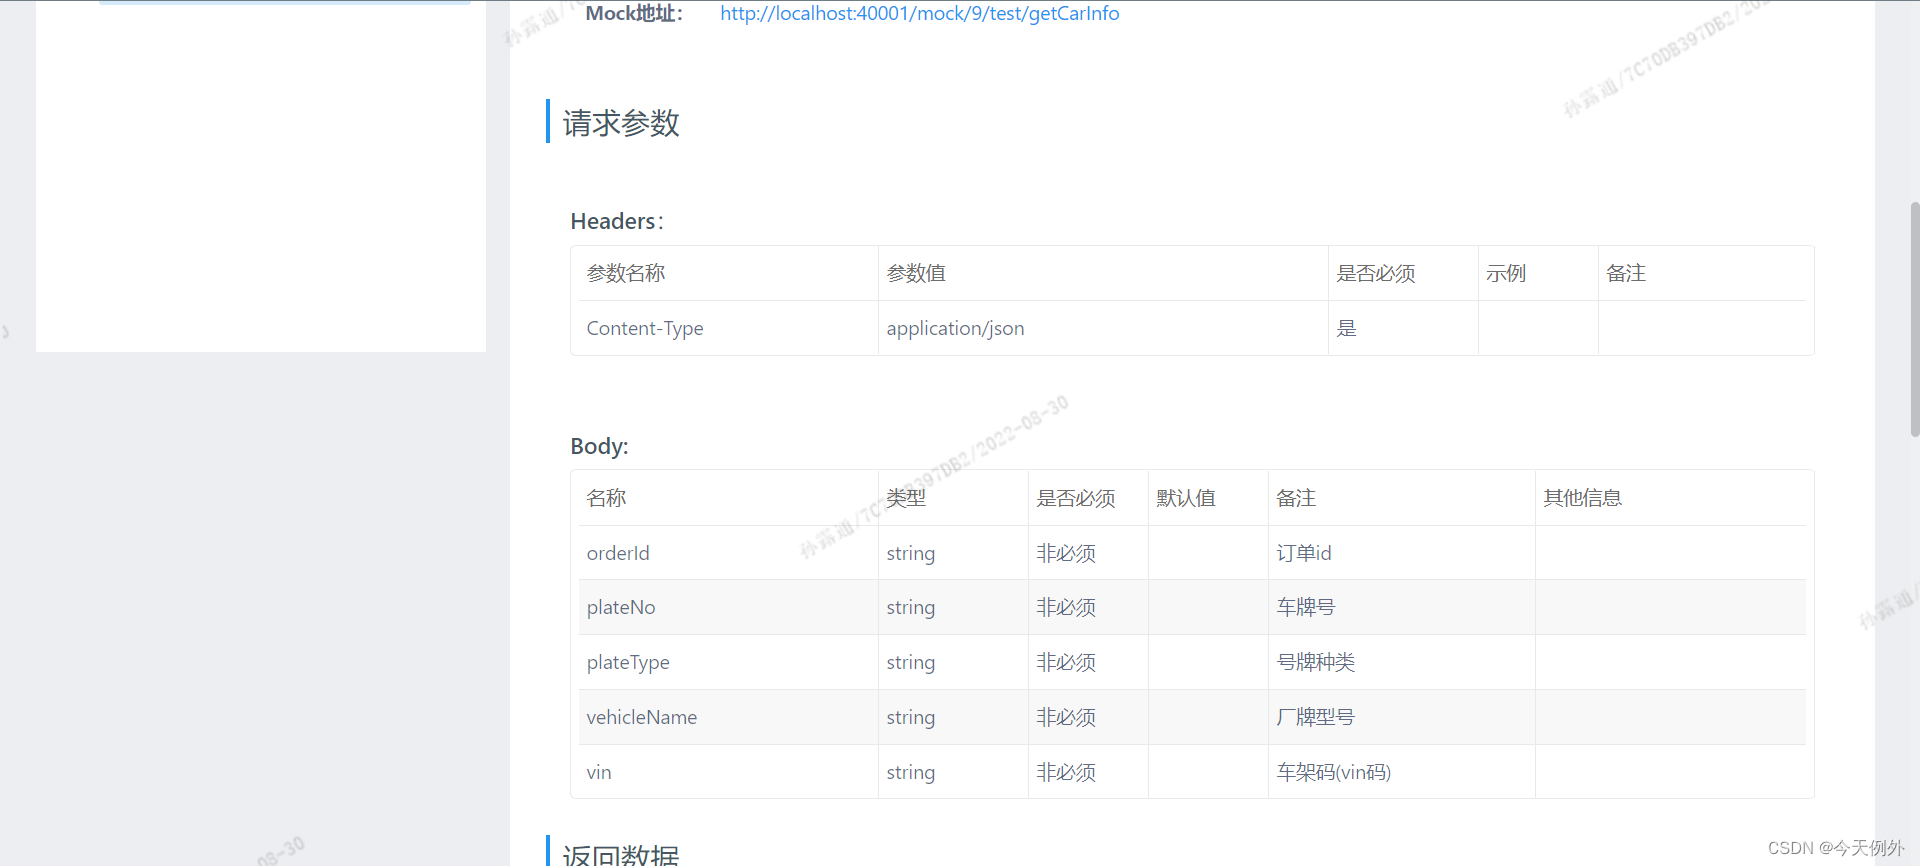
接口相应体(不能截全屏,展示部分)
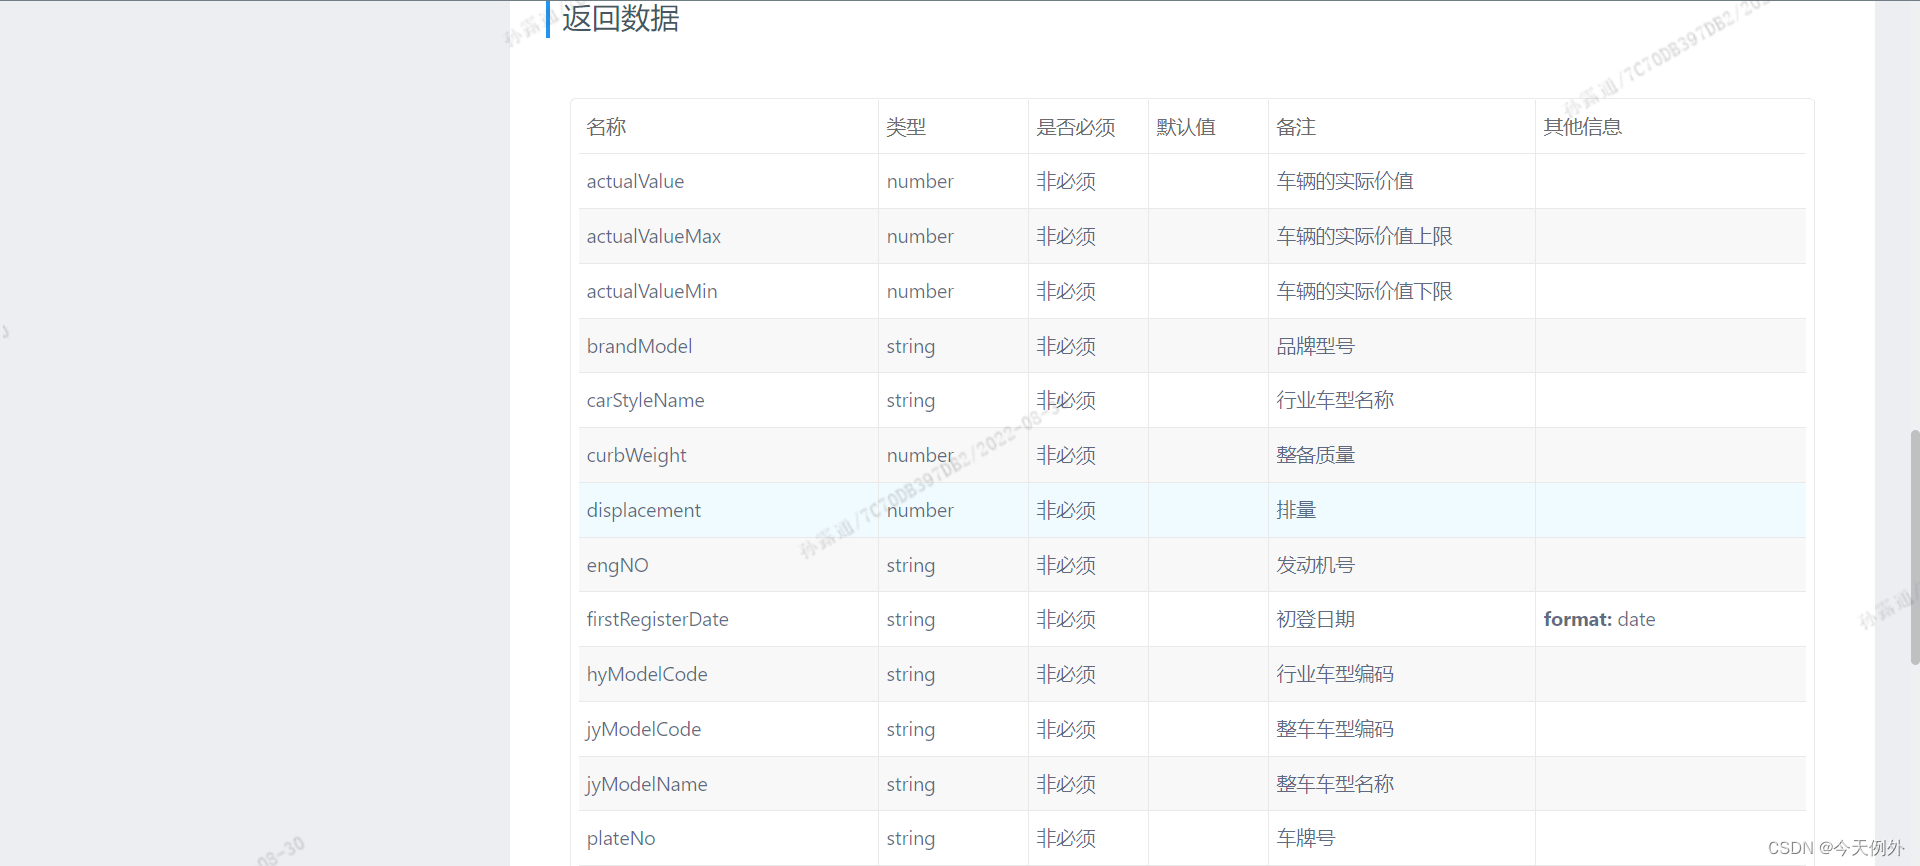
相关链接
OpenApi和Swagger2 Swagger3的关系
Springboot集成OpenAPI-Swagger3并通过Yapi做接口管理
Springboot集成springFox-Swagger3并通过Yapi做接口管理
Sofaboot集成Swagger3并通过Yapi做接口管理
swagger-yapi-demo项目下载


 4705
4705


 被折叠的 条评论
为什么被折叠?


