


1、前端页面的代码
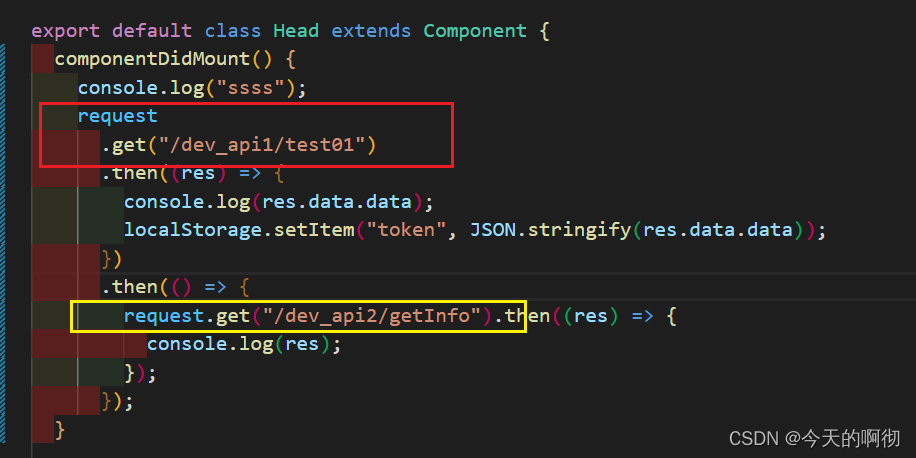
2个请求发送到2个不同的应用上
2、后端代码
2.1 pom.xml
 <dependency>
            <groupId>org.springframework.boot</groupId>
            <artifactId>spring-boot-starter-web</artifactId>
        </dependency>

        <dependency>
            <groupId>org.springframework.boot</groupId>
            <artifactId>spring-boot-starter-test</artifactId>
            <scope>test</scope>
        </dependency>
        <dependency>
            <groupId>org.springframework.session</groupId>
            <artifactId>spring-session-data-redis</artifactId>
            <version>2.3.3.RELEASE</version>
        </dependency>
        <dependency>
            <groupId>org.springframework.boot</groupId>
            <artifactId>spring-boot-starter-data-redis</artifactId>
            <version>2.3.4.RELEASE</version>
        </dependency>
2.2 application.properties
server.port=8081
spring.profiles.active=pro
spring.datasource.username=root
#spring.datasource.password=6D$&qI9%
spring.datasource.password=123456
spring.datasource.driver-class-name=com.mysql.cj.jdbc.Driver
serverTimezone=GMT&useUnicode=true&characterEncoding=utf8
spring.datasource.url=jdbc:mysql://localhost:3306/pokweb?serverTimezone=GMT&useUnicode=true&characterEncoding=utf8
#spring.datasource.type=com.alibaba.druid.pool.DruidDataSource
spring.datasource.druid.db-type=com.alibaba.druid.pool.DruidDataSource
#redis
spring.redis.port=6379
spring.redis.host=127.0.0.1
spring.redis.database=0
spring.redis.timeout=30000
spring.redis.pool.min-idle=0
spring.redis.pool.max-idle=8
spring.redis.pool.max-wait=-1
spring.redis.pool.max-active=8
spring.session.store-type=redis
mysql部分不需要的可以注释掉
2.3 启动类
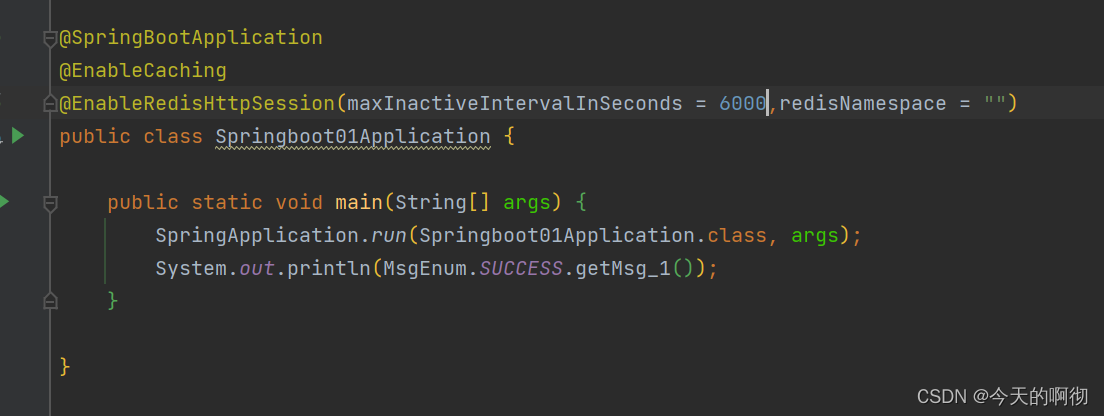
其中@EnableRedisHttpSession注解这个有几个值自己去看看吧,flushMode为刷新的模式共有2种
ON_SAVE: 只有当SessionRepository.save(Session)方法被调用时,才会将session中的数据同步到redis中. 在web 应用中, 当请求完成响应后, 才开始同步. 也就是说在执行response之前session数据都是缓存在本地的.
IMMEDIATE: 实时同步session 数据到redis. 当执行SessionRepository.createSession()时, 会将session数据同步到redis中;当对session的attribute进行set/remove 等操作时, 也会同步session中的数据到redis中.
2.4 controller类
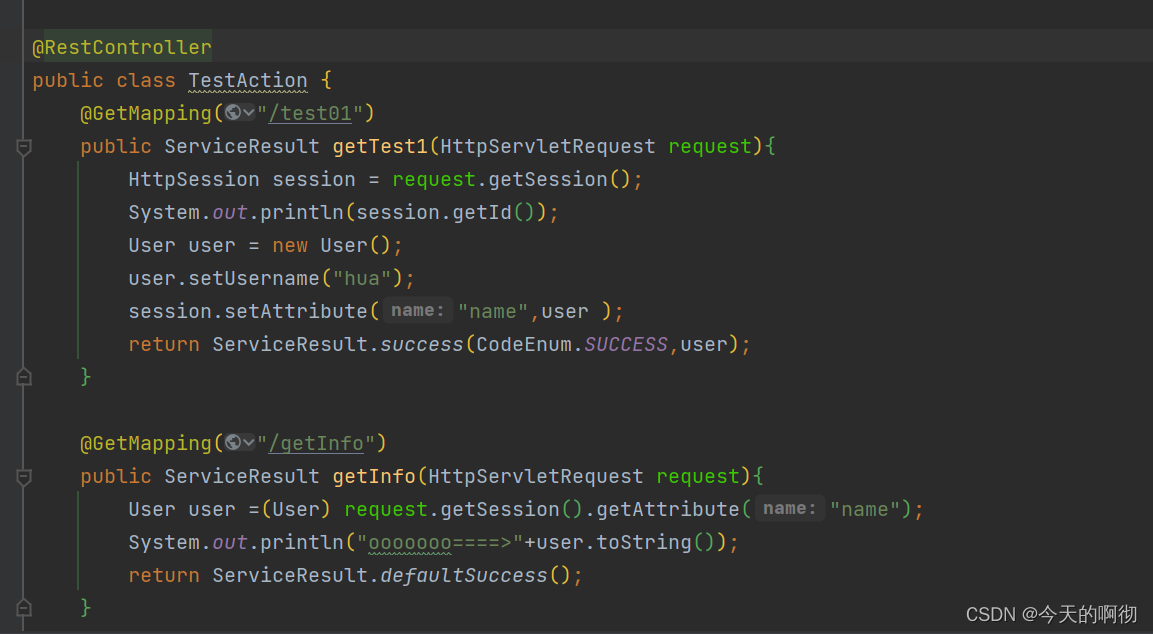
为了方便全写在一起了
将应用复制一份出来

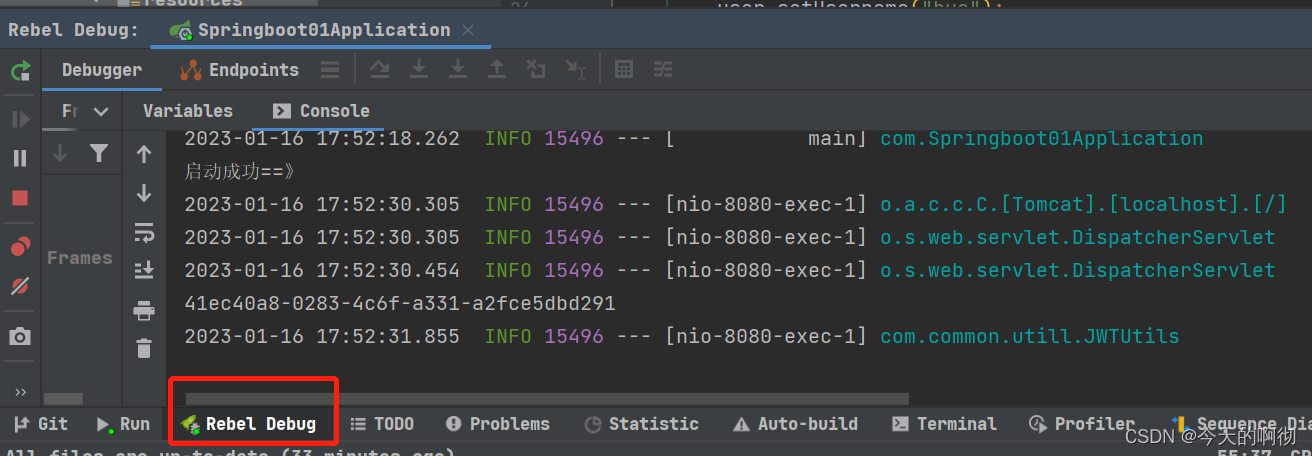
执行启动类
这时redis中就会新增3个key
其中一个为

3.测试接口
第一个应用的第一个接口执行了session.setAttribute(“name”,user );
在第二个应用的第二个接口中获取到了这个user
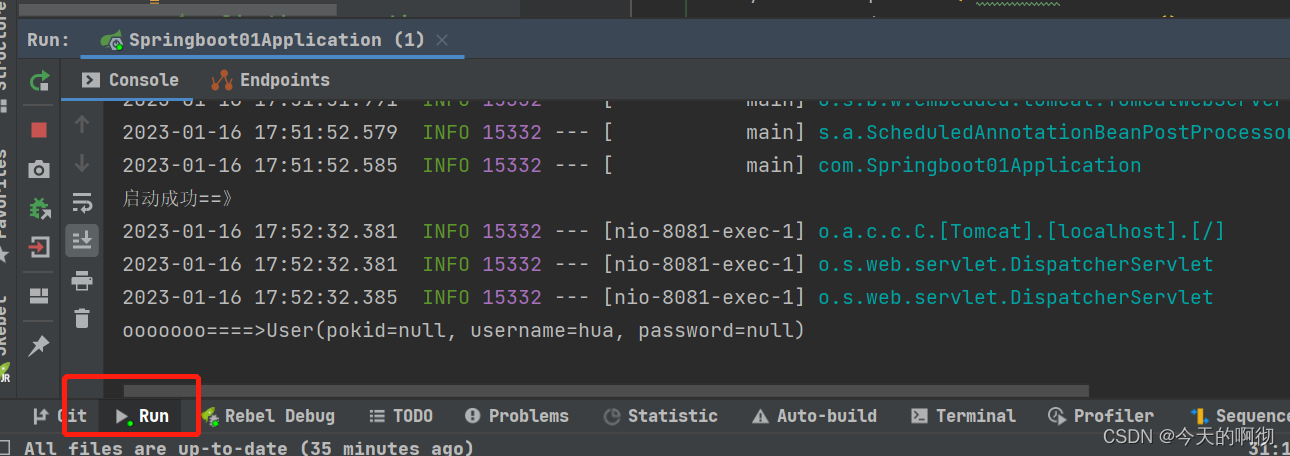
不需要自己去redis中获取session


 2160
2160


 被折叠的 条评论
为什么被折叠?
被折叠的 条评论
为什么被折叠?
 到【灌水乐园】发言


