


前提介绍
1、为什么要使用单元测试?
答:由于在SpringBoot开发过程中,每开发一个模块,有时需要从controller、service、mapper到甚至xml文件的编写全部开发完毕才能进行测试,这是十分浪费时间的,比如开发人员想测试一段mybatis的sql是否正常运行,就不得不为这段sql开发上述流程的一整套代码。此外若项目太大,每次调试都需重启服务,而启动时间十分漫长(相信很多开发人员深有体会),调试十分麻烦。因此需要引入单元测试。
单元测试的优点:
1、可以直接将bean注入到测试类,比如mapper和sql写好了,将业务写到测试方法中直接运行测试方法即可观测结果,而Spring中是不允许直接运行service的。
2、启动时间减少。junit启动时,如加上@RunWith(SpringRunner.class)注解,则会启动spring容器,但是其他的组件不会启动,相比较启动整个服务的时间而言,大大减少了调试的时间。
接下来就开始实践一波。
第一步、添加依赖
pom文件添加:
		<dependency>
            <groupId>org.springframework.boot</groupId>
            <artifactId>spring-boot-starter-test</artifactId>
            <scope>test</scope>
        </dependency>
        <dependency>
            <groupId>org.springframework.boot</groupId>
            <artifactId>spring-boot-test</artifactId>
        </dependency>
        <dependency>
            <groupId>junit</groupId>
            <artifactId>junit</artifactId>
            <version>4.12</version>
        </dependency>
        <dependency>
            <groupId>org.springframework</groupId>
            <artifactId>spring-test</artifactId>
        </dependency>
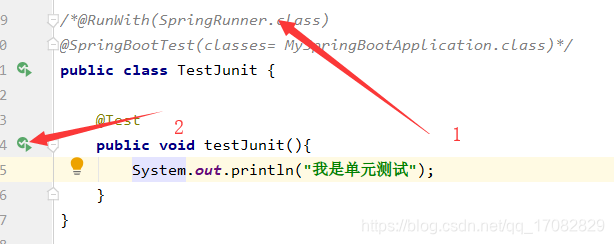
第二步、src/test/java下新建测试类

第三步、编写测试方法
import com.ffw.springboot.MySpringBootApplication;
import org.junit.Test;
import org.junit.runner.RunWith;
import org.springframework.boot.test.context.SpringBootTest;
import org.springframework.test.context.junit4.SpringRunner;

@RunWith(SpringRunner.class)//以Spring启动类的方式运行测试类
@SpringBootTest(classes= MySpringBootApplication.class)//测试启动类入口,这里填写自己的
public class TestJunit {

	@AutoWired
	private UserMapper userMapper;//如有必要,可以直接注入mapper
    @Test//测试方法入口注解
    public void testJunit(){
        System.out.println("我是单元测试");
        //userMapper.queryAllUser();//如有必要,可直接调用mapper方法测试sql
    }
}
第四步、运行测试方法,得到结果

注意事项
1、测试类和方法可不可以单独运行,不加@RunWith和@SpringBootTest?
答:完全可以。只是之后不能再使用Spring容器中任何的bean,否则将报错提示需要注入的bean找不到。只是类似纯粹的JAVA工程。 演示:

2、为什么项目加入WebSocket之后,再运行Junit方法会报错?
答:解决方案:在@SpringBootTest注解内加入添加如下属性即可。(具体原理暂时不明)
@SpringBootTest(classes = HelloApplication.class,webEnvironment = SpringBootTest.WebEnvironment.DEFINED_PORT)


 559
559


 被折叠的 条评论
为什么被折叠?
被折叠的 条评论
为什么被折叠?
 到【灌水乐园】发言


