


- spring mvc框架与fileupload文件上传
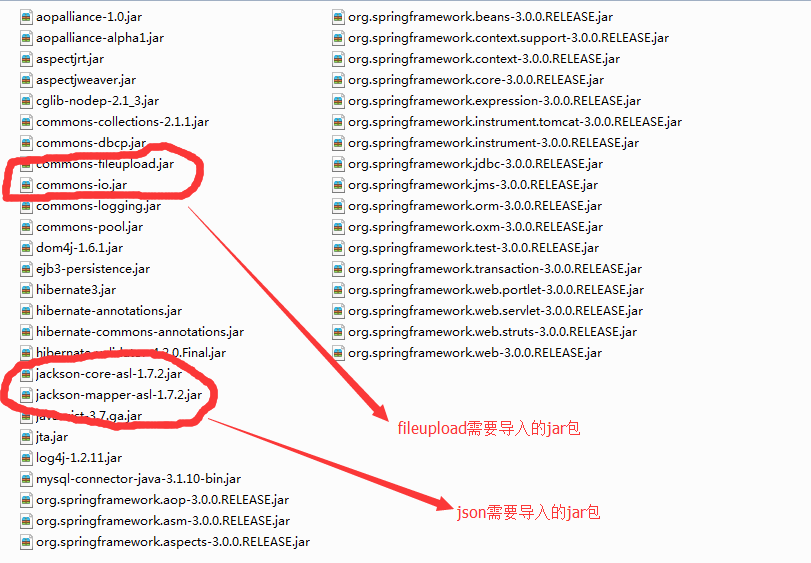
项目需要导入的jar包
fileupload需要配置的spring-servletxml文件信息
<!-- 处理文件上传 -->
    <bean id="multipartResolver"
        class="org.springframework.web.multipart.commons.CommonsMultipartResolver">
        <property name="defaultEncoding" value="gbk" /> <!-- 默认编码 (ISO-8859-1) -->
        <property name="maxInMemorySize" value="10240" /> <!-- 最大内存大小 (10240)-->
        <property name="uploadTempDir" value="/upload/" /> <!-- 上传后的目录名 (WebUtils#TEMP_DIR_CONTEXT_ATTRIBUTE) -->
        <property name="maxUploadSize" value="-1" /> <!-- 最大文件大小,-1为无限止(-1) -->
    </bean>
需要的代码信息
import java.io.File;
import java.util.Date;

import javax.servlet.ServletContext;

import org.springframework.stereotype.Controller;
import org.springframework.web.bind.annotation.RequestMapping;
import org.springframework.web.bind.annotation.RequestMethod;
import org.springframework.web.bind.annotation.RequestParam;
import org.springframework.web.context.ServletContextAware;
import org.springframework.web.multipart.commons.CommonsMultipartFile;


//声明这是一个bean:为控制类的bean对象
@Controller
public class FileUploadController implements ServletContextAware {

    private ServletContext servletContext;

    public void setServletContext(ServletContext context) {
        this.servletContext  = context;
    }

    //表示如果form表单访问的是upload.do并且为post请求则使用这个方法
    @RequestMapping(value="/upload.do", method = RequestMethod.POST)
    //声明成一个接受上传的方法
    public String handleUploadData(String name,@RequestParam("file") CommonsMultipartFile file){
        if (!file.isEmpty()) {
               String path = this.servletContext.getRealPath("/tmp/");  //获取本地存储路径
               System.out.println(path);
               //得到文件的初始名称
               String fileName = file.getOriginalFilename();
               String fileType = fileName.substring(fileName.lastIndexOf("."));
               System.out.println(fileType);
               File file2 = new File(path,new Date().getTime() + fileType); //新建一个文件
               try {
                    file.getFileItem().write(file2); //将上传的文件写入新建的文件中
               } catch (Exception e) {
                    e.printStackTrace();
               }
               //重定向到文件上传成功页面
               return "redirect:upload_ok.jsp";
            }else{
                //重定向到文件上传失败页面
                return "redirect:upload_error.jsp";
            }
    }
}
上面的注解需要在springmvc-servlet.xml配置一些信息,用于服务器能够解析收到
    <!-- 对web包中的所有类进行扫描,以完成Bean创建和自动依赖注入的功能 -->
    <context:component-scan base-package="com.xingyao" />


    <mvc:annotation-driven />  <!-- 支持spring3.0新的mvc注解 -->
    <!-- 启动Spring MVC的注解功能,完成请求和注解POJO的映射 -->
    <bean
        class="org.springframework.web.servlet.mvc.annotation.AnnotationMethodHandlerAdapter">
        <property name="cacheSeconds" value="0" />
        <property name="messageConverters">
            <list>
                <bean
                    class="org.springframework.http.converter.json.MappingJacksonHttpMessageConverter"></bean>
            </list>
        </property>
    </bean>


----------
spring与ajax
1. 导入的jar包见上面的图片
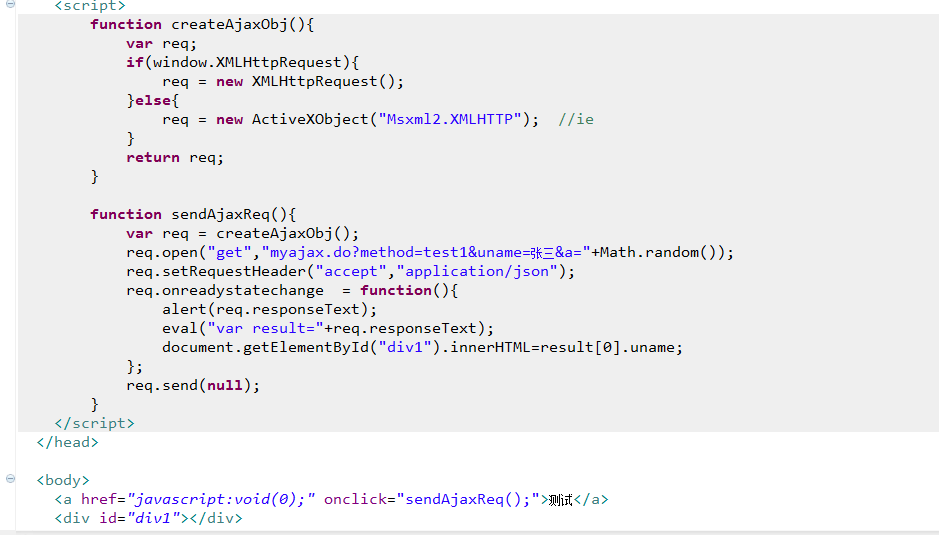
2. jsp页面的代码
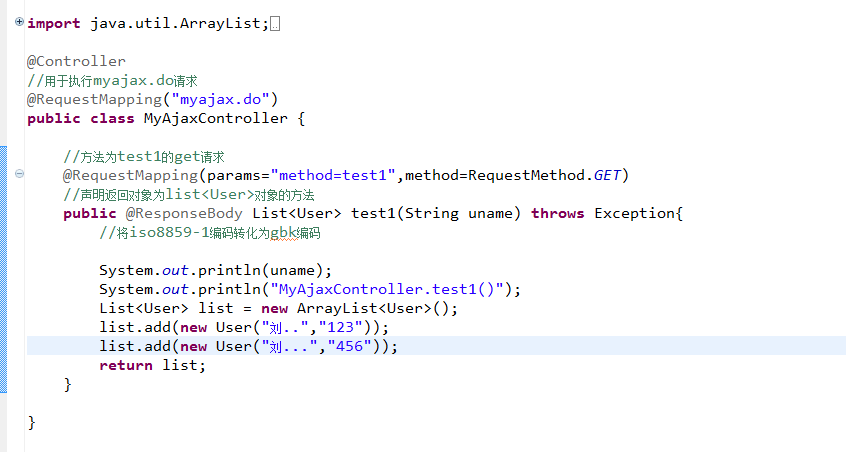
3.servlet层的代码
spring与过滤器
- spring-servlet.xml的配置
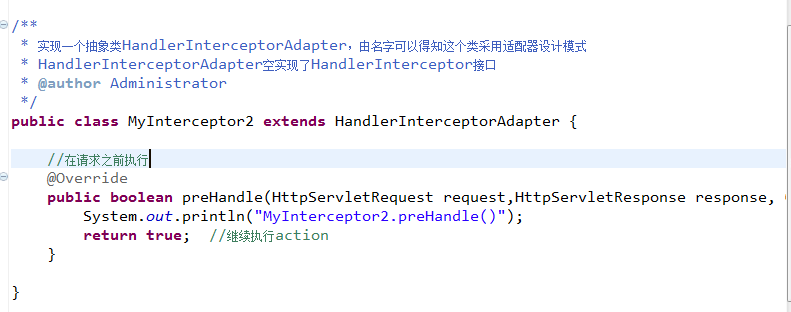
servelt层代码的写法
还有一些方法

public void afterCompletion(HttpServletRequest request, HttpServletResponse response, Object handler, Exception ex) throws Exception {
        System.out.println("最后执行!!!一般用于释放资源!!");

    }

    public void postHandle(HttpServletRequest request,HttpServletResponse response, Object handler, ModelAndView modelAndView) throws Exception {
        System.out.println("Action执行之后,生成视图之前执行!!");
    }
这就是spring的一些应用


 381
381

 被折叠的 条评论
为什么被折叠?
被折叠的 条评论
为什么被折叠?
 到【灌水乐园】发言


