


PageHelper分页插件使用,SSM,Springboot分页失效问题解决
返回导航页
SSM 框架
https://blog.csdn.net/hancoder/article/details/106922139
1、使用maven(这个神器一定要学会使用)
   <dependency>		**//引入jar包**
    <groupId>com.github.pagehelper</groupId>
    <artifactId>pagehelper</artifactId>
    <version>5.0.3</version>
   </dependency>
   <dependency>
    <groupId>com.github.jsqlparser</groupId>
    <artifactId>jsqlparser</artifactId>
    <version>0.9.5</version>
        </dependency>
2、在Spring-mybatis的配置文件中配置分页插件
<!-- spring和MyBatis完美整合,不需要mybatis的配置映射文件 -->
 	<bean id="sqlSessionFactory" class="org.mybatis.spring.SqlSessionFactoryBean">
        <property name="dataSource" ref="dataSource" />
        <!-- 自动扫描mapping.xml文件 -->
        <property name="mapperLocations" value="classpath:/com/hbyg/mapper/*.xml"></property>

        <property name="plugins">
            <array>
                <bean class="com.github.pagehelper.PageInterceptor">
                    <property name="properties">
                        <!--使用下面的方式配置参数,一行配置一个 -->
                        <value>
                            offsetAsPageNum=true
                            rowBoundsWithCount=true
                            pageSizeZero=true
                            reasonable=true
                        </value>
                    </property>
                </bean>
            </array>
        </property>
    </bean>
3、在Controller层的结果中添加分页操作
   @RequestMapping("/getAllDep")
   public String GetAll(@RequestParam(value="pn", defaultValue="1")Integer pn,Model model){
   	//紧跟查询结果的分页情况(第几页, 每页多少记录)
   	PageHelper.startPage(pn, 2);
   	List<DepartInfo> dep=service1.getAllDep();
   	//骚操作: 将结果放入pageinfo中,这个pageinfo就有很多有用的参数
   	PageInfo<DepartInfo> info=new PageInfo<>(dep,5);

   		**//new PageInfo<>(dep)单页  连续5分页new PageInfo<>(dep,5);**

   	System.out.println("当前页面"+info.getPageNum());
   	System.out.println("总页码"+info.getPages());
   	System.out.println("总记录数"+info.getTotal());
   	System.out.println("当前页有几个记录"+info.getSize());
   	System.out.println("当前页的pagesize"+info.getPageSize());
   	System.out.println("前一页"+info.getPrePage());
   	System.out.println("结果"+info.getList());
   	int[] nums=info.getNavigatepageNums();
   	model.addAttribute("info", info);
   	return "success";   //跳转到success.jsp 页面
   }
   ```
   ___4、JSP页面接收参数___
   ```

<table cellspacing="0" cellpadding="5" border="1">
   <tr>
   <th>id</th><th>Name</th><th>DESC</th><th>STATE</th>
   </tr>
   <c:forEach items="${info.list}" var="de">
   <tr>
   	<td>${de.depId }</td>
   	<td>${de.depName }</td>
   	<td>${de.depDesc }</td>
   	<td>${de.depState }</td>
   </tr>
   </c:forEach>
   <tr>
   	<td colspan="4">
   	<a href="getAllDep?pn=1">首页</a>	<a href="getAllDep?pn=${info.prePage }">上一页</a>
   	  <c:forEach items="${info.navigatepageNums }" var="num">
   	  <c:if test="${num==info.pageNum }">
   	  【${num}】
   	  </c:if>
   	  <c:if test="${num !=info.pageNum }">
   	  <a href="getAllDep?pn=${num }">${num }</a>
   	  </c:if>

   	  </c:forEach>
   	<a href="getAllDep?pn=${info.nextPage }">下一页</a>  <a href="getAllDep?pn=${info.pages }"></a>
   	</td>
   </tr>
</table>
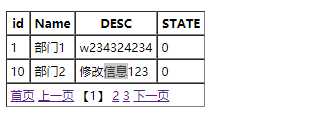
5、显示效果
Springboot框架
引入pom依赖 -
<!-- 分页插件 -->
        <dependency>
            <groupId>com.github.pagehelper</groupId>
            <artifactId>pagehelper</artifactId>
            <version>5.0.3</version>
        </dependency>
        //这个依赖一定要引入,不然分页插件不管用,即使加了配置类也不管用
        <dependency>
            <groupId>com.github.pagehelper</groupId>
            <artifactId>pagehelper-spring-boot-starter</artifactId>
            <version>1.2.12</version>
        </dependency>
使用,一定要注意代码顺序,原因请看分页插件原理
PageHelper.startPage(currentPage, pageSize); // 1
List<BlogInfo> list = blogService.getBlogInfoListByCategoryName(typeName); // 2
PageInfo<BlogInfo> info = new PageInfo<>(list, 5);  //3
无需配置文件
//1
Page<InvoiceBillInfoVo> page = new MyPage<>(billInfoPo.getPageIndex(), billInfoPo.getPageSize());

//2
List<InvoiceBillInfoVo> invoiceBillList = viVisitDataMapper.getInvoiceBillList(page,billInfoPo);

//3
 List<InvoiceBillInfoVo> getInvoiceBillList(@Param("page") Page page, @Param("model") InvoiceBillInfoPo billInfoPo);

//4
 <select id="getInvoiceBillList" resultMap="InvoiceBillInfoVoMap">
 select * from XXX
 </select>


 424
424


 被折叠的 条评论
为什么被折叠?
被折叠的 条评论
为什么被折叠?
 到【灌水乐园】发言


