


Spring Boot 最强大的功能就是把我们常用的场景抽取成了一个个Starter(场景启动器),我们通过引入Spring Boot为我提供的这些场景启动器,我们再进行少量的配置就能使用相应的功能。即使是这样,SpringBoot也不能囊括我们所有的使用场景,往往我们需要自定义Starter,来简化我们对Spring Boot的使用。
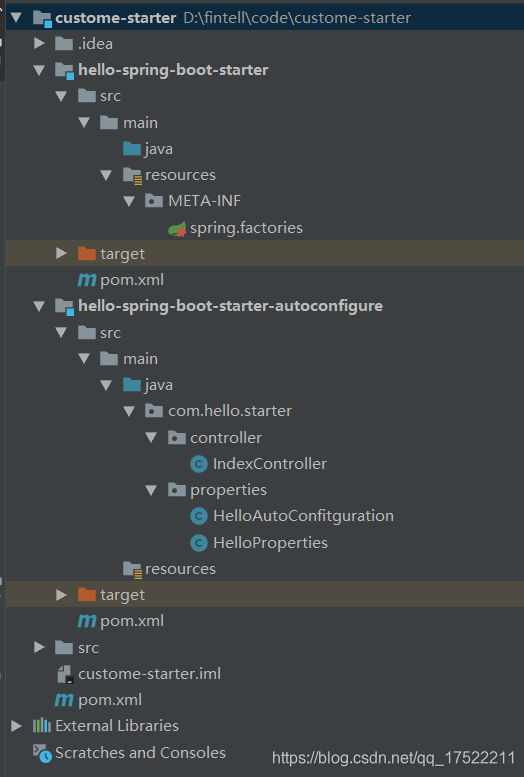
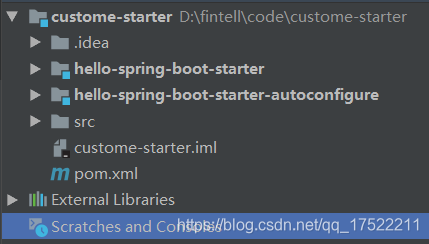
项目截图
项目源码代码量很少,浪费积分,建议跟着下方流程搭建一遍。~~~~~~
===================================================================
项目搭建流程
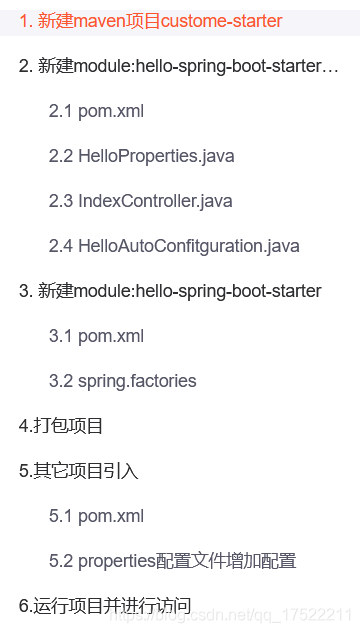
1. 新建maven项目custome-starter
新建项目,不做说明,自己新建即可
groupId : com.custome.starter
artifactId : custome-starter
2. 新建module:hello-spring-boot-starter-autoconfigure
新建module不做说明,自己新建即可
artifactId: hello-spring-boot-starter-autoconfigure
2.1 pom.xml
<?xml version="1.0" encoding="UTF-8"?>
<project xmlns="http://maven.apache.org/POM/4.0.0"
         xmlns:xsi="http://www.w3.org/2001/XMLSchema-instance"
         xsi:schemaLocation="http://maven.apache.org/POM/4.0.0 http://maven.apache.org/xsd/maven-4.0.0.xsd">
    <parent>
        <artifactId>custome-starter</artifactId>
        <groupId>com.custome.starter</groupId>
        <version>1.0</version>
    </parent>
    <modelVersion>4.0.0</modelVersion>

    <artifactId>hello-spring-boot-starter-autoconfigure</artifactId>

    <properties>
        <maven.test.skip>true</maven.test.skip>
        <maven.javadoc.skip>true</maven.javadoc.skip>
        <project.build.sourceEncoding>UTF-8</project.build.sourceEncoding>
        <project.reporting.outputEncoding>UTF-8</project.reporting.outputEncoding>
        <java.version>1.8</java.version>
        <spring.boot.version>2.1.0.RELEASE</spring.boot.version>
    </properties>

    <dependencies>
        <dependency>
            <groupId>org.springframework.boot</groupId>
            <artifactId>spring-boot-starter-web</artifactId>
            <version>${spring.boot.version}</version>
            <optional>true</optional>
        </dependency>
        <dependency>
            <groupId>org.springframework.boot</groupId>
            <artifactId>spring-boot</artifactId>
            <version>${spring.boot.version}</version>
            <optional>true</optional>
        </dependency>
        <!-- 依据需要可自行添加需要的依赖包 -->
    </dependencies>

</project>
2.2 HelloProperties.java
package com.hello.starter.properties;

import org.springframework.boot.context.properties.ConfigurationProperties;
import org.springframework.stereotype.Component;

@Component
@ConfigurationProperties(prefix = "hello.starter")
public class HelloProperties {

    private String name;

    public String getName() {
        return name;
    }

    public void setName(String name) {
        this.name = name;
    }
}
2.3 IndexController.java
package com.hello.starter.controller;

import com.hello.starter.properties.HelloProperties;
import org.springframework.web.bind.annotation.GetMapping;
import org.springframework.web.bind.annotation.RestController;

@RestController
public class IndexController {

    private HelloProperties helloProperties;

    public IndexController(HelloProperties helloProperties) {
        this.helloProperties = helloProperties;
    }

    @GetMapping(value = "/hello-starter")
    public String index() {
        return helloProperties.getName() + " - 自定义starter!";
    }

}
2.4 HelloAutoConfitguration.java
package com.hello.starter.properties;

import com.hello.starter.controller.IndexController;
import org.springframework.beans.factory.annotation.Autowired;
import org.springframework.boot.context.properties.ConfigurationProperties;
import org.springframework.boot.context.properties.EnableConfigurationProperties;
import org.springframework.context.annotation.Bean;
import org.springframework.context.annotation.Configuration;

/**
 * 此注解信息不做说明,不清楚的可自行官网查询
 */
@Configuration
@ConfigurationProperties(value = "hello.starter.name")
@EnableConfigurationProperties(HelloProperties.class)
public class HelloAutoConfitguration {
    @Autowired
    private HelloProperties helloProperties;

    @Bean
    public IndexController indexController() {
        return new IndexController(helloProperties);
    }

}
3. 新建module:hello-spring-boot-starter
新建module不做说明,自己新建即可
artifactId: hello-spring-boot-starter
3.1 pom.xml
<?xml version="1.0" encoding="UTF-8"?>
<project xmlns="http://maven.apache.org/POM/4.0.0"
         xmlns:xsi="http://www.w3.org/2001/XMLSchema-instance"
         xsi:schemaLocation="http://maven.apache.org/POM/4.0.0 http://maven.apache.org/xsd/maven-4.0.0.xsd">
    <parent>
        <artifactId>custome-starter</artifactId>
        <groupId>com.custome.starter</groupId>
        <version>1.0</version>
    </parent>
    <modelVersion>4.0.0</modelVersion>

    <artifactId>hello-spring-boot-starter</artifactId>

    <dependencies>
        <!-- 引入 hello-spring-boot-starter-autoconfigure -->
        <dependency>
            <groupId>com.custome.starter</groupId>
            <artifactId>hello-spring-boot-starter-autoconfigure</artifactId>
            <version>1.0</version>
        </dependency>
    </dependencies>

</project>
3.2 spring.factories
org.springframework.boot.autoconfigure.EnableAutoConfiguration=\
com.hello.starter.properties.HelloAutoConfitguration
4.打包项目
mvn clean compile install
5.其它项目引入
5.1 pom.xml
<dependency>
     <groupId>com.custome.starter</groupId>
     <artifactId>hello-spring-boot-starter</artifactId>
     <version>1.0</version>
</dependency>
5.2 properties配置文件增加配置
hello.starter.name=xxx
6.运行项目并进行访问
http://localhost:port/hello-starter


 8761
8761


 被折叠的 条评论
为什么被折叠?
被折叠的 条评论
为什么被折叠?
 到【灌水乐园】发言


