


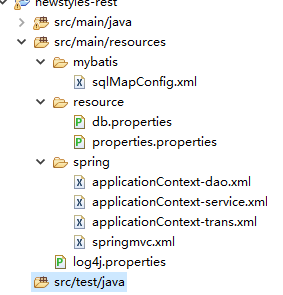
接着上一节,可能有些对文件的目录组织有些问题,不知道文件应该放置到什么地方,所以,先将上一个博客中的内容进行一个补充:
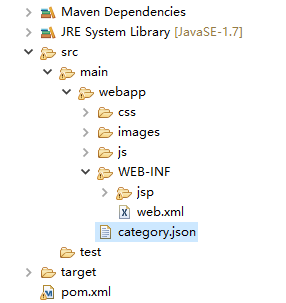
目录组织为:
而这一次将完成门户系统的搭建任务。
根据上一个博客中的结构图,我们可以分析如下内容:
1.要不要连接数据库?不需要,从结构中可以看到,门户系统仅调用服务并不会连接数据库。所以我们可以不适用mybatis类。
2.Spring需要使用嘛?需要,因为我们需要spring进行bean的管理等。
3.springmvc徐娅哟使用嘛?需要,这个需要作为一个表现层进行控制等。
4.同时对于页面的编辑等的如,jstl,jQuery等,同时还需要使用httpClient(使用java代码模拟浏览器)
在这个项目中,rest相当于服务端,门户系统可以认为是一个客户端。
搭建门户工程:
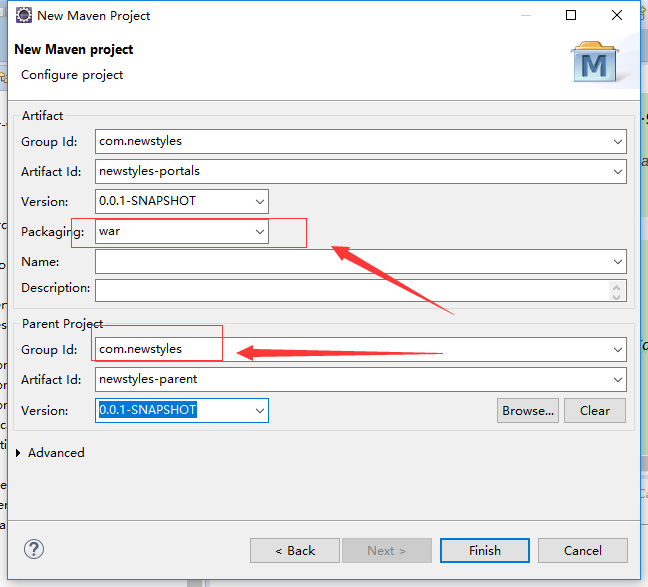
修改配置pom文件(同时也需要在使用一个tomcat服务器进行模拟):
<project xmlns="http://maven.apache.org/POM/4.0.0" xmlns:xsi="http://www.w3.org/2001/XMLSchema-instance" xsi:schemaLocation="http://maven.apache.org/POM/4.0.0 http://maven.apache.org/xsd/maven-4.0.0.xsd">
  <modelVersion>4.0.0</modelVersion>
  <parent>
    <groupId>com.newstyles</groupId>
    <artifactId>newstyles-parent</artifactId>
    <version>0.0.1-SNAPSHOT</version>
  </parent>
  <groupId>com.newstyles</groupId>
  <artifactId>newstyles-portal</artifactId>
  <version>0.0.1-SNAPSHOT</version>
  <packaging>war</packaging>

  <dependencies>
  <dependency>
<!--   用到的工具类 -->
    <groupId>com.newstyles</groupId>
  <artifactId>newstyles-common</artifactId>
  <version>0.0.1-SNAPSHOT</version>
  </dependency>
  		<!-- JSP相关 -->
		<dependency>
			<groupId>jstl</groupId>
			<artifactId>jstl</artifactId>
		</dependency>
  		<!-- Spring -->
		<dependency>
			<groupId>org.springframework</groupId>
			<artifactId>spring-context</artifactId>
		</dependency>
		<dependency>
			<groupId>org.springframework</groupId>
			<artifactId>spring-beans</artifactId>
		</dependency>
		<dependency>
			<groupId>org.springframework</groupId>
			<artifactId>spring-webmvc</artifactId>

		</dependency>
		<dependency>
			<groupId>org.springframework</groupId>
			<artifactId>spring-jdbc</artifactId>
		</dependency>
		<dependency>
			<groupId>org.springframework</groupId>
			<artifactId>spring-aspects</artifactId>
		</dependency>
				<dependency>
			<groupId>javax.servlet</groupId>
			<artifactId>servlet-api</artifactId>
			<scope>provided</scope>
		</dependency>
		<dependency>
			<groupId>javax.servlet</groupId>
			<artifactId>jsp-api</artifactId>
			<scope>provided</scope>
		</dependency>

  </dependencies>
      <build>
		<!-- 配置插件 -->
		<plugins>
			<plugin>
				<groupId>org.apache.tomcat.maven</groupId>
				<artifactId>tomcat7-maven-plugin</artifactId>
				<configuration>
					<port>8082</port>
					<path>/</path>
				</configuration>
			</plugin>
		</plugins>
	</build>
</project>配置web.xml:
<?xml version="1.0" encoding="UTF-8"?>
<web-app xmlns:xsi="http://www.w3.org/2001/XMLSchema-instance"
	xmlns="http://java.sun.com/xml/ns/javaee" xmlns:web="http://java.sun.com/xml/ns/javaee/web-app_3_0.xsd"
	xsi:schemaLocation="http://java.sun.com/xml/ns/javaee http://java.sun.com/xml/ns/javaee/web-app_3_0.xsd"
	id="WebApp_ID" version="3.0">

	<display-name>newstyles-portal</display-name>
	<welcome-file-list>
		<welcome-file>index.html</welcome-file>
	    <welcome-file>index.htm</welcome-file>
		<welcome-file>index.jsp</welcome-file>
		<welcome-file>default.html</welcome-file>
		<welcome-file>default.htm</welcome-file>
		<welcome-file>default.jsp</welcome-file>
	</welcome-file-list>

	<!-- 加载spring容器 -->
	<context-param>
		<param-name>contextConfigLocation</param-name>
		<param-value>classpath:spring/applicationContext*.xml</param-value>
	</context-param>
	<listener>
		<listener-class>org.springframework.web.context.ContextLoaderListener</listener-class>
	</listener>

	<!-- 解决post乱码 -->
	<filter>
		<filter-name>CharacterEncodingFilter</filter-name>
		<filter-class>org.springframework.web.filter.CharacterEncodingFilter</filter-class>
		<init-param>
			<param-name>encoding</param-name>
			<param-value>utf-8</param-value>
		</init-param>
		<!-- <init-param>
			<param-name>forceEncoding</param-name>
			<param-value>true</param-value>
		</init-param> -->
	</filter>
	<filter-mapping>
		<filter-name>CharacterEncodingFilter</filter-name>
		<url-pattern>/*</url-pattern>
	</filter-mapping>


	<!-- springmvc的前端控制器 -->
	<servlet>
		<servlet-name>newstyles-portal</servlet-name>
		<servlet-class>org.springframework.web.servlet.DispatcherServlet</servlet-class>
		<!-- contextConfigLocation不是必须的, 如果不配置contextConfigLocation, springmvc的配置文件默认在:WEB-INF/servlet的name+"-servlet.xml" -->
		<init-param>
			<param-name>contextConfigLocation</param-name>
			<param-value>classpath:spring/springmvc.xml</param-value>
		</init-param>
		<load-on-startup>1</load-on-startup>
	</servlet>
	<servlet-mapping>
		<servlet-name>newstyles-portal</servlet-name>
<!-- 		伪静态化 -->
		<url-pattern>*.html</url-pattern>
	</servlet-mapping>

</web-app>
框架整合(可以参考manager工程):
根据上一博客的结构图我们可以发现,我们不需要连接数据库,但是会有服务逻辑的产生,所以我们应该配置一个service,来调用rest的服务:
servcie配置:
<beans xmlns="http://www.springframework.org/schema/beans"
	xmlns:context="http://www.springframework.org/schema/context" xmlns:p="http://www.springframework.org/schema/p"
	xmlns:aop="http://www.springframework.org/schema/aop" xmlns:tx="http://www.springframework.org/schema/tx"
	xmlns:xsi="http://www.w3.org/2001/XMLSchema-instance"
	xsi:schemaLocation="http://www.springframework.org/schema/beans http://www.springframework.org/schema/beans/spring-beans-4.0.xsd
	http://www.springframework.org/schema/context http://www.springframework.org/schema/context/spring-context-4.0.xsd
	http://www.springframework.org/schema/aop http://www.springframework.org/schema/aop/spring-aop-4.0.xsd http://www.springframework.org/schema/tx http://www.springframework.org/schema/tx/spring-tx-4.0.xsd
	http://www.springframework.org/schema/util http://www.springframework.org/schema/util/spring-util-4.0.xsd">

	<!-- 加载配置文件 -->
	<context:property-placeholder location="classpath:resource/*.properties" />
<!--     扫描包,加载实线类 -->
	<context:component-scan base-package="com.newstyles.portal.service"></context:component-scan>

</beans>
<?xml version="1.0" encoding="UTF-8"?>
<beans xmlns="http://www.springframework.org/schema/beans"
	xmlns:xsi="http://www.w3.org/2001/XMLSchema-instance" xmlns:p="http://www.springframework.org/schema/p"
	xmlns:context="http://www.springframework.org/schema/context"
	xmlns:mvc="http://www.springframework.org/schema/mvc"
	xsi:schemaLocation="http://www.springframework.org/schema/beans http://www.springframework.org/schema/beans/spring-beans.xsd
        http://www.springframework.org/schema/mvc http://www.springframework.org/schema/mvc/spring-mvc-4.0.xsd
        http://www.springframework.org/schema/context http://www.springframework.org/schema/context/spring-context.xsd">


<context:component-scan base-package="com.newstyles.portal.controller" />
<mvc:annotation-driven/>
	<bean
		class="org.springframework.web.servlet.view.InternalResourceViewResolver">
		<property name="prefix" value="/WEB-INF/jsp/" />
		<property name="suffix" value=".jsp" />
	</bean>

</beans>
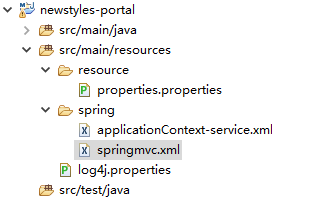
添加JSP等的文件:
将文件组织为一下格式:
为什么这么组织,因为之前的web工程我们web.xml文件中拦截所有的资源,使用的是“/”,而我们这个工程的拦截内容为“*.html”;将不再祈同样的作用,如果将css,js等放入到webapp文件夹下面的WEB-INF文件夹里面,则不会访问到这些资源,所以我们将文件组织为下面的格式:
之后创建一个controller,用来测试打开我们的门户系统的首页:
@Controller
public class IndexController {

	@RequestMapping("/index")
	public String showIndex() throws Exception{
		return "index";
	}
}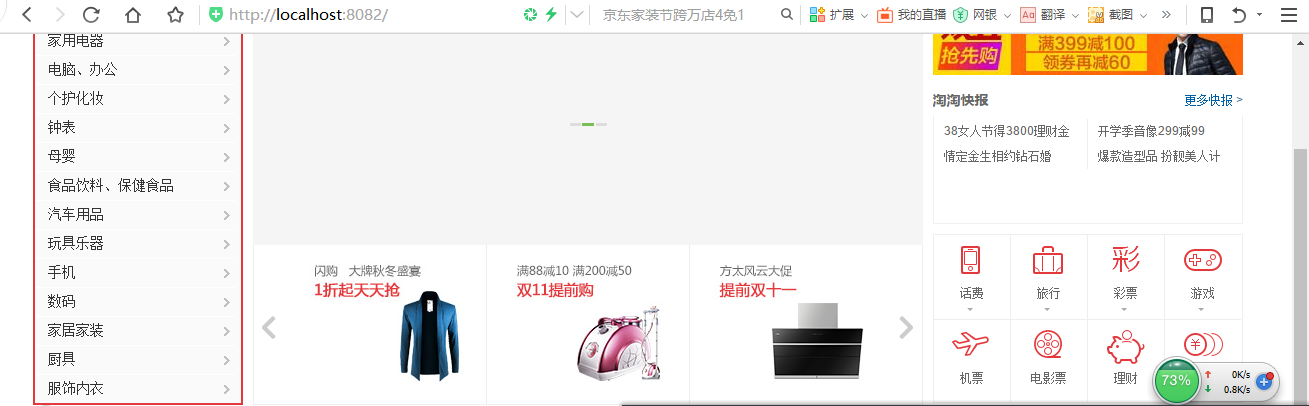
测试成功。到这里我们的门户系统也搭建完成。


 259
259

 被折叠的 条评论
为什么被折叠?
被折叠的 条评论
为什么被折叠?
 到【灌水乐园】发言


